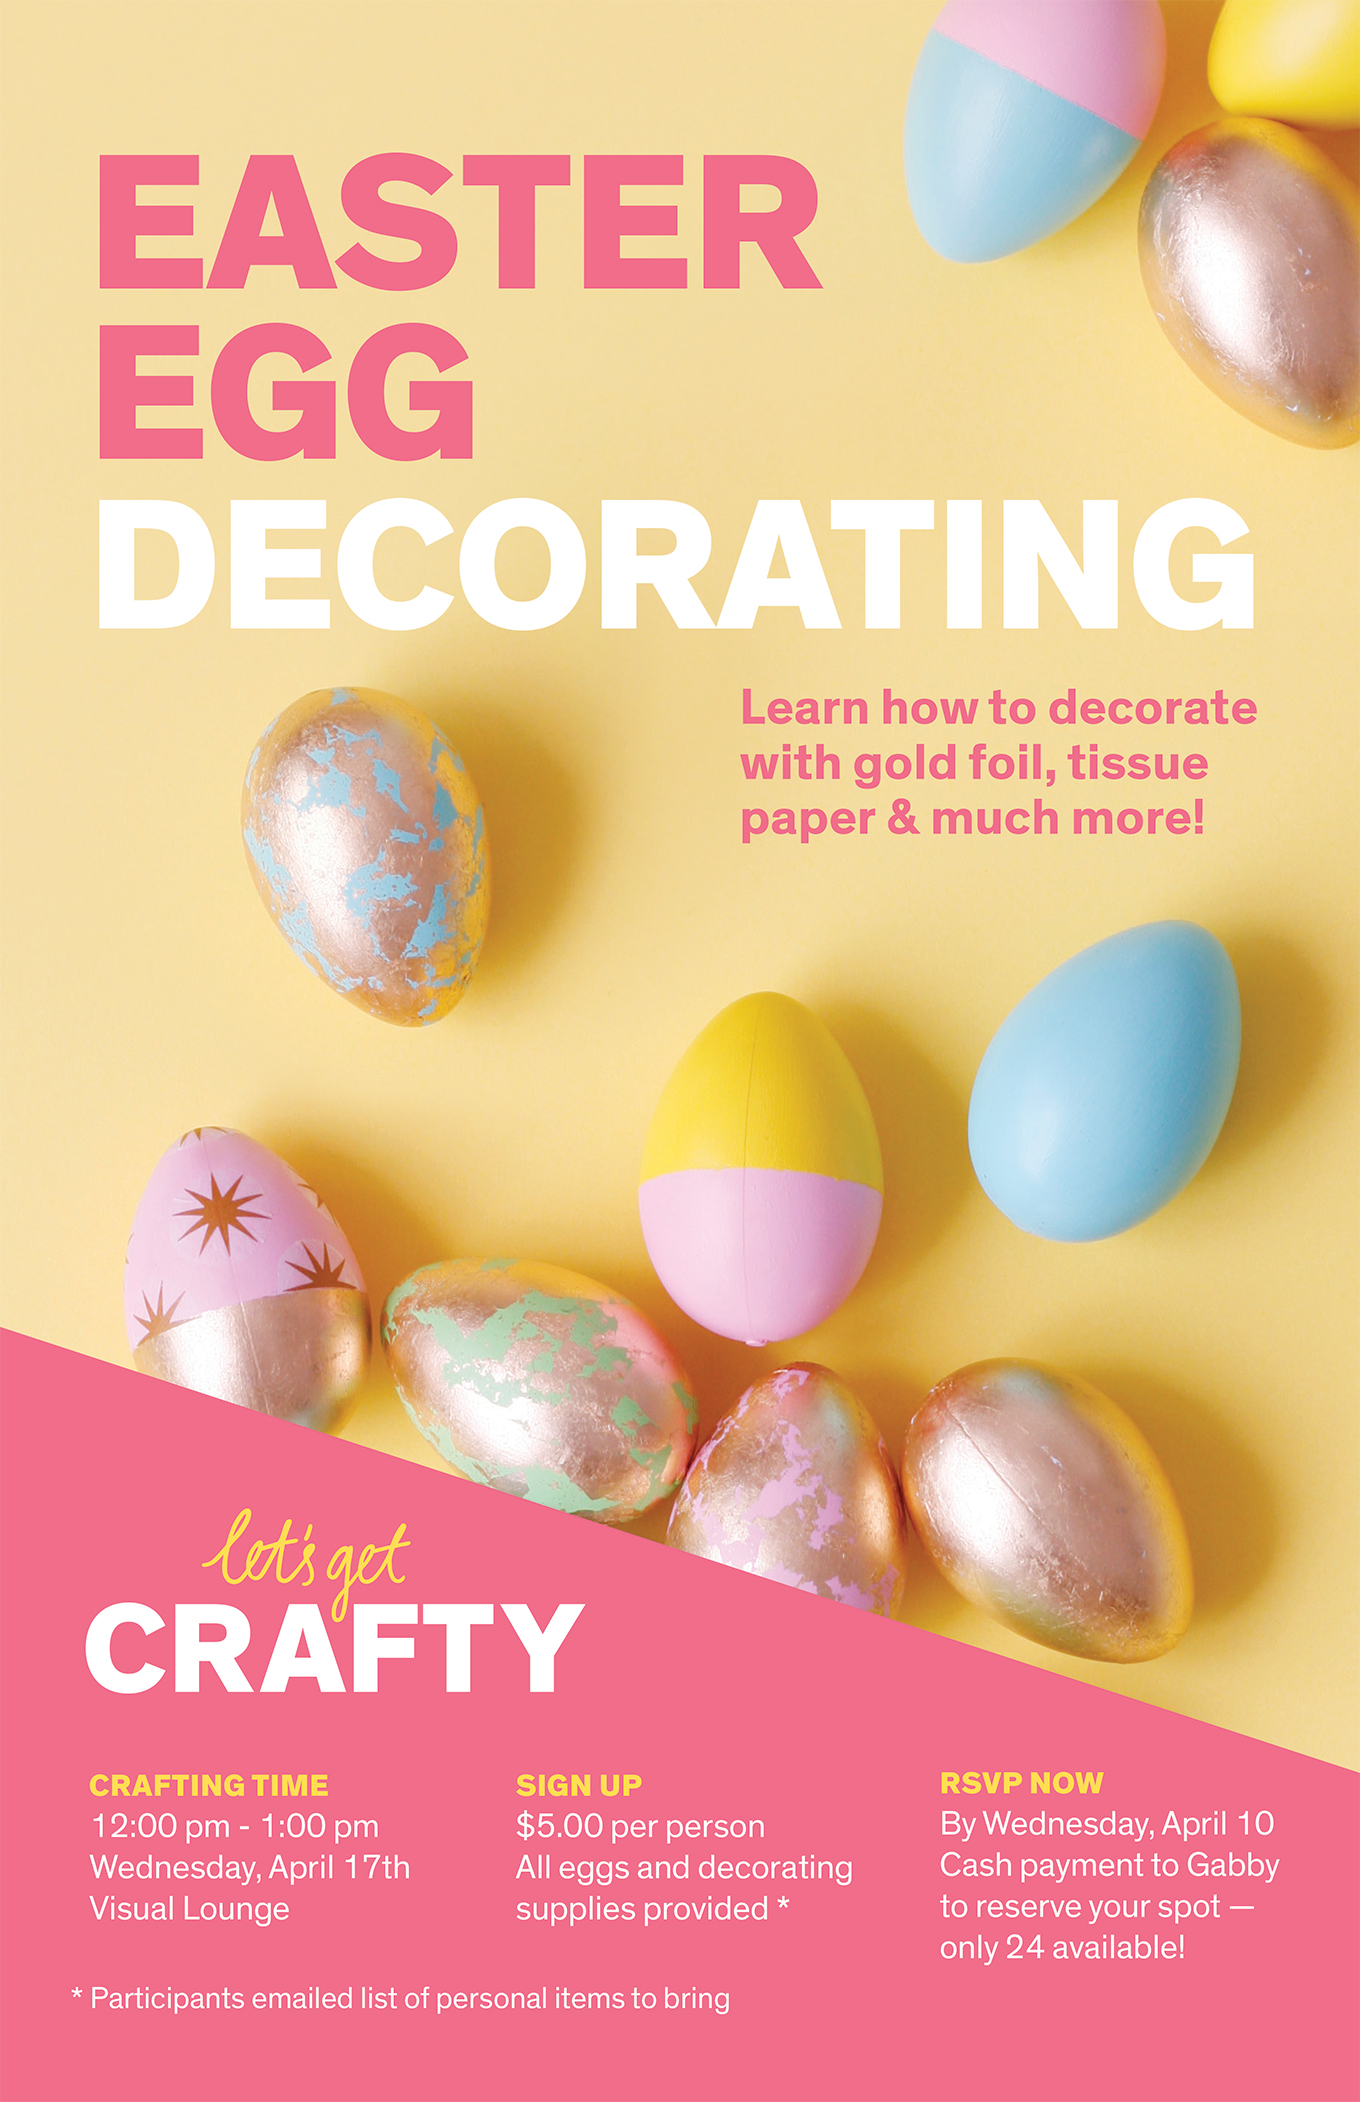
Easter Egg Decorating Poster
Posted by Paige Smith at 7:33 PM Comments Off on Easter Egg Decorating Poster

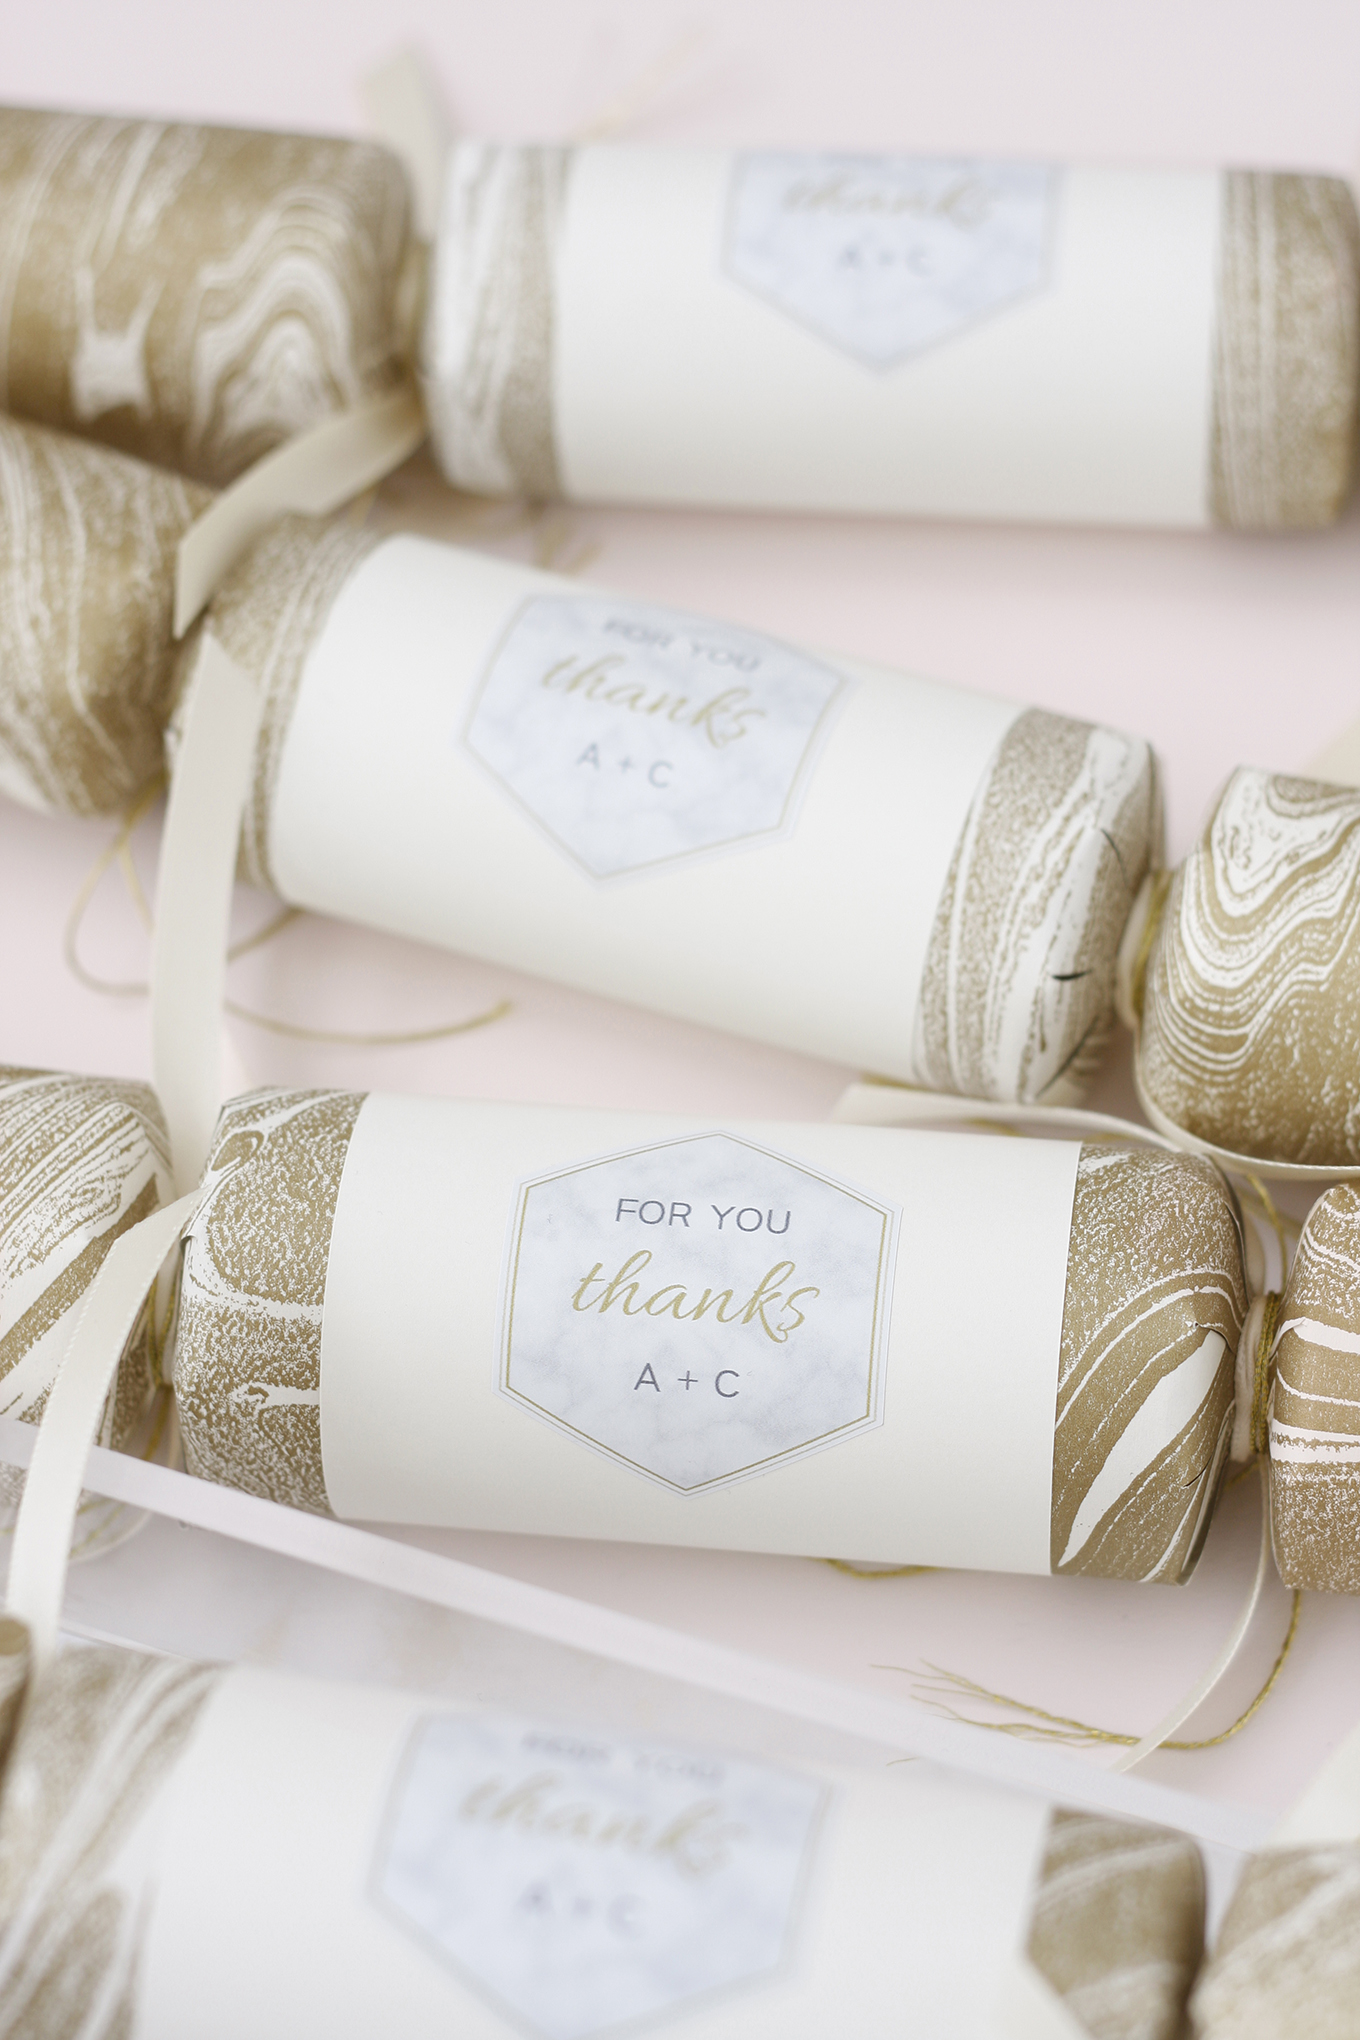
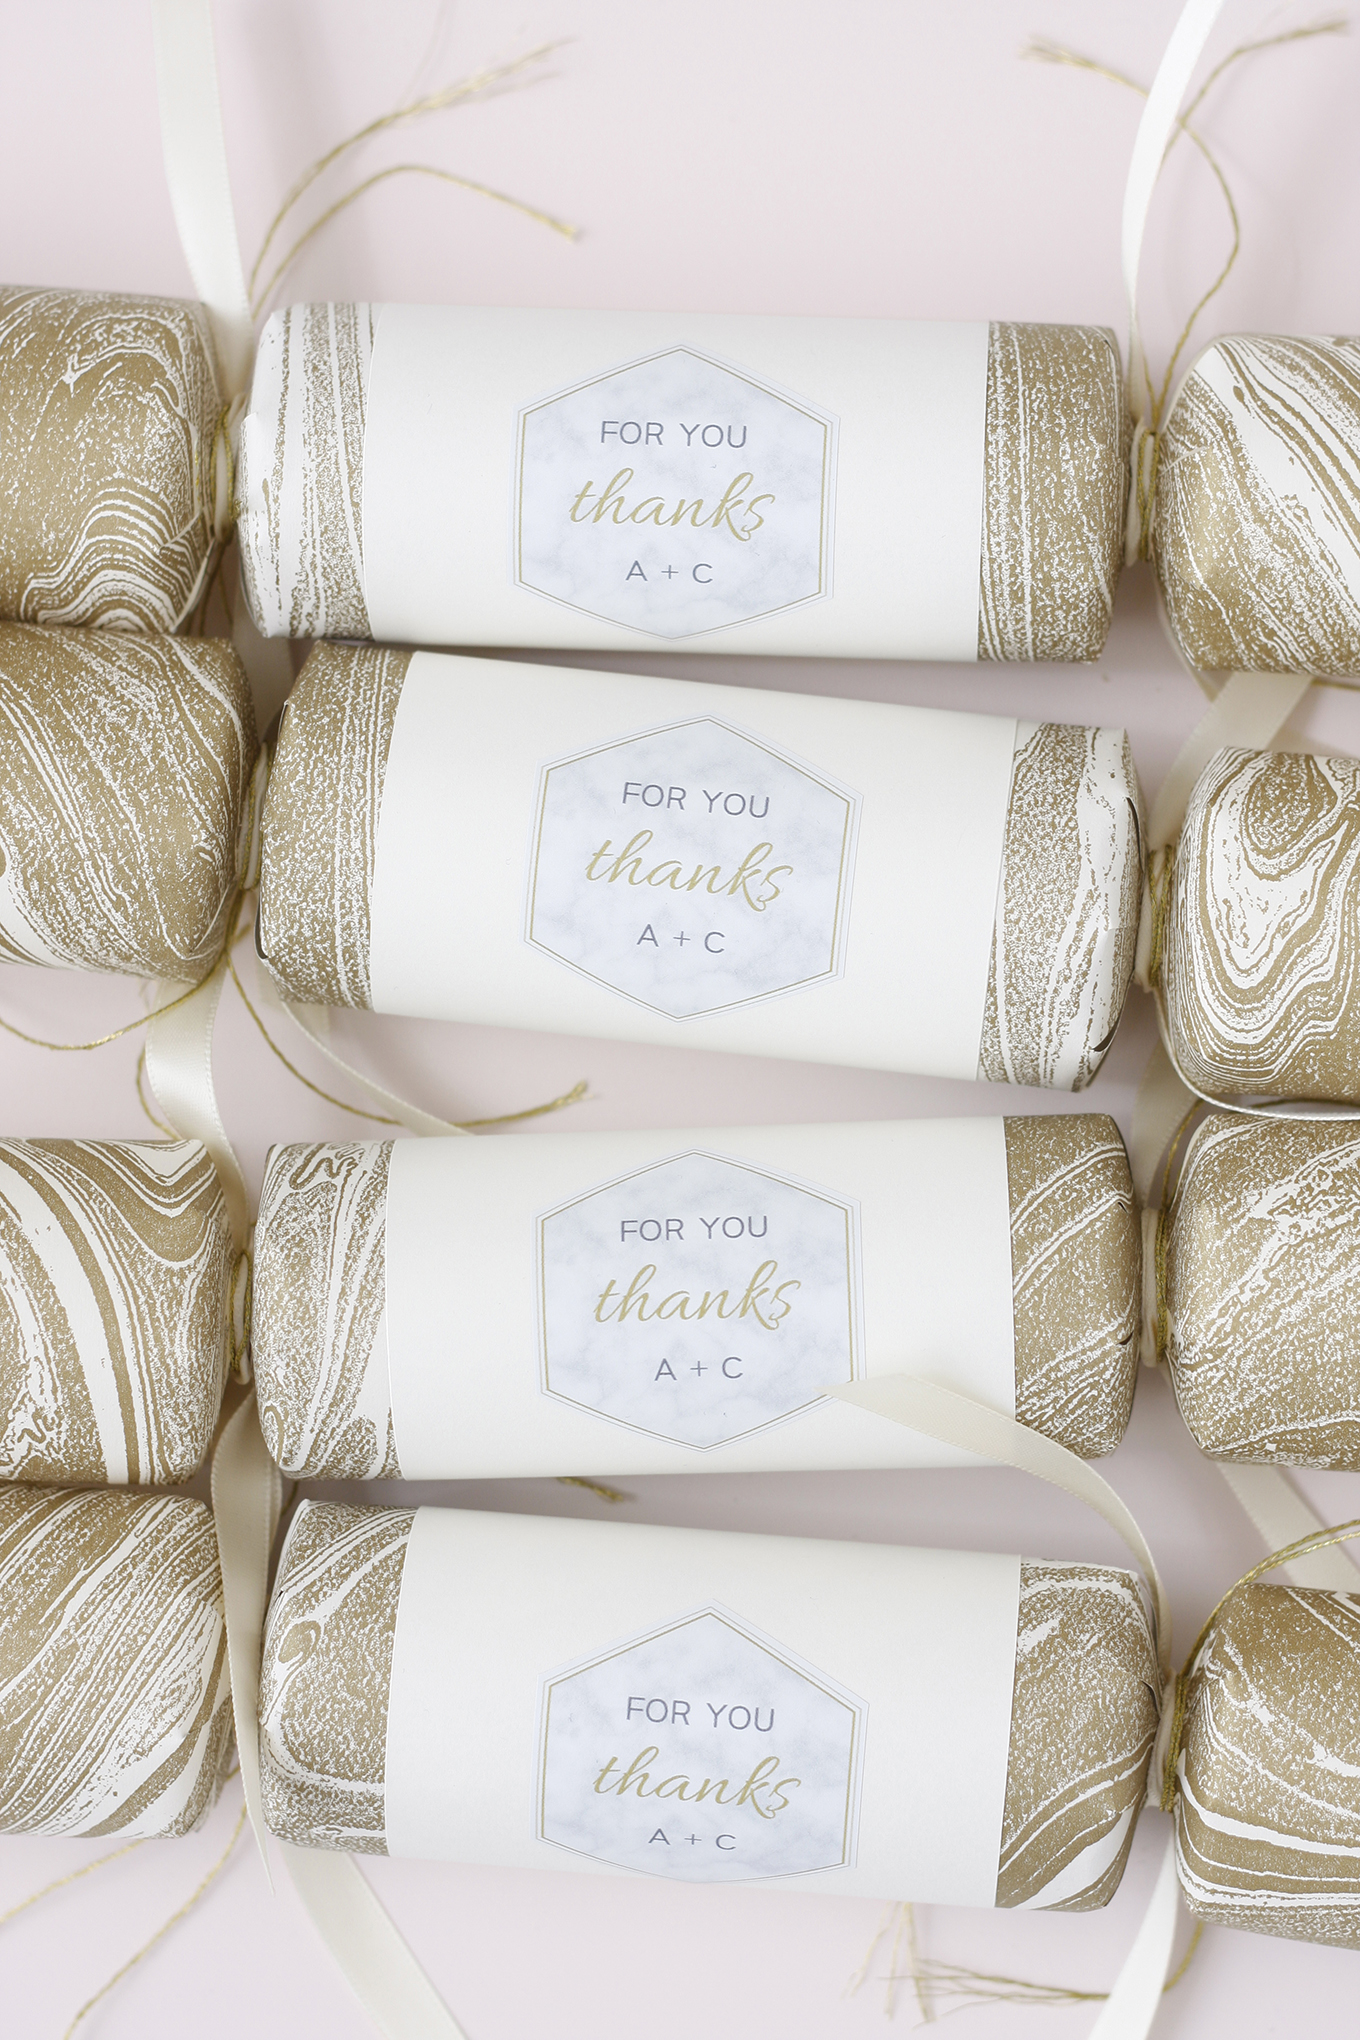
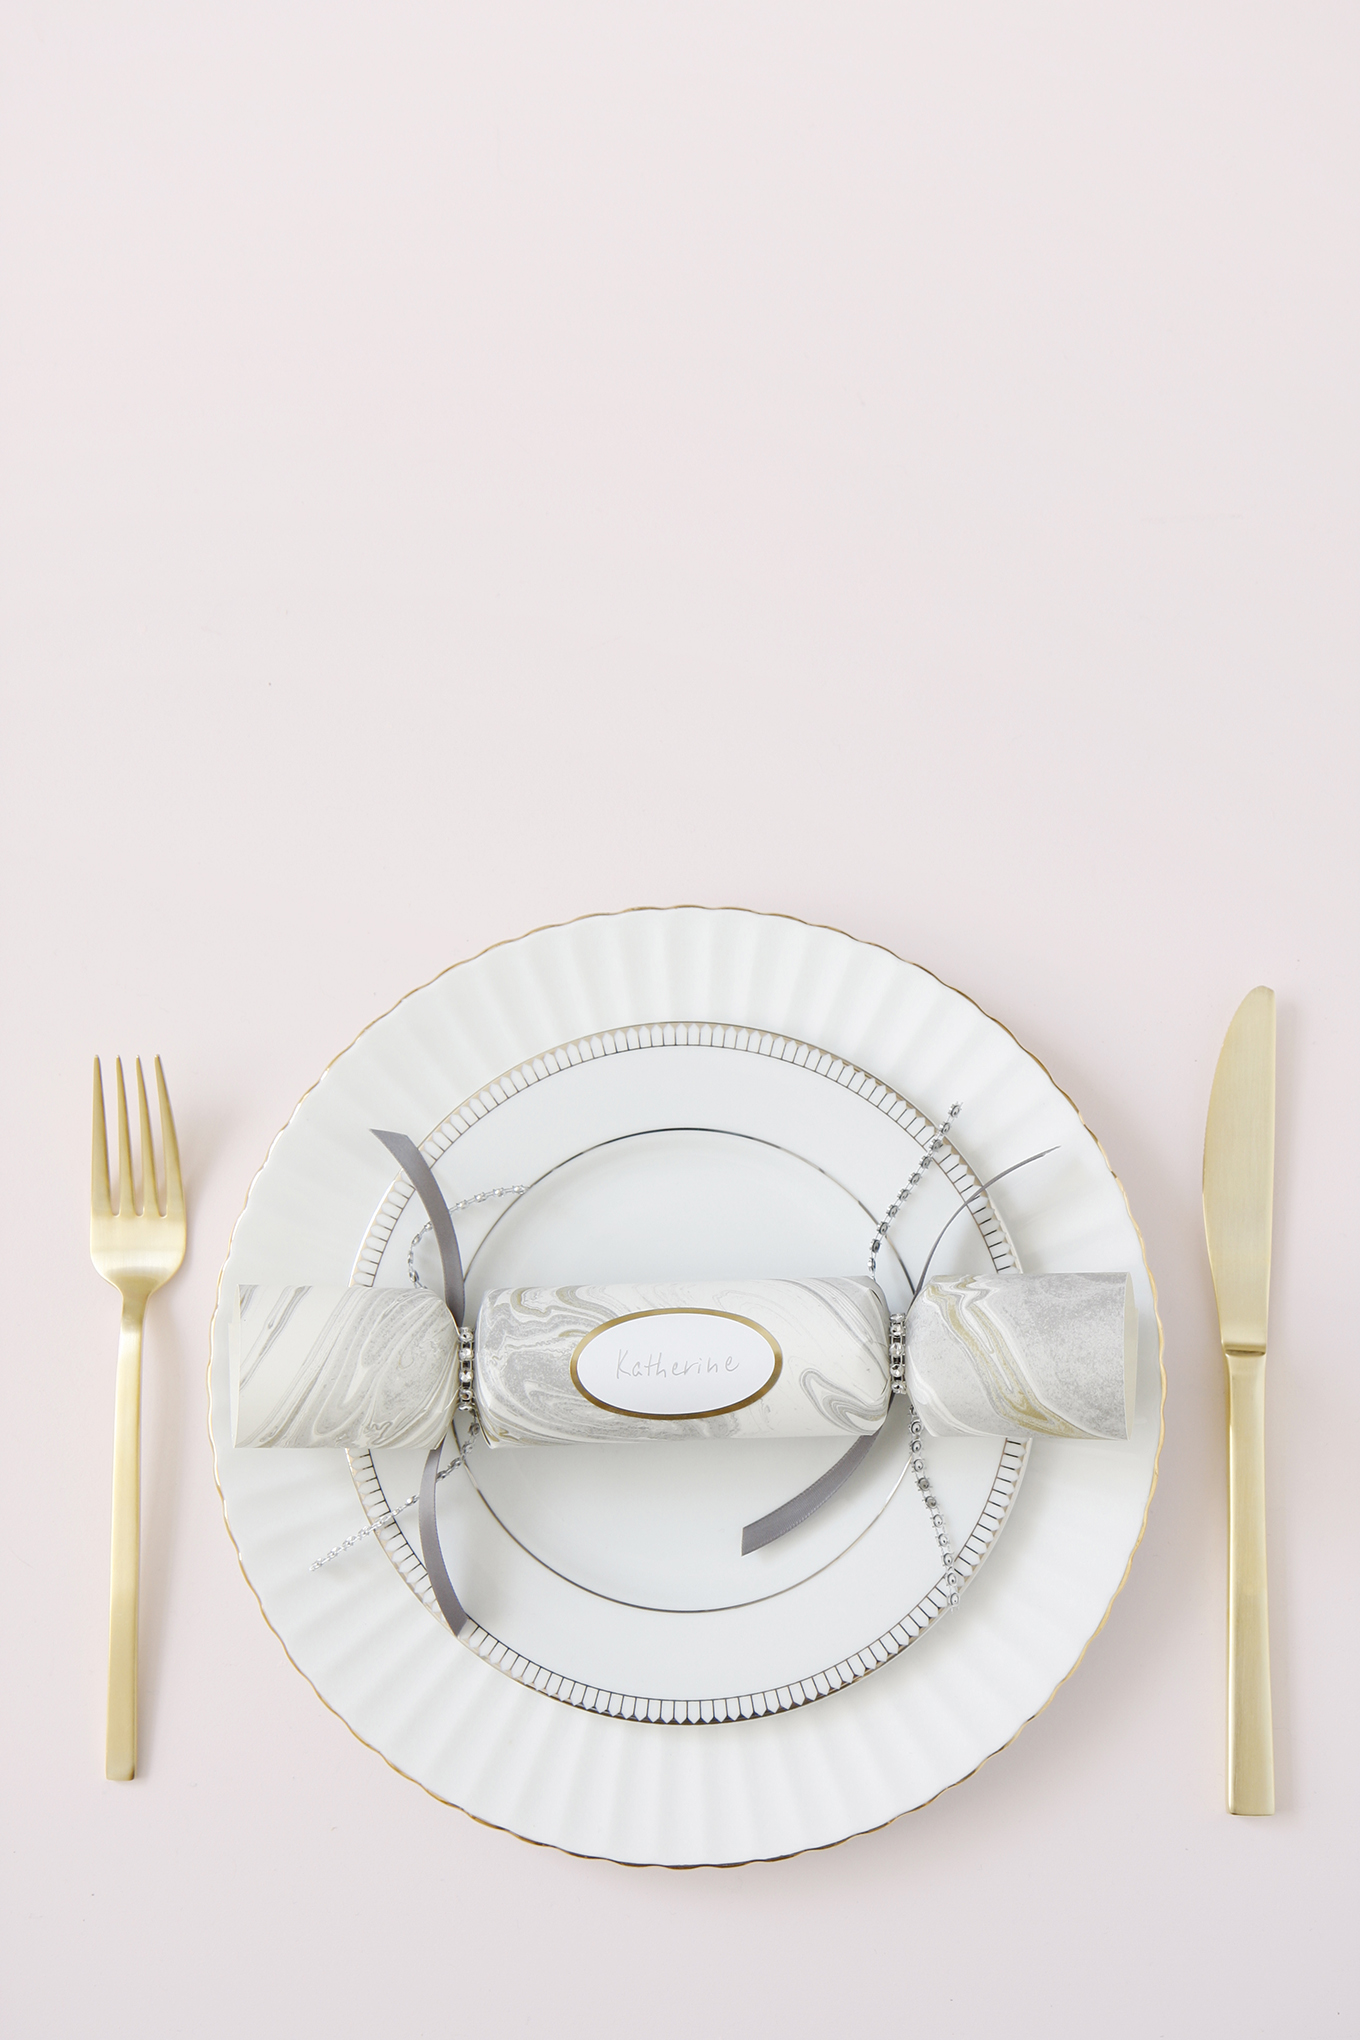
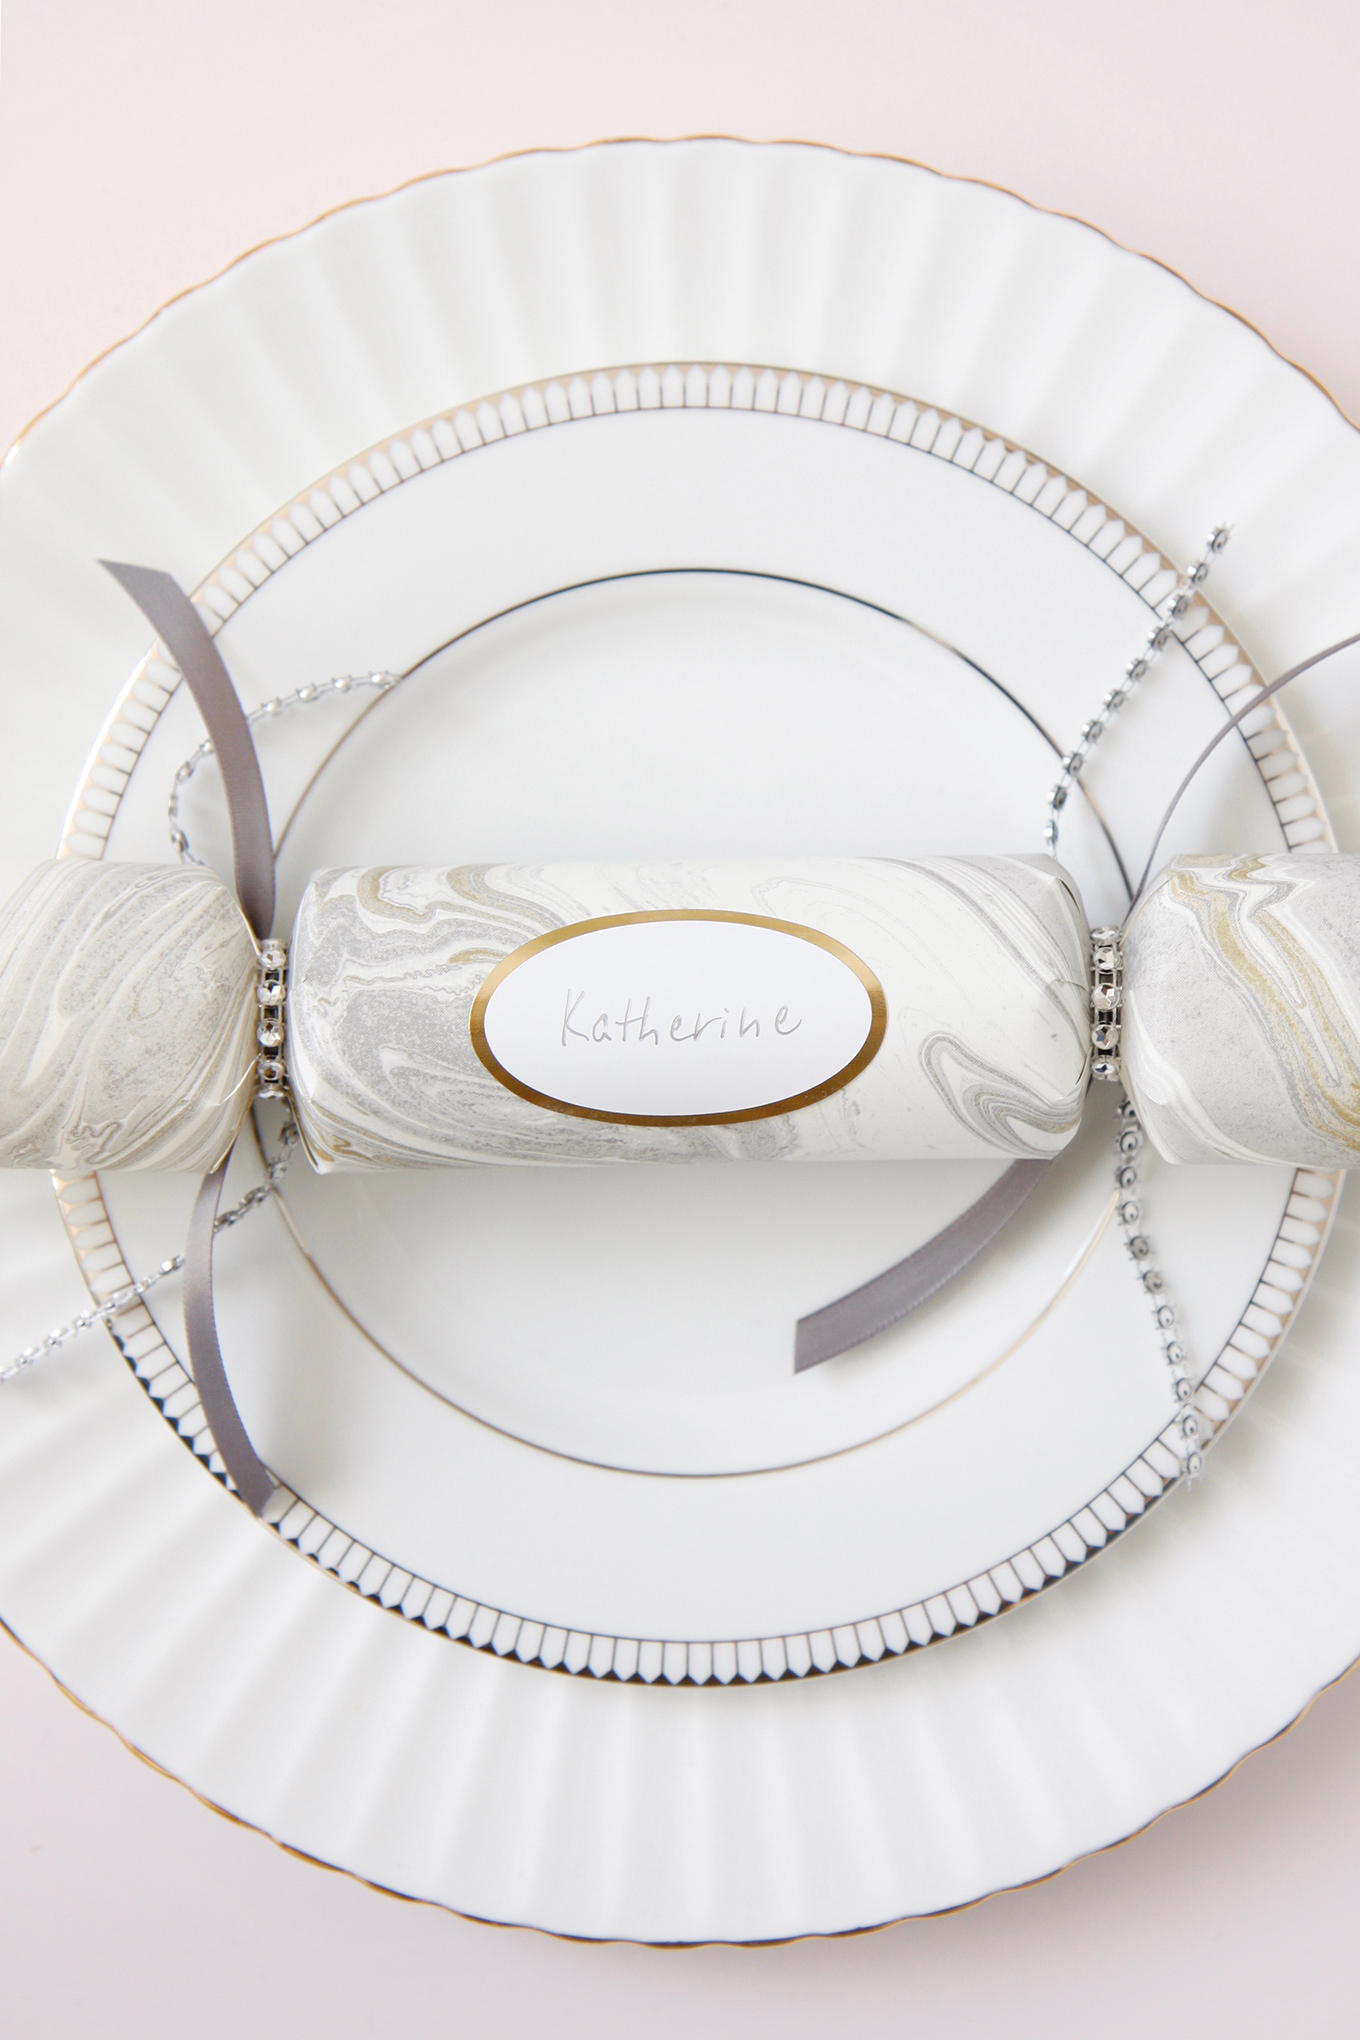
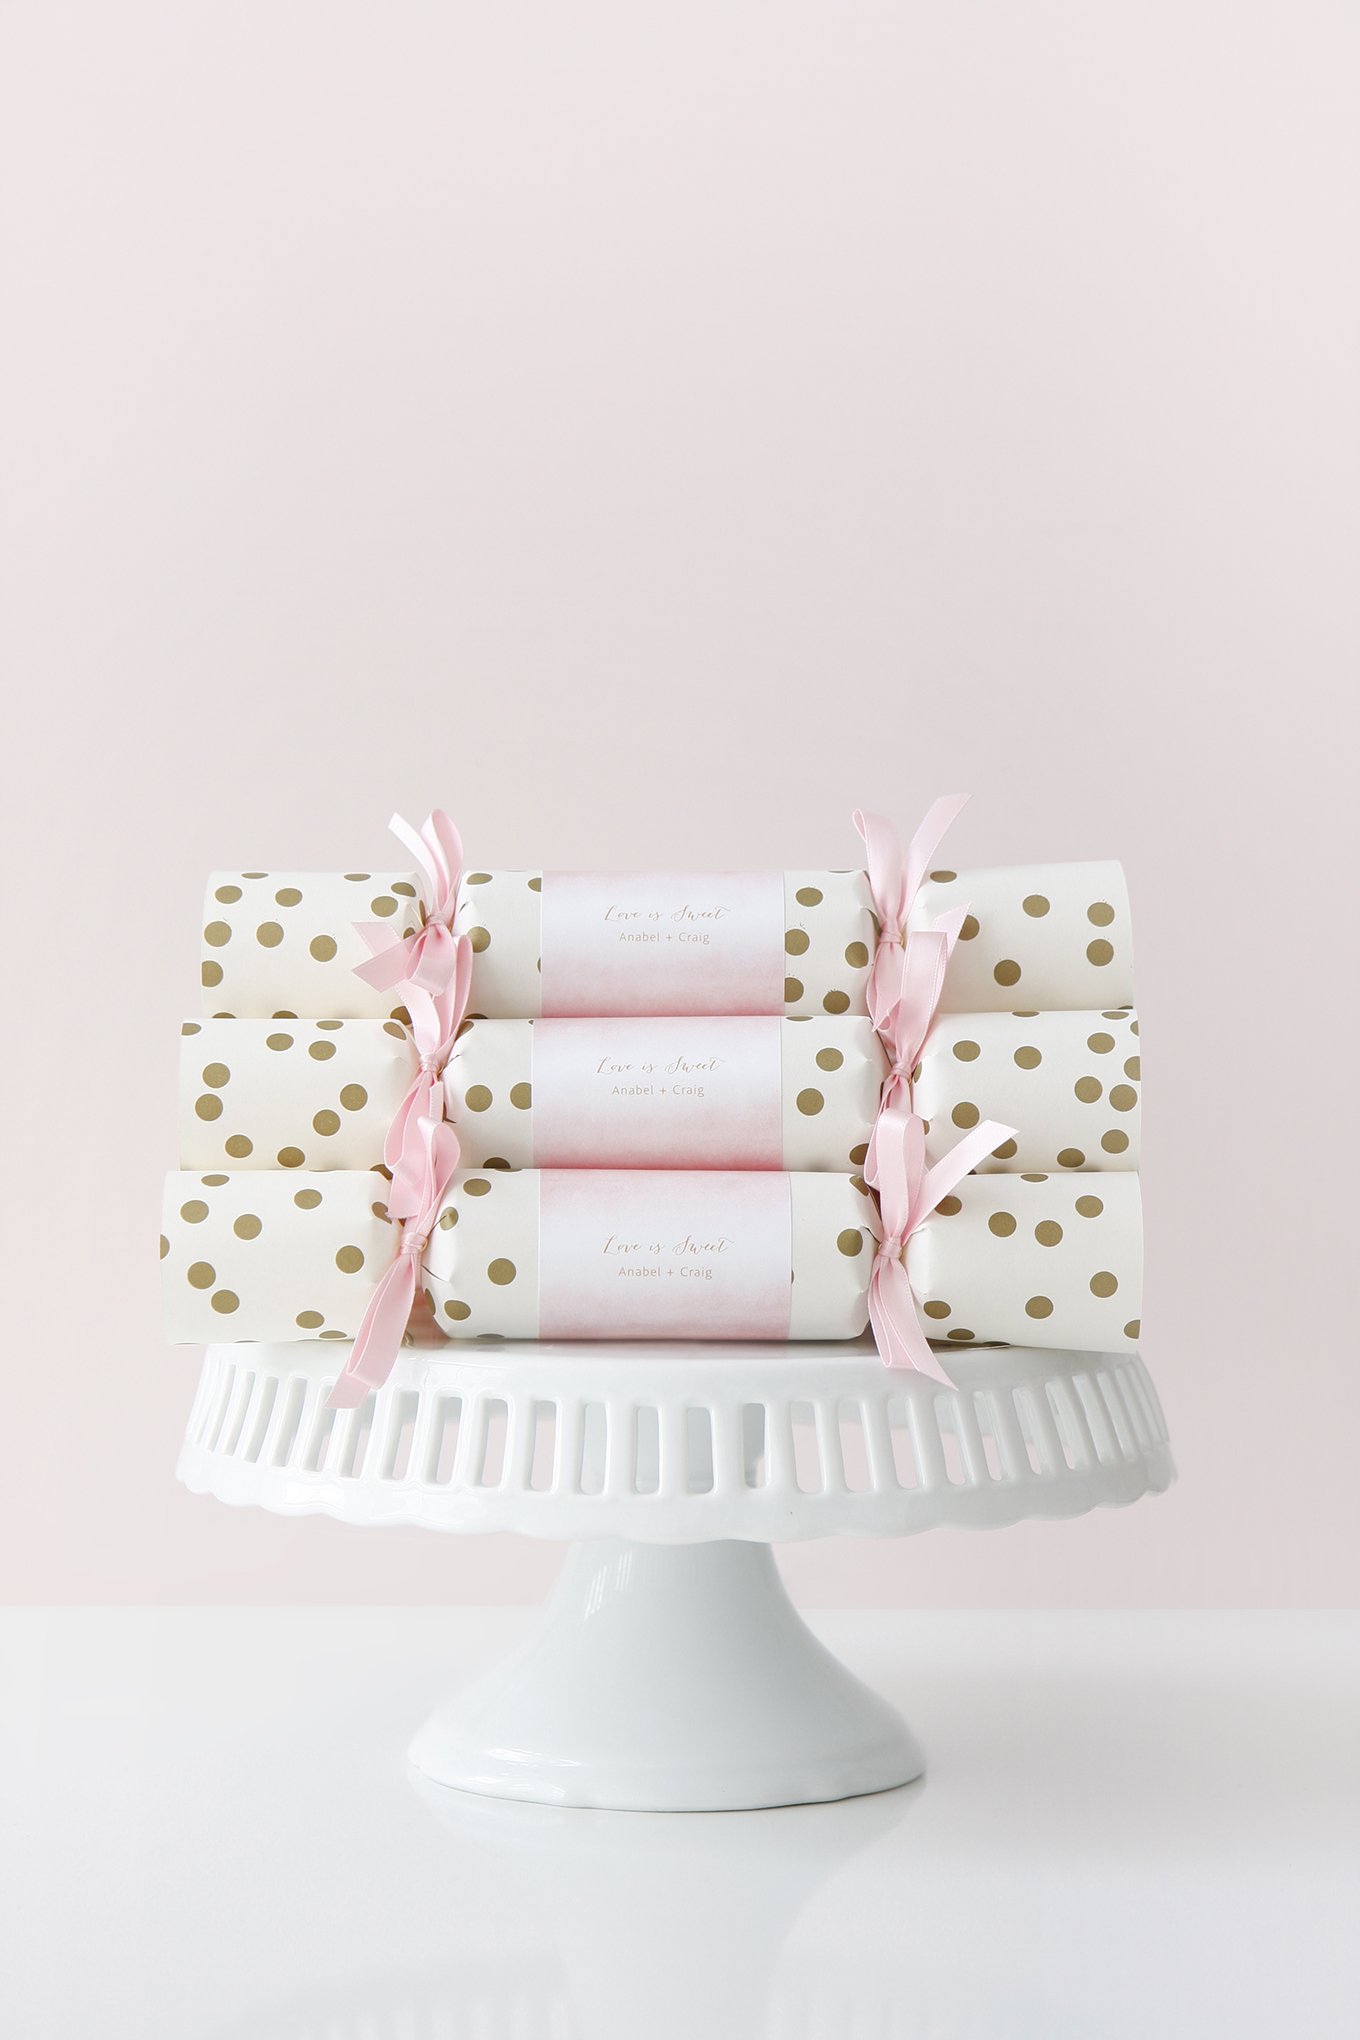
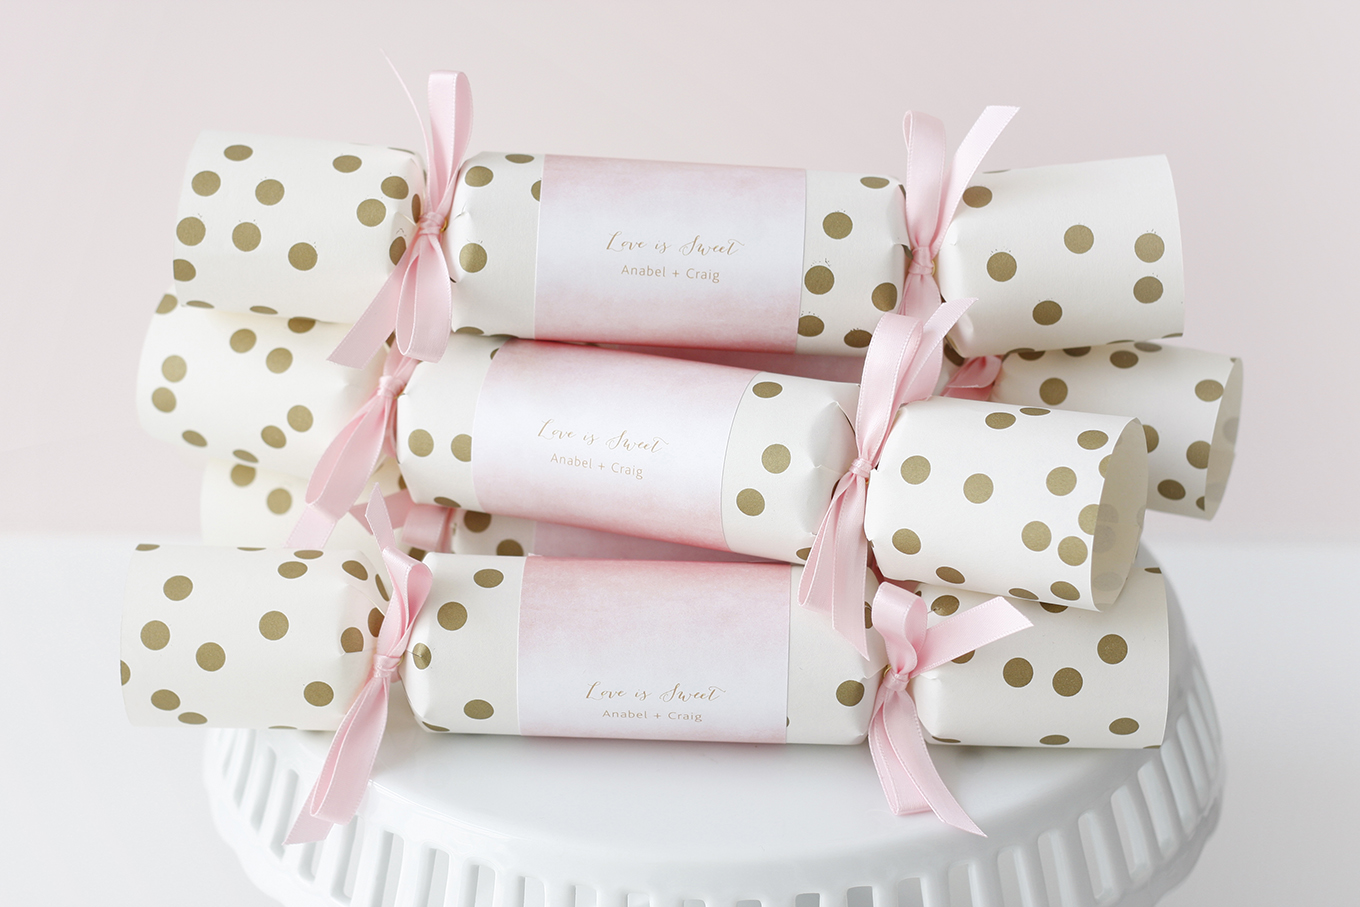
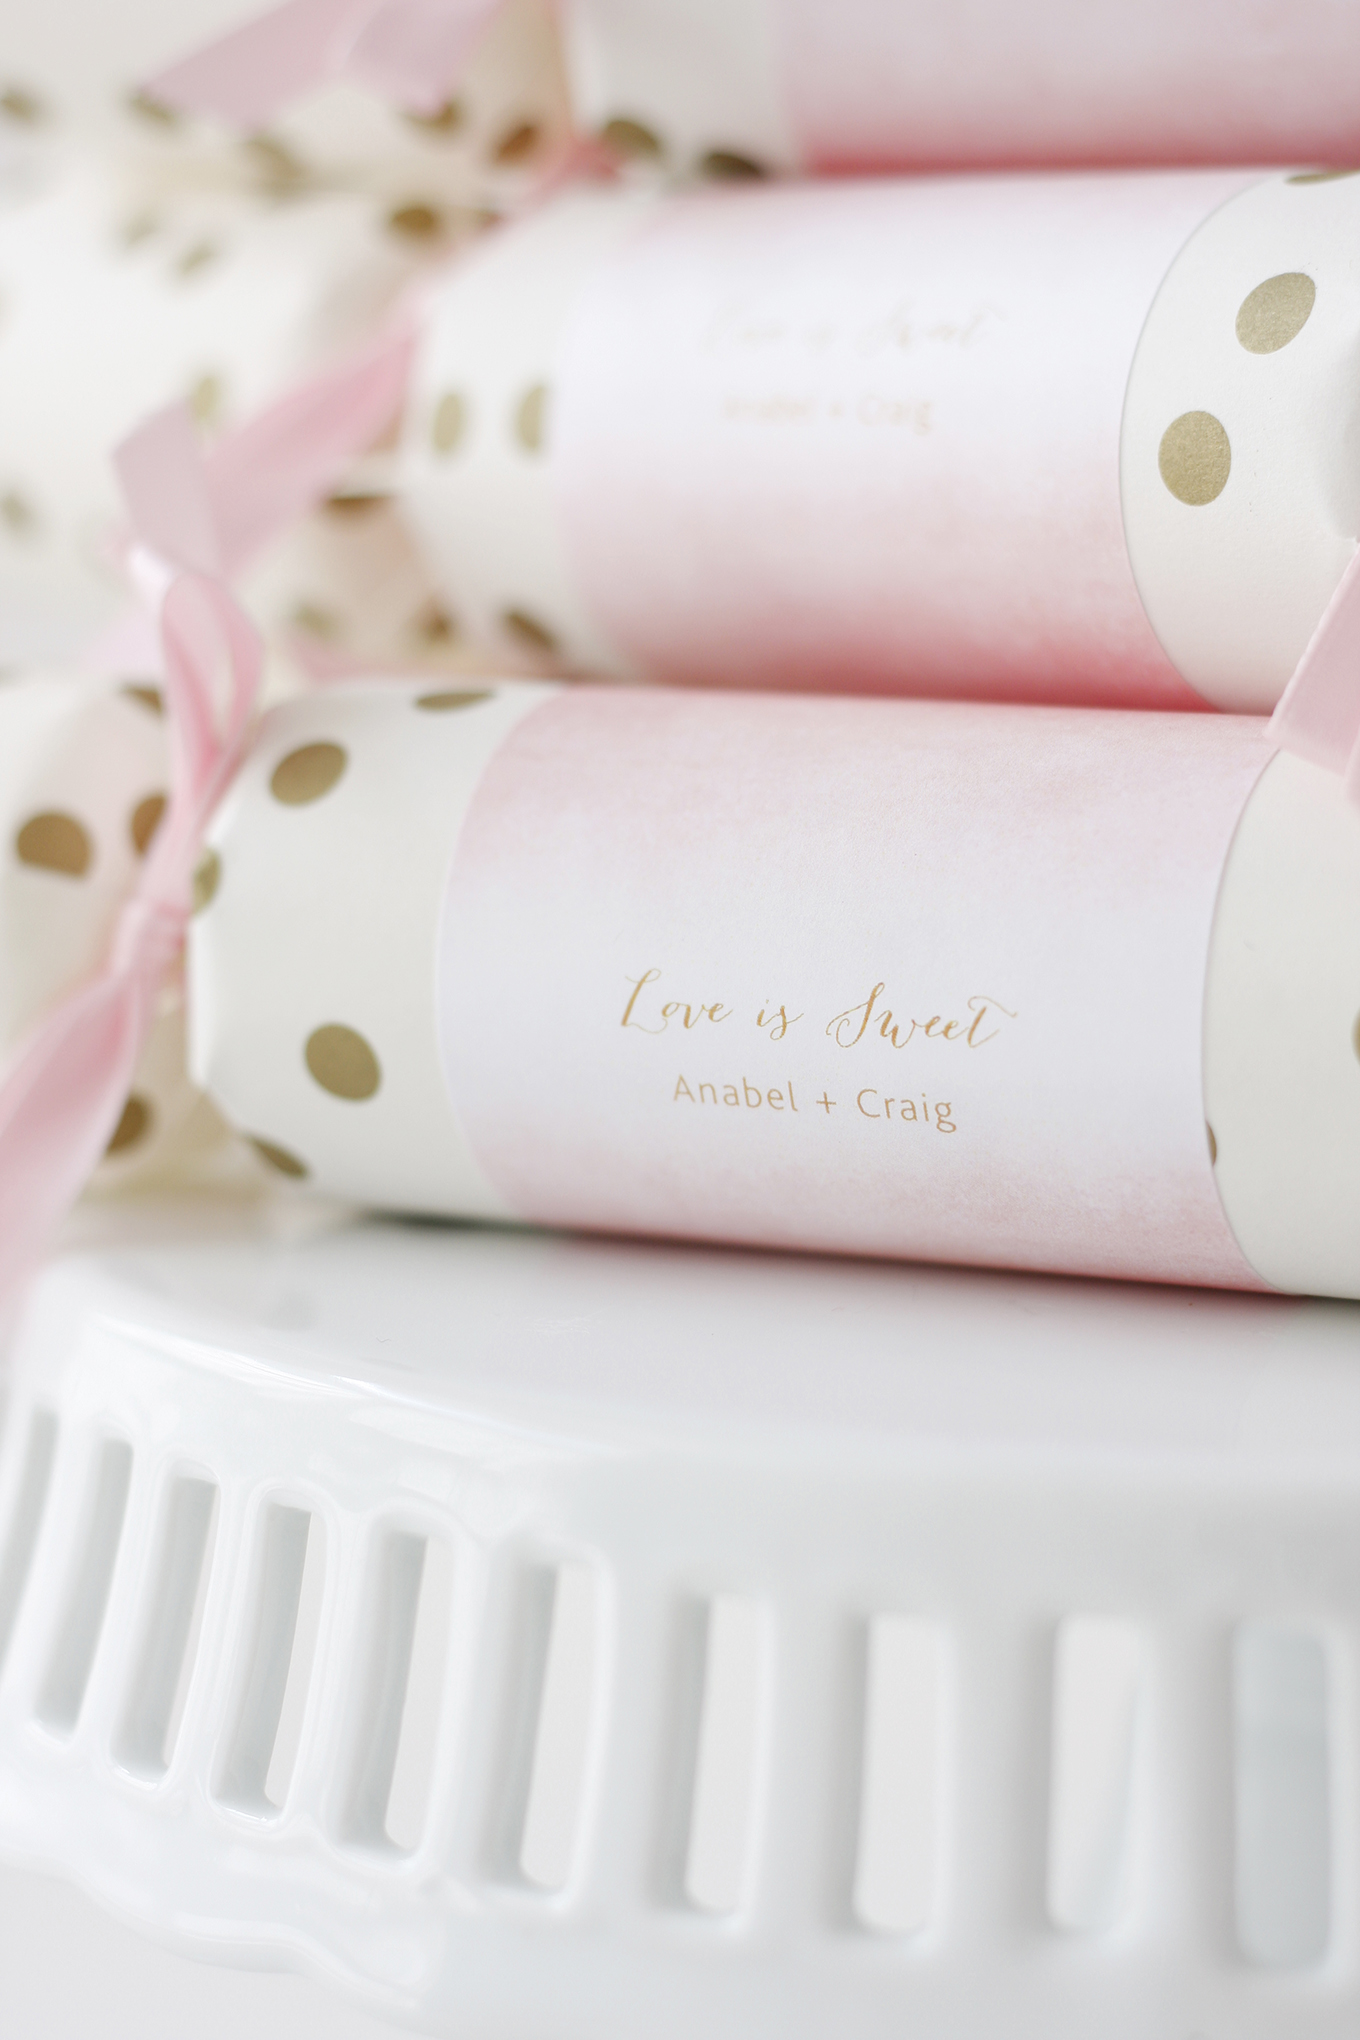
https://blog.weddingstar.com/get-the-look-poppers-3-ways/
As a contributing maker to bemakeful.com, I was really excited participating in their next Makeful Challenge; decorating a cell phone case. Initially, I was not sure what I was going to do to transform a cell phone case.
 I have always loved the patina of vintage skeleton keys; the ones pictured here are from my very own collection when I was pulling together inspiration for my wedding. So when I was rummaging through my dresser of crafting supplies, it sparked the idea when I found a stack of rub-on decals I had purchased from Michael’s craft store many years ago.
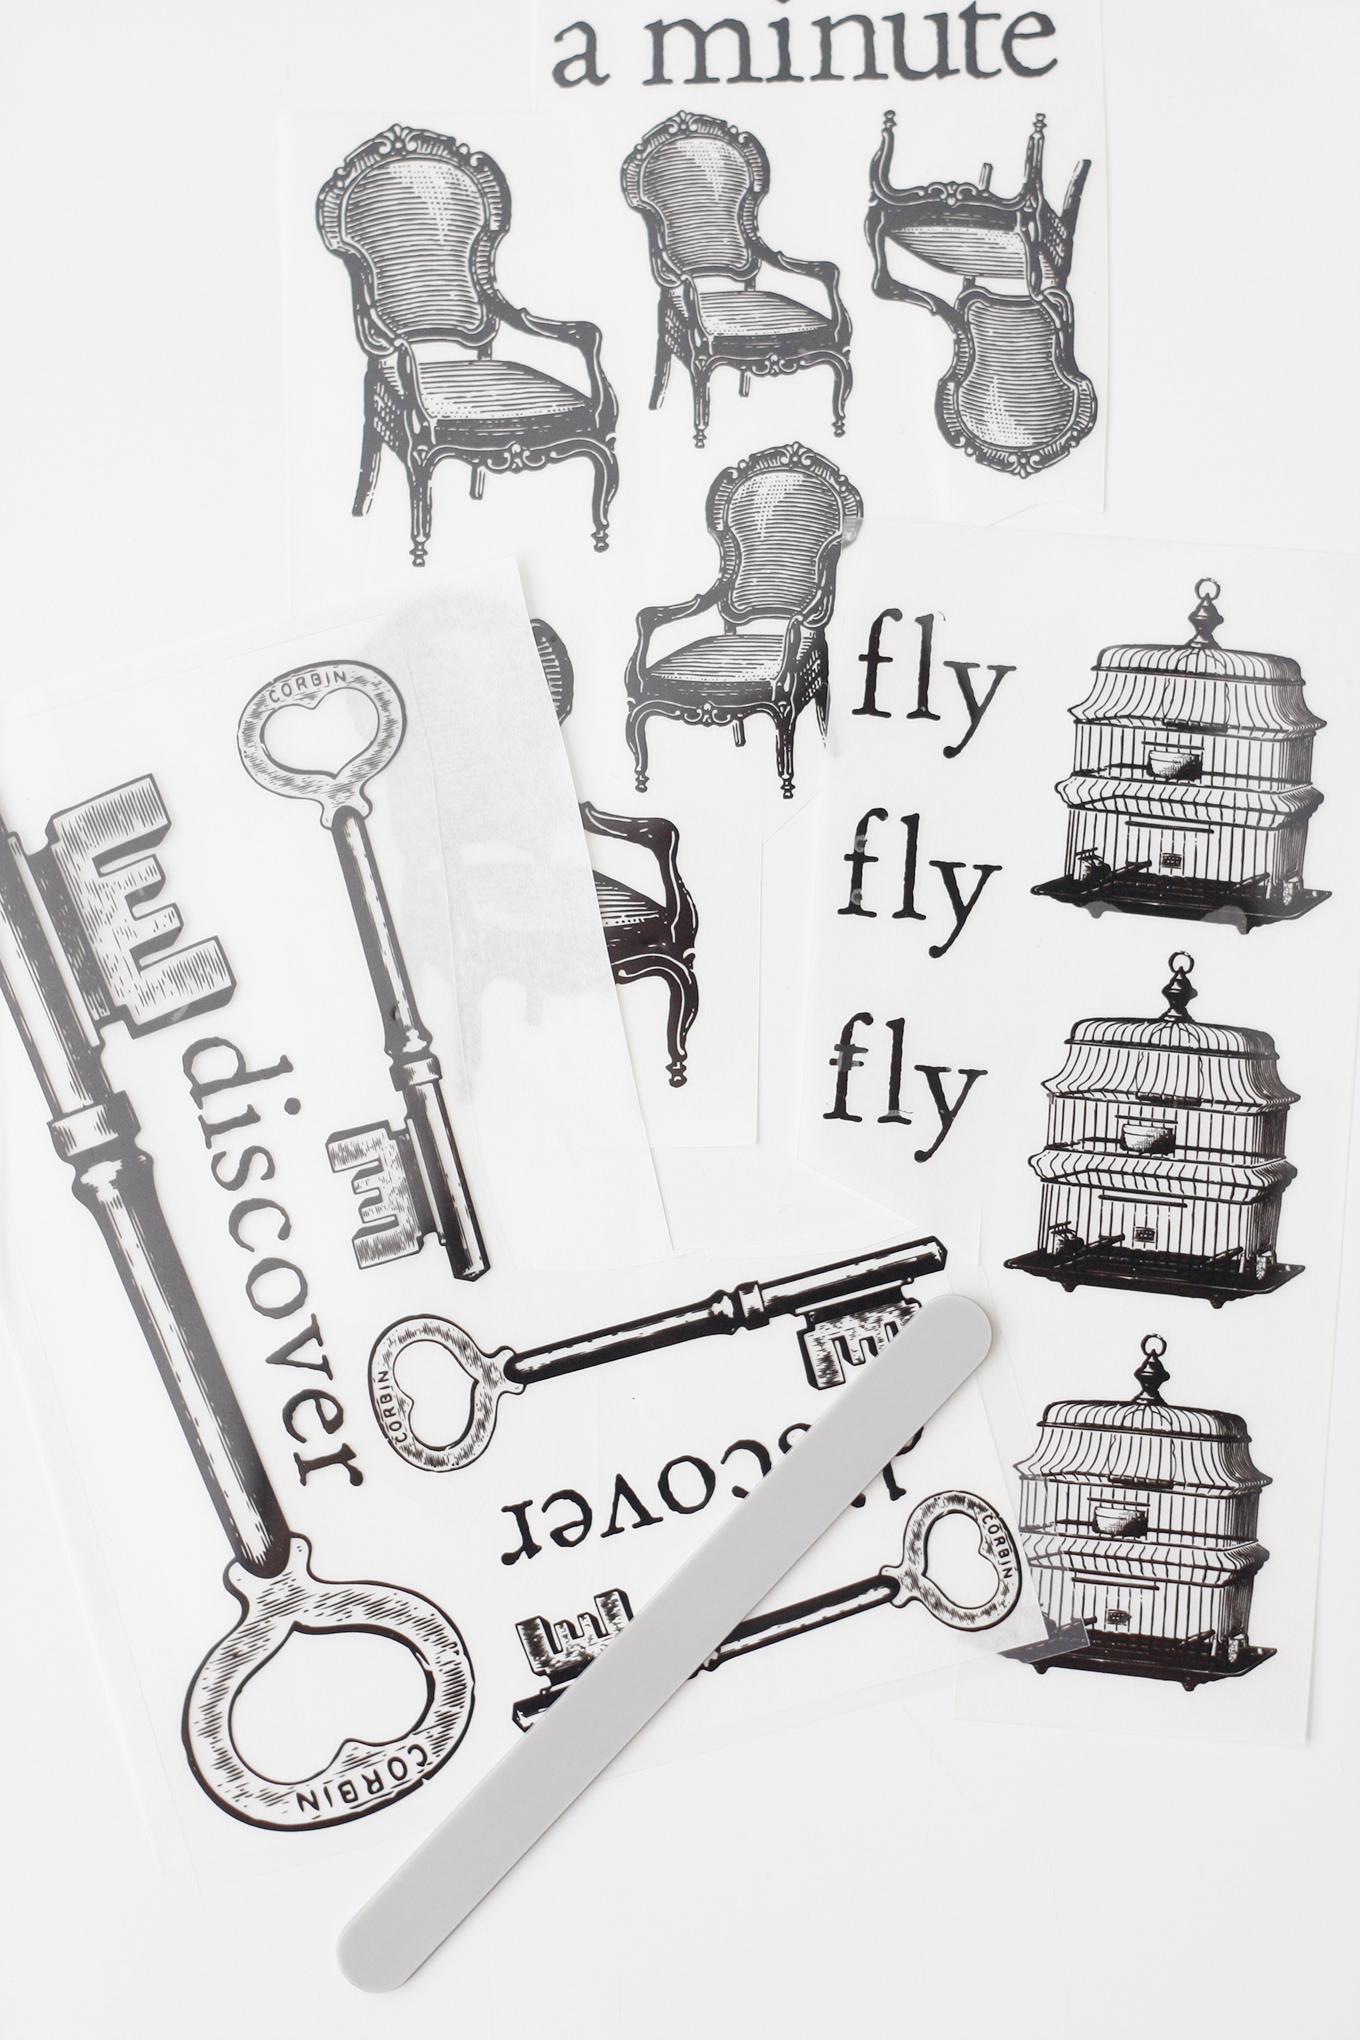 Using the decals of the vintage keys, I layered different sizes to look like a pile of keys. I love the contrast of the vintage look and feel of the etchings/illustrations against the modern-day technology of the iPhone. I am so happy with the results and I hope you like it too!
 Materials & Tools
• Various images of rub-on decals
• Popsicle stick
Step 1
Plan design for inside clear plastic cell phone case.
Step 2
Place decal artwork side down inside the cell phone case and using the popsicle stick, rub the decal onto the surface.
Step 3
Once layering multiple decals inside the clear cell phone case to the layout of your liking, pop the case onto your phone. You are now done and ready to show it off to the world.
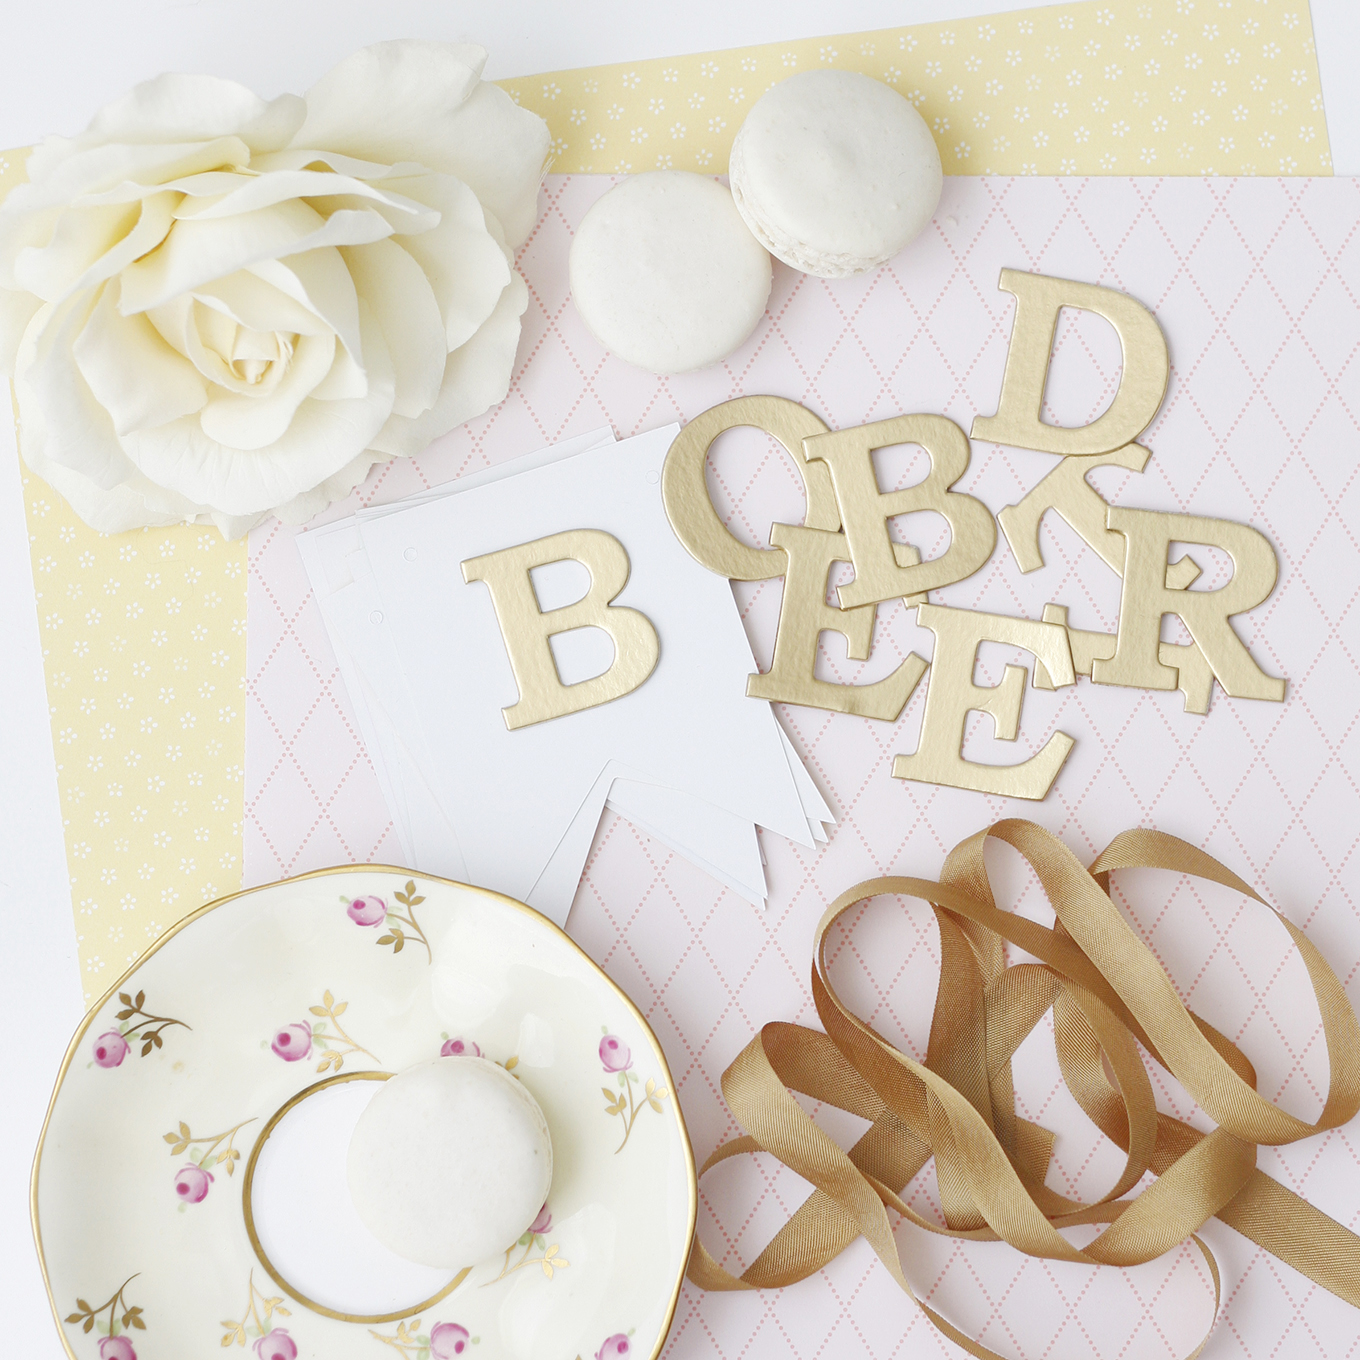
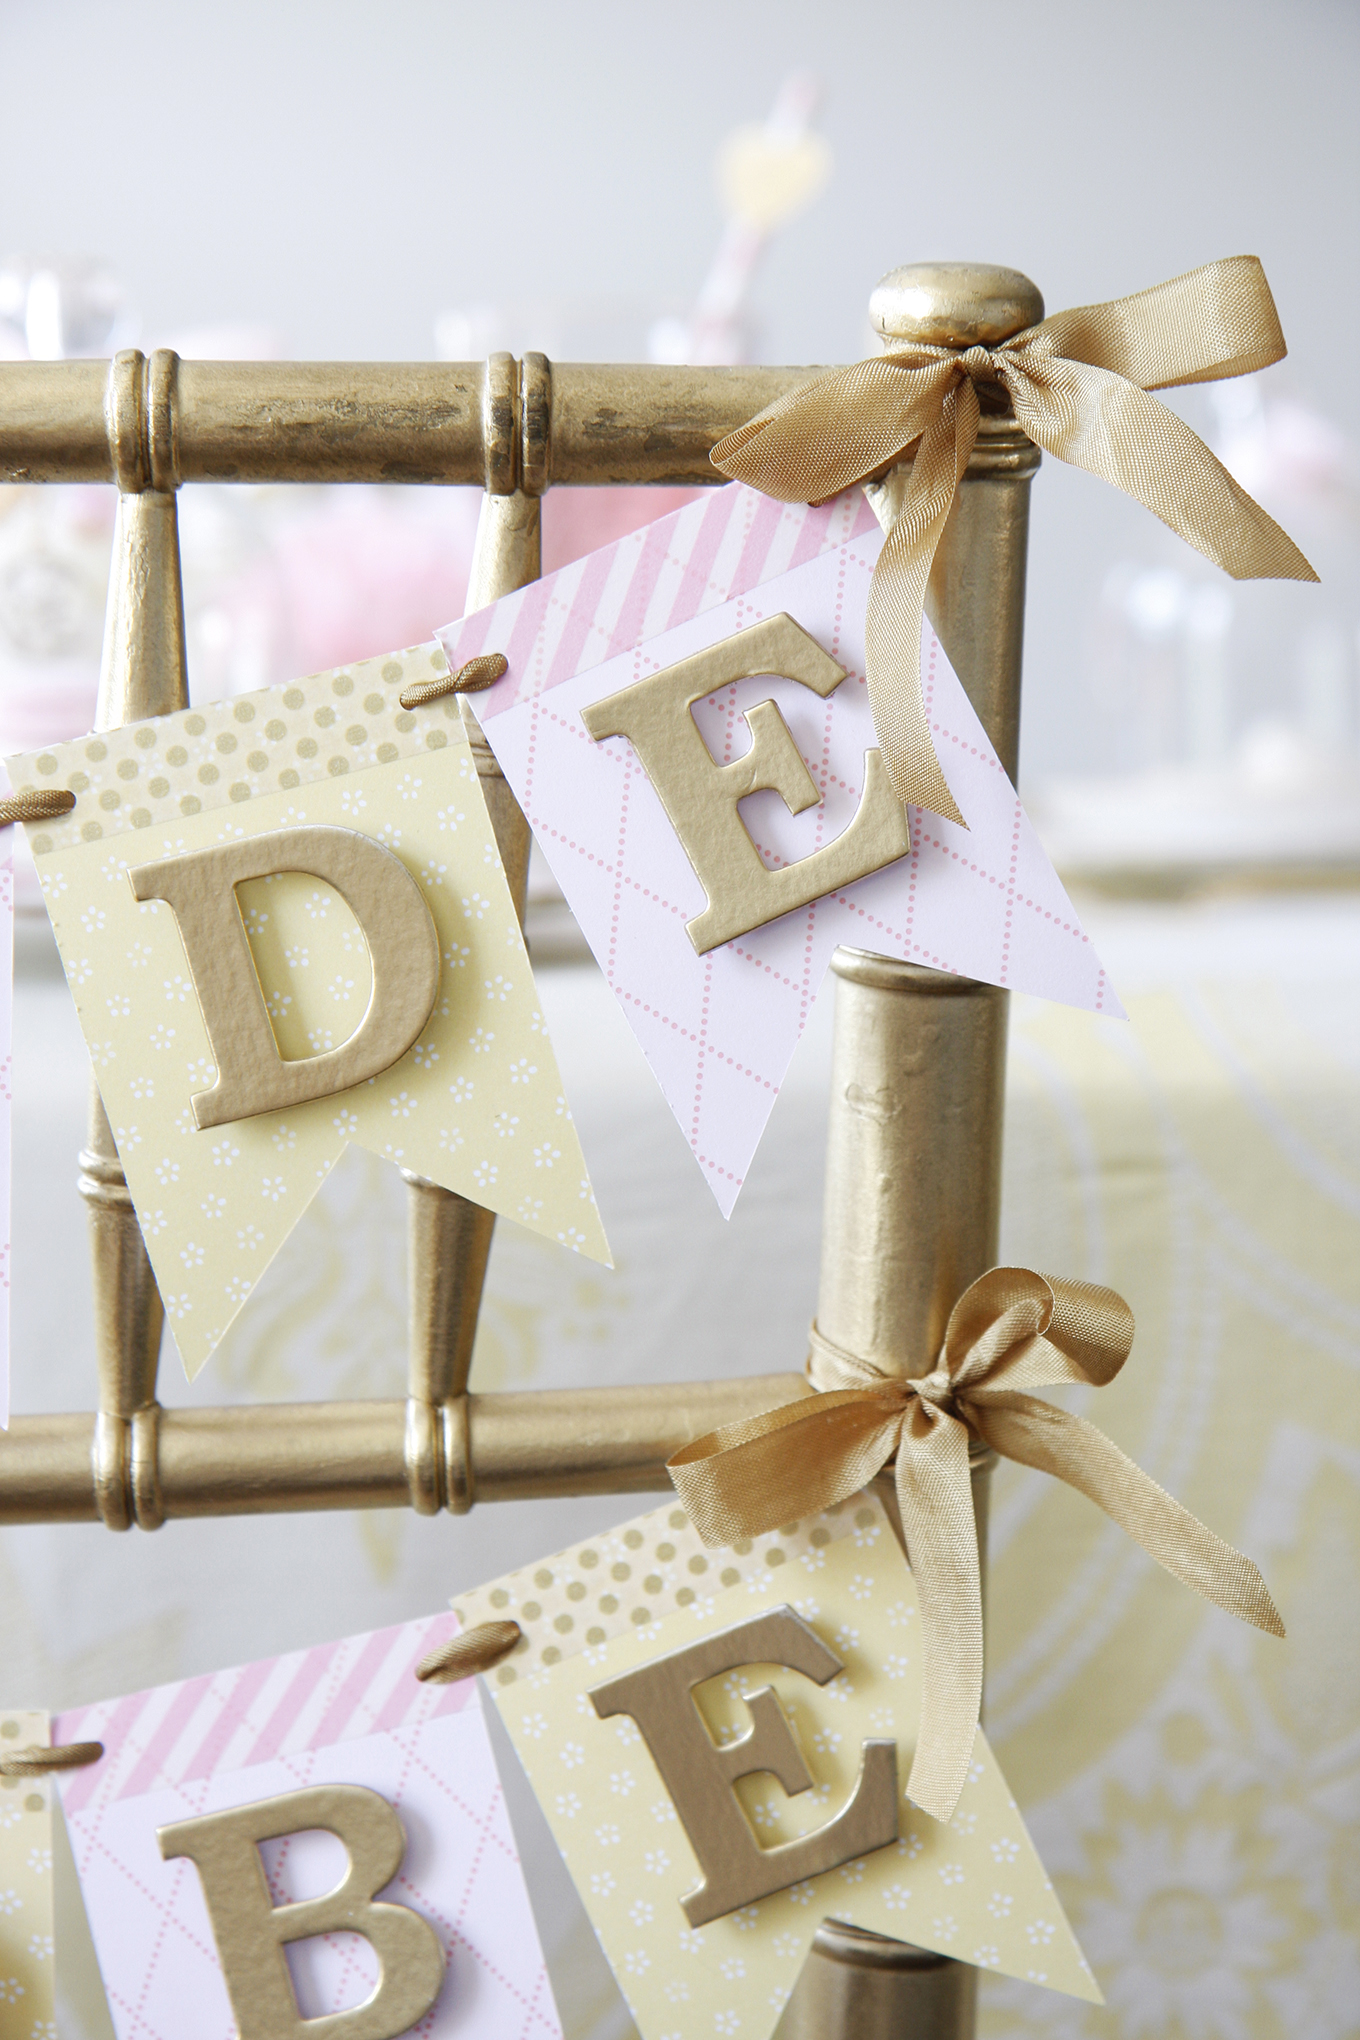
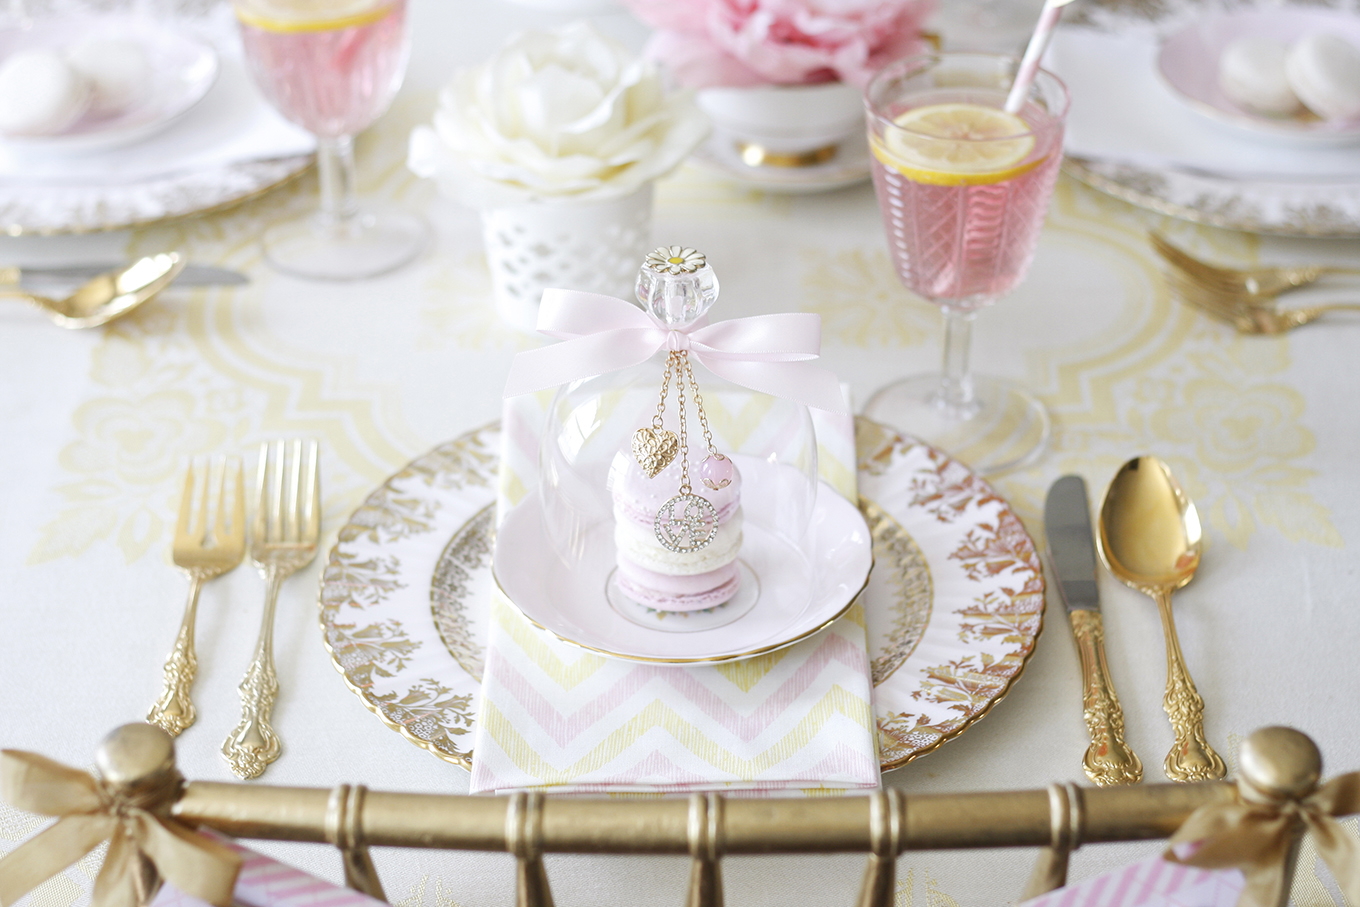
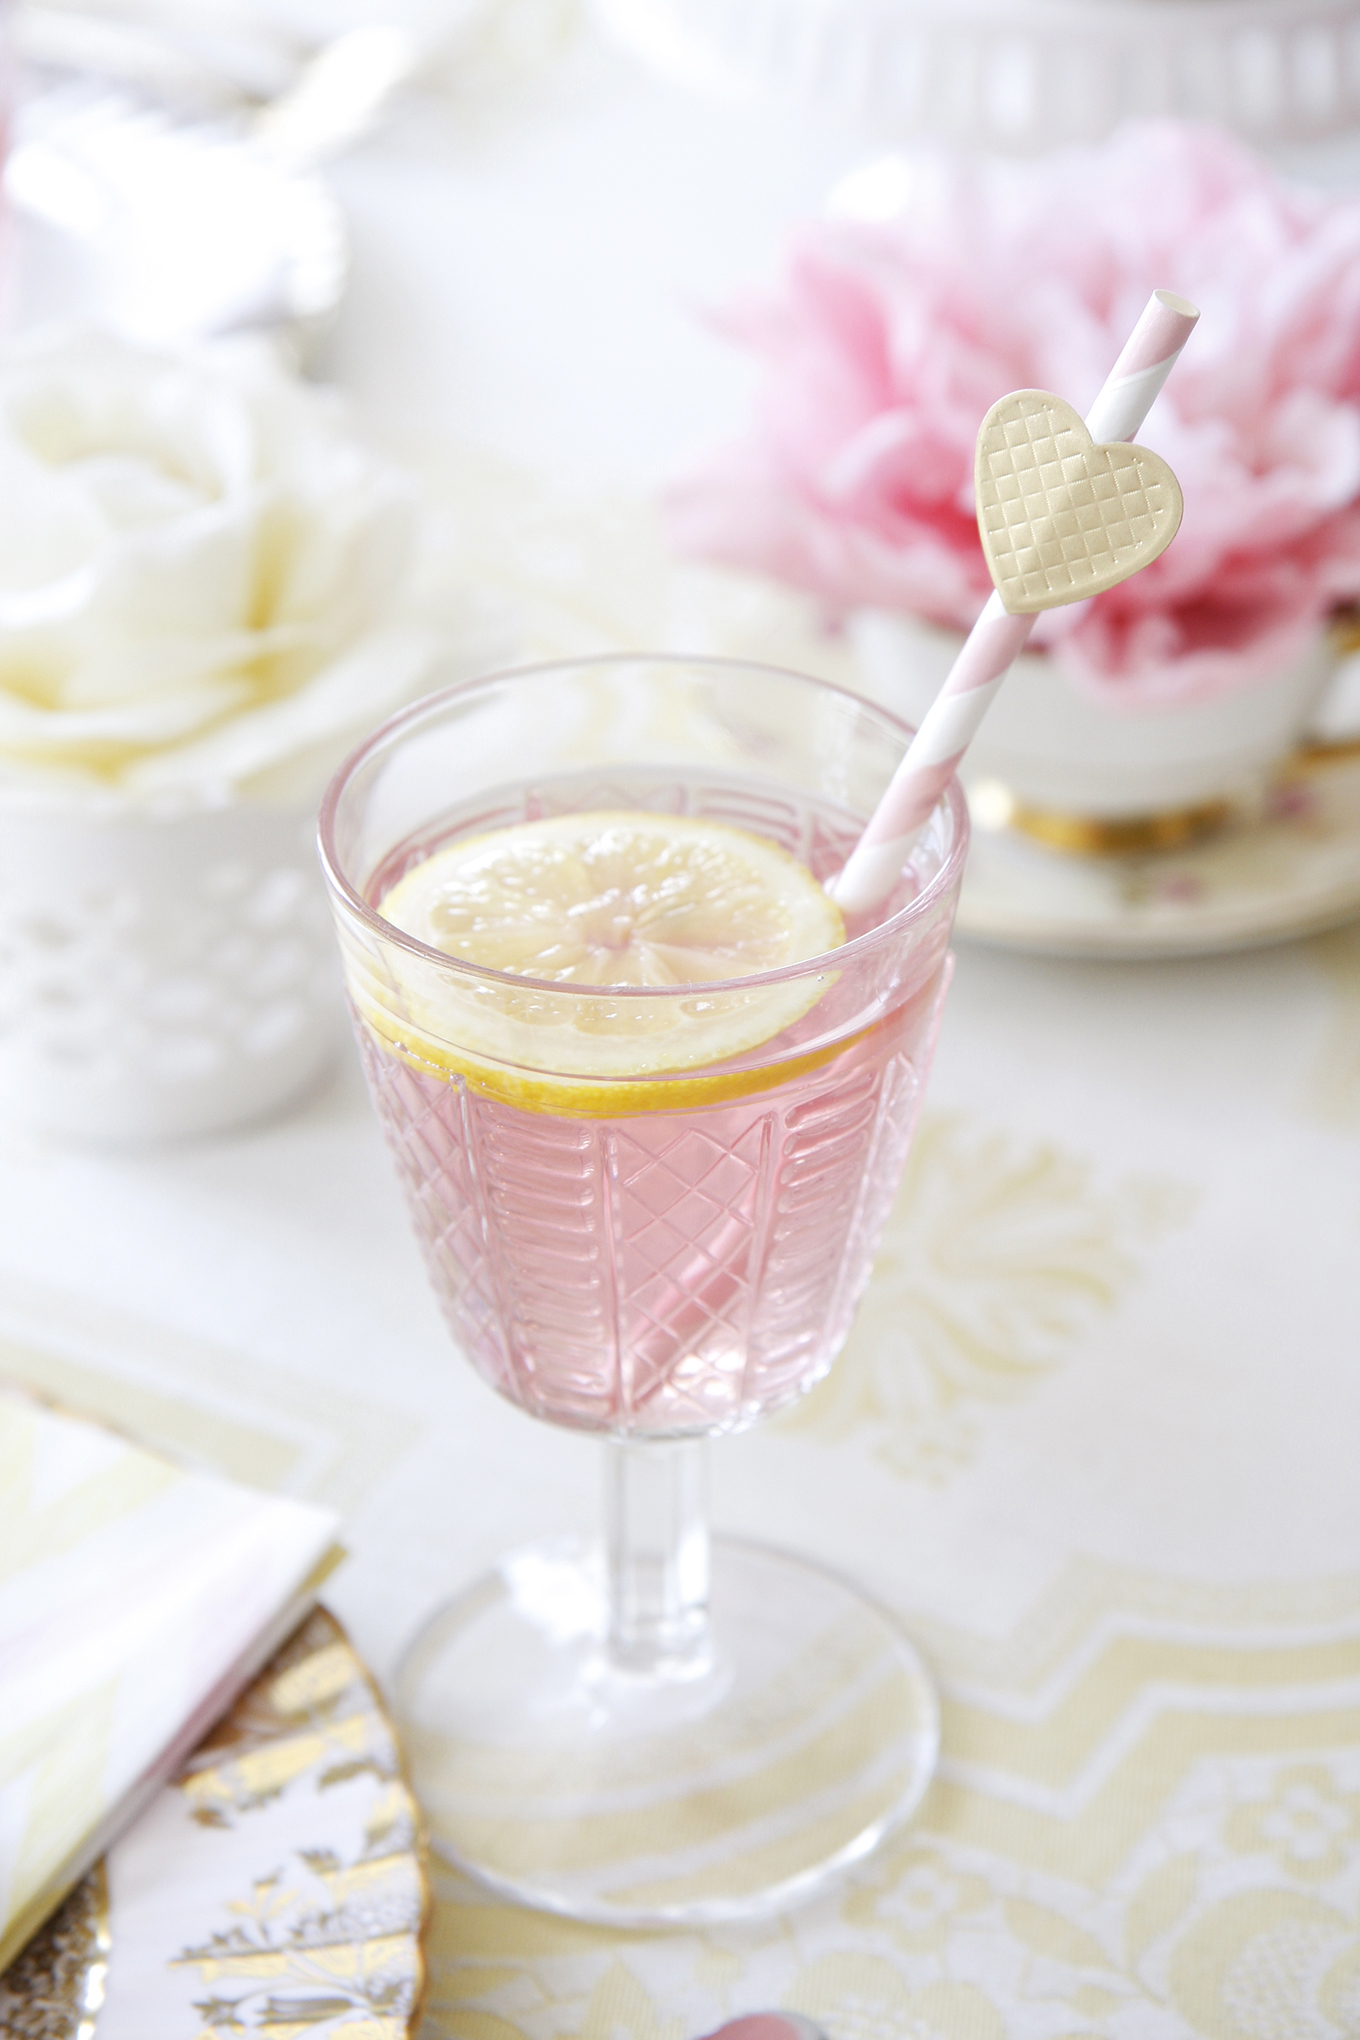
As a bride-to-be myself, I had so much fun creating this chair banner craft for my wedding shower concept. As you may have noticed, I love absolutely everything pink and gold, but recently I have been finding myself appreciating the colour yellow. On a recent antiquing trip with my dear friend Jennifer of Tufts and Toile, I found the perfect pale yellow tablecloth to compliment my wedding shower tablescape, which was a great score that only cost $10. I can’t wait to have my very own wedding shower — to come one day

 Materials
• Various crafting card stock in complimentary colours and patterns (yellow & pink)
• Alphabet letters (spray painted gold)
• Foam adhesive circles
• Washi tape to coordinate with paper stock
• Seam binding ribbon
• Decorative flower
 Tools
Tools
• X-acto knife and blade
• Ruler
• Hole punch
 Step 1
Measure and cut out ten rectangular cards in card stock of your choice that are 2 5/8″ wide x 3 3/4″ tall. You can use alternating paper designs for variety. Cut a triangular notch at the bottom of each card.
Step 2
With the hole punch, create 2 holes at the top of each card on both the right and left side.
Step 3
Arrange each letter of ‘Bride to Be’ on a separate card. You can either use glue to attach the letters to the cards. Or as I prefer, to use small foam adhesive circles that give dimension to the letters.
Step 4
At the top of each card, lay a strip of washi tape and trim the ends on either side of the card.
Step 5
Thread the seam binding through all of the holes in the cards to hang the banner.
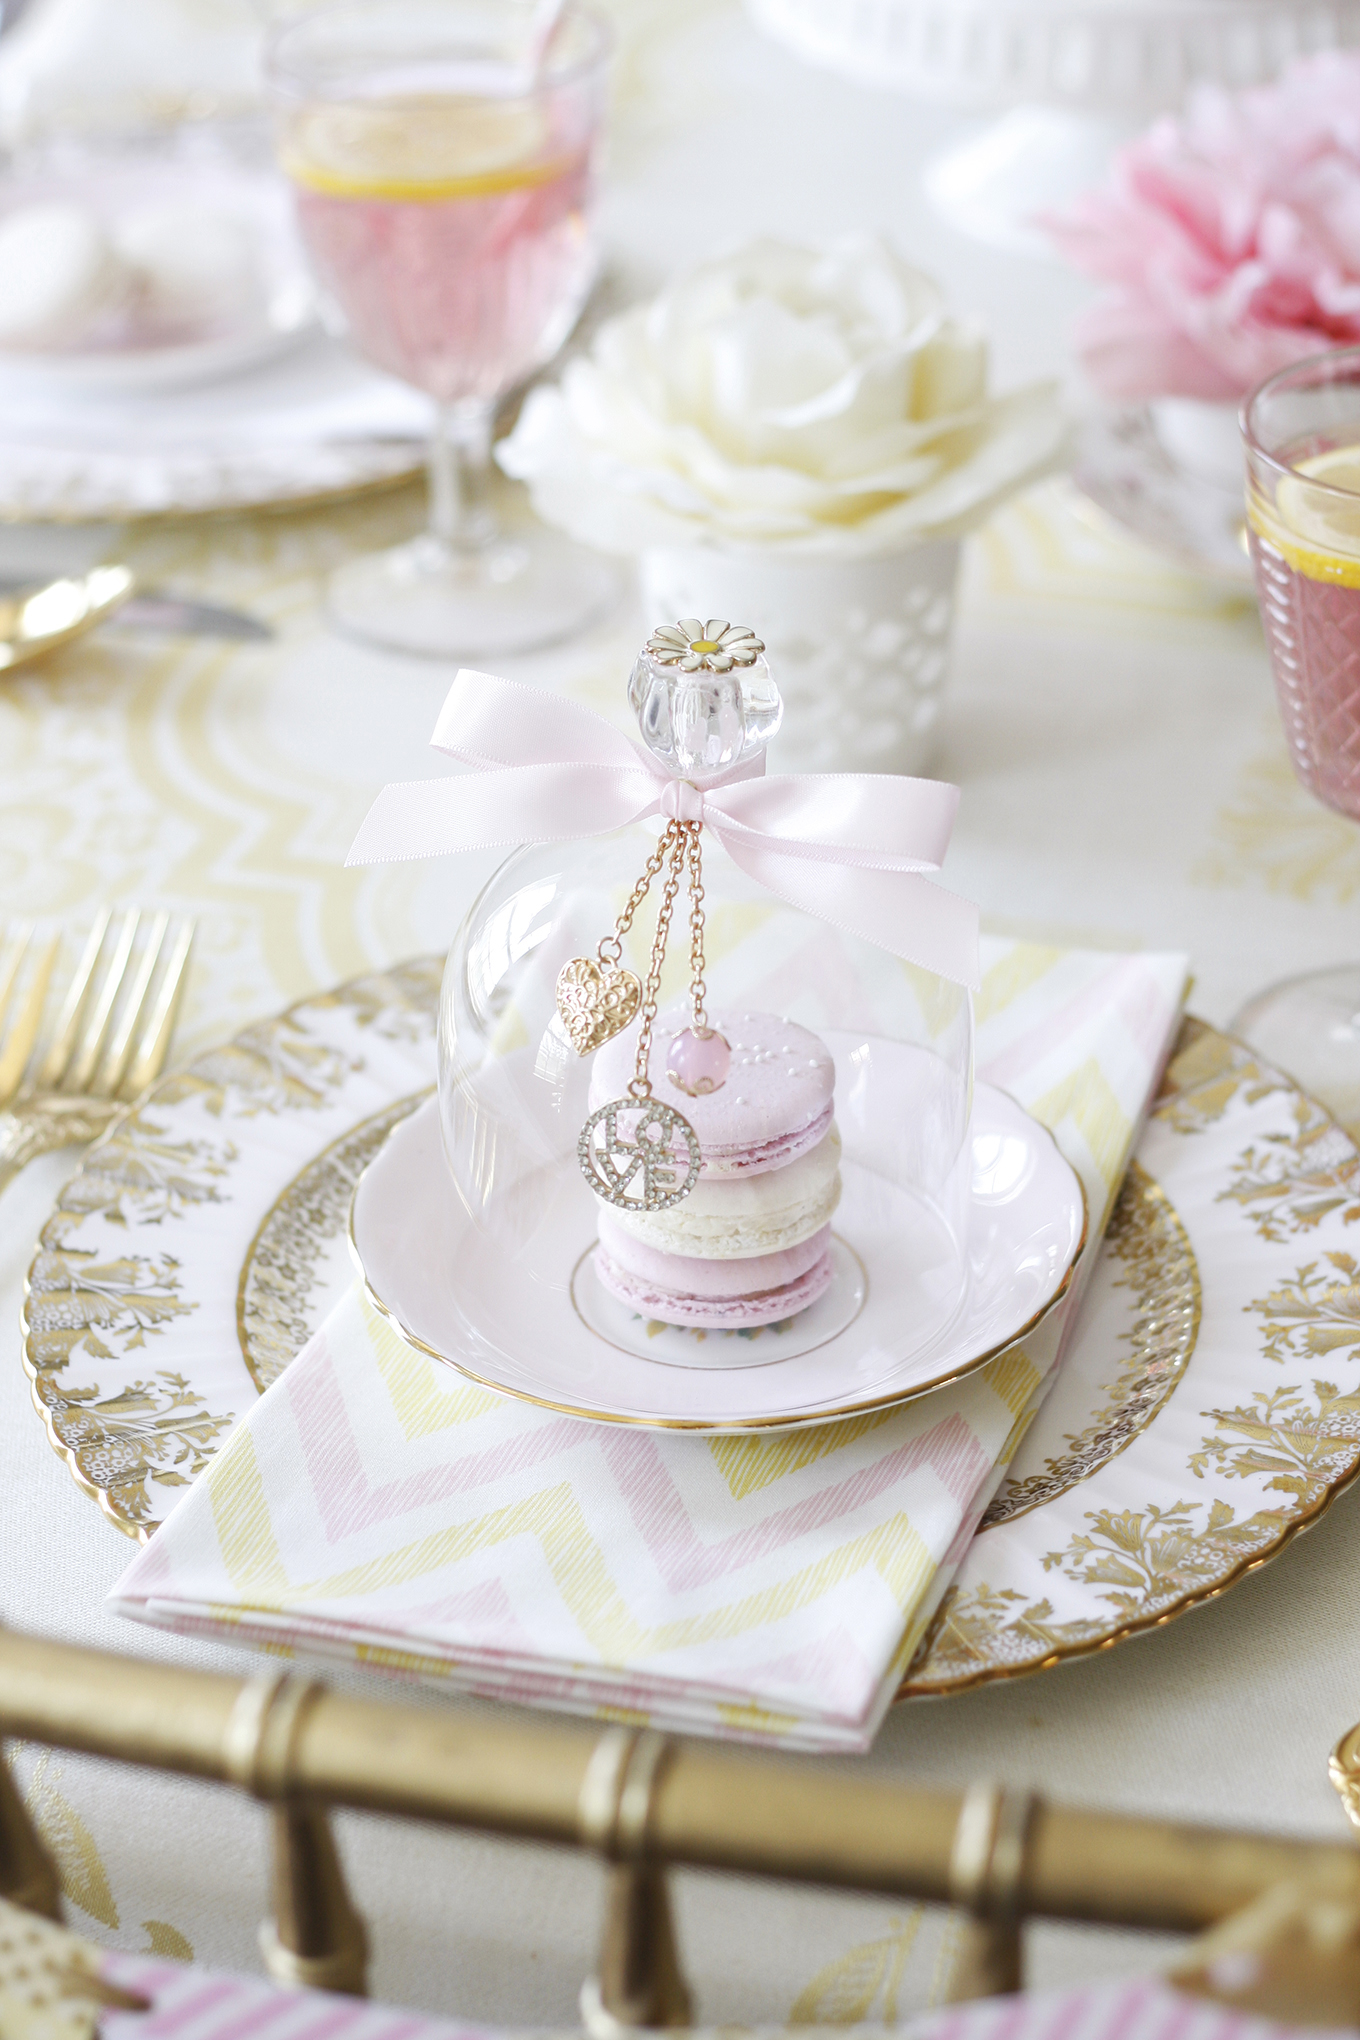
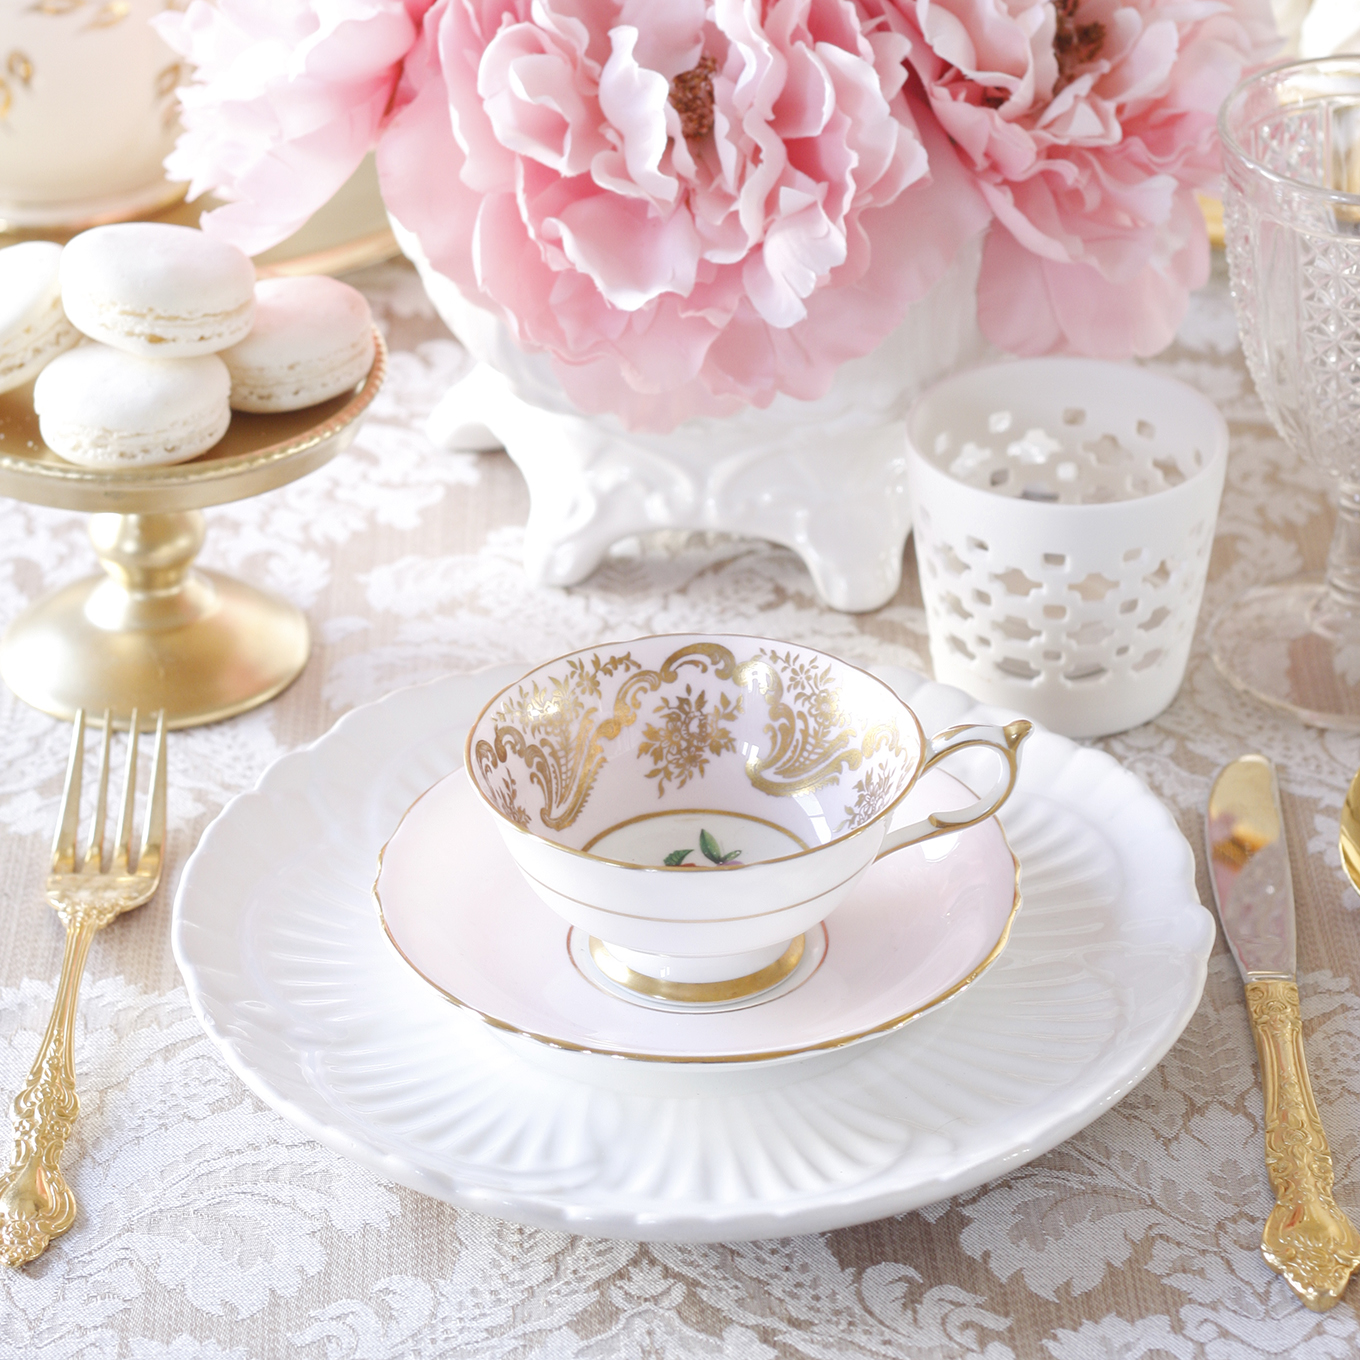
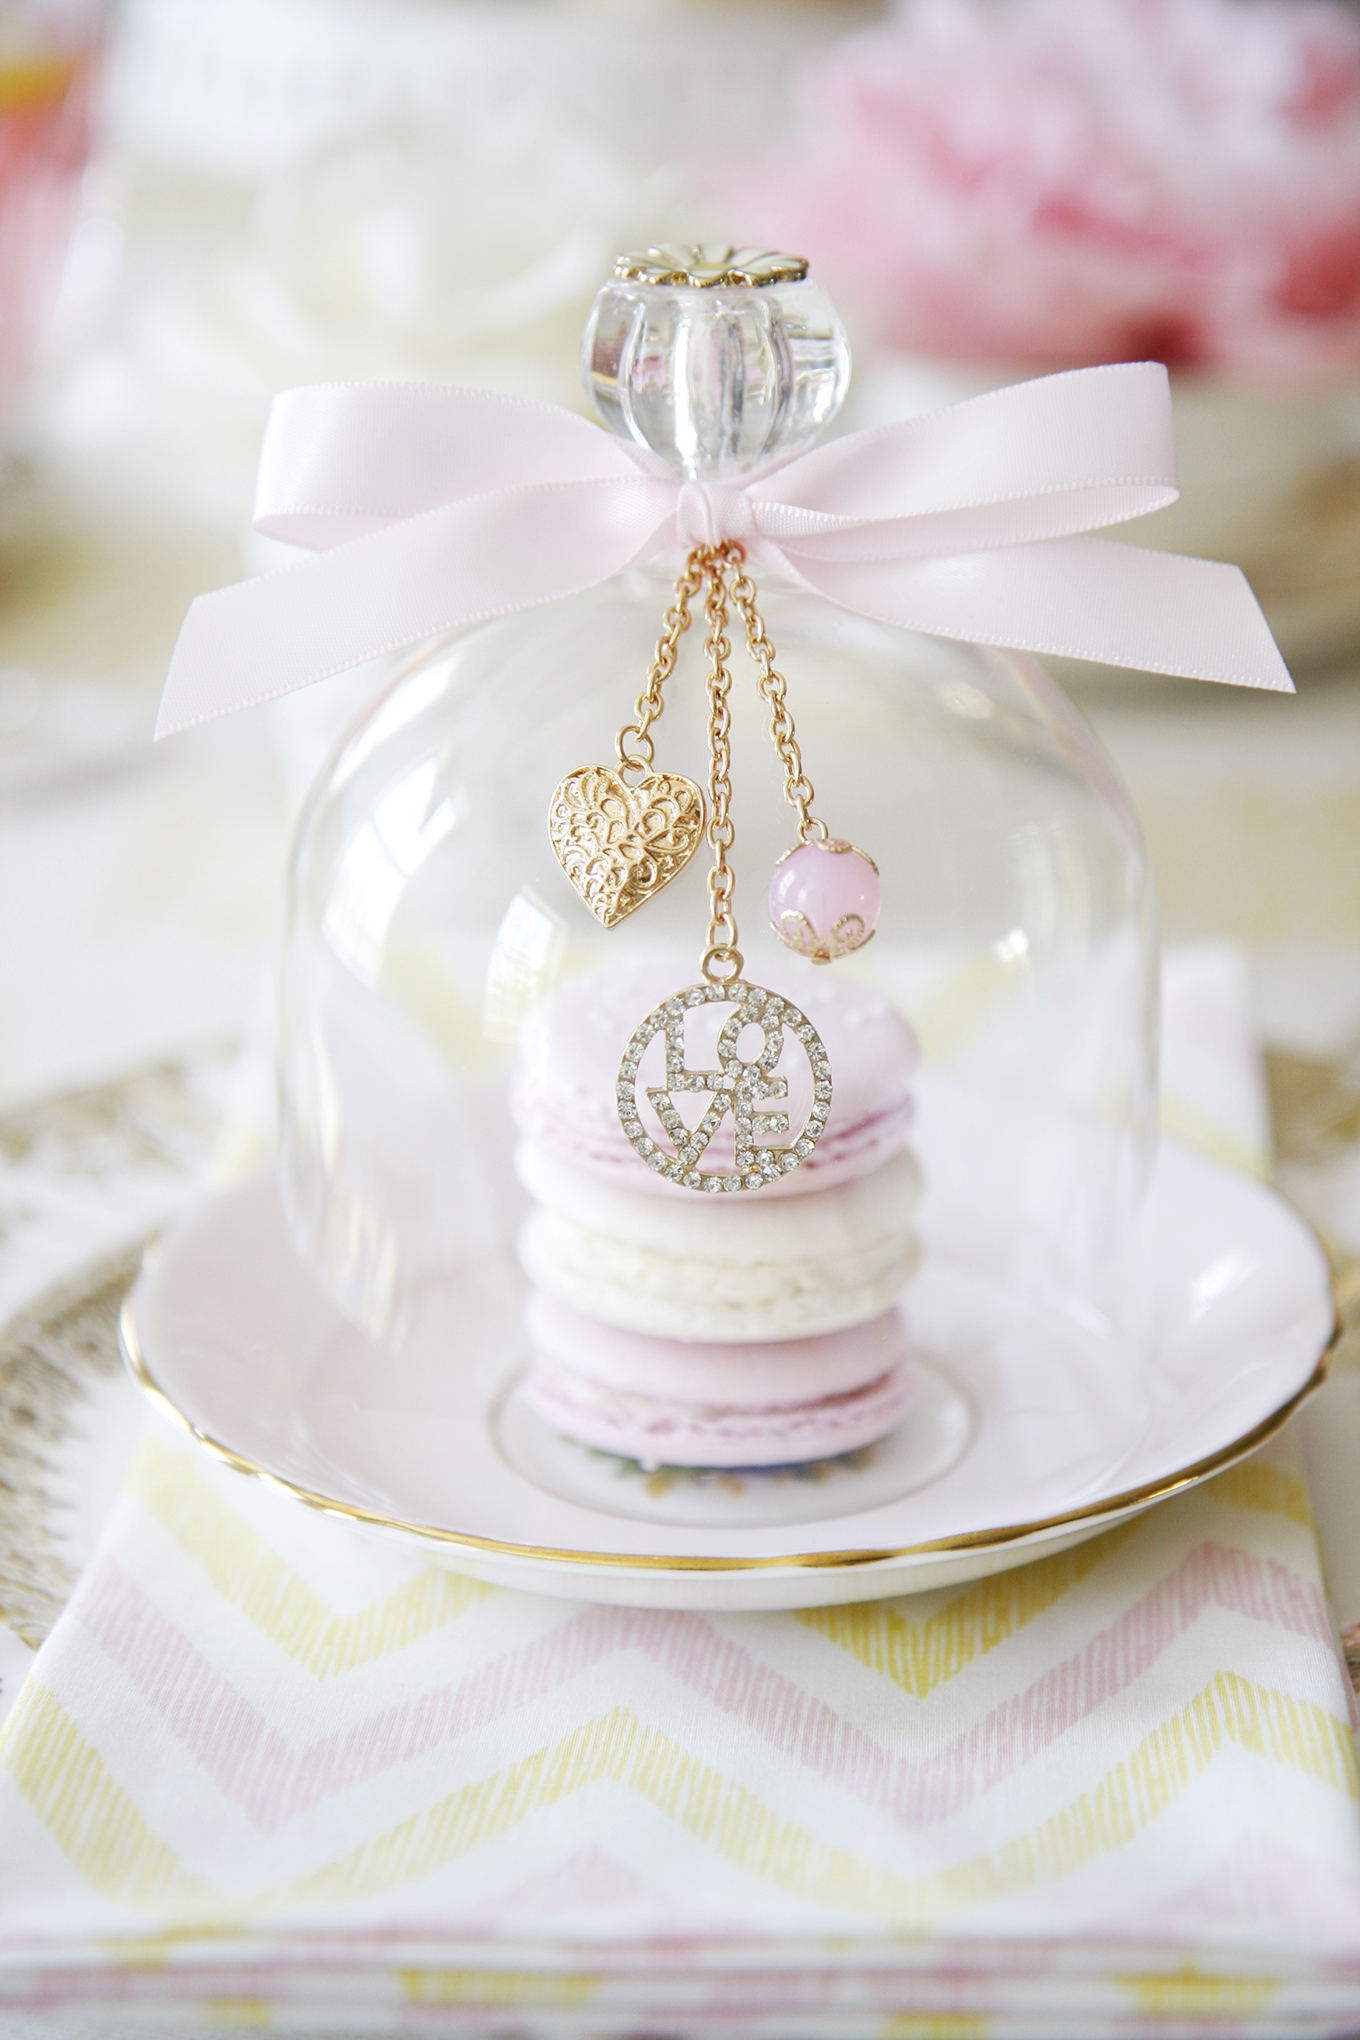 Macarons by Sweet Philosophy
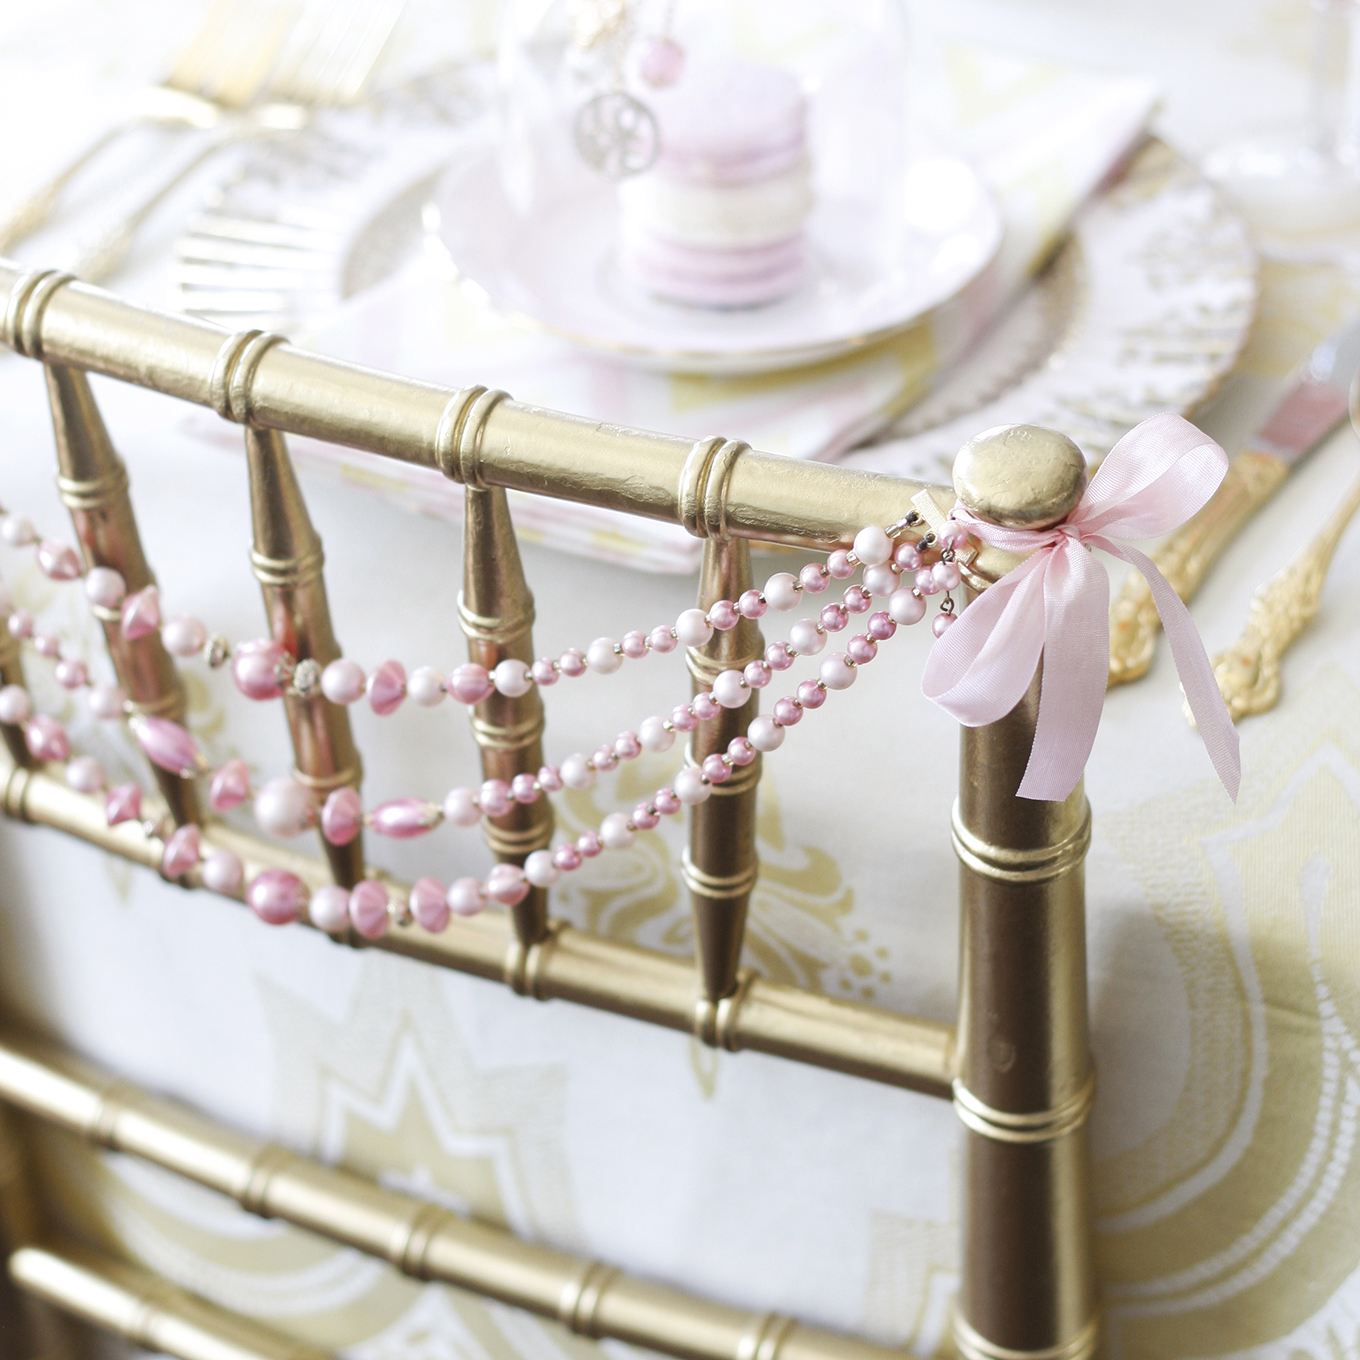
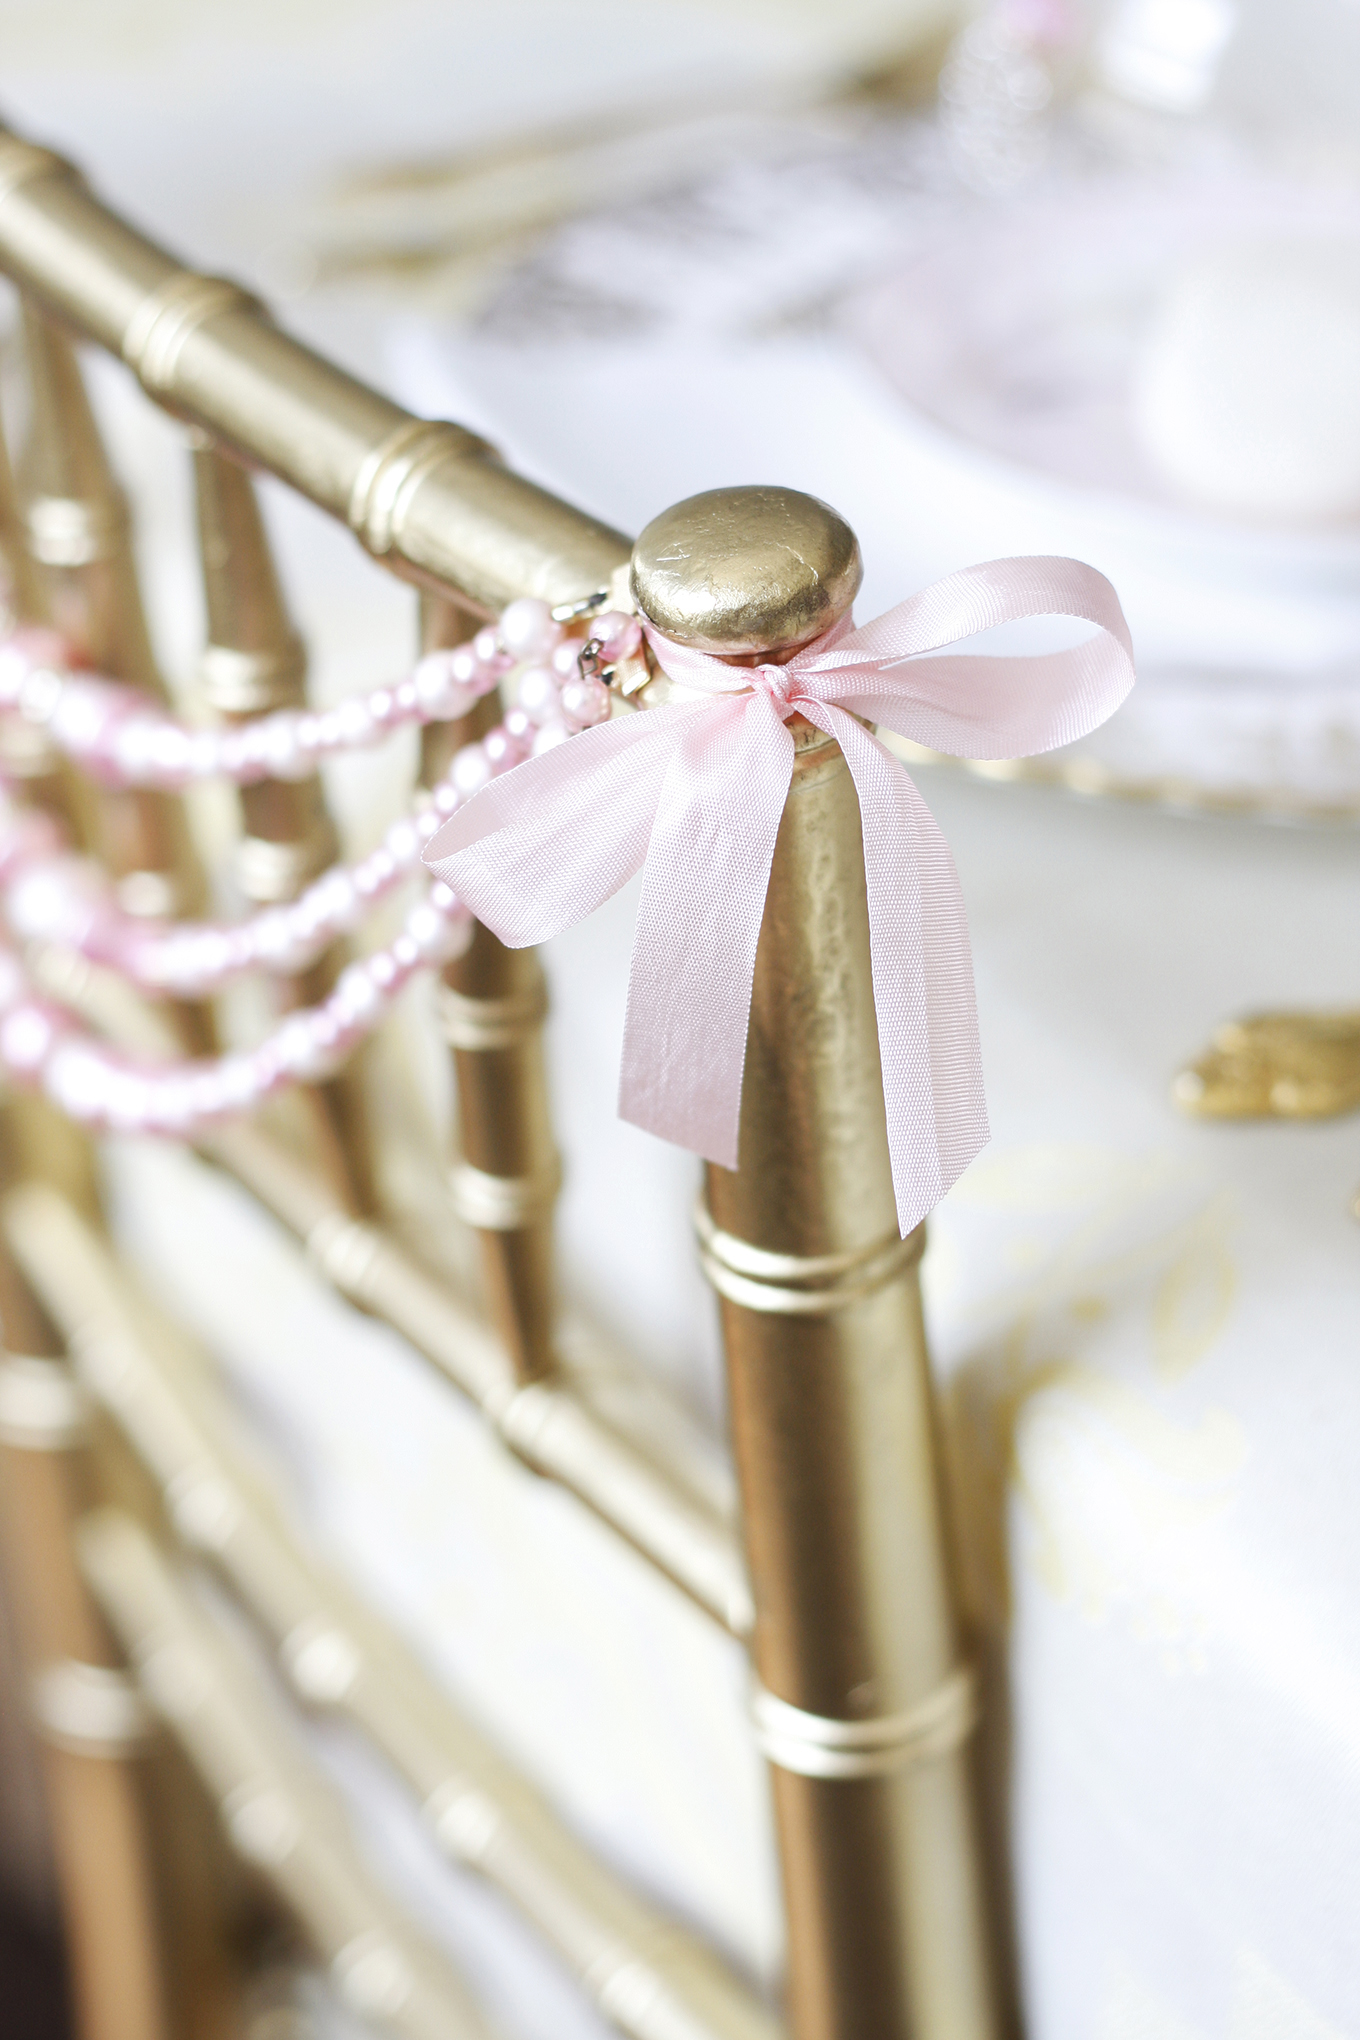
 For each of the guests, I decorated the chiavari chairs with vintage jewelry necklaces for added sparkle and charm.
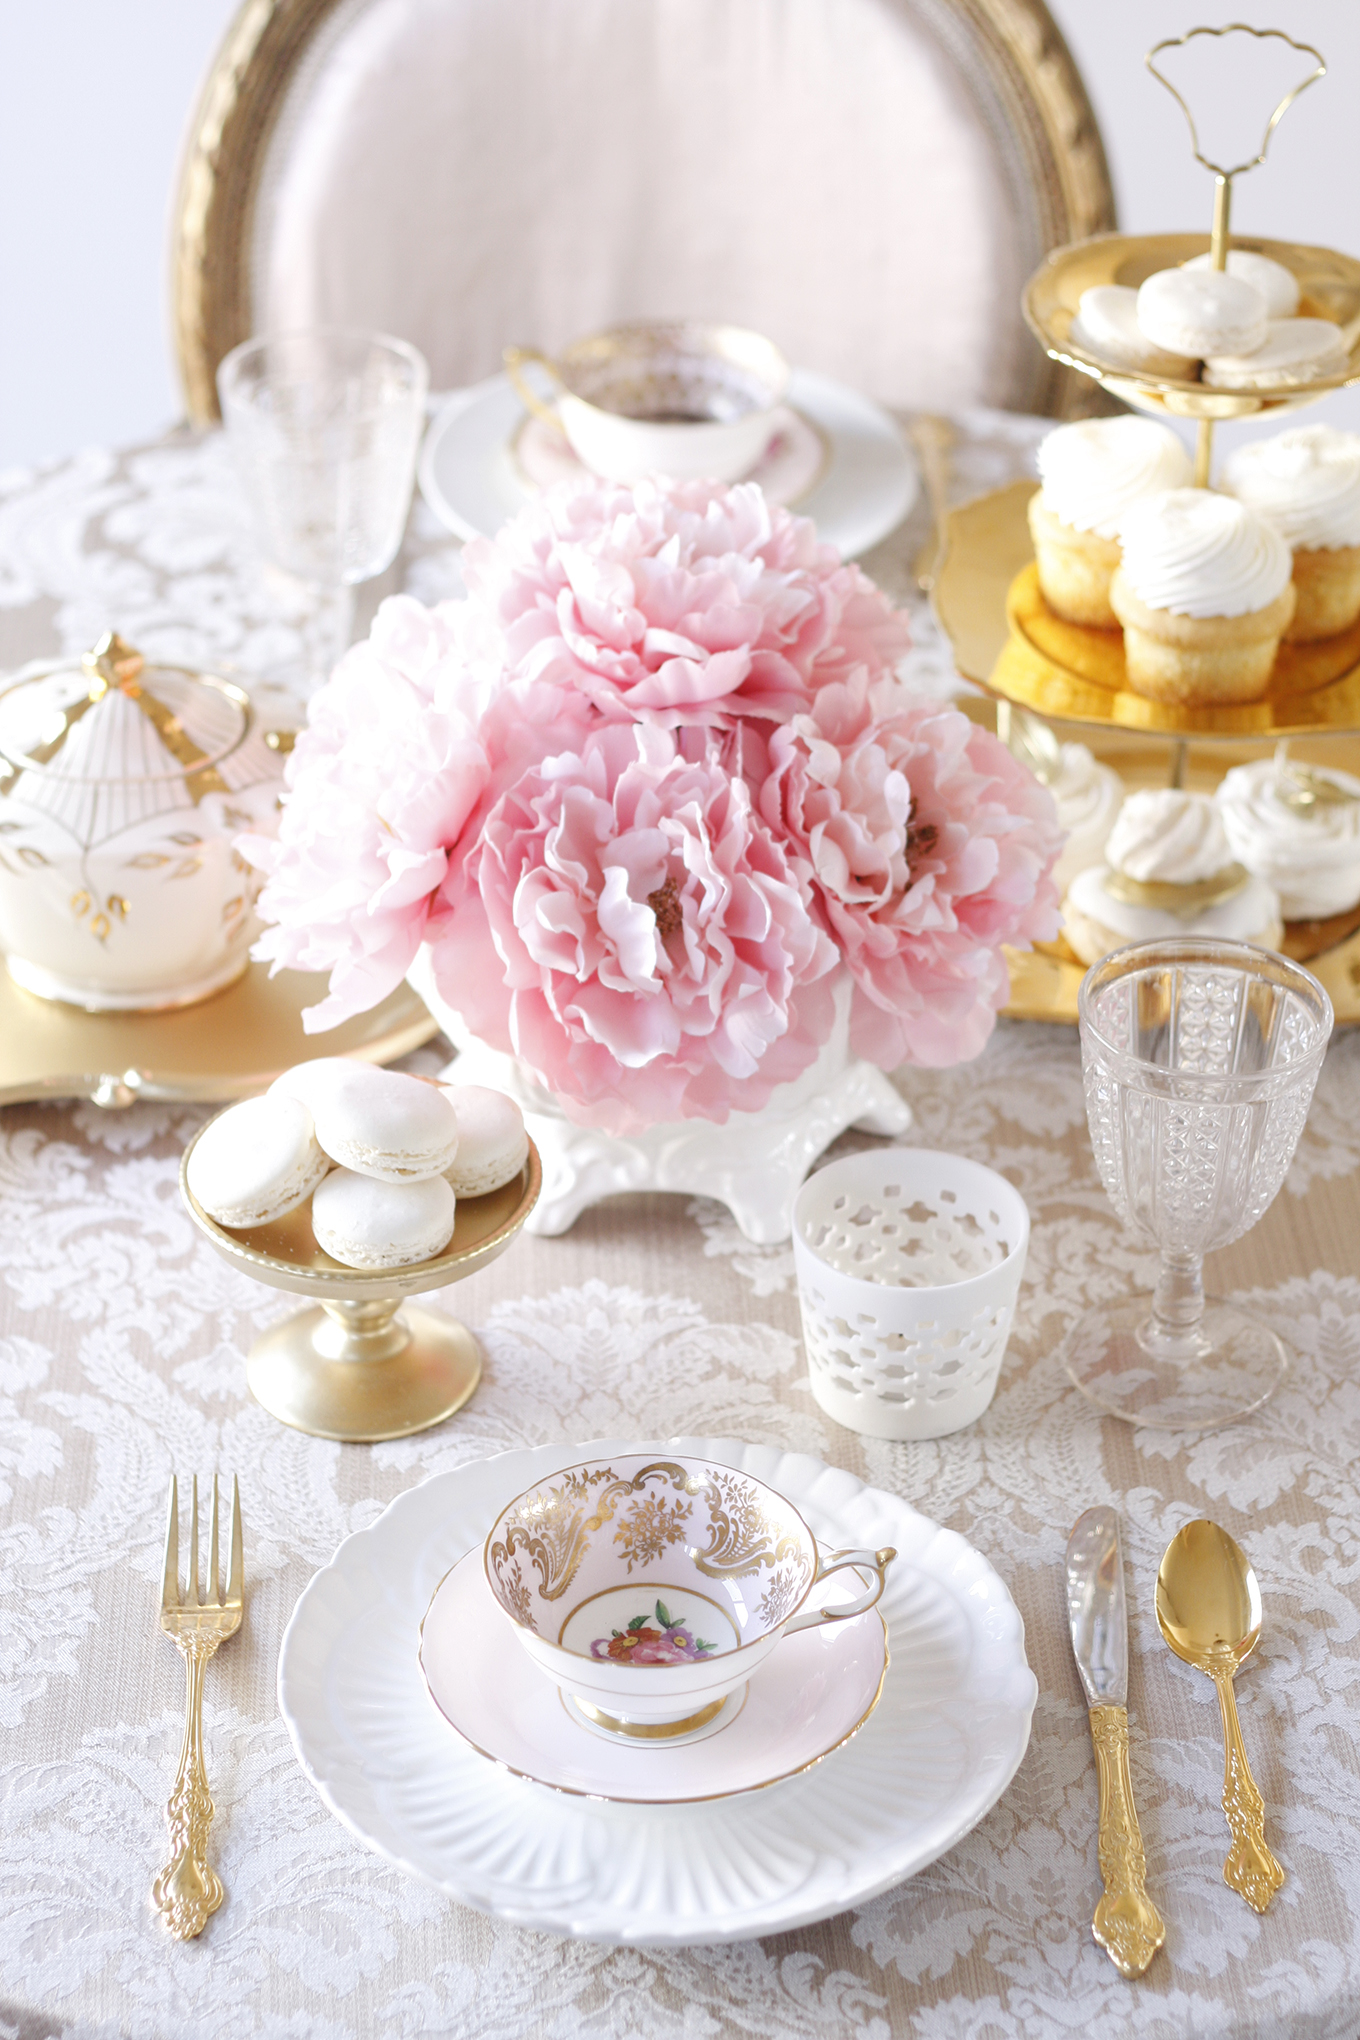
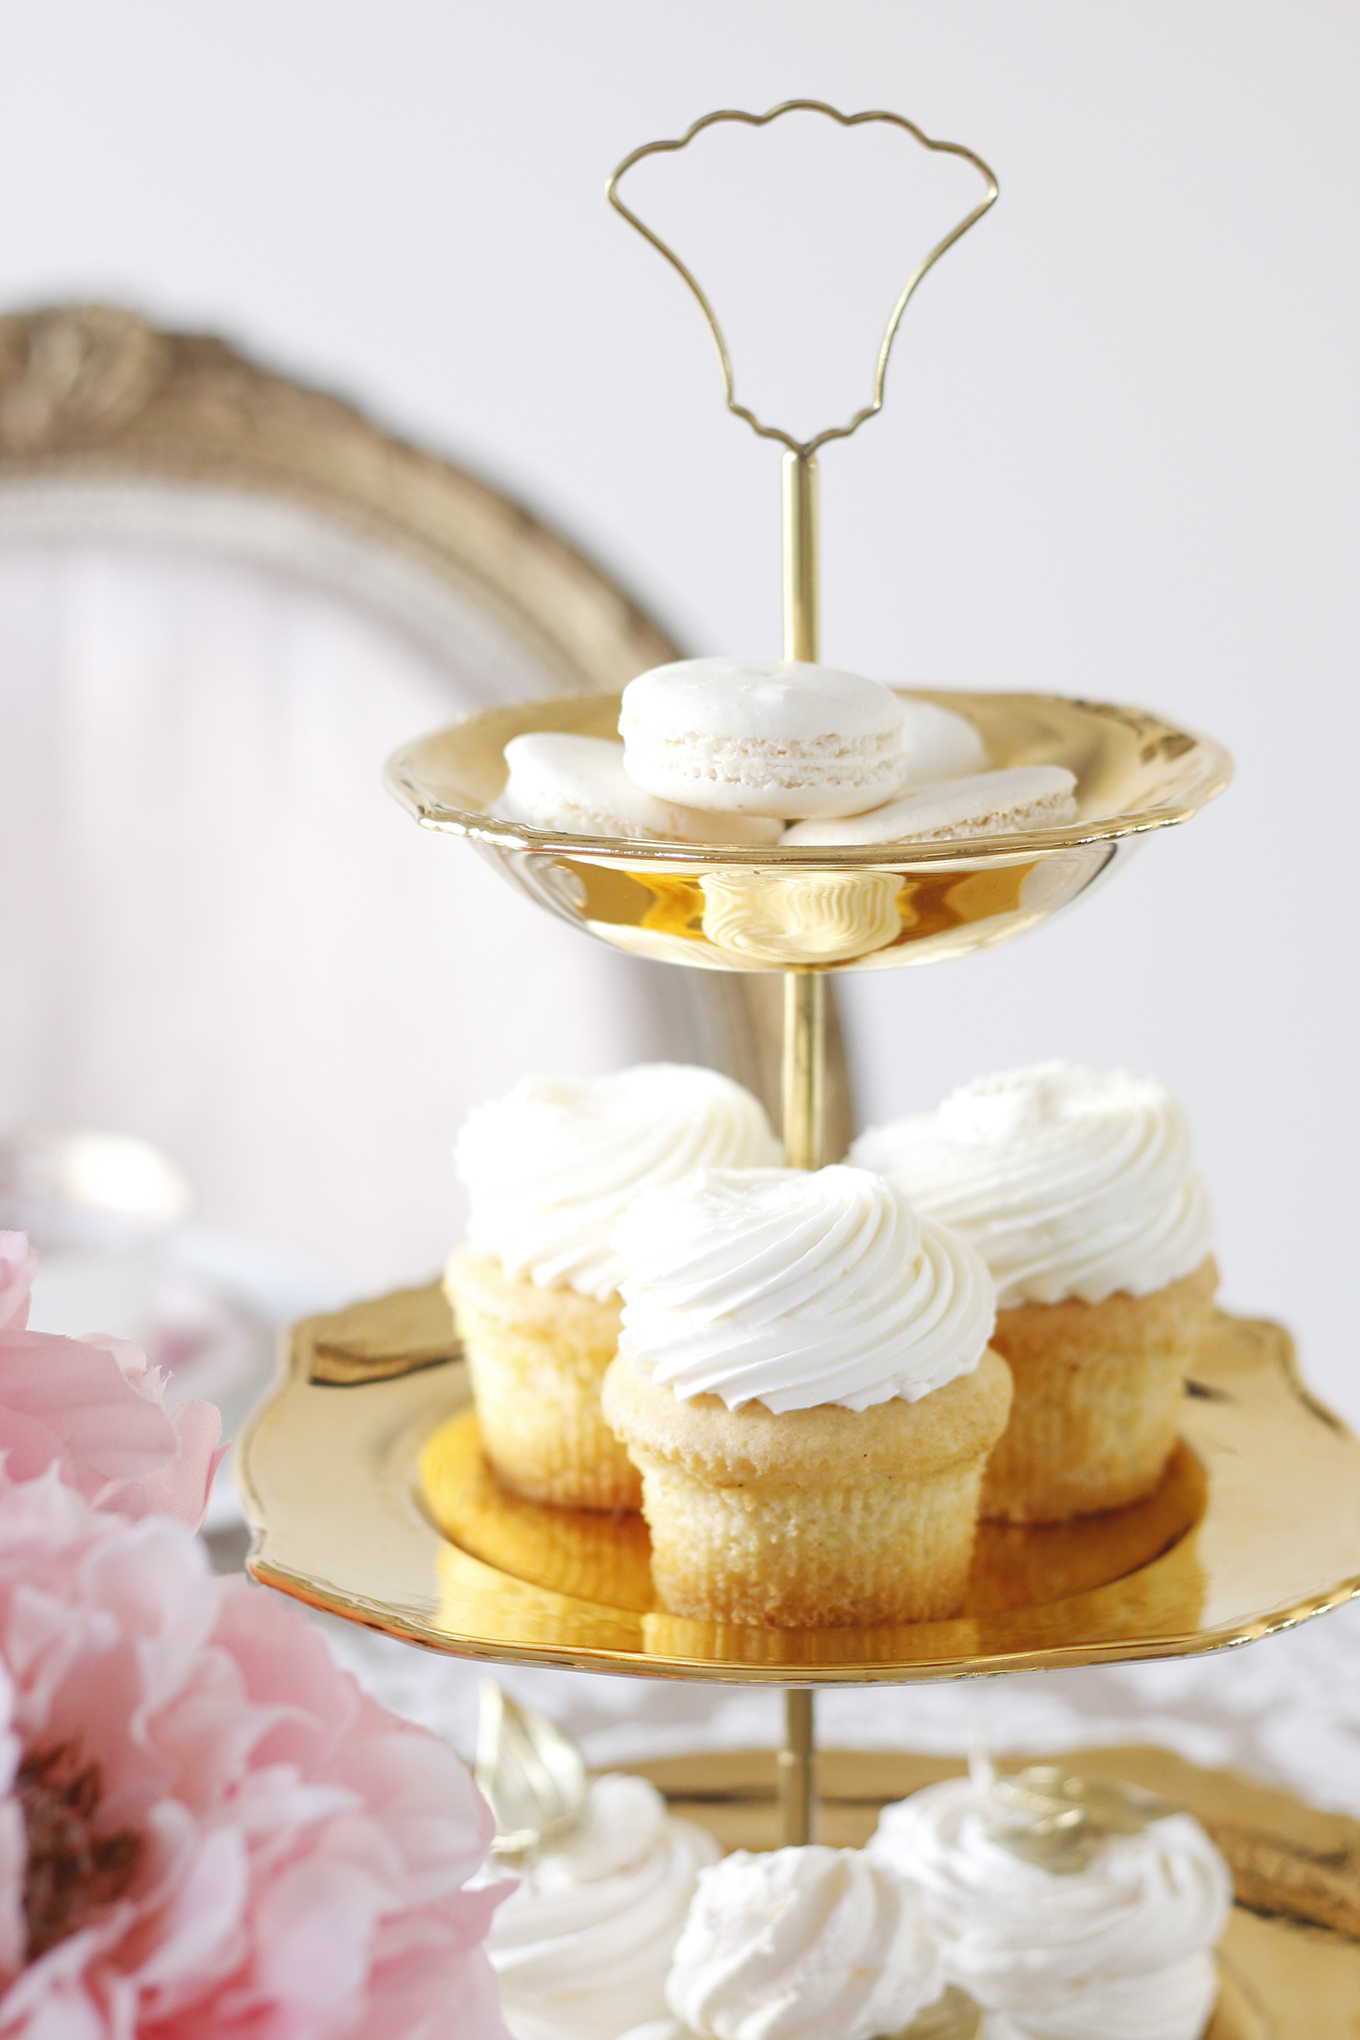 Vanilla cupcakes from CakeStar Bakery
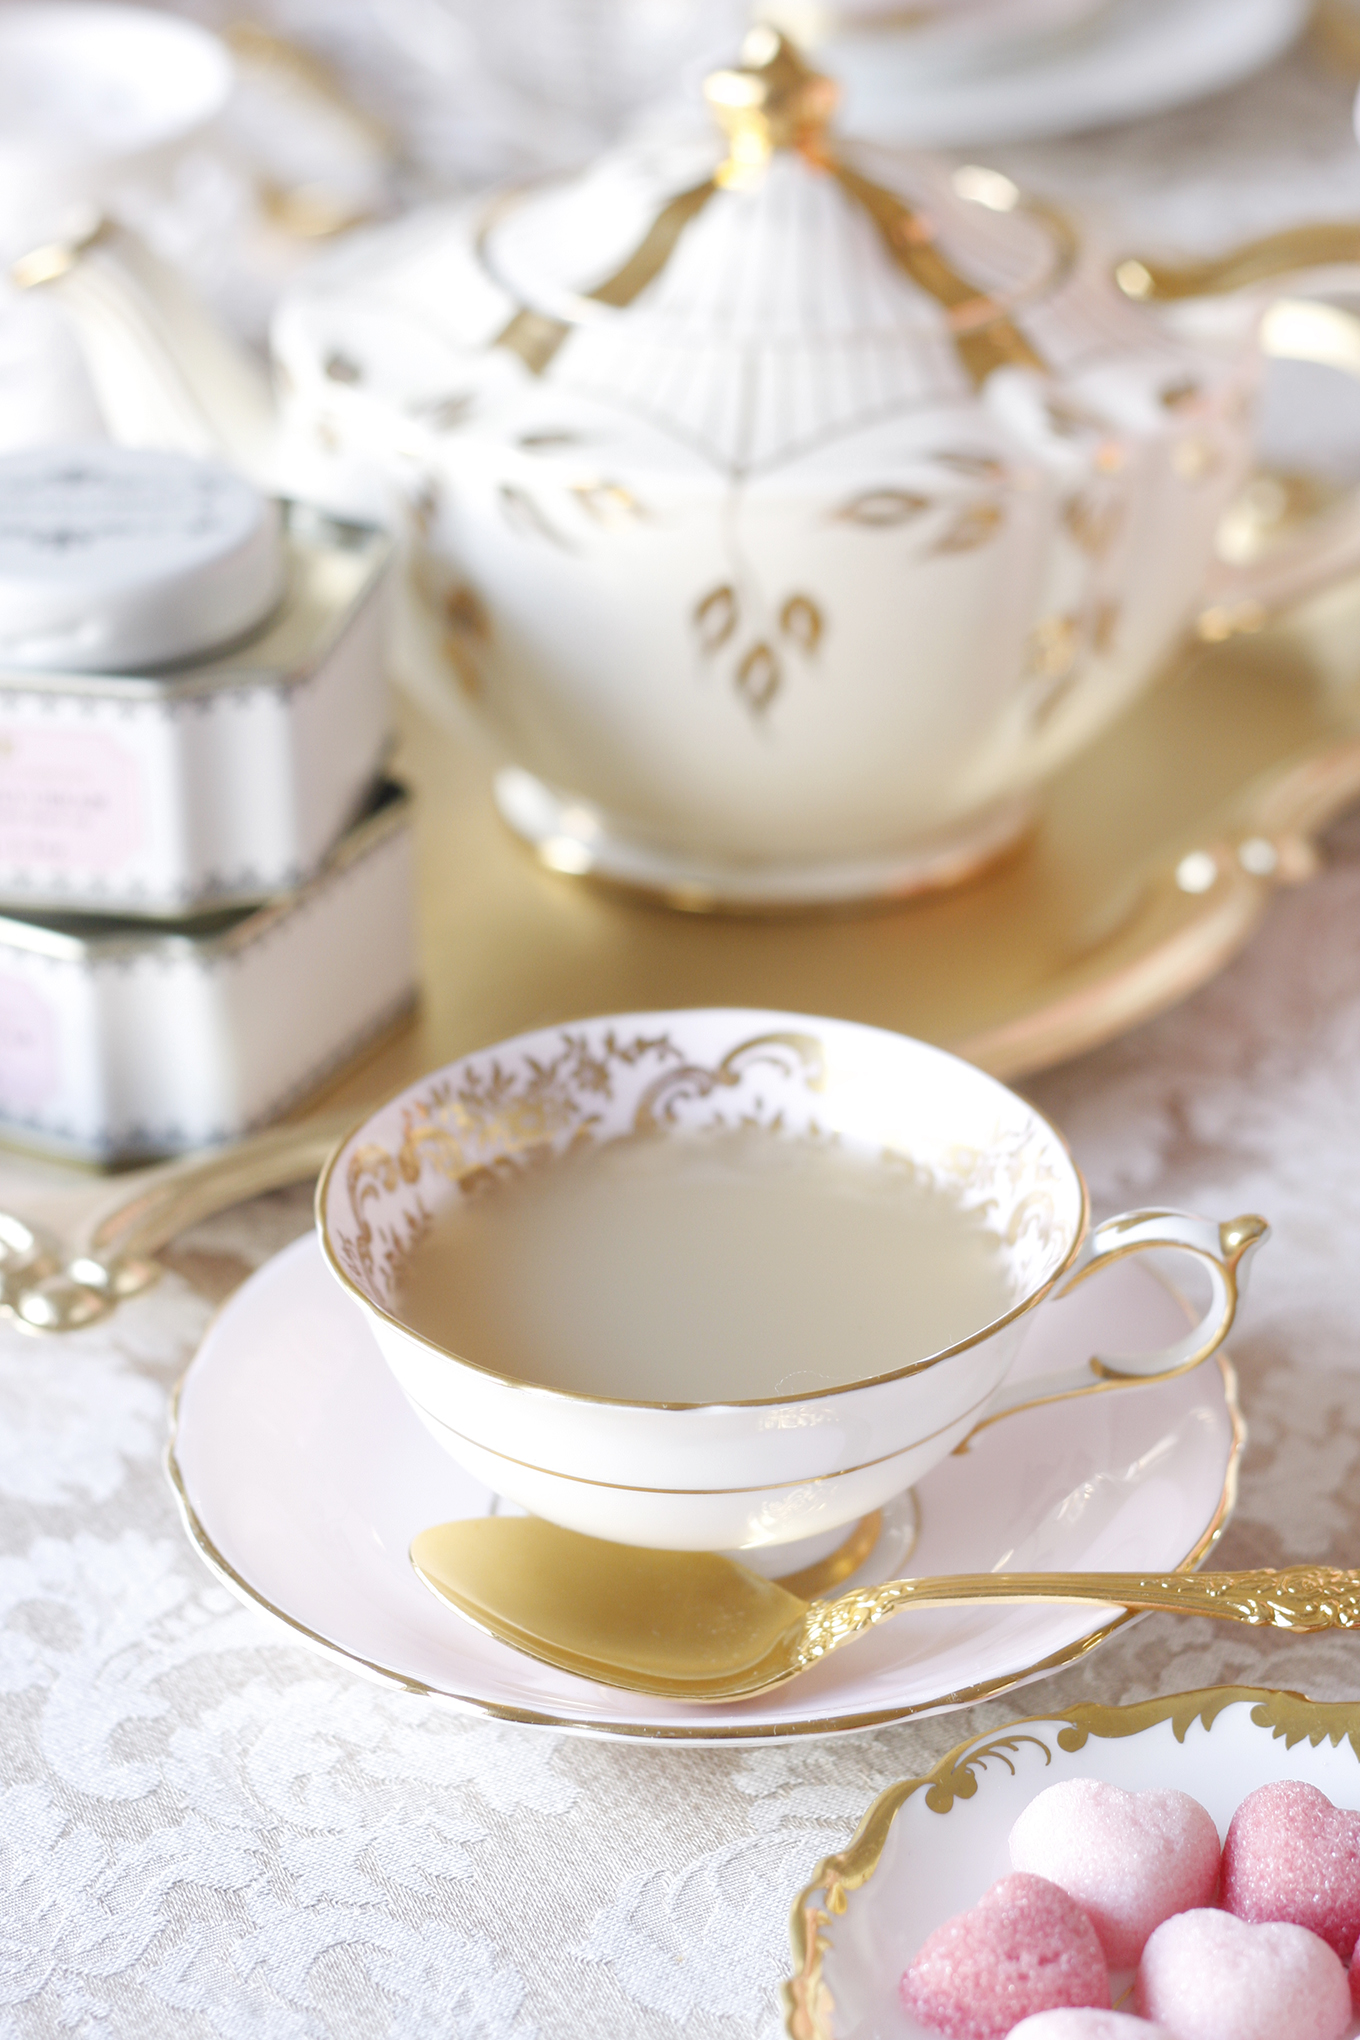
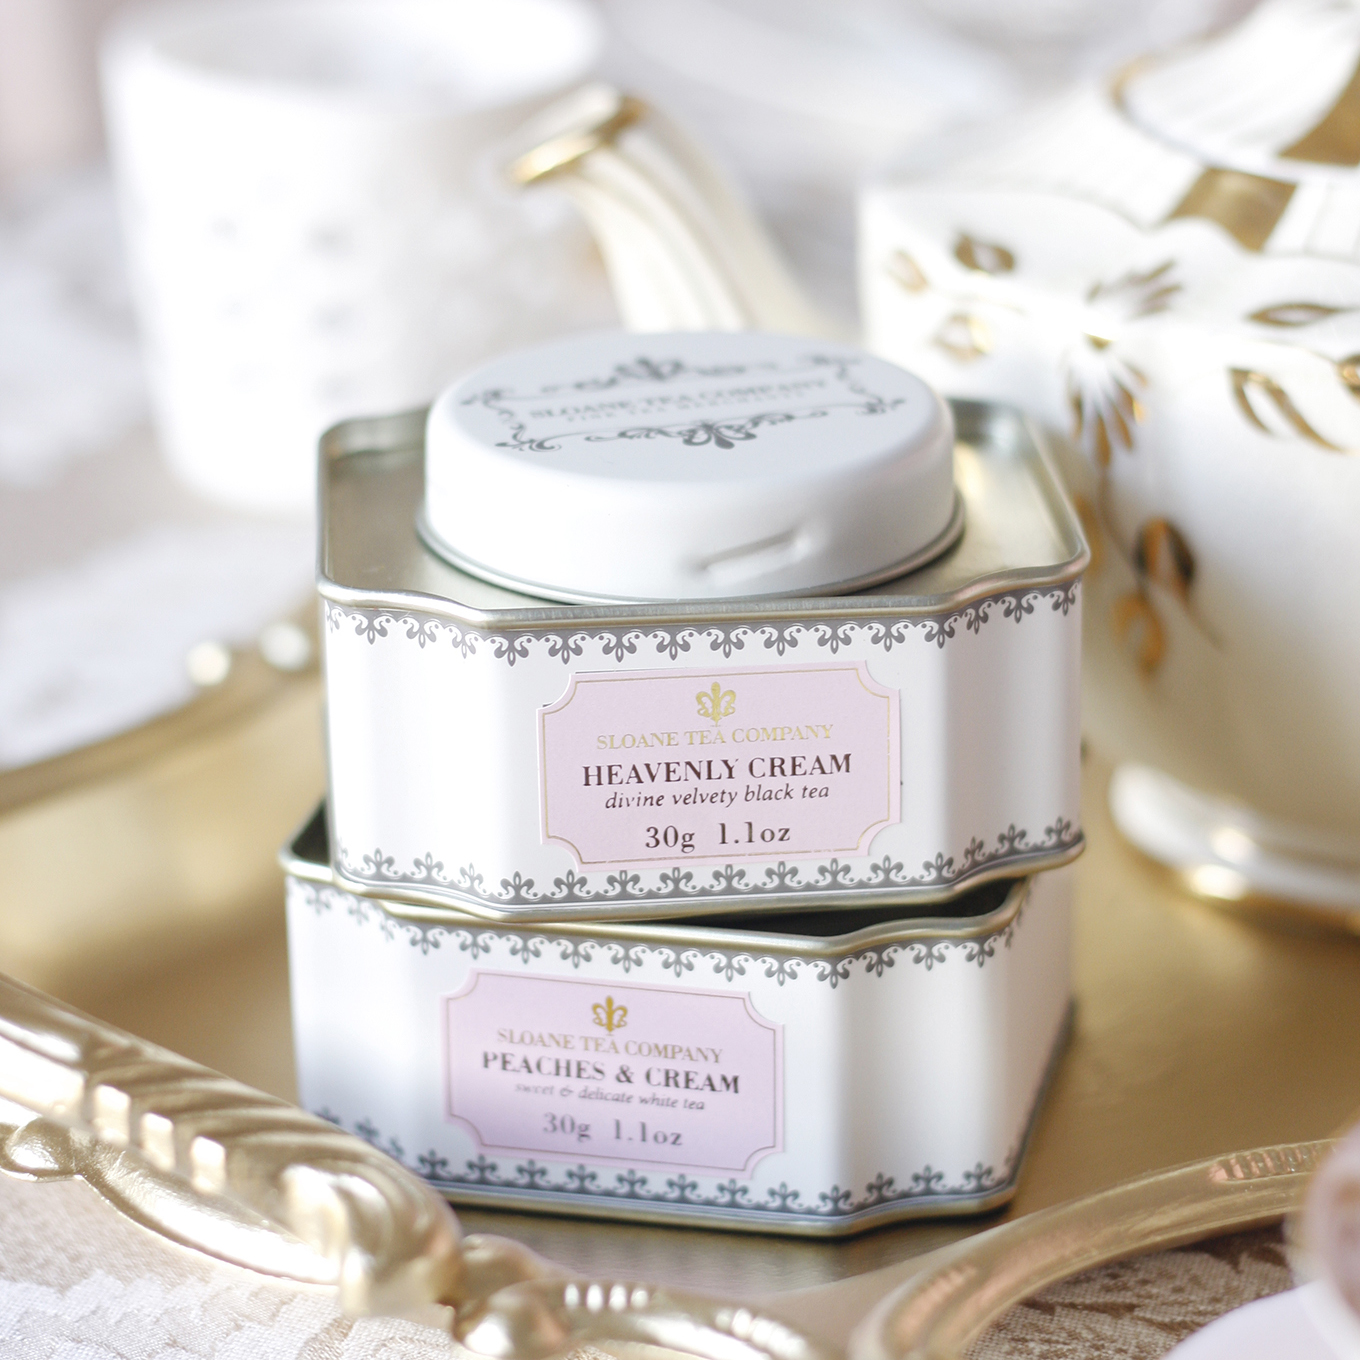 A selection of my favourite teas from Sloane Tea Company
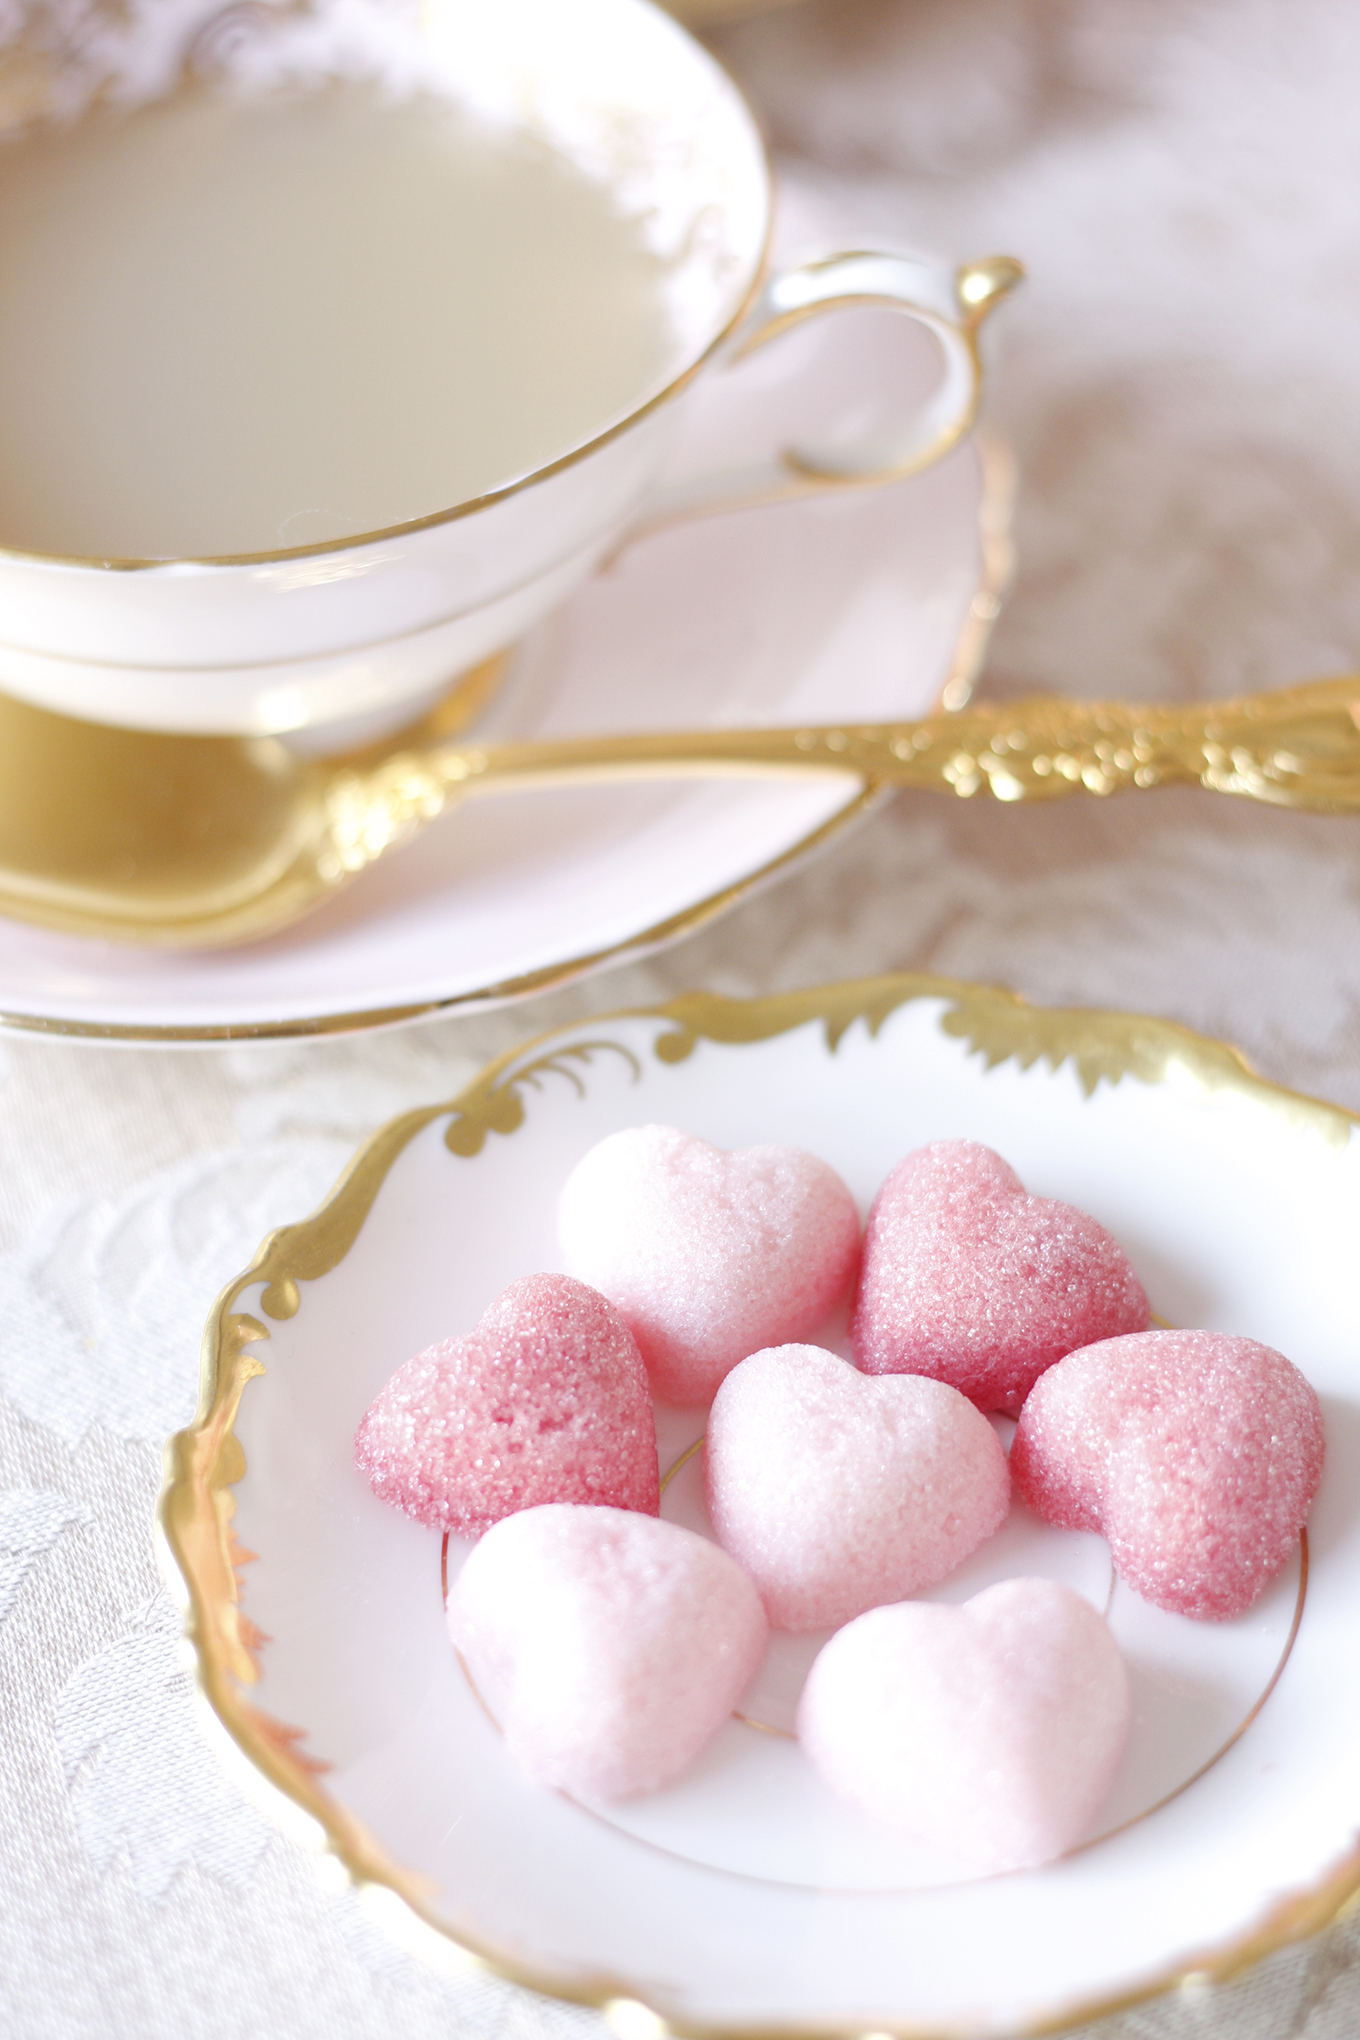 Handmade flavoured heart-shaped sugar cubes by Sweet Bee’s Tea Party
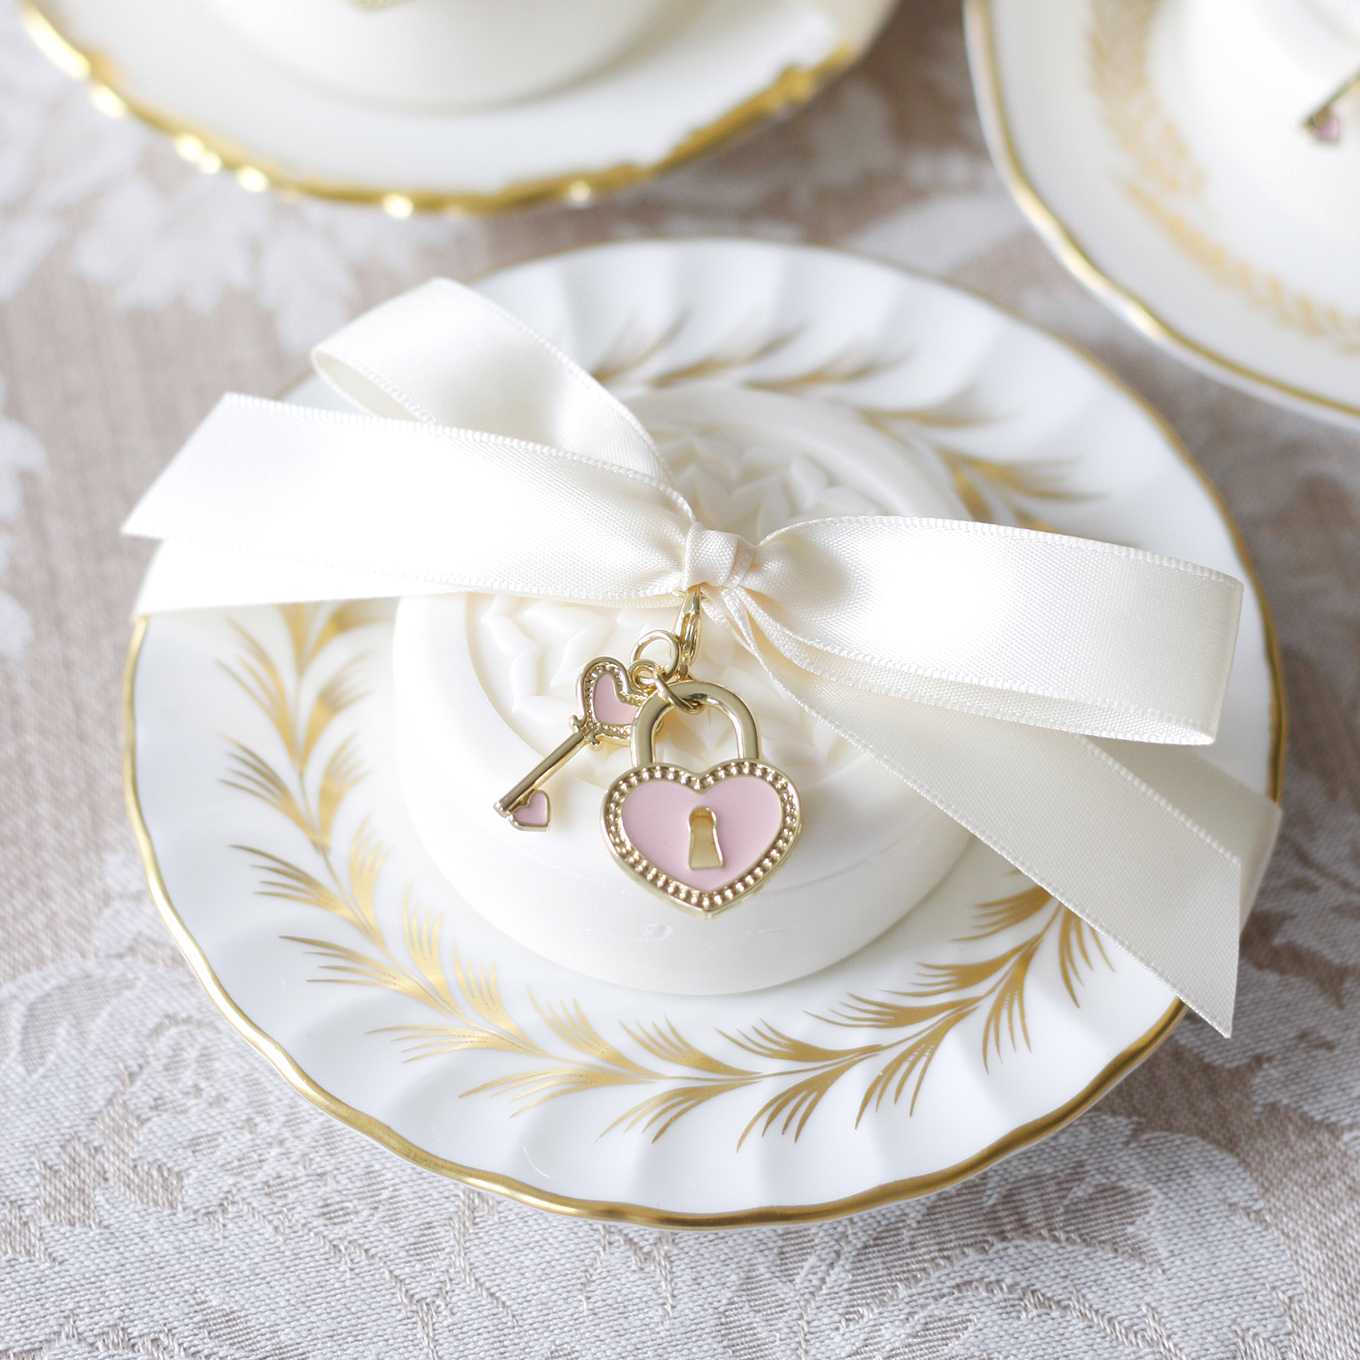
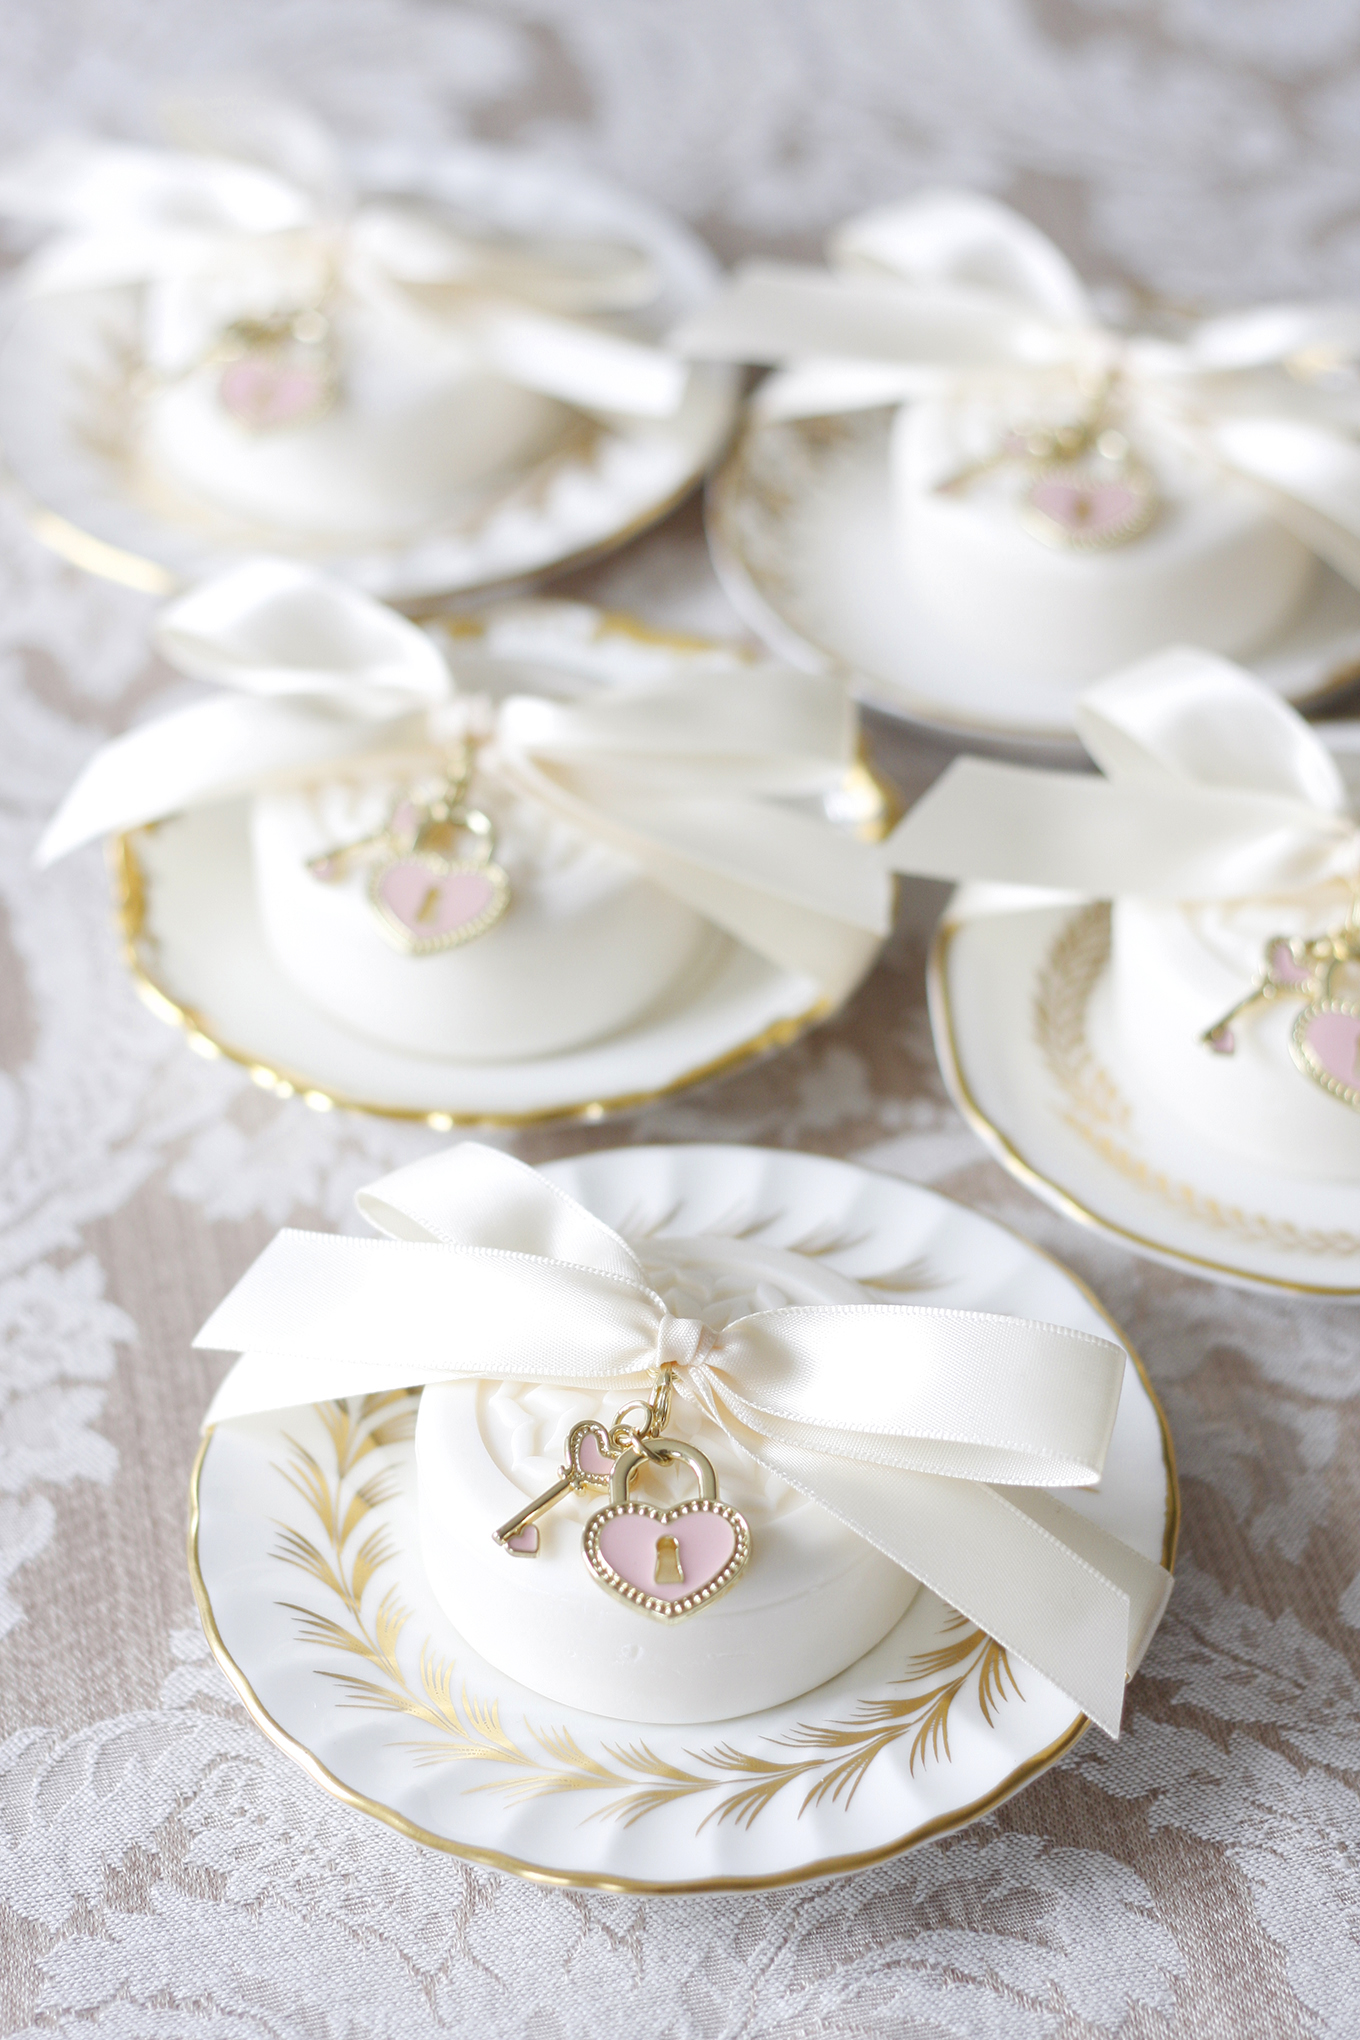
Materials & Tools
• 4.5″ mini fine bone china saucers
• 5/8″ single face satin ribbon
• 2.5″ scented round soaps
• Charms with lobster claw
• Small clasp ring
• Scissors
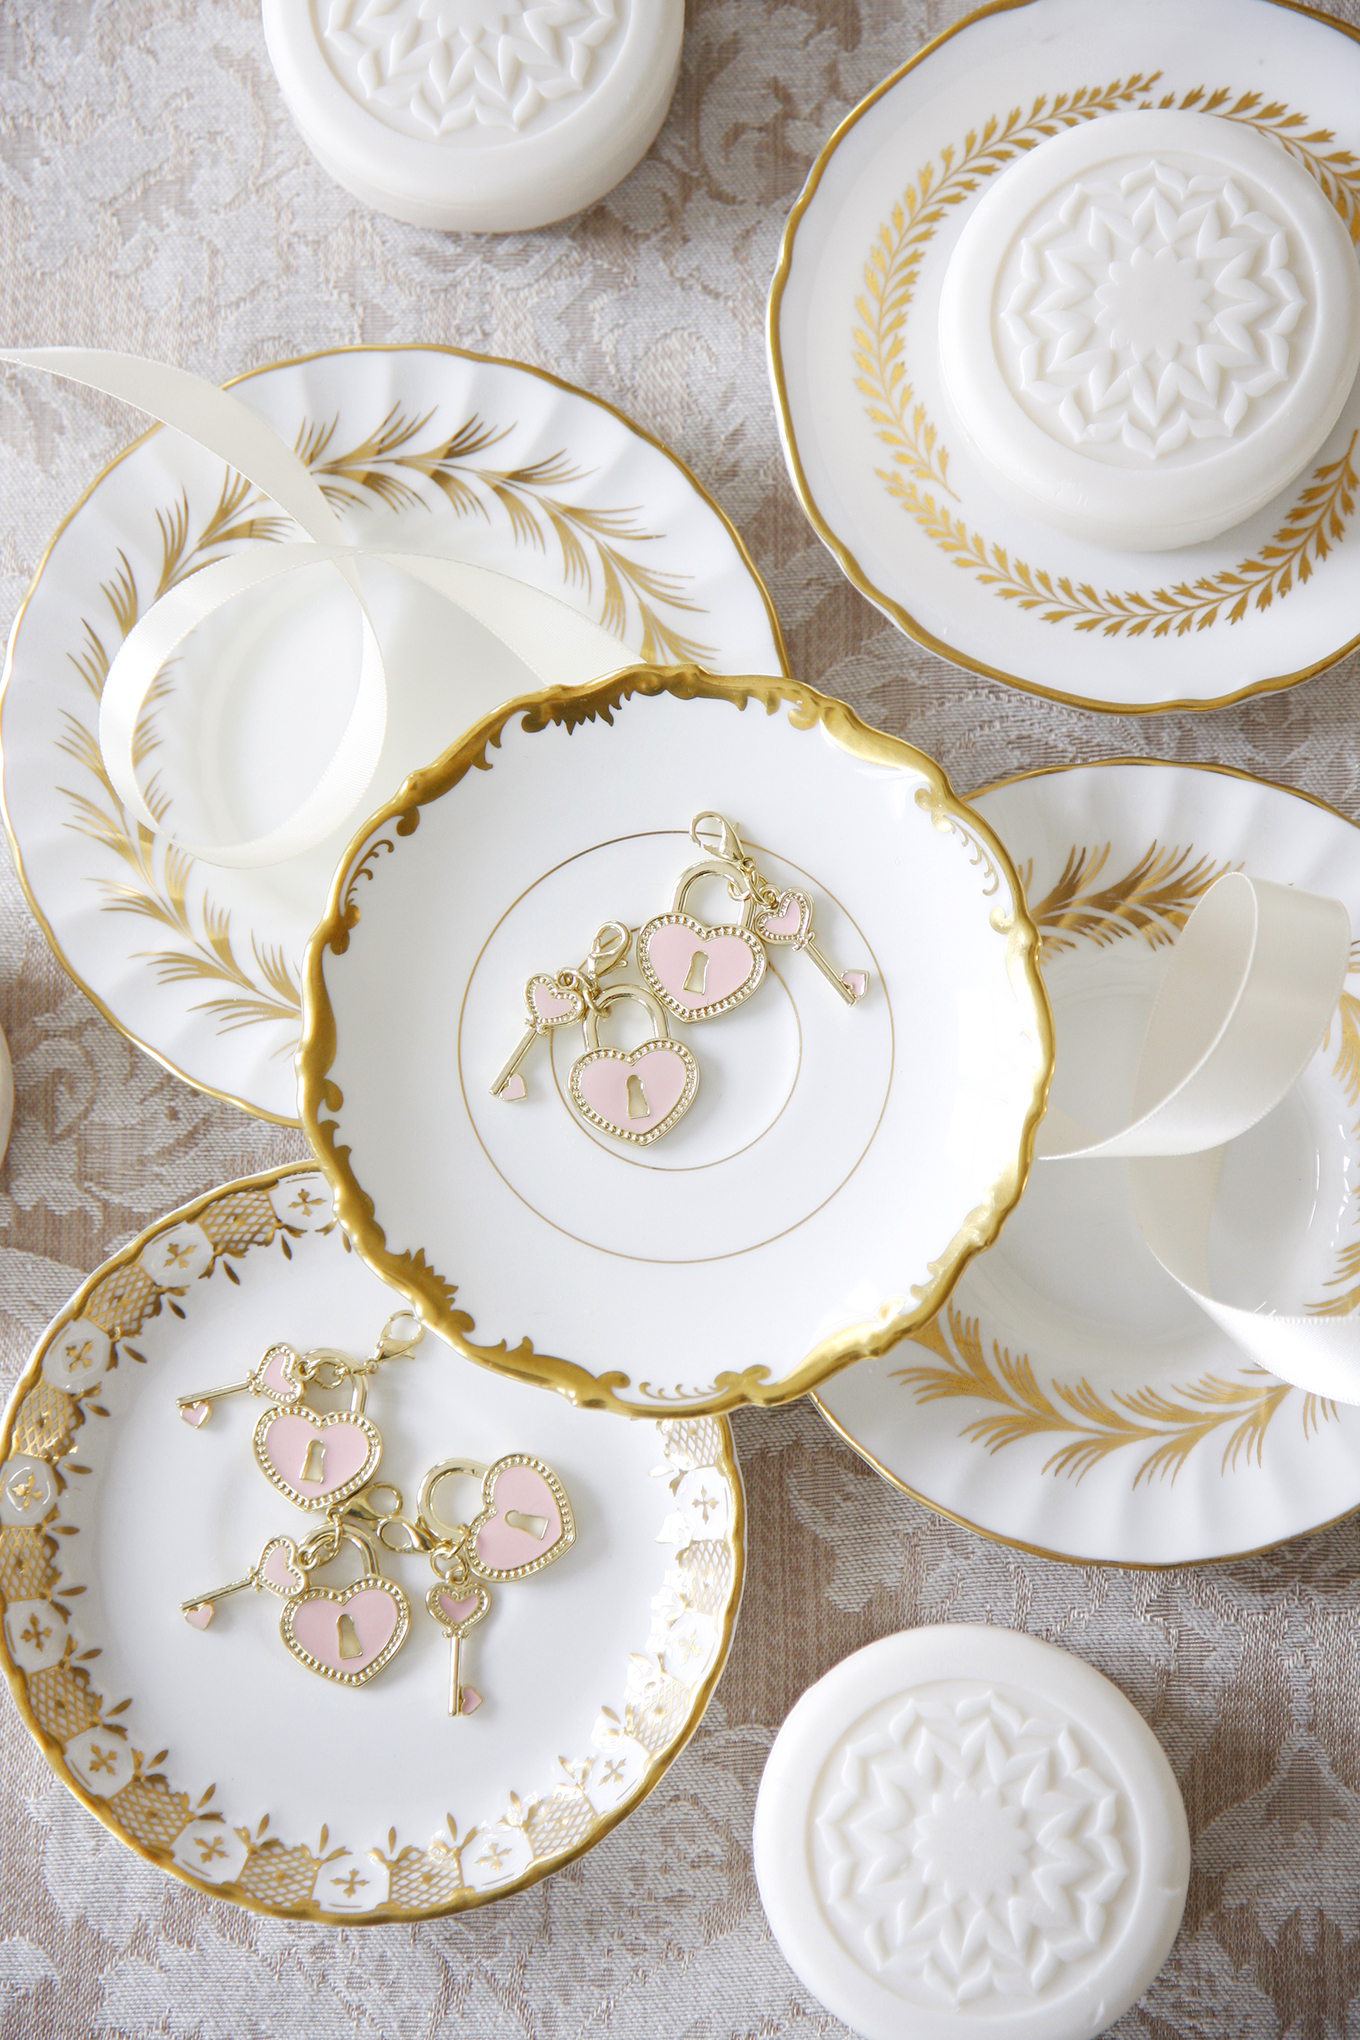 The following instructions are for one soap favour.
Step 1
Cut a strip of ribbon to 18″ and lay flat on table with the shiny side down. Place a round soap in a mini saucer and lay both of these elements in the middle of the ribbon.
Step 2
Feed both ends of the ribbon through a small clasp ring and pull it down till the ribbon is tight against the top of the soap. (Visual not shown)
Step 3
Open the lobster claw and attach the charm to the small clasp ring that is holding together the ribbon in the middle of the soap.
Step 4
Grab both ends of the ribbon and tie a bow in the middle of the soap. Trim ends off at a slant with the scissors.
In April of 2007, I spent three weeks on vacation in Paris and it was the most amazing experience of my life. A year earlier, a girlfriend of mine had quit her job and moved there to live the artist dream to study the masters and paint. Luckily, I was able to stay with her in a small apartment before her Visa expired. For a small town girl like me, going to Paris was literally living a dream — going up the Eiffel tower, visiting the Louvre and shopping the flea markets.
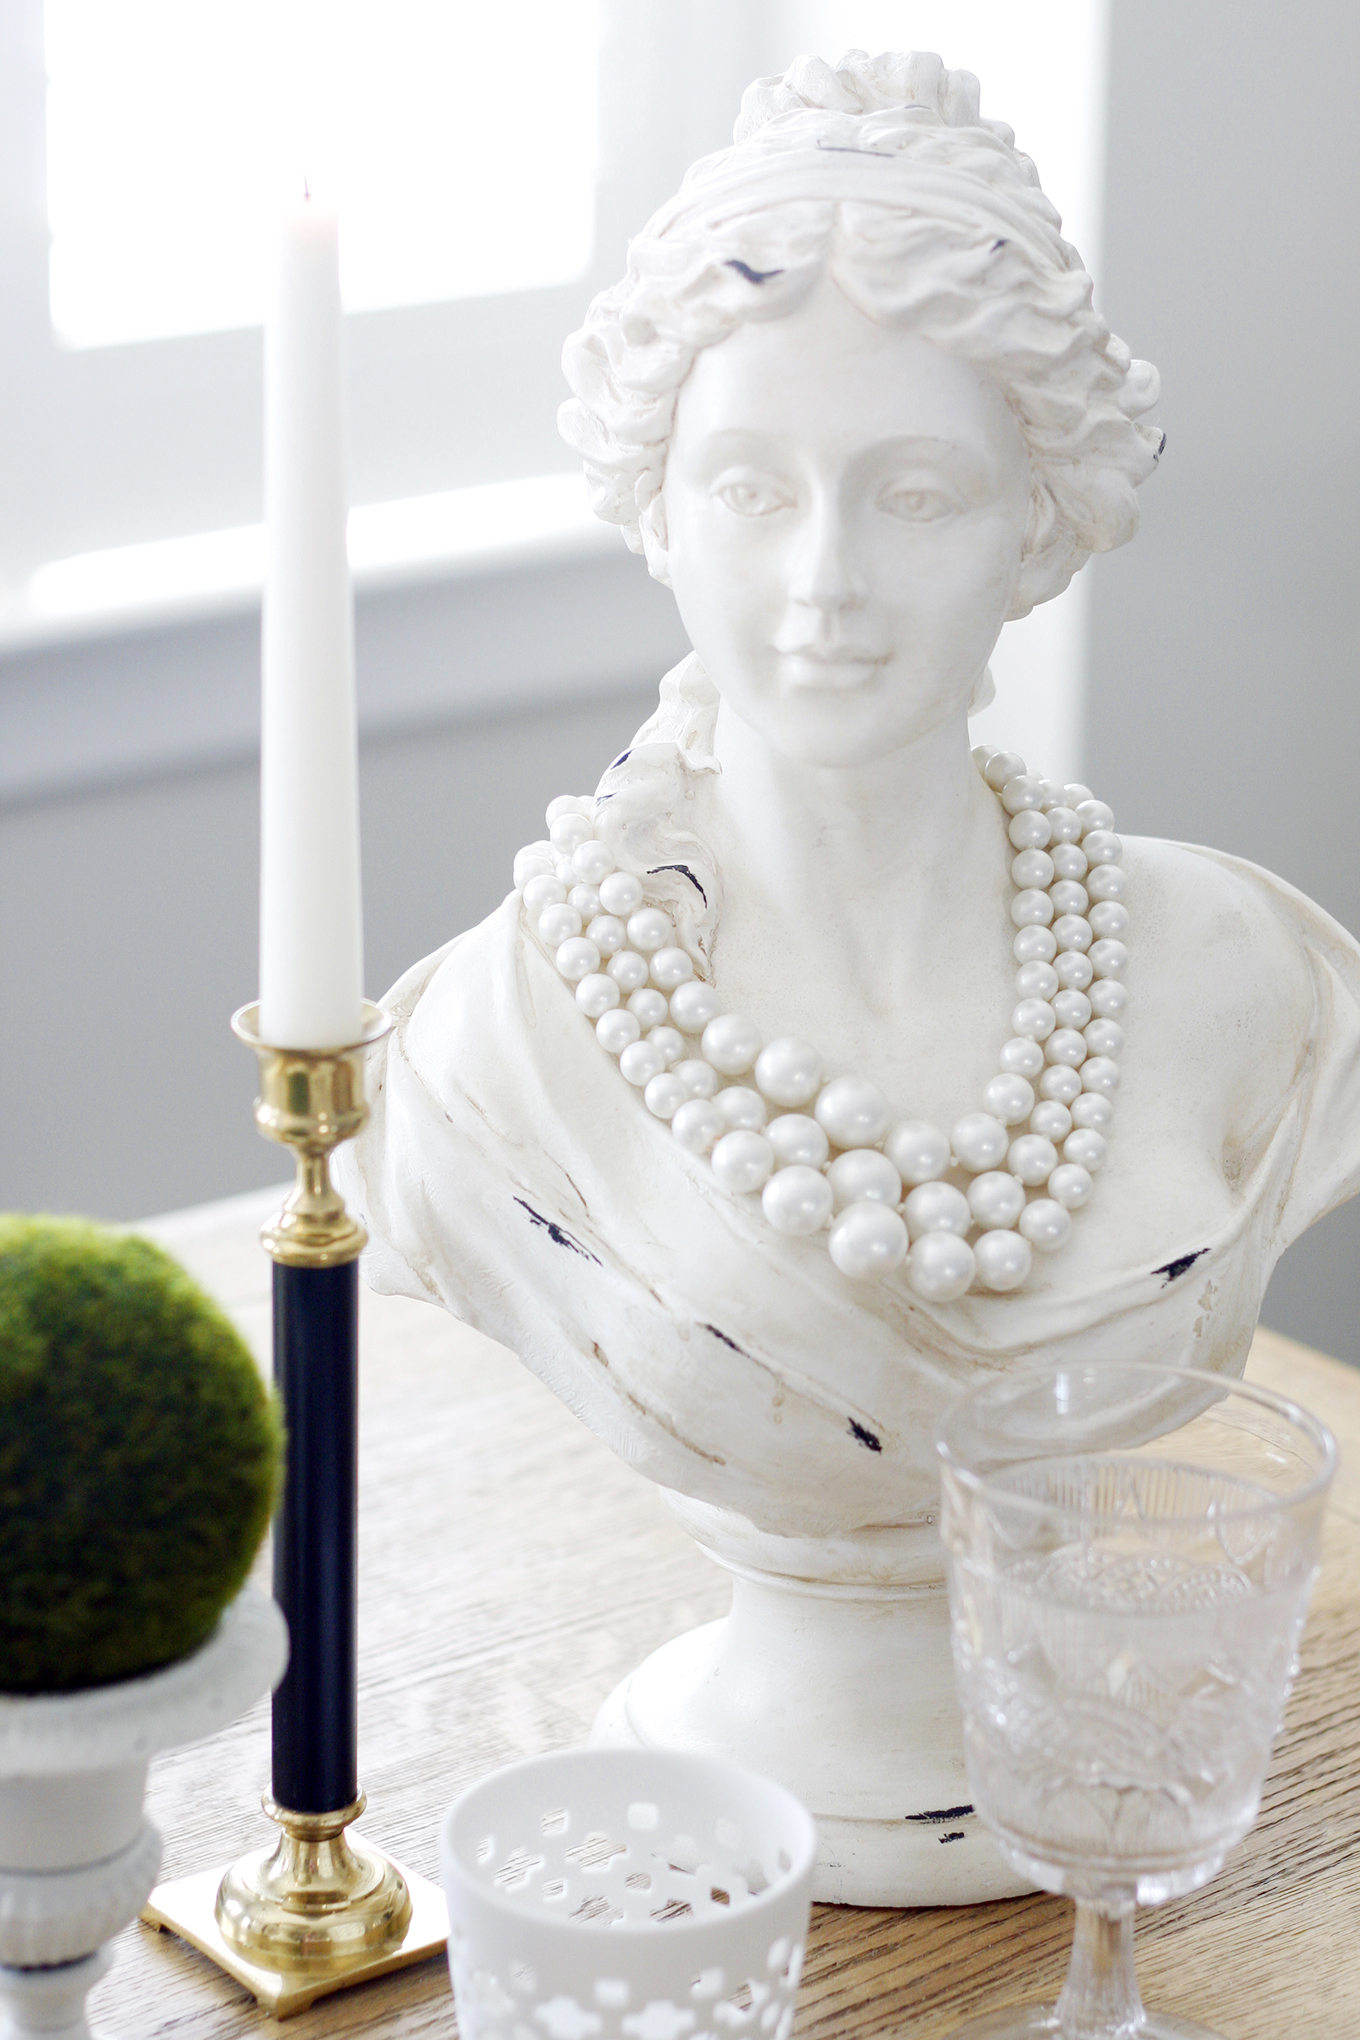
Since I do not have any plans to go back to Paris anytime soon, I was inspired to bring back the look and feel of my time spent there through a French inspired garden tablescape. I put together a style board showcasing some of my favourite things — monogrammed wreath laurel, marble busts, manicured gardens and grand architecture.
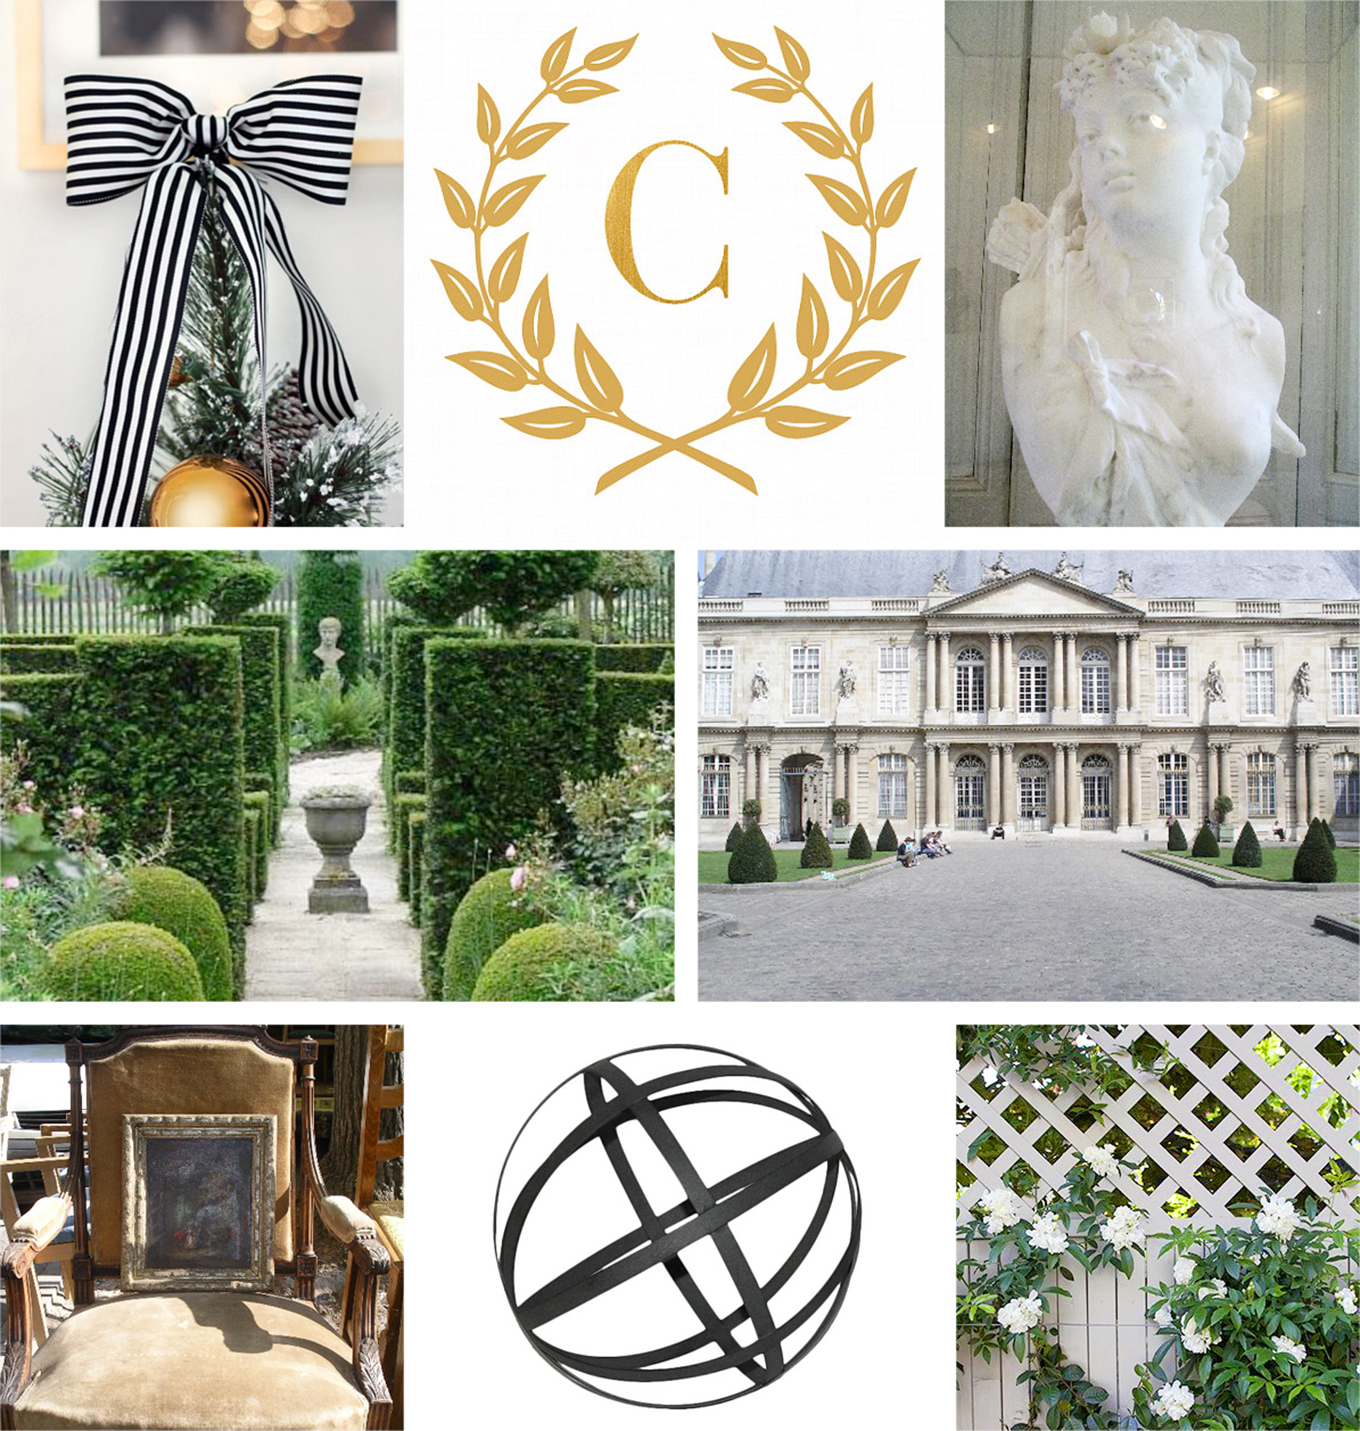 Pulling together decorative props that I already had in the house, I was able to create the look and feel of a French garden through my tablescape below. You may recognize a few things like the brass candlesticks, gold chargers, flatware and glassware from the Easter tablescape I created a few months ago. Its all about using the things you already love and have in your home, but by just adding a few different elements, like the black metal orb and lady bust (I love her!) it makes things fresh and tells a whole new story.
The only thing missing is that I wished to have used a table runner. I have been looking for the perfect one for quite some time now with no luck. But sometimes finding those things you love for your home take time. Just like everything else in life, you just need to have patience and faith that one day, the table runner of my dreams will find me.
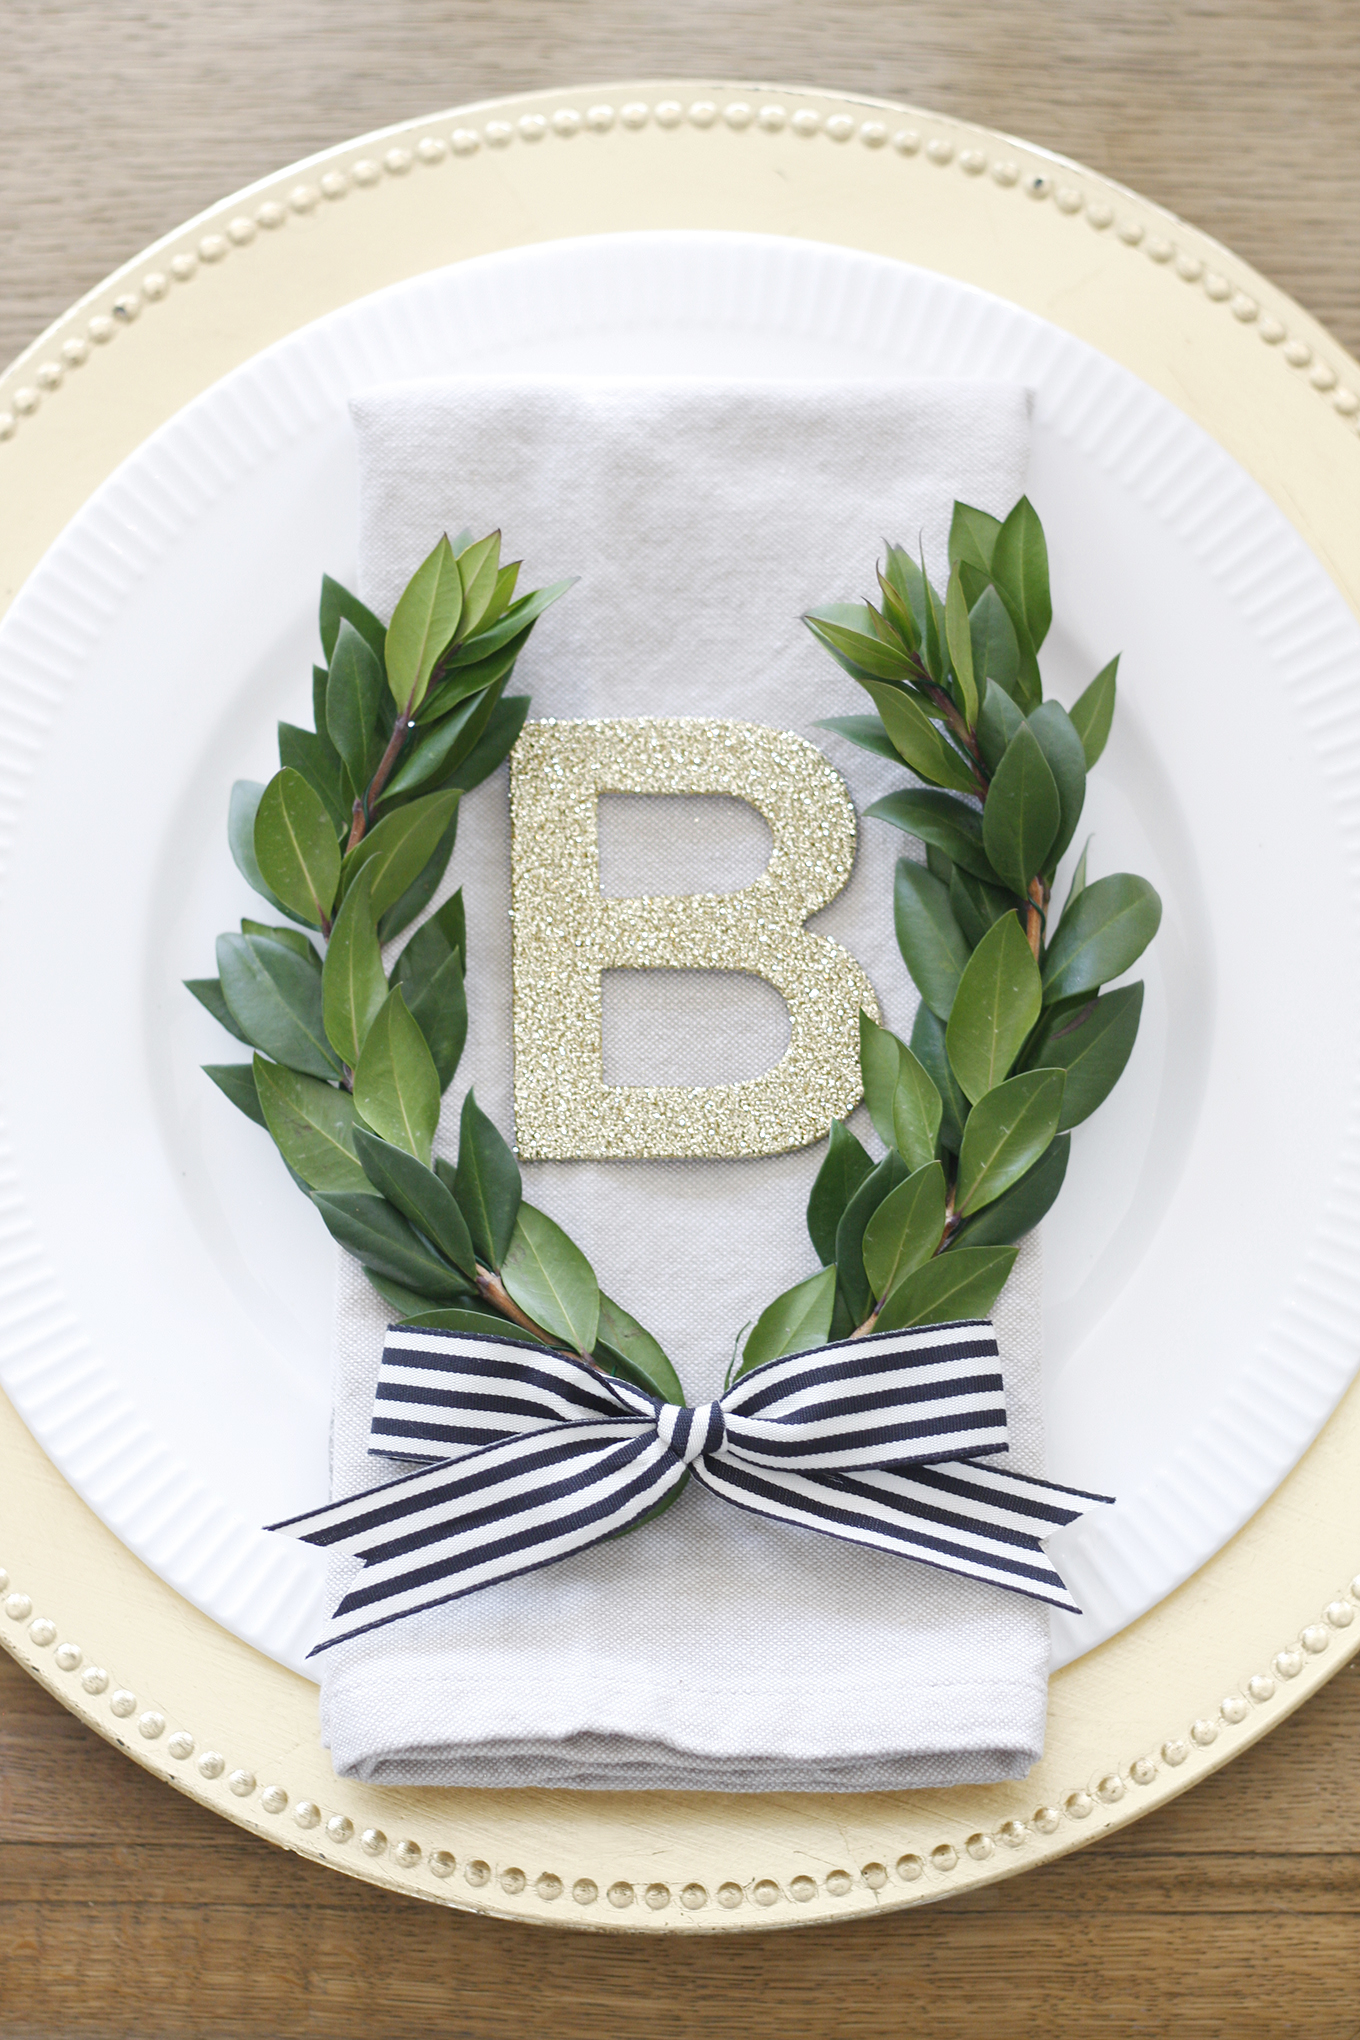
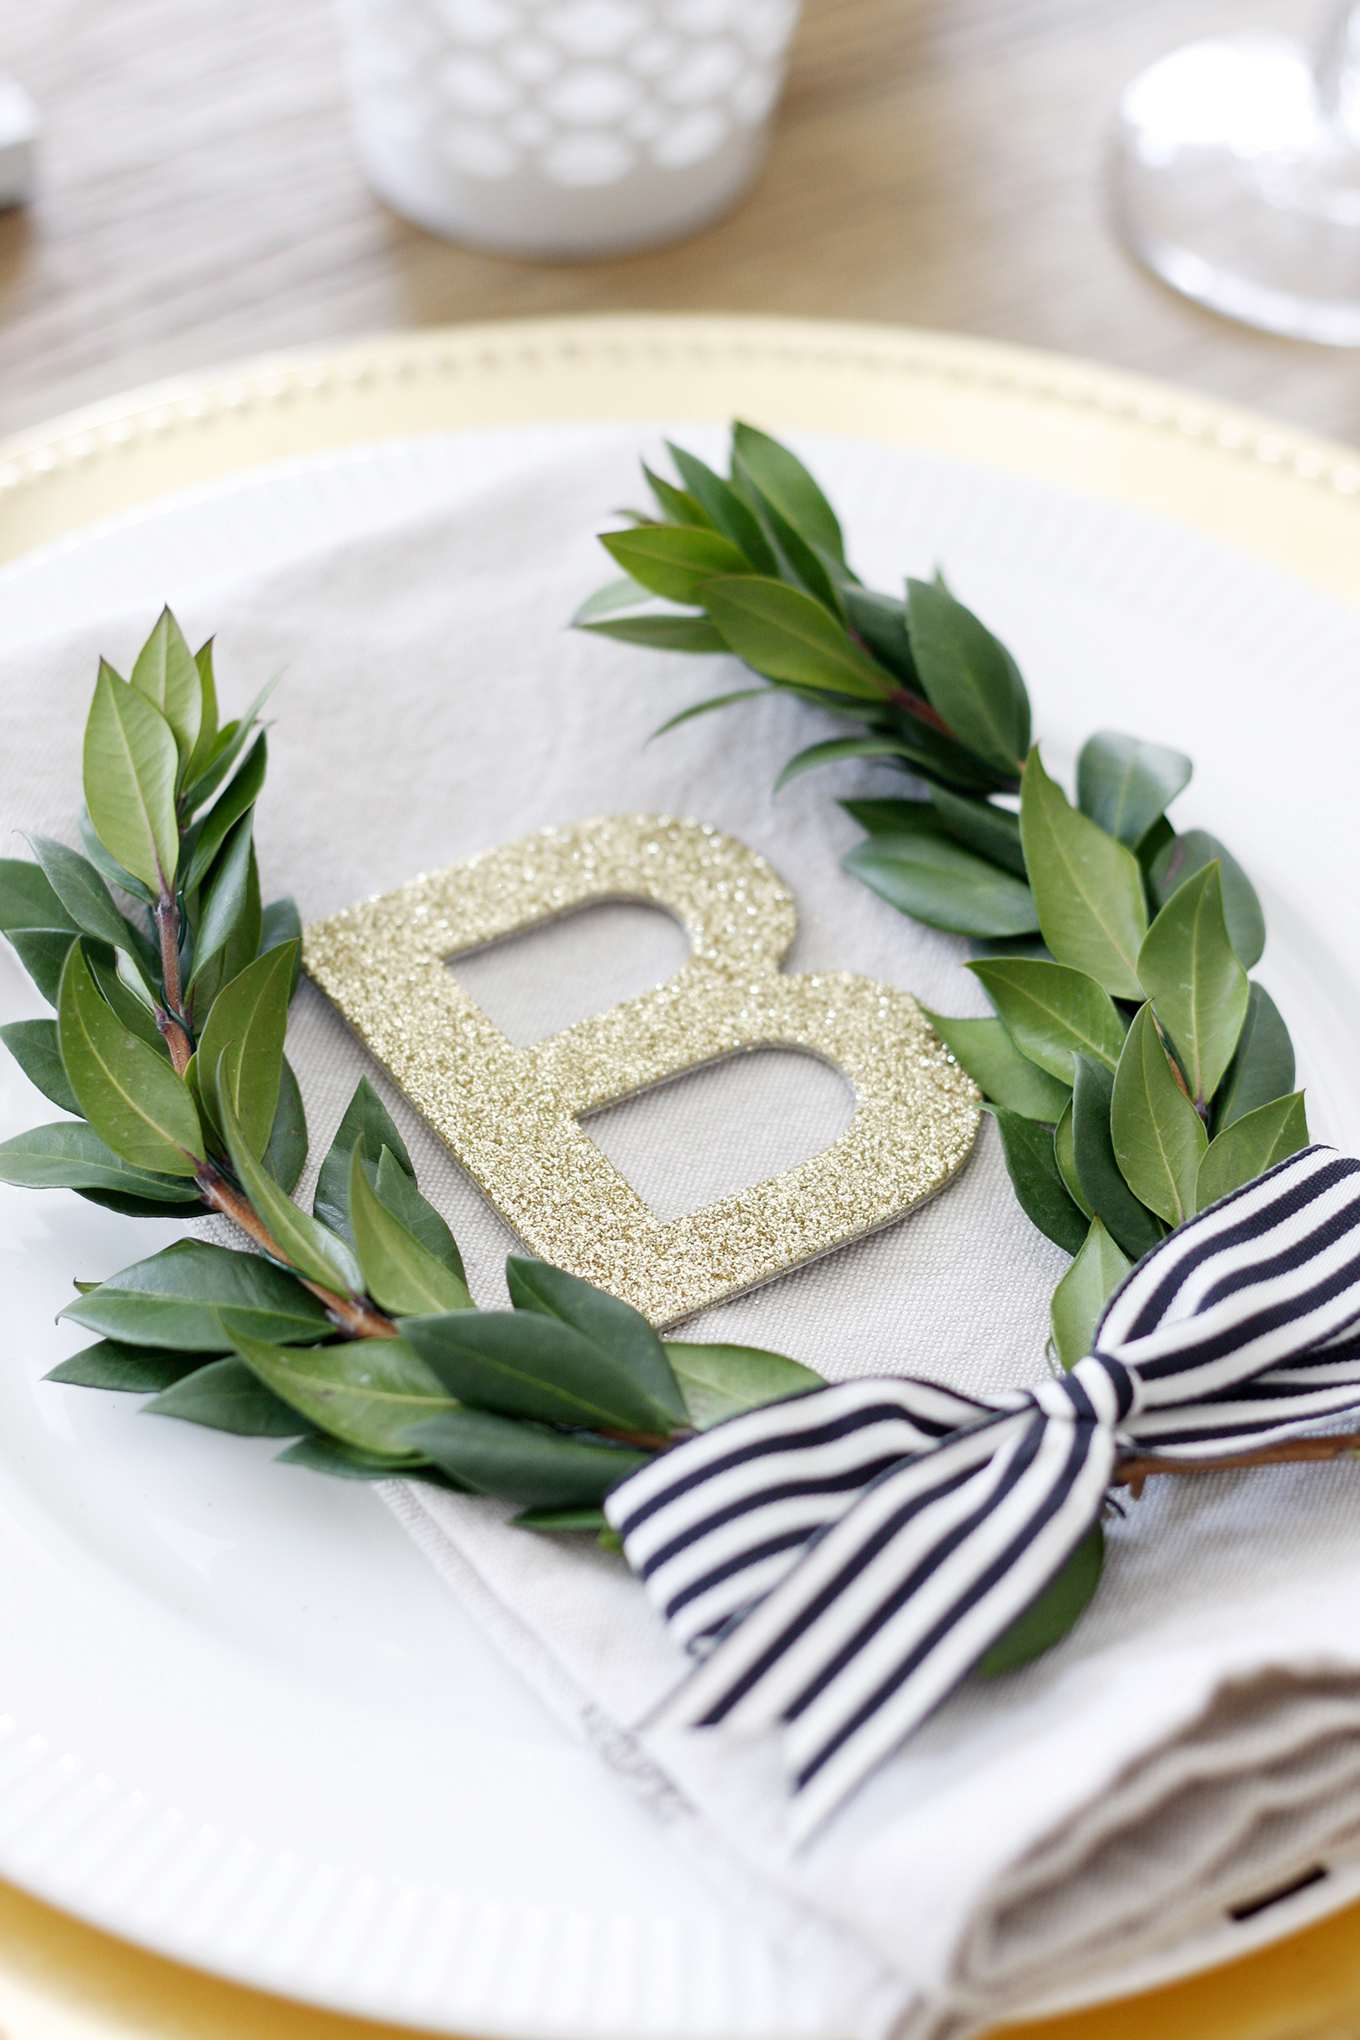
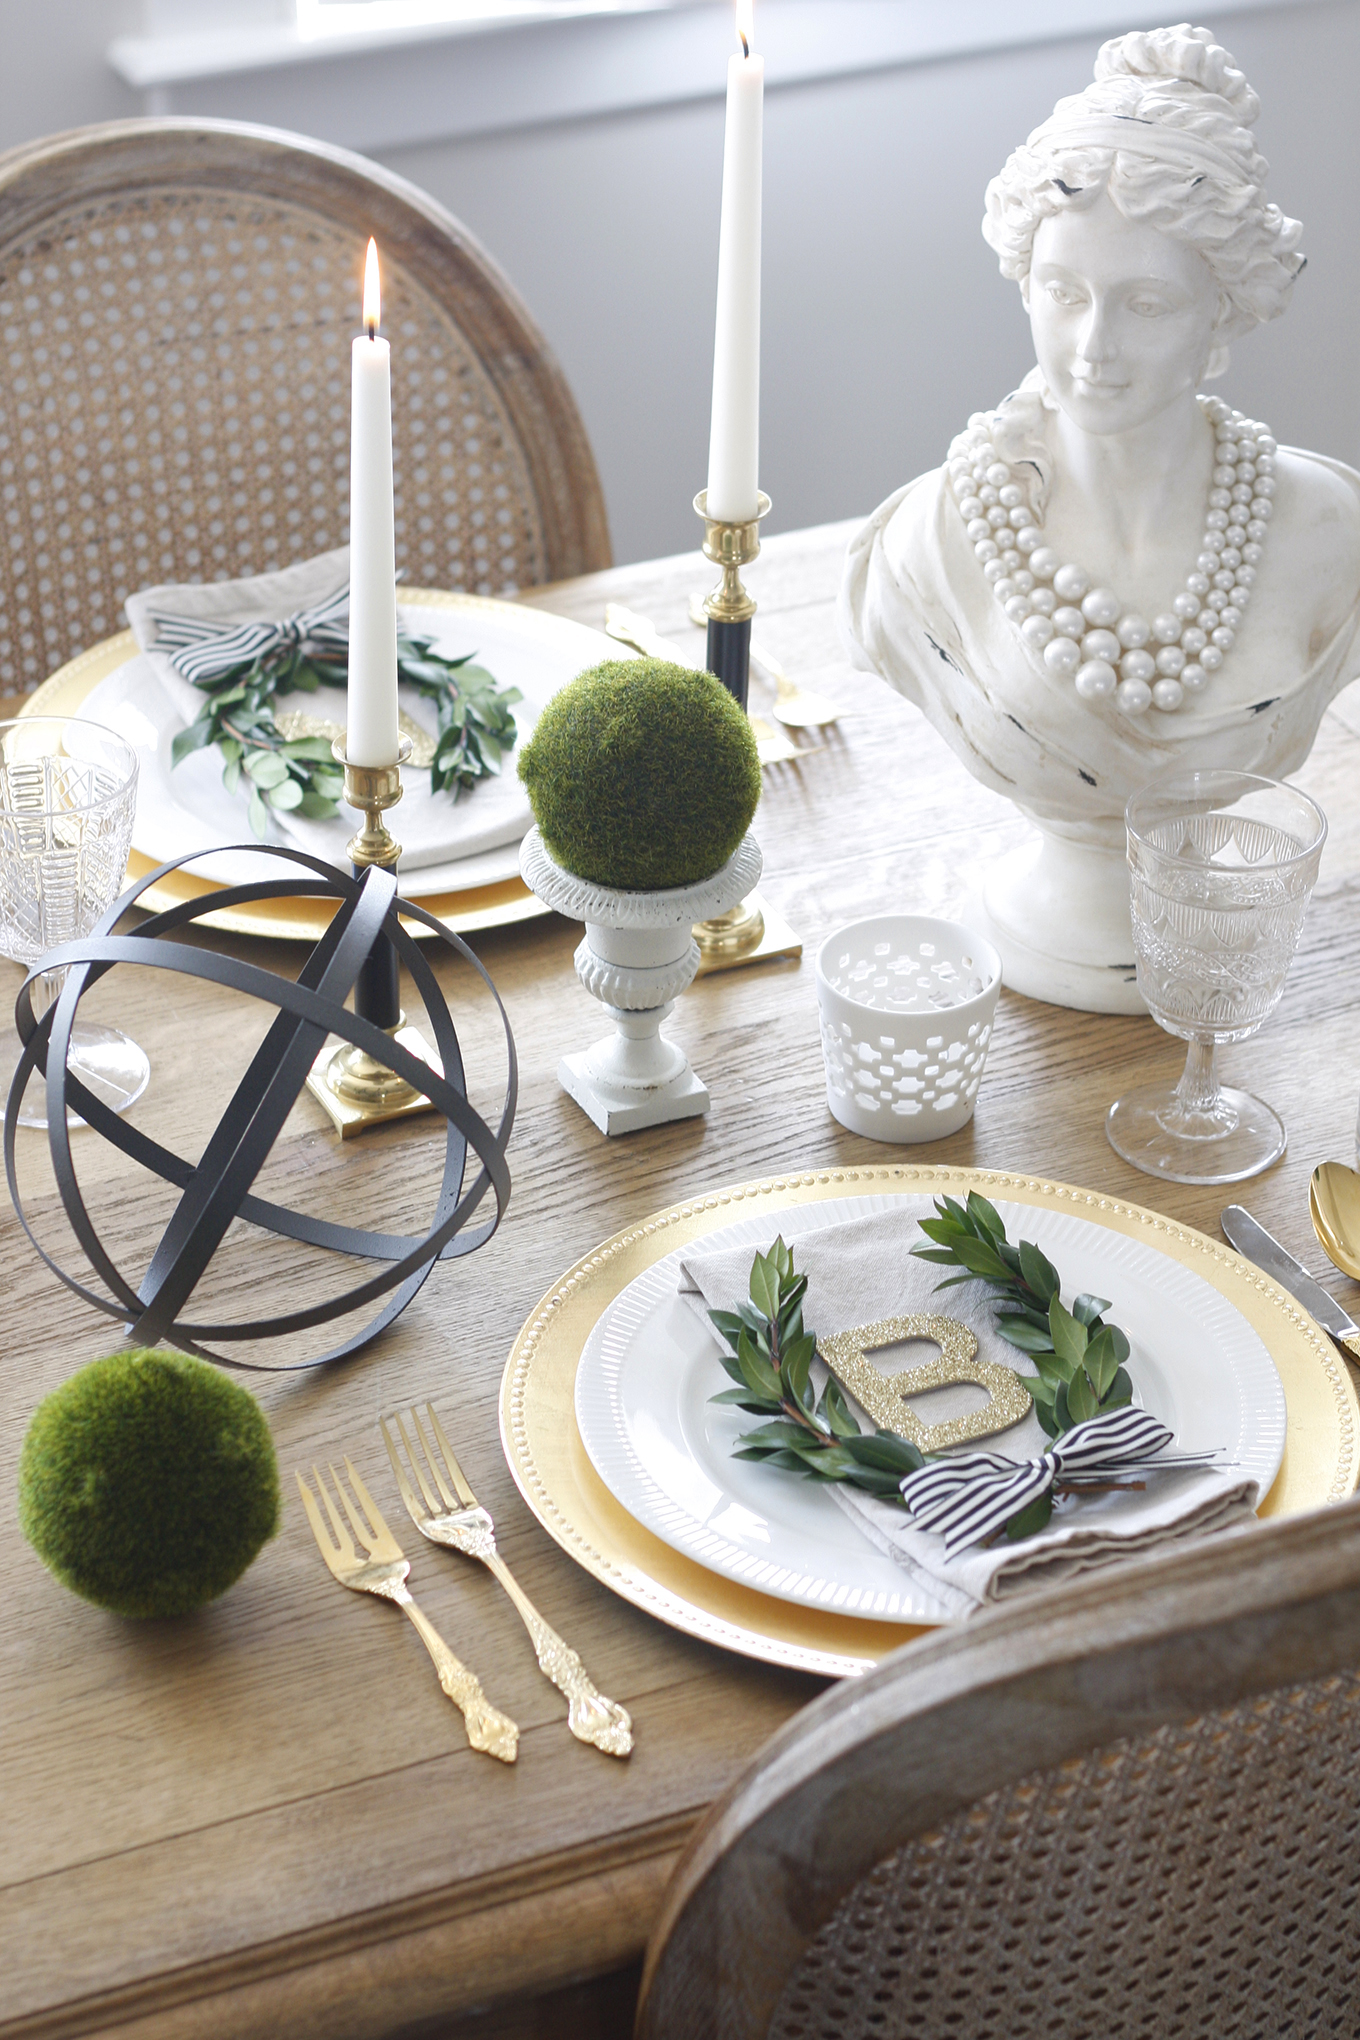 For the French inspired garden tablescape, I really wanted to create something special for each of my friends/guests. For each dinner place setting, it features the initial letter of each guest’s name, surrounded by laurel leaves and topped with a modern black and white striped bow. It looks so classy and elegant, and best of all, it was easy and super simple to create. Also, by using greenery it was very economical and a great alternative to flowers, which yes are beautiful, but can be very expensive. And since the greenery will be out of water, its freshness with last up to only about 1 – 2 days.
 Materials & Tools
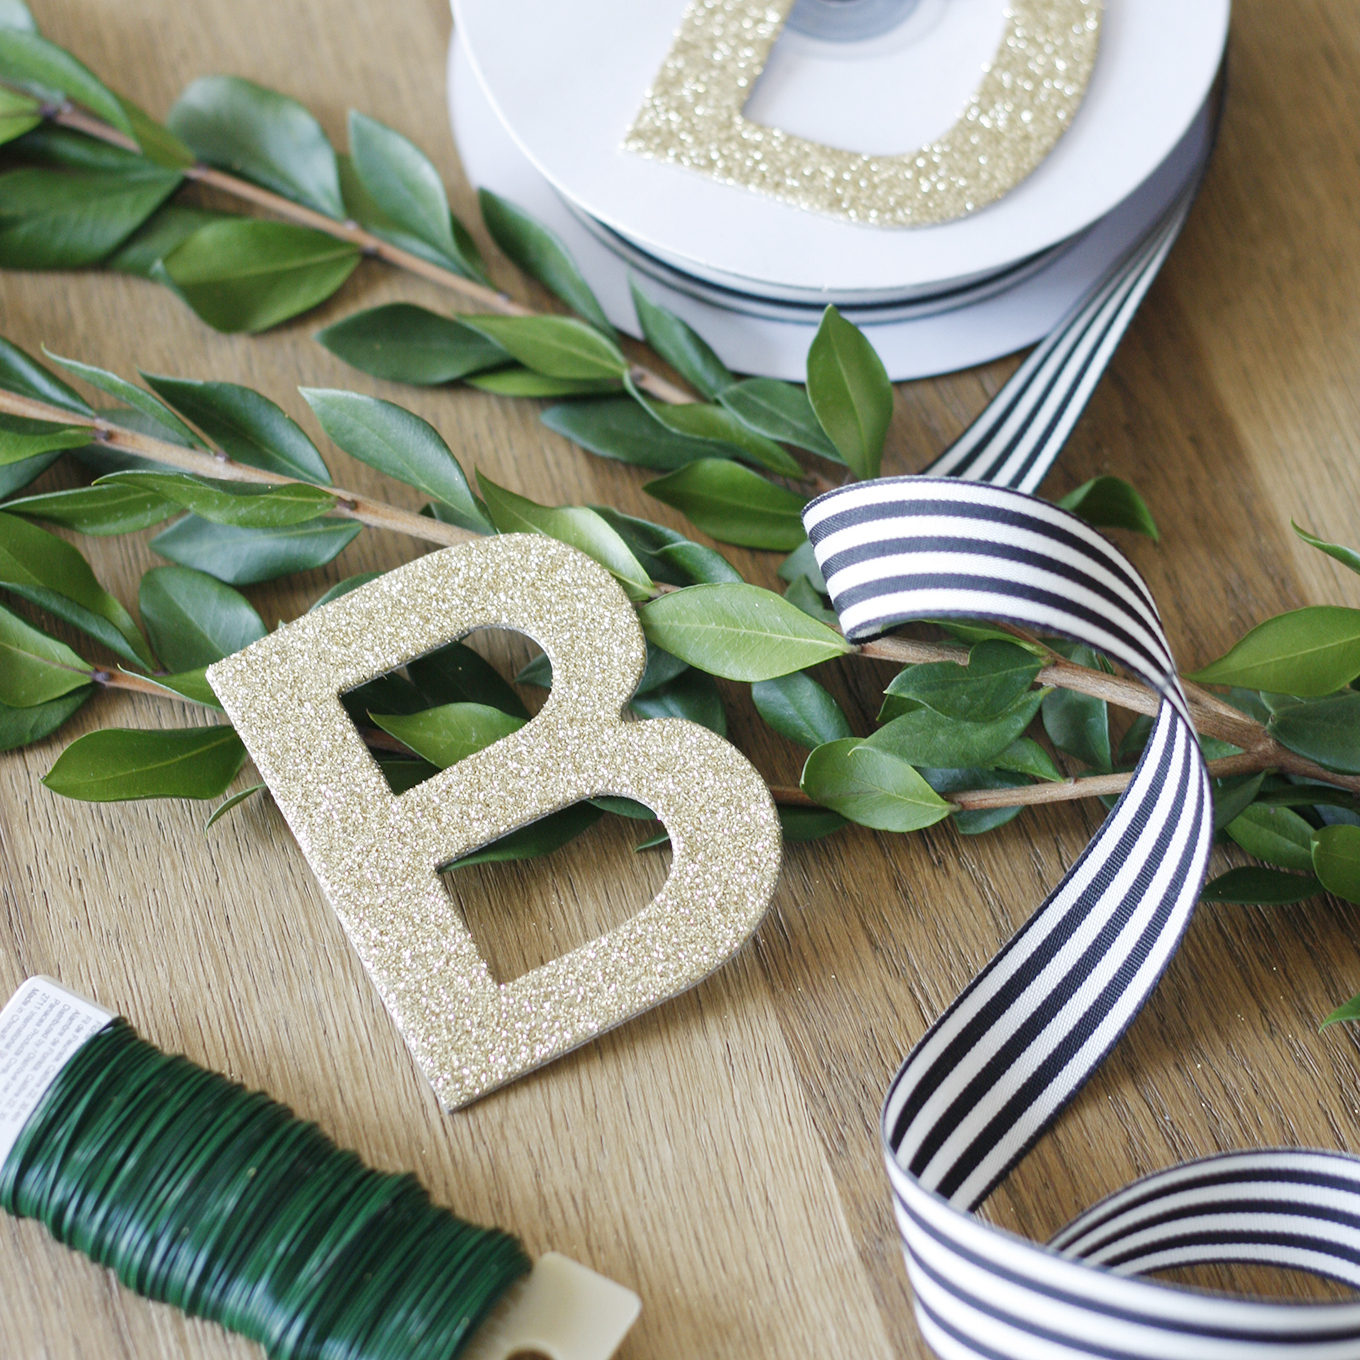
• 3 inch gold glitter letters (available at Michaels)
• 7/8″ black and white striped ribbon
• 24 gauge floral wire
• Sprigs of greenery
• Scissors
 The following instructions are for one individual laurel wreath place setting.
Step 1
Cut two sprigs of greenery approximately 8″ long each. Unwind a strand of floral wire, measure and cut approximately 10″ of wire. Starting at the bottom of the sprig, wind the wire gently around the stem and continue working all the way up. Cut the wire and hide the end behind the leaves.
Step 2
Gently curve each sprig in a horseshoe shape. At this point, you may use another small piece of wire to join the sprigs at the point where they intersect.
Step 3
Next, time to make the bow. It can be a tricky thing to explain, yet alone master, so here are instructions via Martha Stewart. To be honest, my original plan was to tie the bow directly with the greenery, but after a few unsuccessful tries to make the bow look ‘just right’, I decided to ‘cheat’ and just rest the bow on top of the laurel wreath.
Step 4
In the example shown, I selected the letter ‘B’ for my friend Barb. Fold the linen napkin, lay the gold letter in the middle, assemble the laurel wreath around it and lay the striped ribbon on top. Voila, it’s done!
 I hope you have enjoyed learning about how to make your own laurel wreath. Please leave a reply in the comments below. I would love to hear from you! And just for fun, I have compiled a few sources of where to find the pieces you need to create your own French inspired garden tablescape.
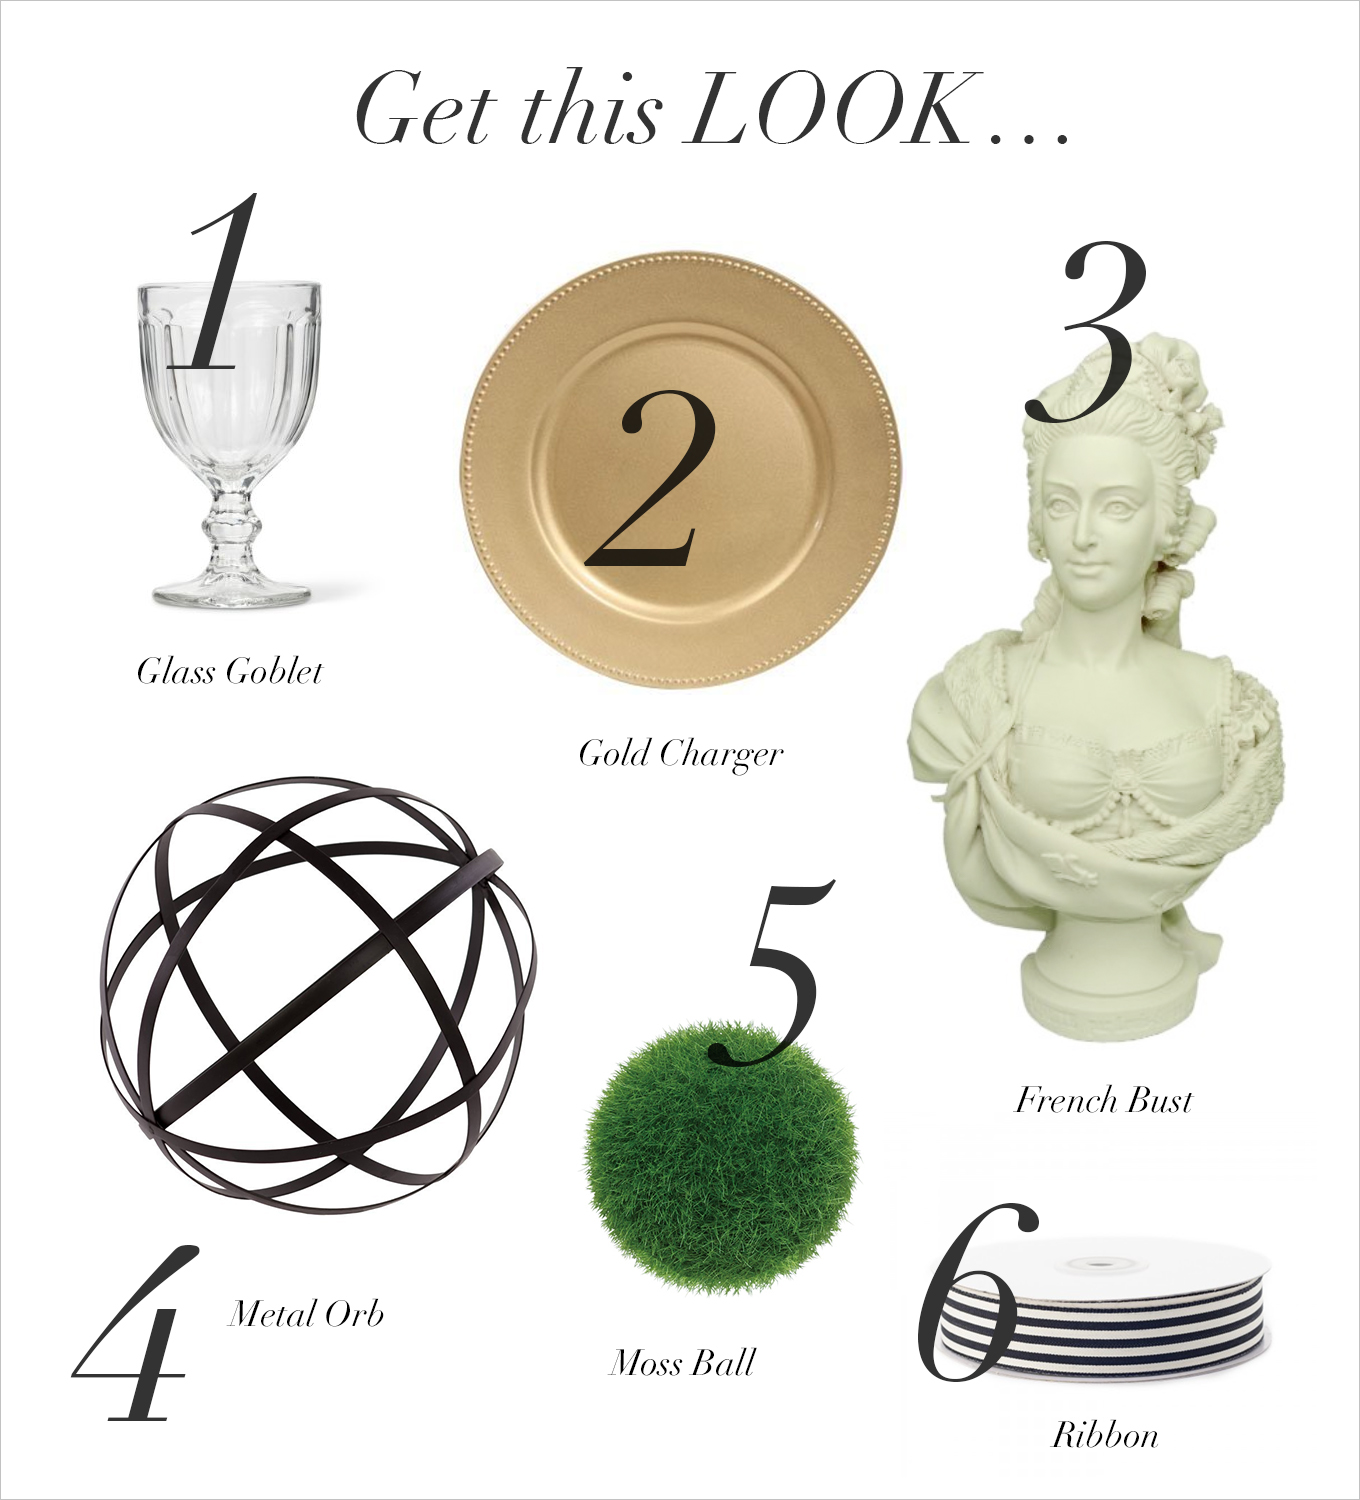 1 Glass Goblets, Amazon.ca, 2 Gold Charger, Amazon.ca, 3 French Bust, Amazon.ca, 4 Metal Orb, Amazon.ca, 5Moss Ball, Amazon.ca, 6 Ribbon, Creative Bag
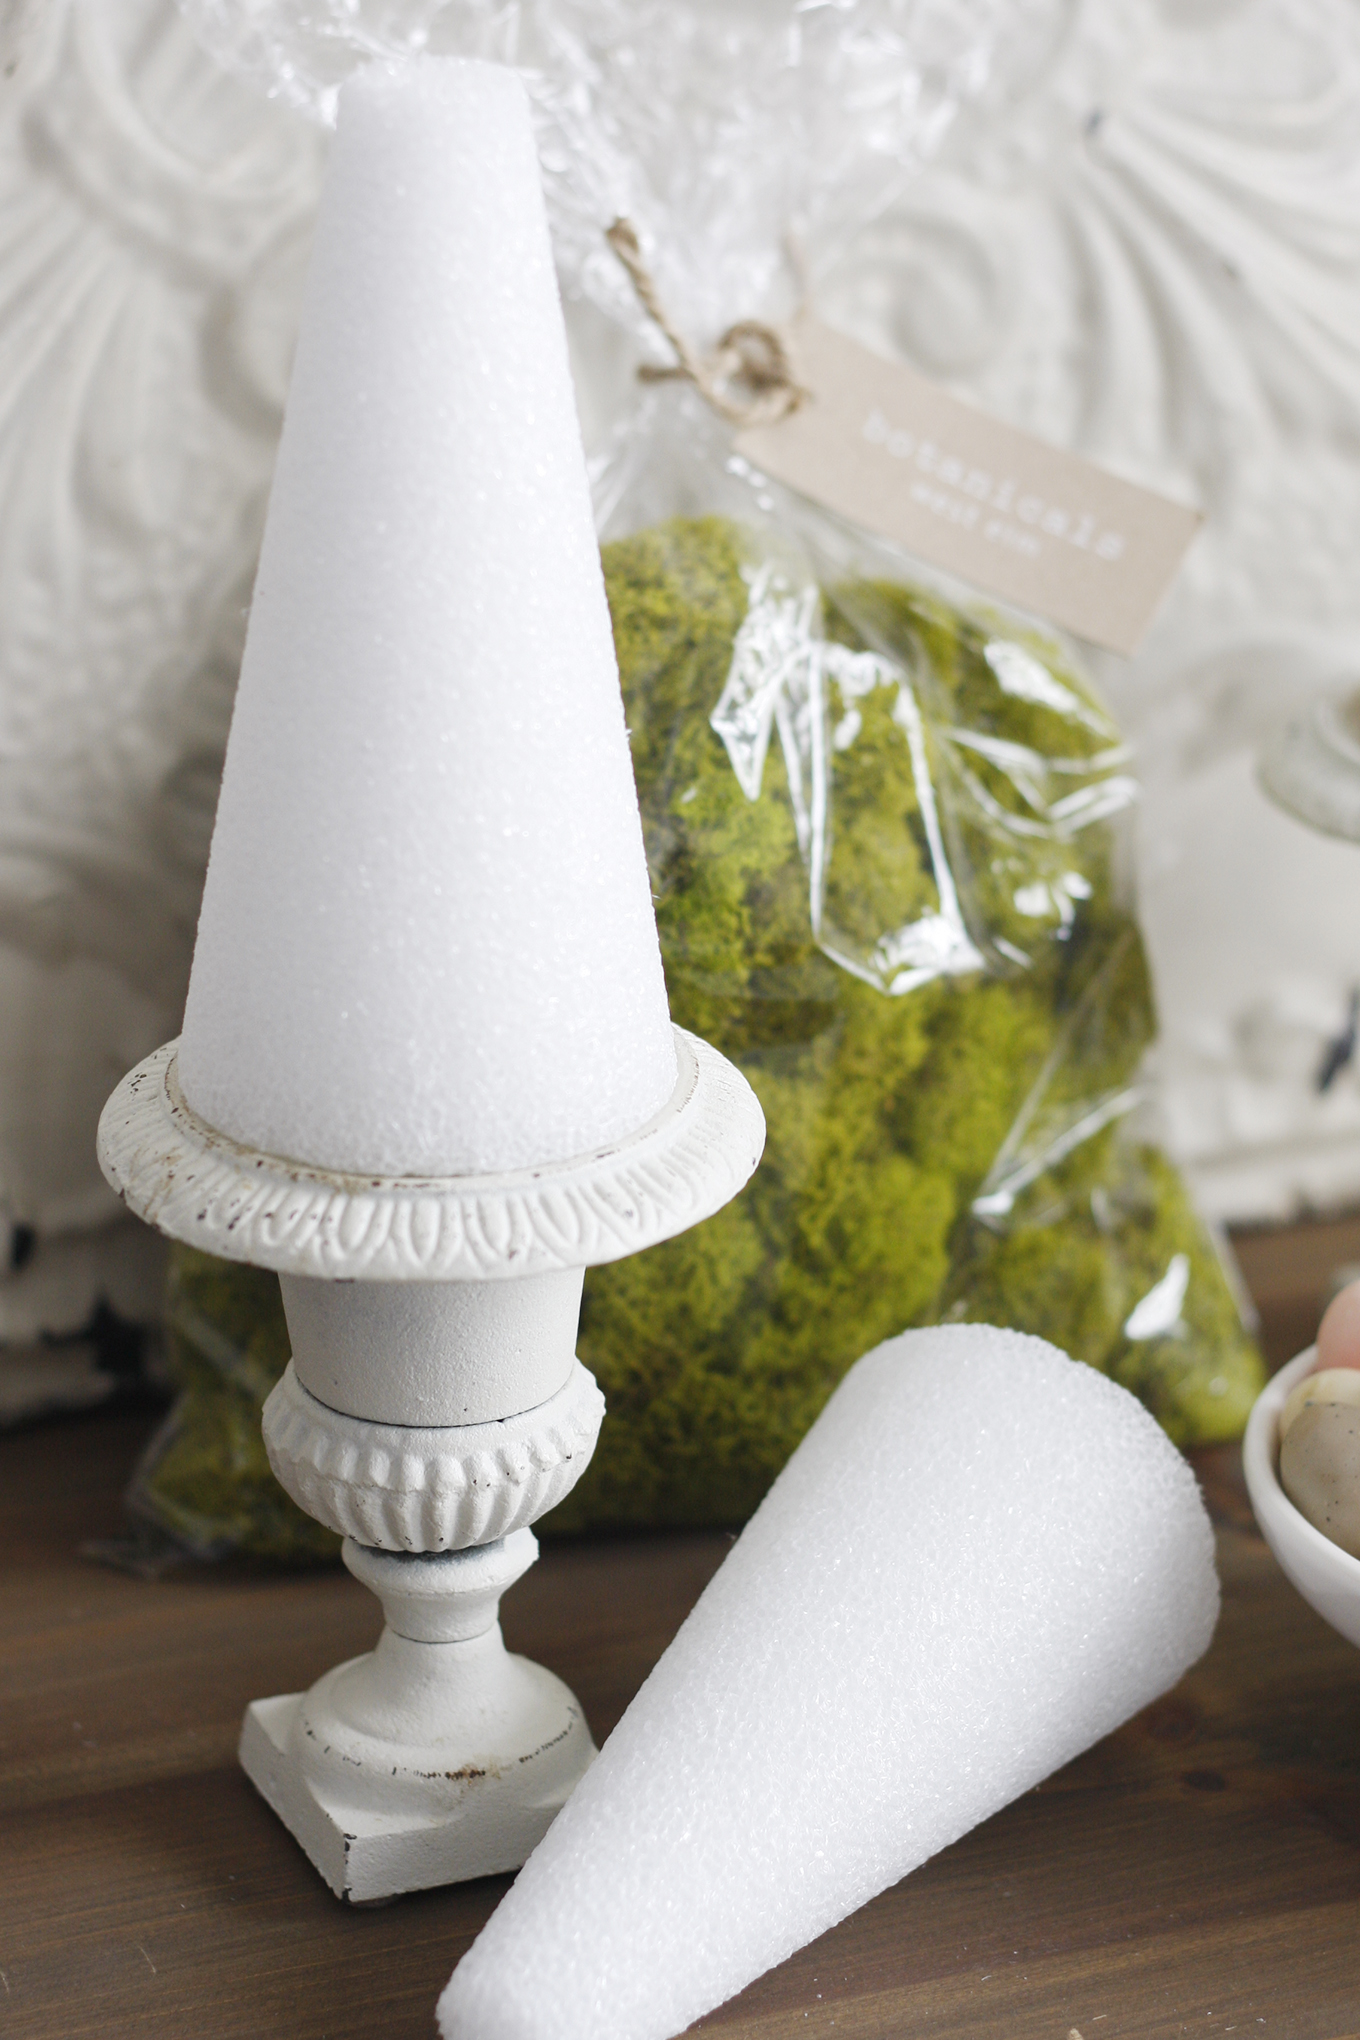
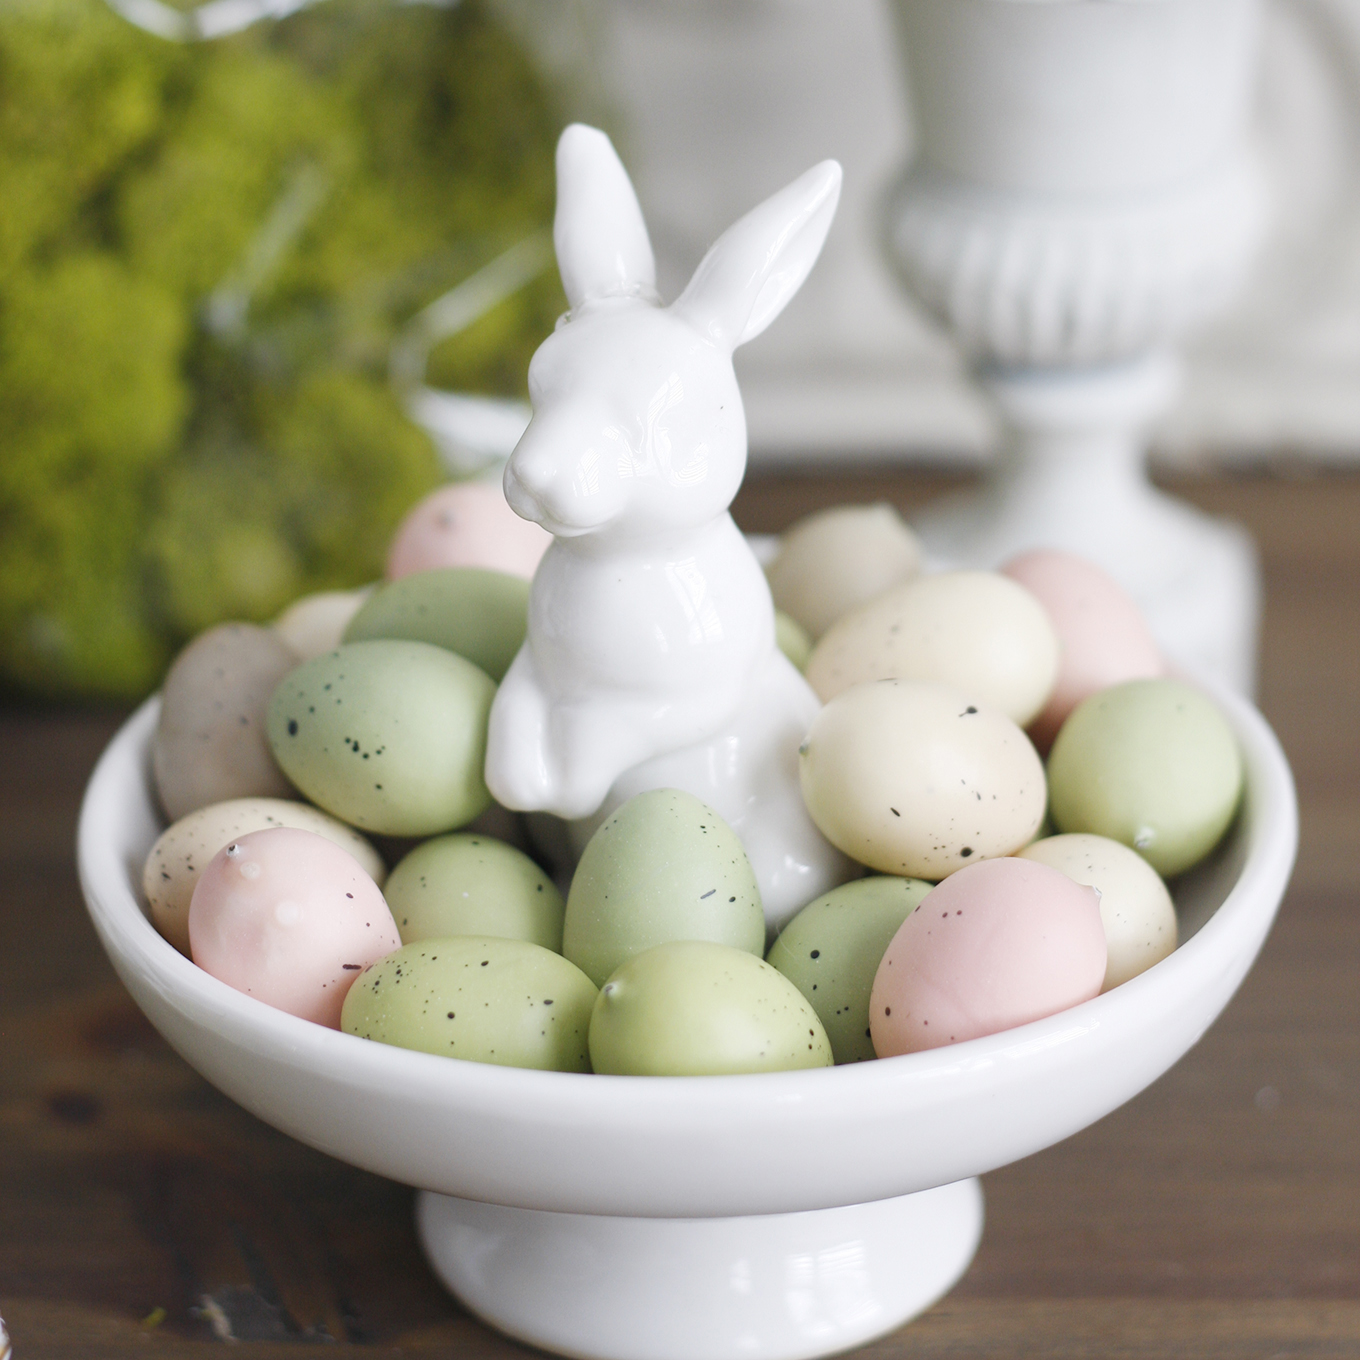
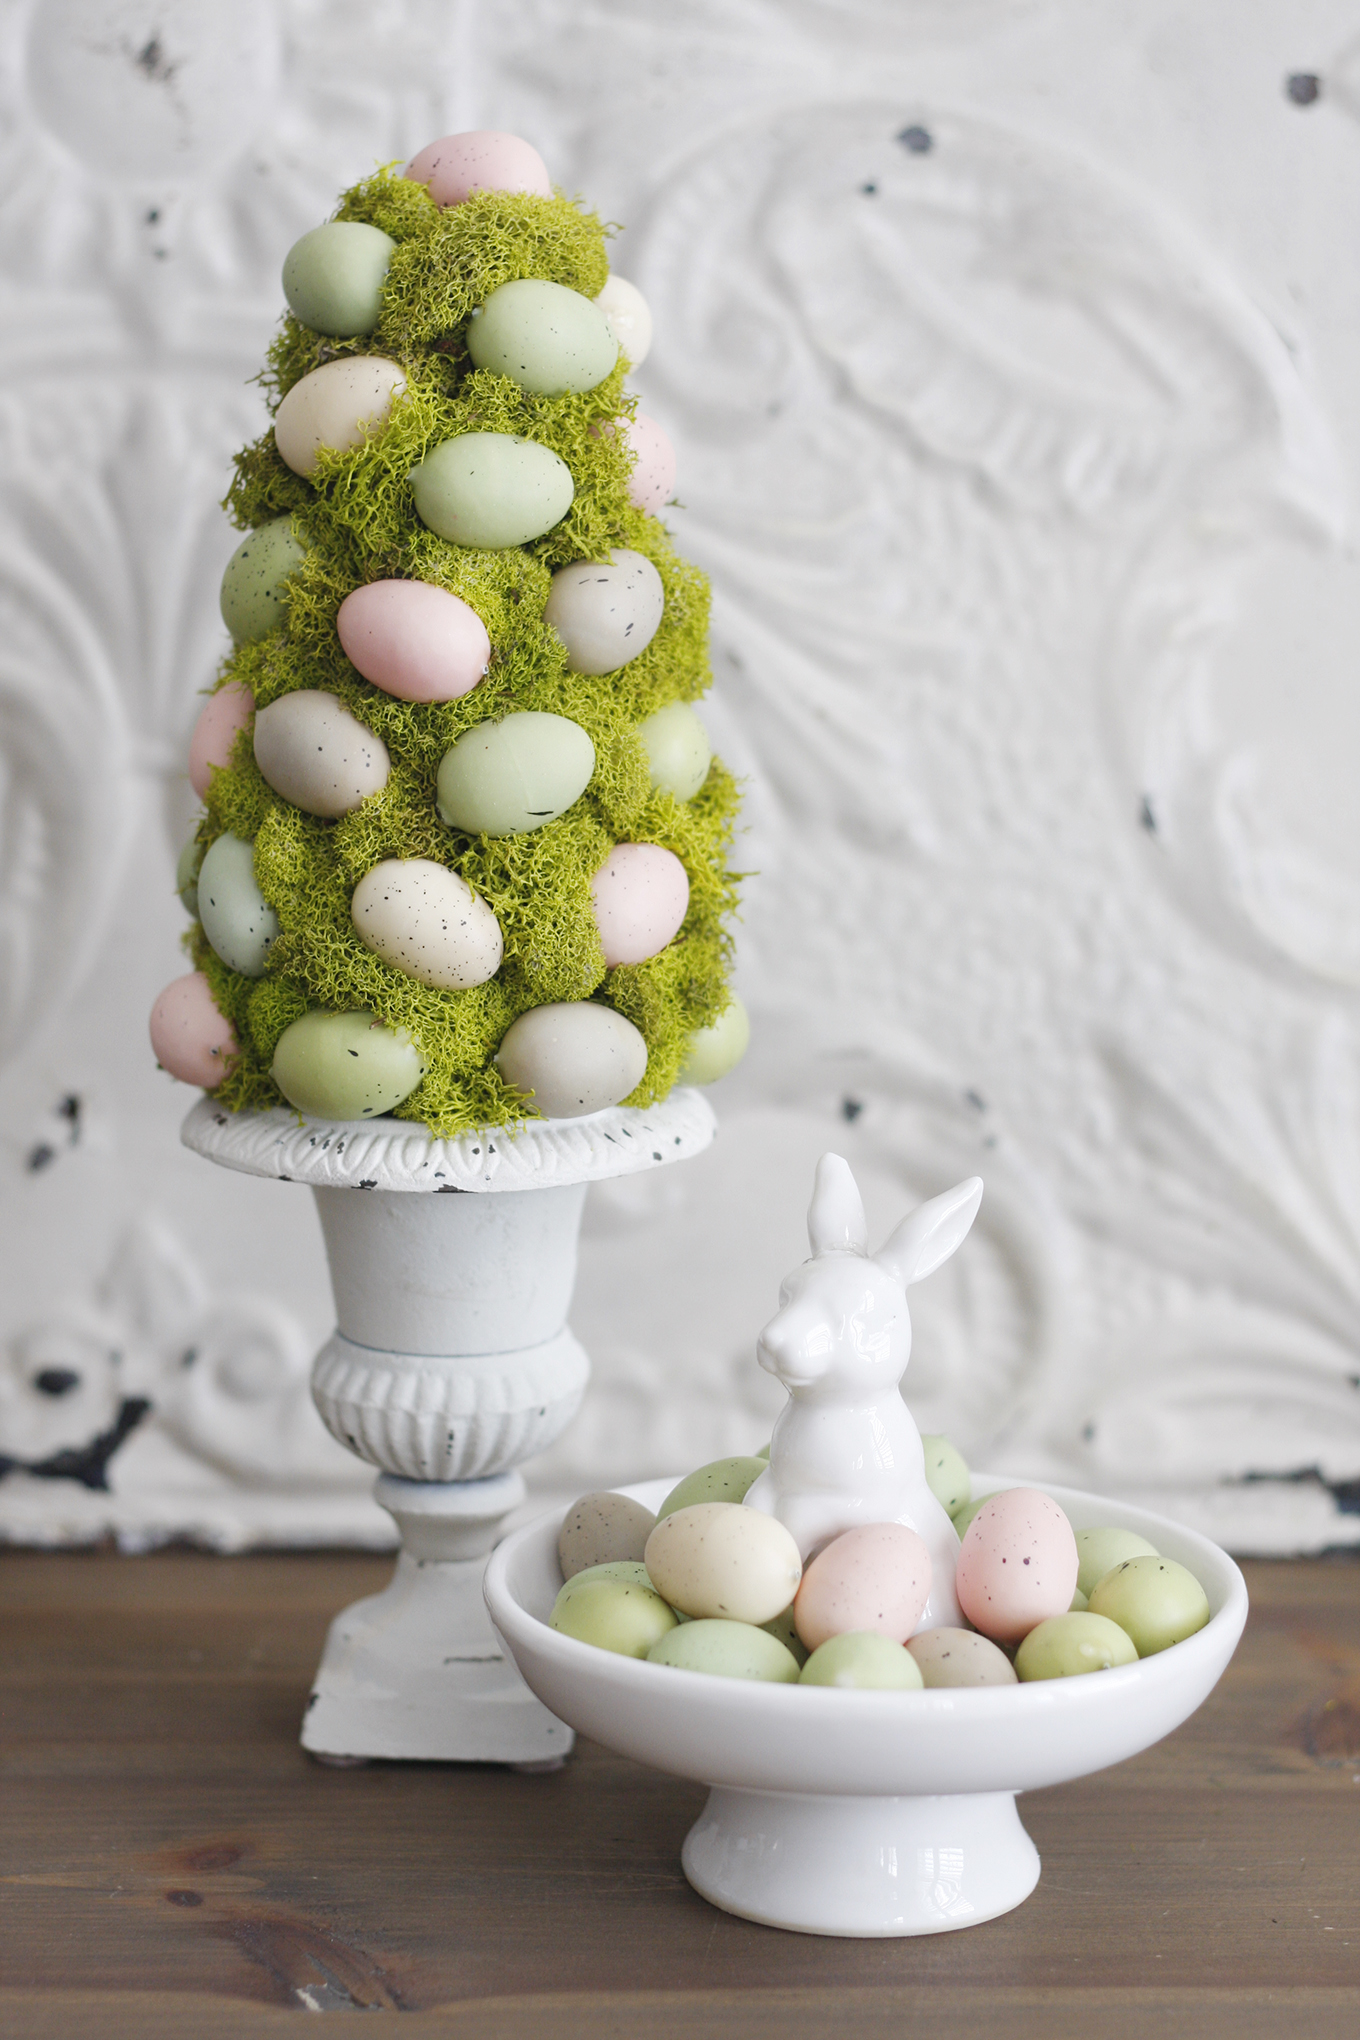
I absolutely love this time of year when I can decorate for Easter with my favourite things — like eggs and especially bunnies! I have always loved the look of topiary trees and have seen them before made with large eggs on Pinterest. I already had a collection of mini eggs and the cast iron urns, so I was so happy to finally put everything together to make my own topiary this year.
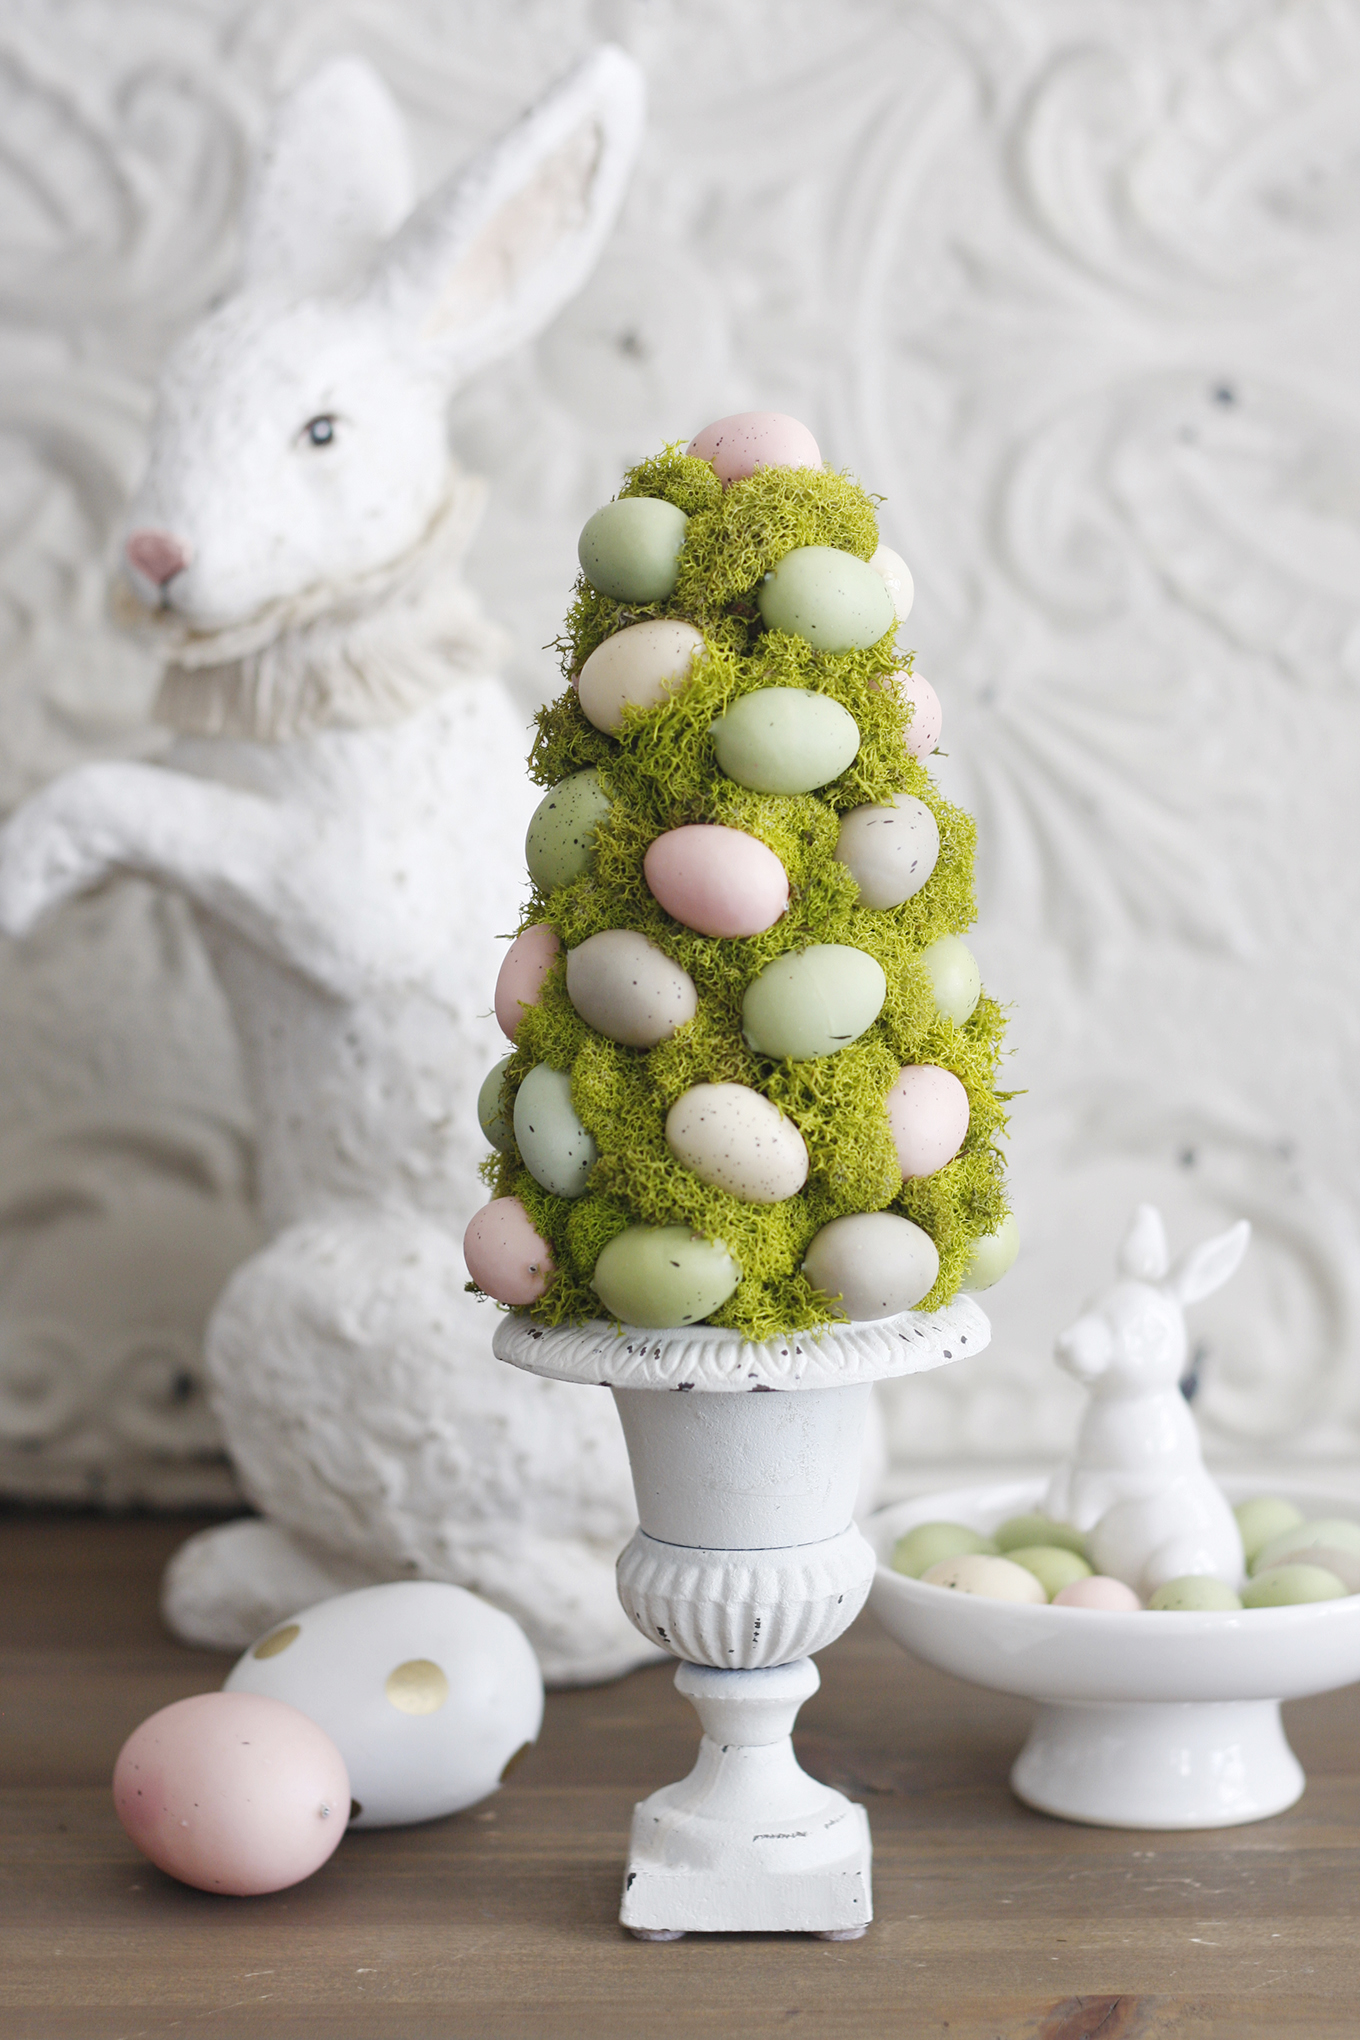 I purchased the mini eggs previously at Homesense and the urns were a thrift find at the flea market a few years ago, but I am sure that a vase would work just as well. This is a super easy craft idea to do as all it really requires is gluing and tucking things into place. The only unfortunate thing is that I did not have enough mini eggs to make two topiaries like I had planned. Now like a real Easter egg hunt, I need to look for about a dozen more mini eggs.
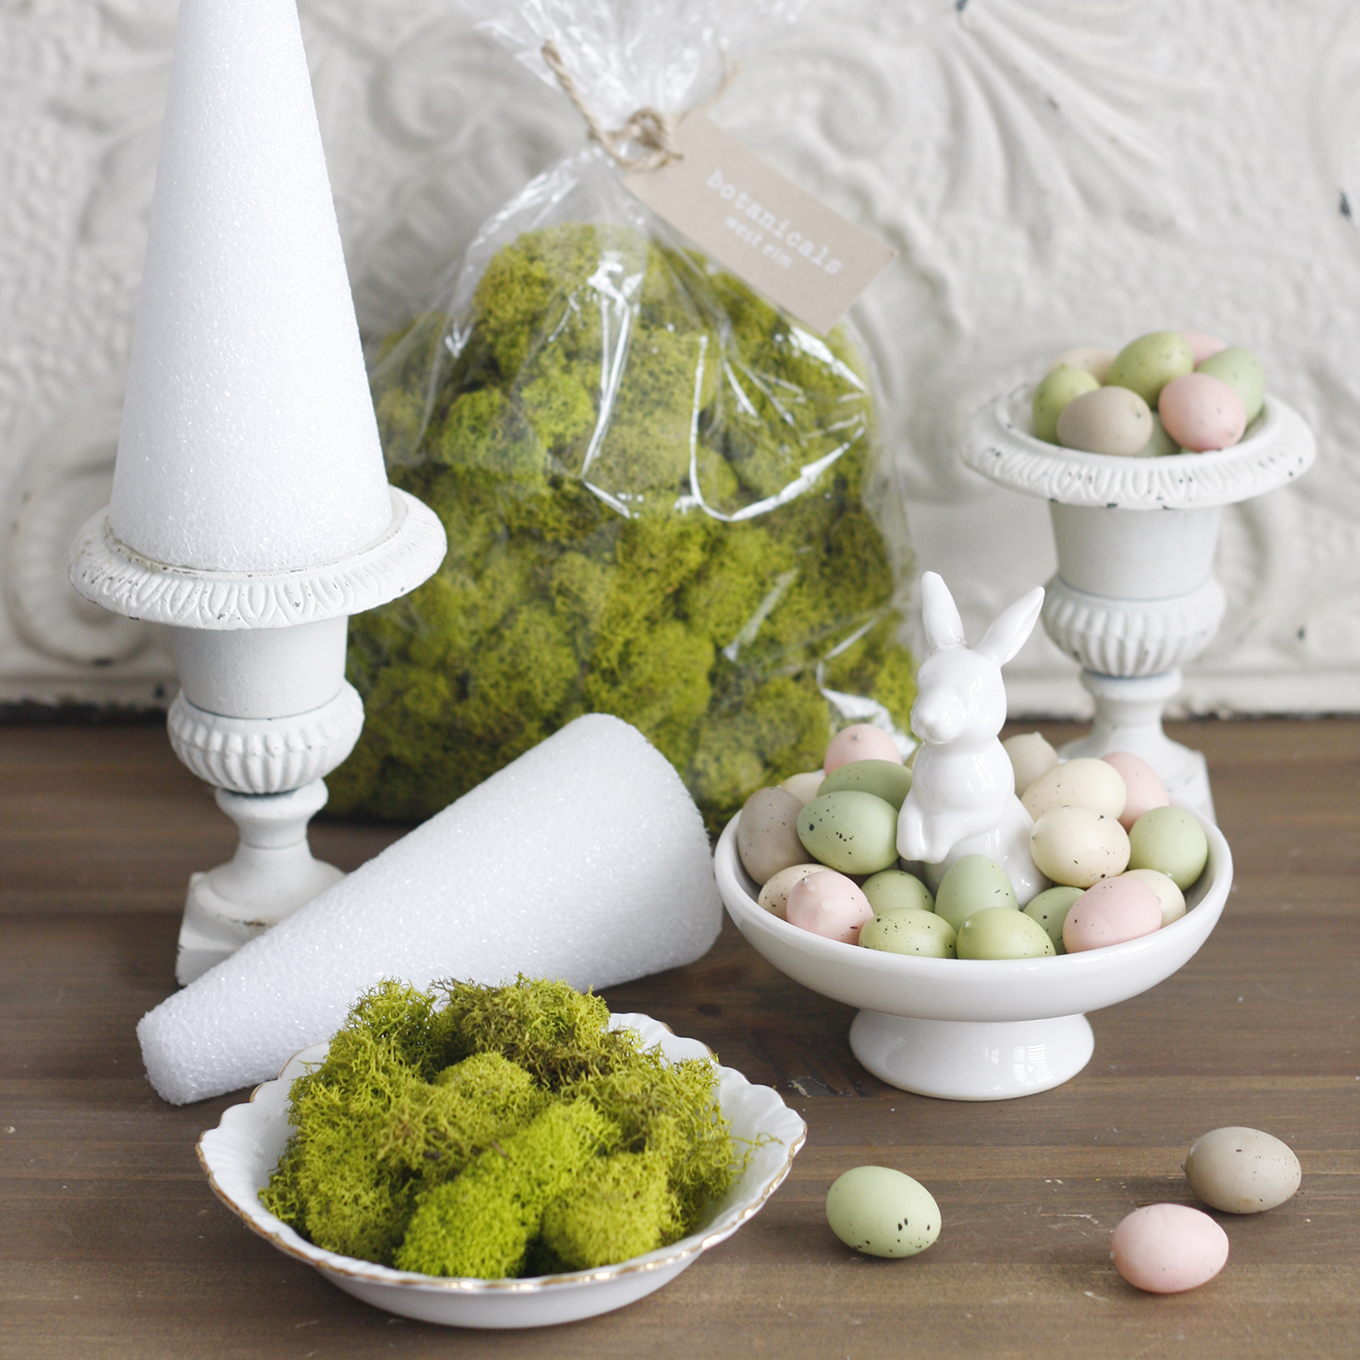 Materials & Tools
• 6 inch tall Styrofoam Cone
• Mini urn or vase (fits base of cone)
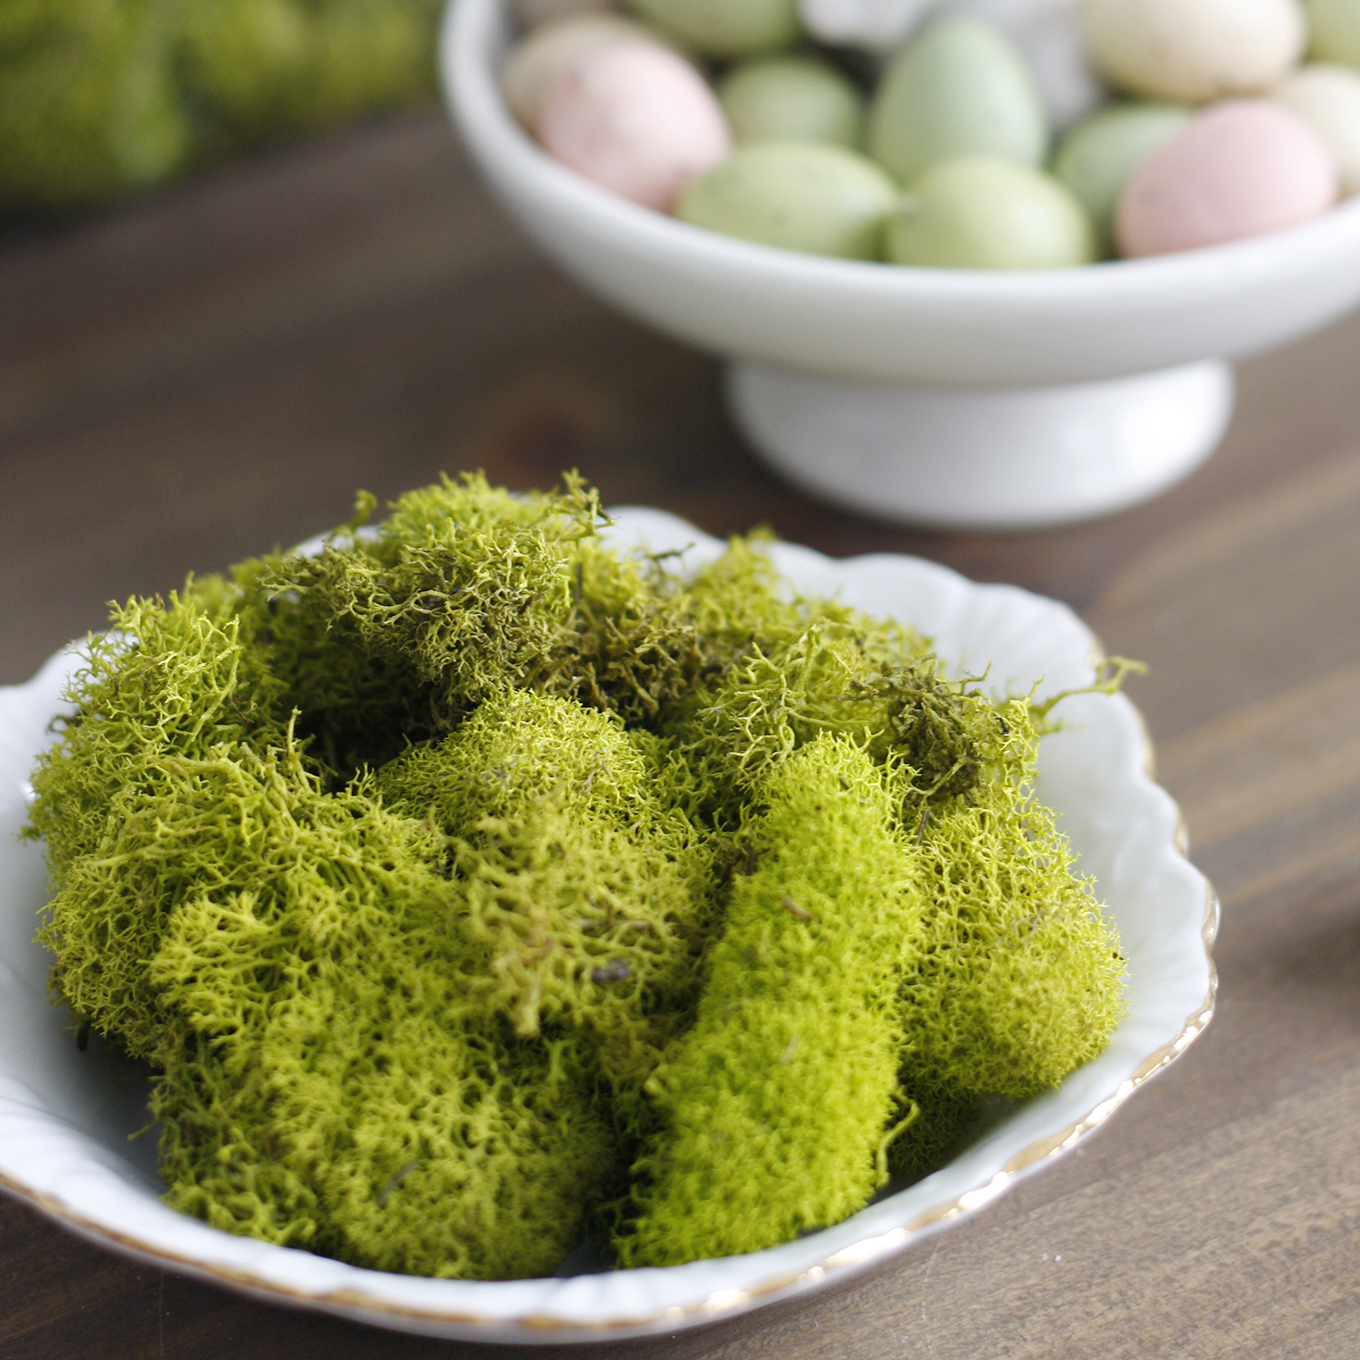
• Green moss
• 38 mini plastic decorative/craft eggs
• Hot glue sticks
• Hot glue gun
 Step 1
Plug in your glue gun to heat it up. Once it is hot, start gluing each mini egg to the styrofoam cone with about the same distance between each one. No need to get out the ruler here, just whatever looks good visually to your eye.
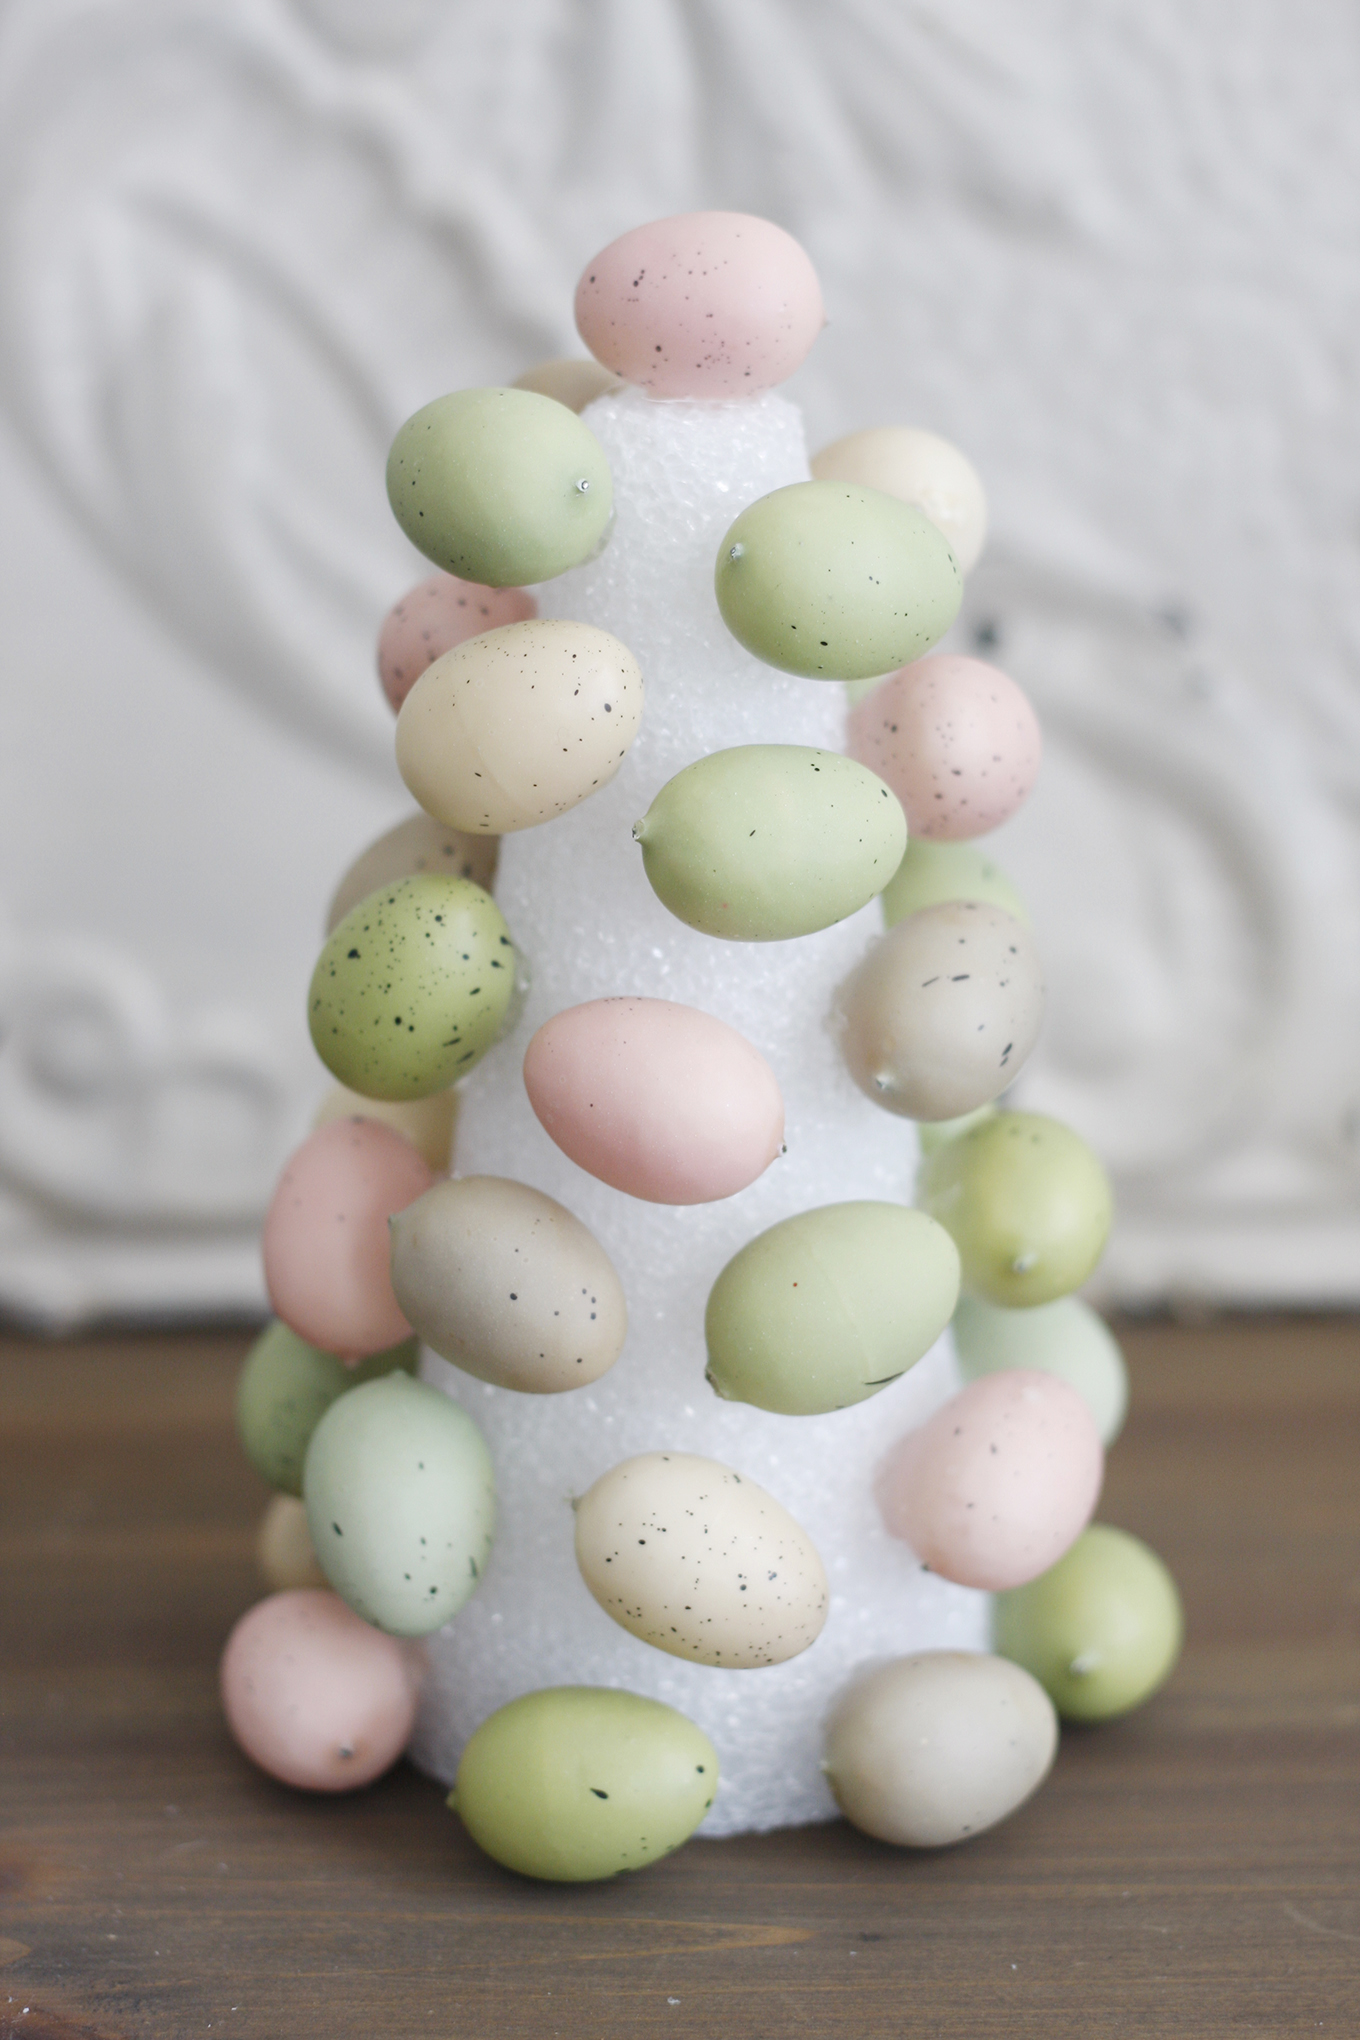 Step 2
Once all of the eggs are glued to the cone, take small pieces of the green moss and tuck into the open spaces between each of the mini eggs on the topiary. I just used my fingers to push them into place and hot glued a few pieces of the moss here and there to adhere to the cone.
 Step 3
After the moss is tucked around all of the eggs, place the cone on top of the urn or vase. TA DA! Now your decoration is finished and ready to display. Happy Easter!
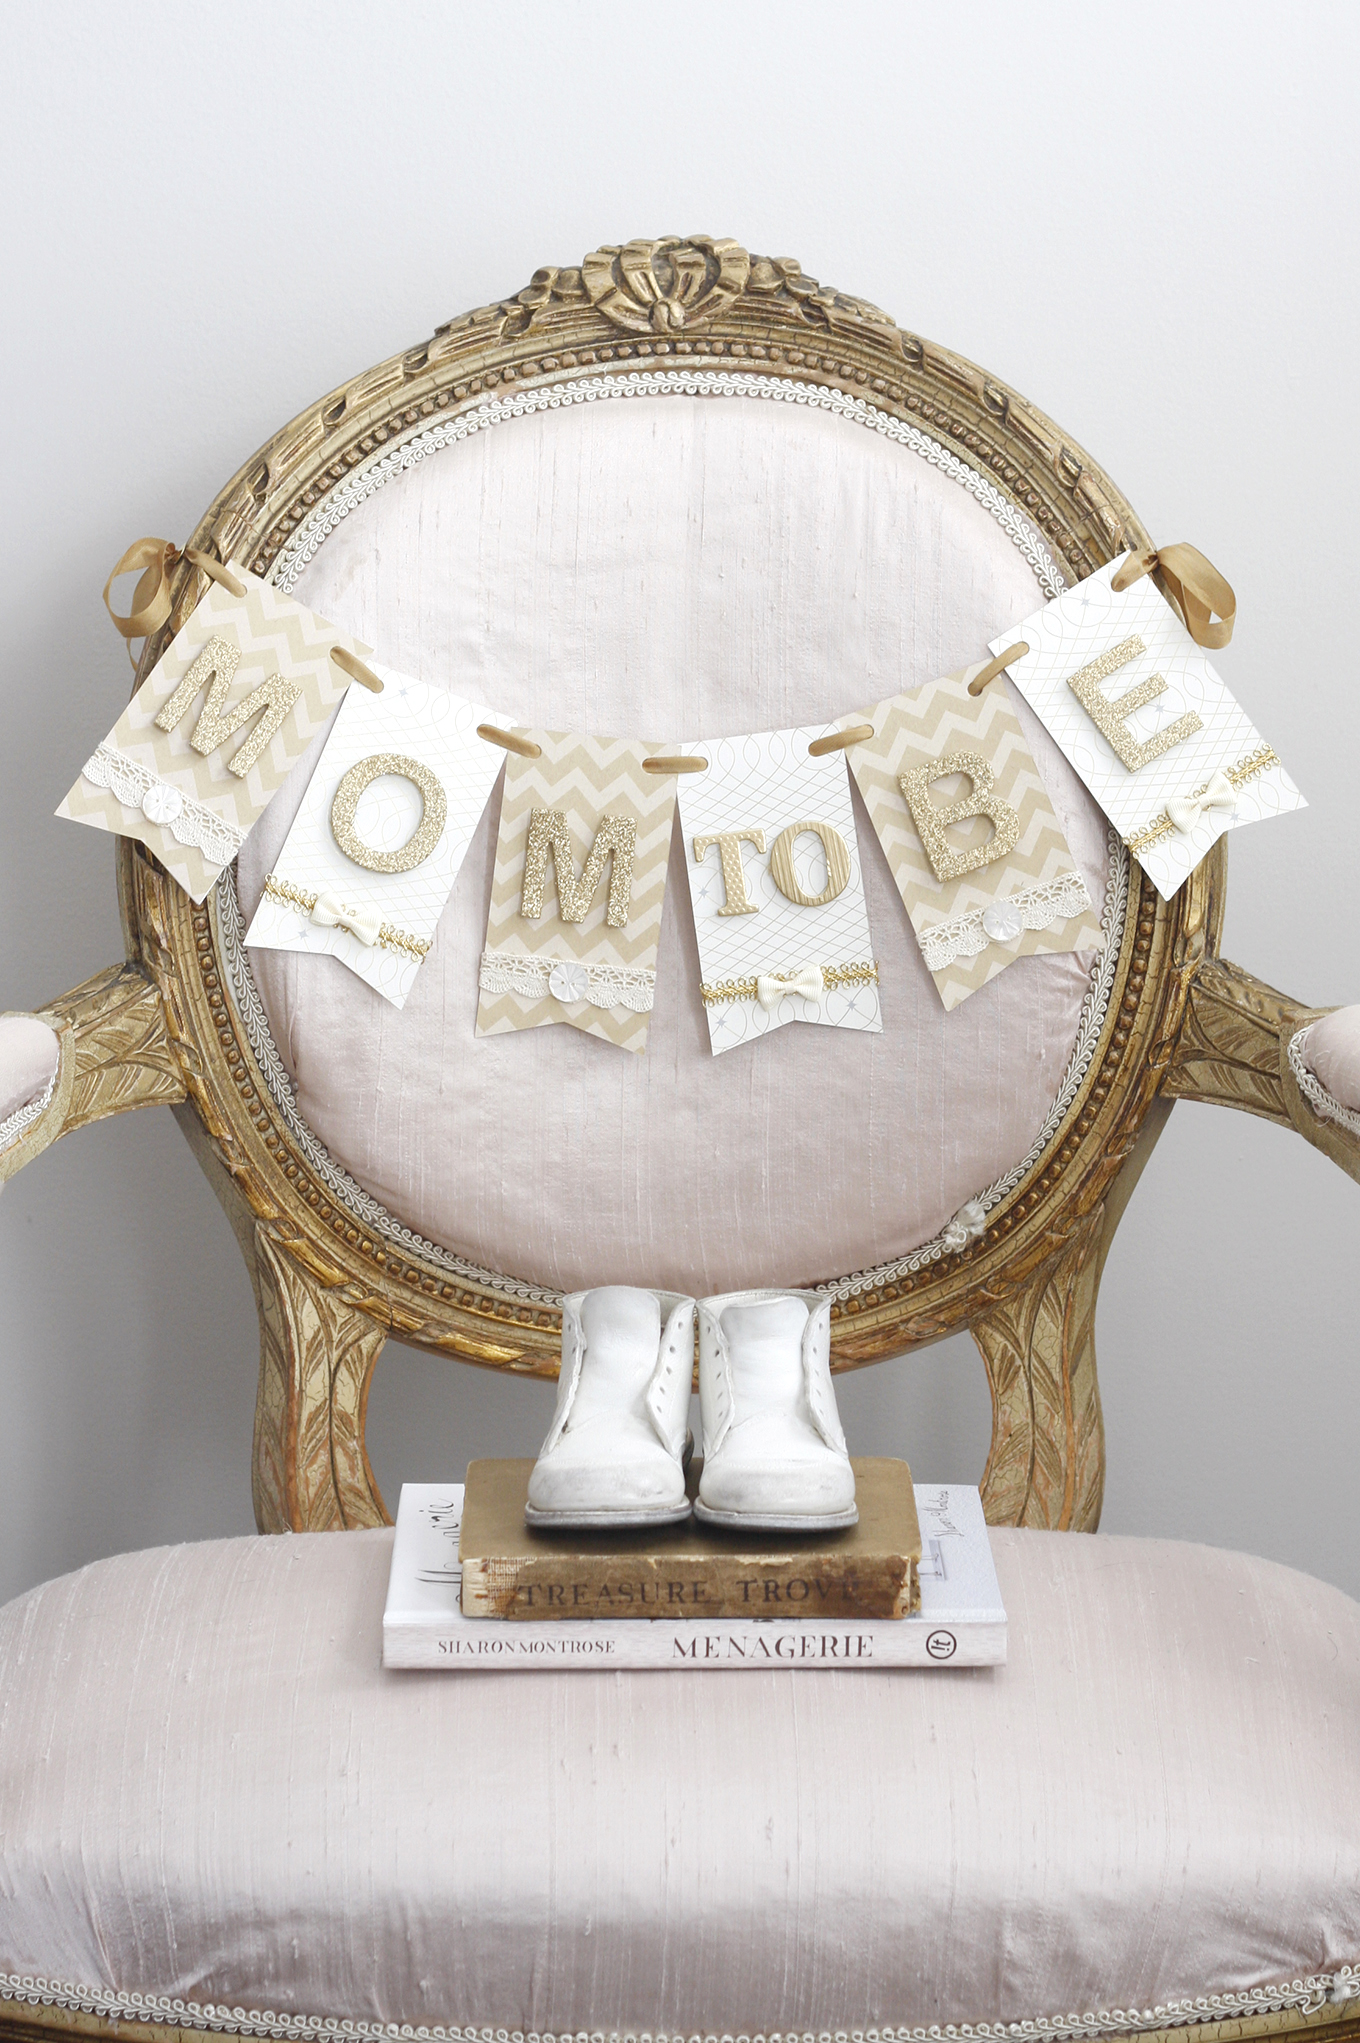
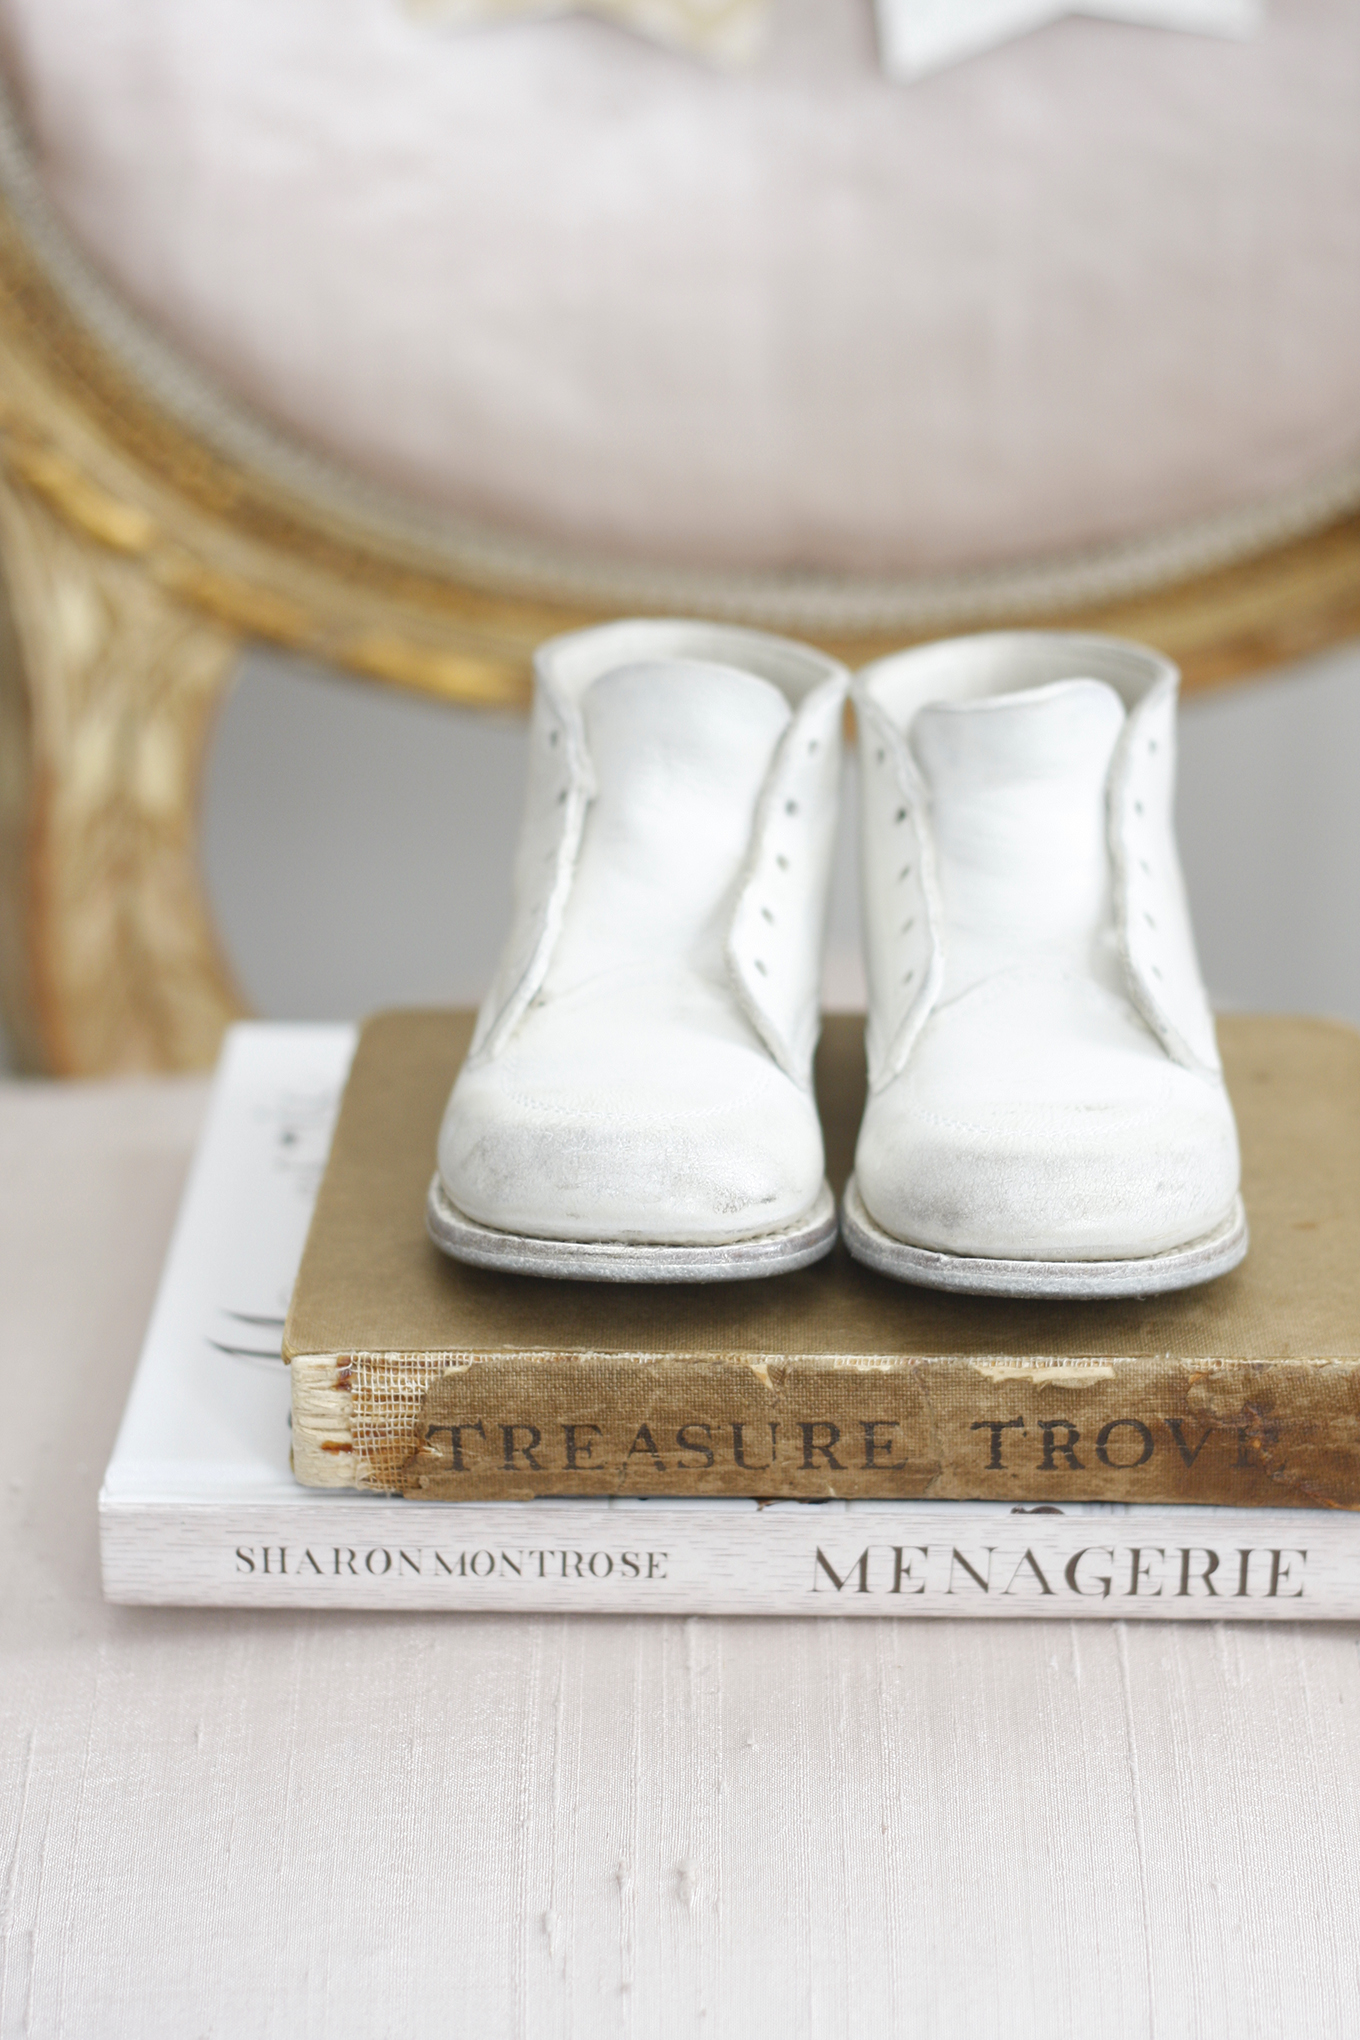
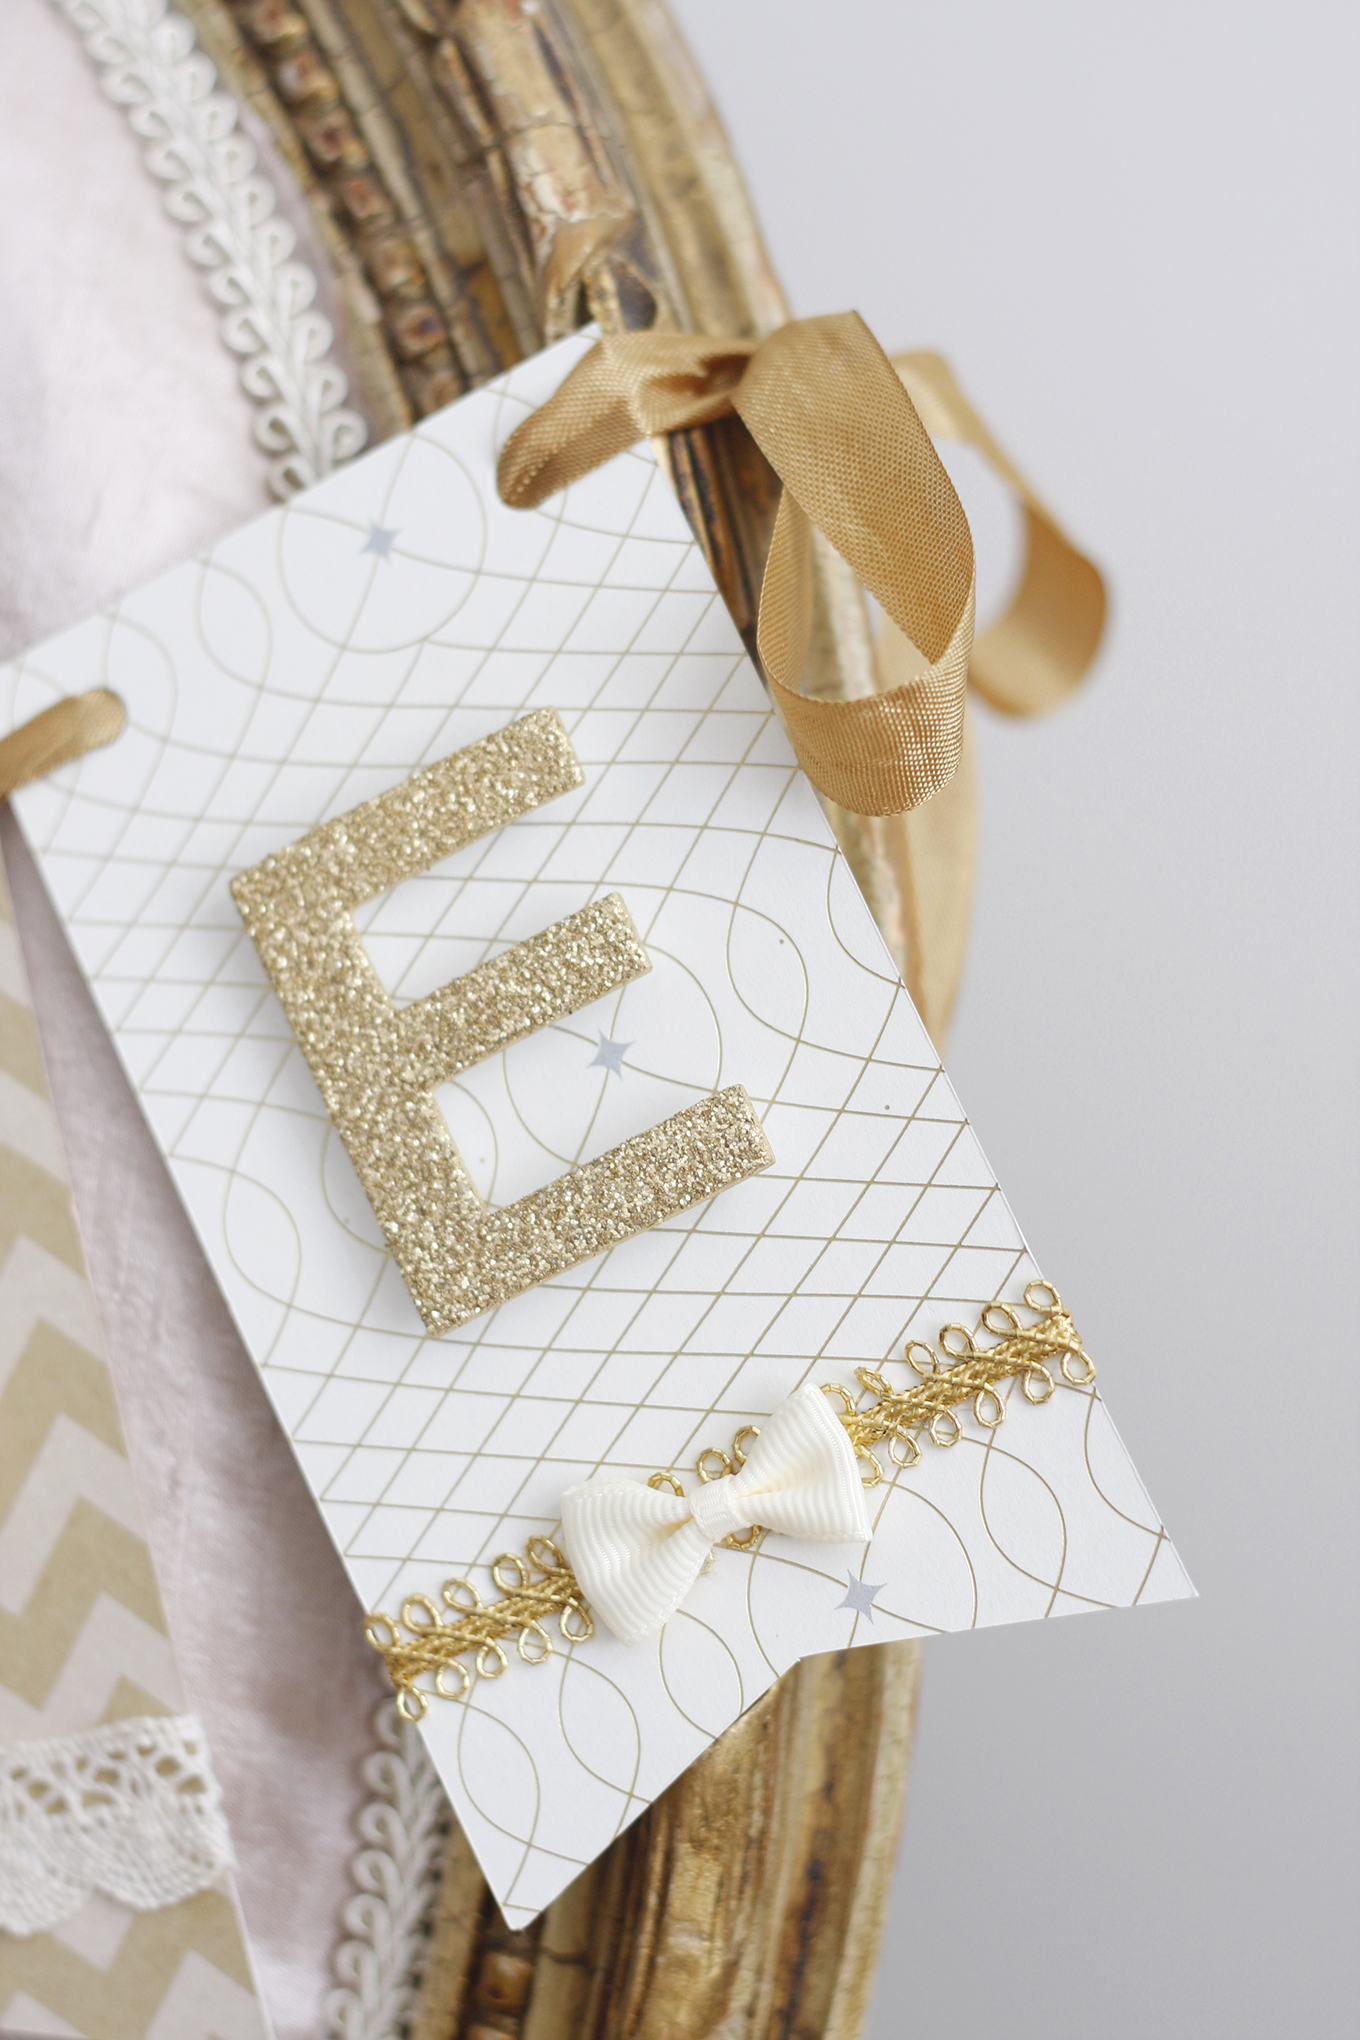
If you are planning to host a baby shower, here is a beautiful and easy decor idea to dress up the party and make the ‘Mom to Be’ feel extra special as the guest of honour. Now, typically the banner would be displayed on the back of her chair at a baby shower, but I have styled and photographed it on the front to illustrate this craft. All of the supplies featured here are easy to find at your local craft store. Or you may all ready have these supplies at home — a selection of pretty card stock and bits and bobs — so its easy to start crafting!
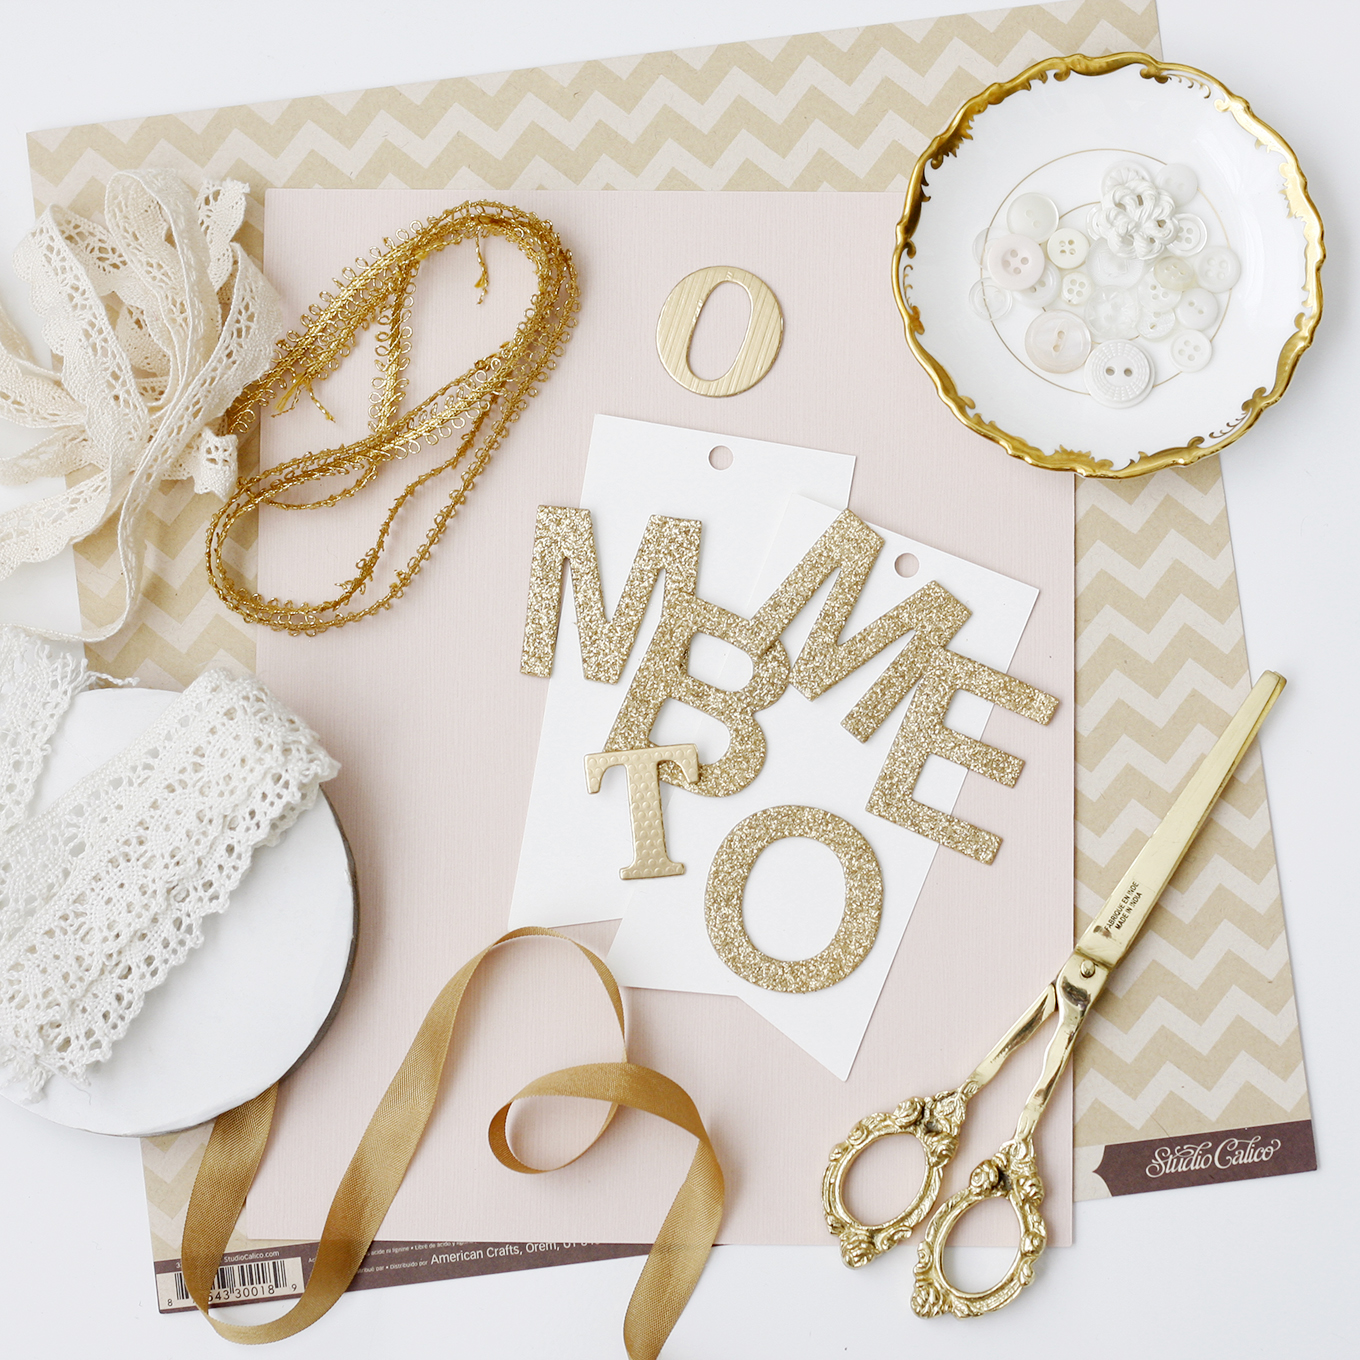
 Materials
• Various crafting card stock in complimentary colours and patterns
• Alphabet letters (glitter is optional)
• Foam adhesive circles
• Seam binding or ribbon
• Bits and bobs like bows and buttons
 Tools
Tools
• X-acto knife and blade
• Ruler
• Hole punch
• White glue (I prefer a brand called Weldbond)
 Step 1
Measure and cut out six rectangular cards in card stock of your choice that are 2 3/4″ wide x 5″ tall. You can use alternating paper designs for variety. Cut a small notch at the bottom of each card.
Step 2
With the hole punch, create 2 holes at the top of each card on both the right and left side.
Step 3
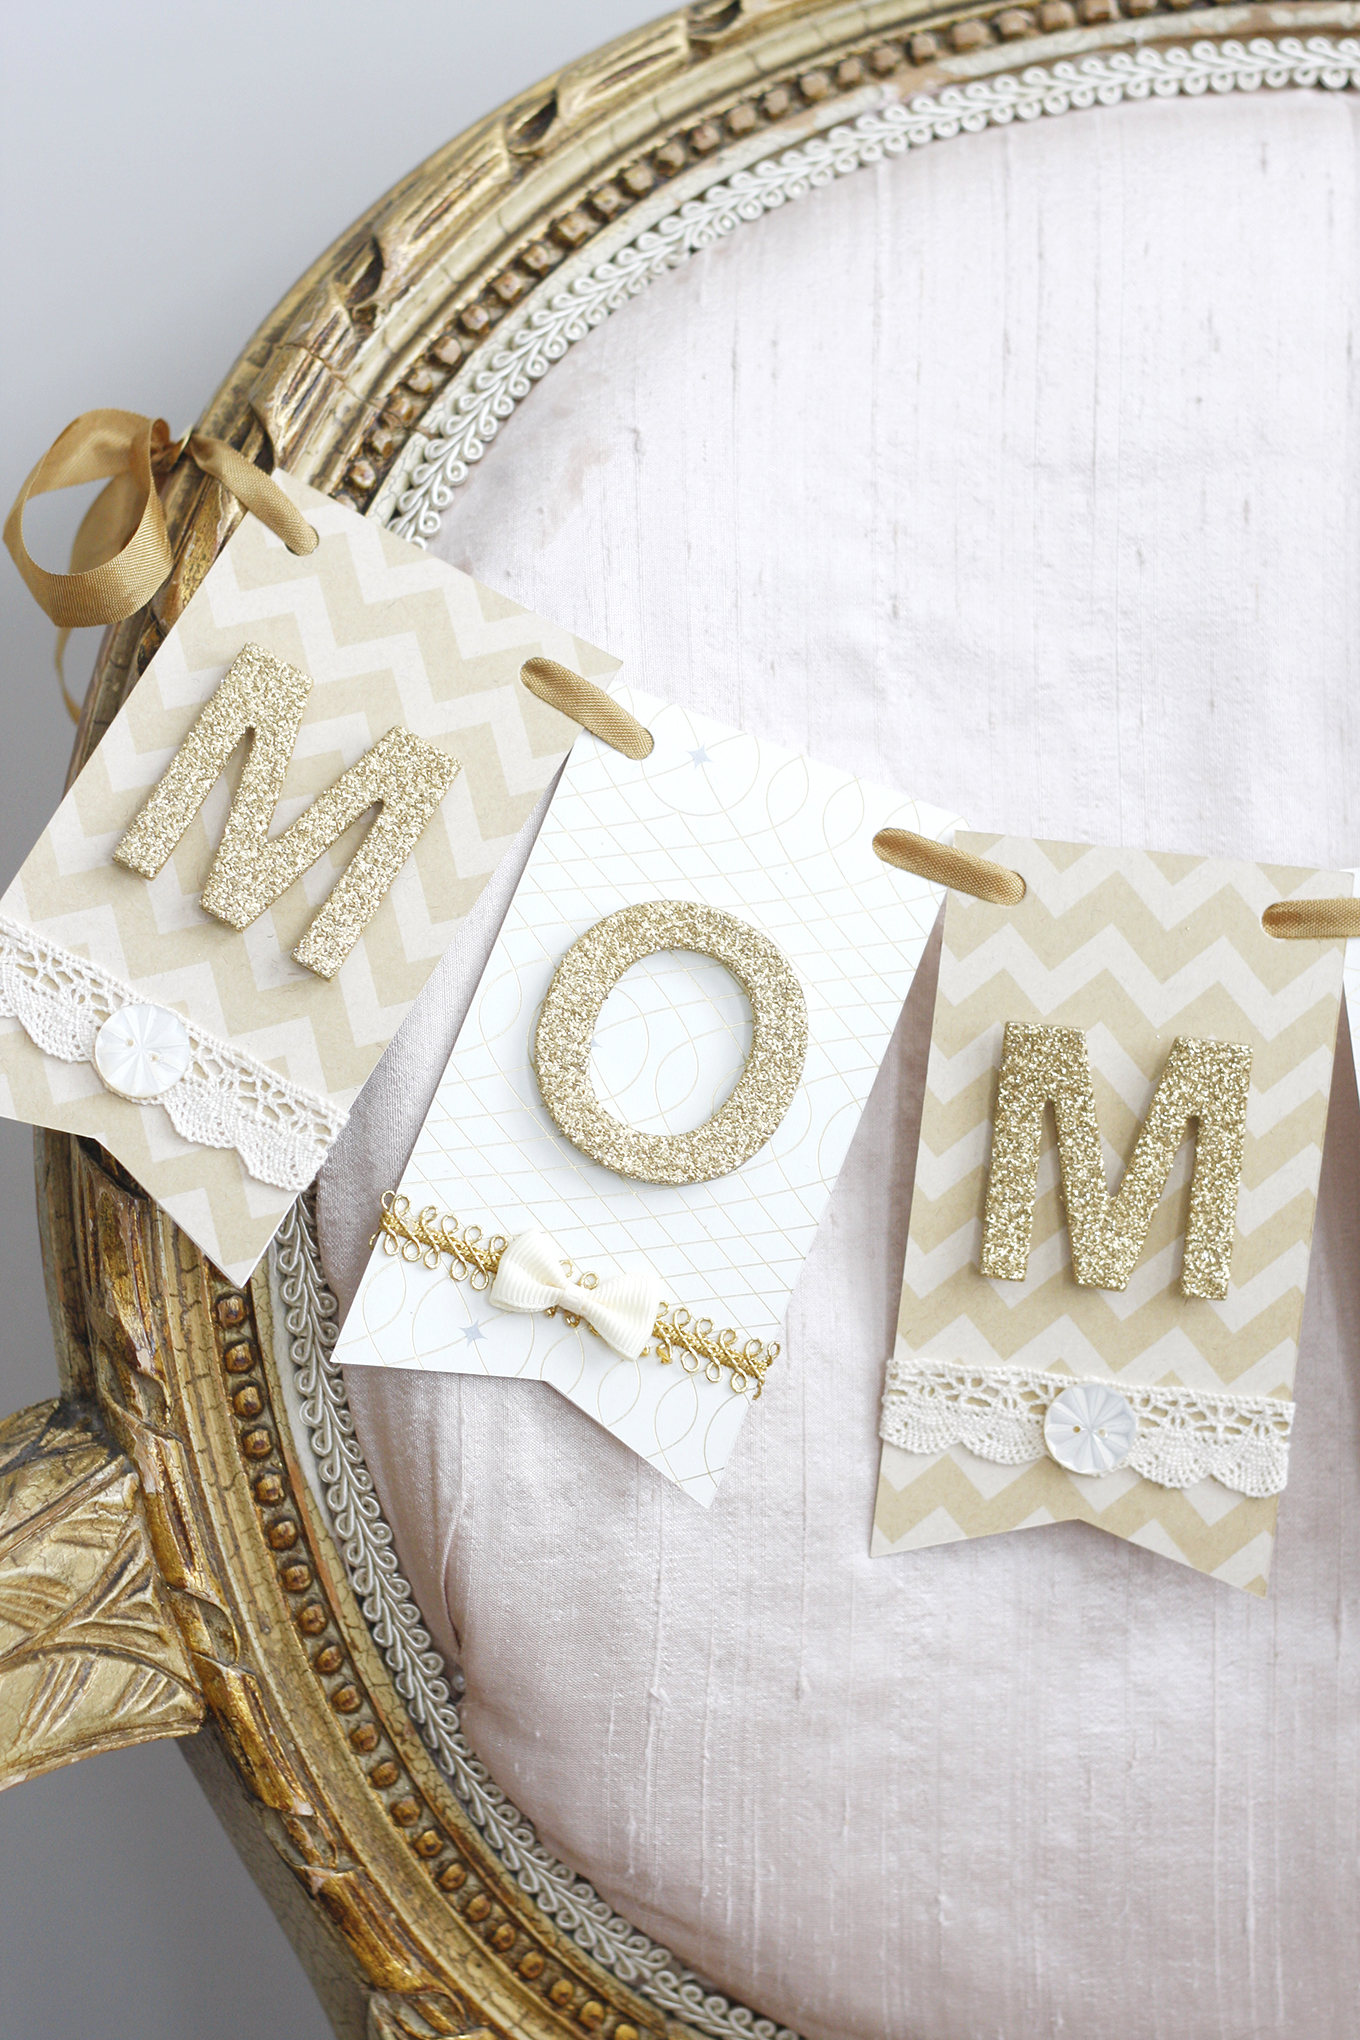
Arrange each letter of ‘Mom to Be’ on a separate card. You can either use glue to attach the letters to the cards. Or as I prefer, to use small foam adhesive circles that give dimension to the letters.
Step 4
At the bottom of each card, glue on the trims and buttons of your choice.
Step 5
Thread the seam binding through all of the holes in the cards to hang the banner.
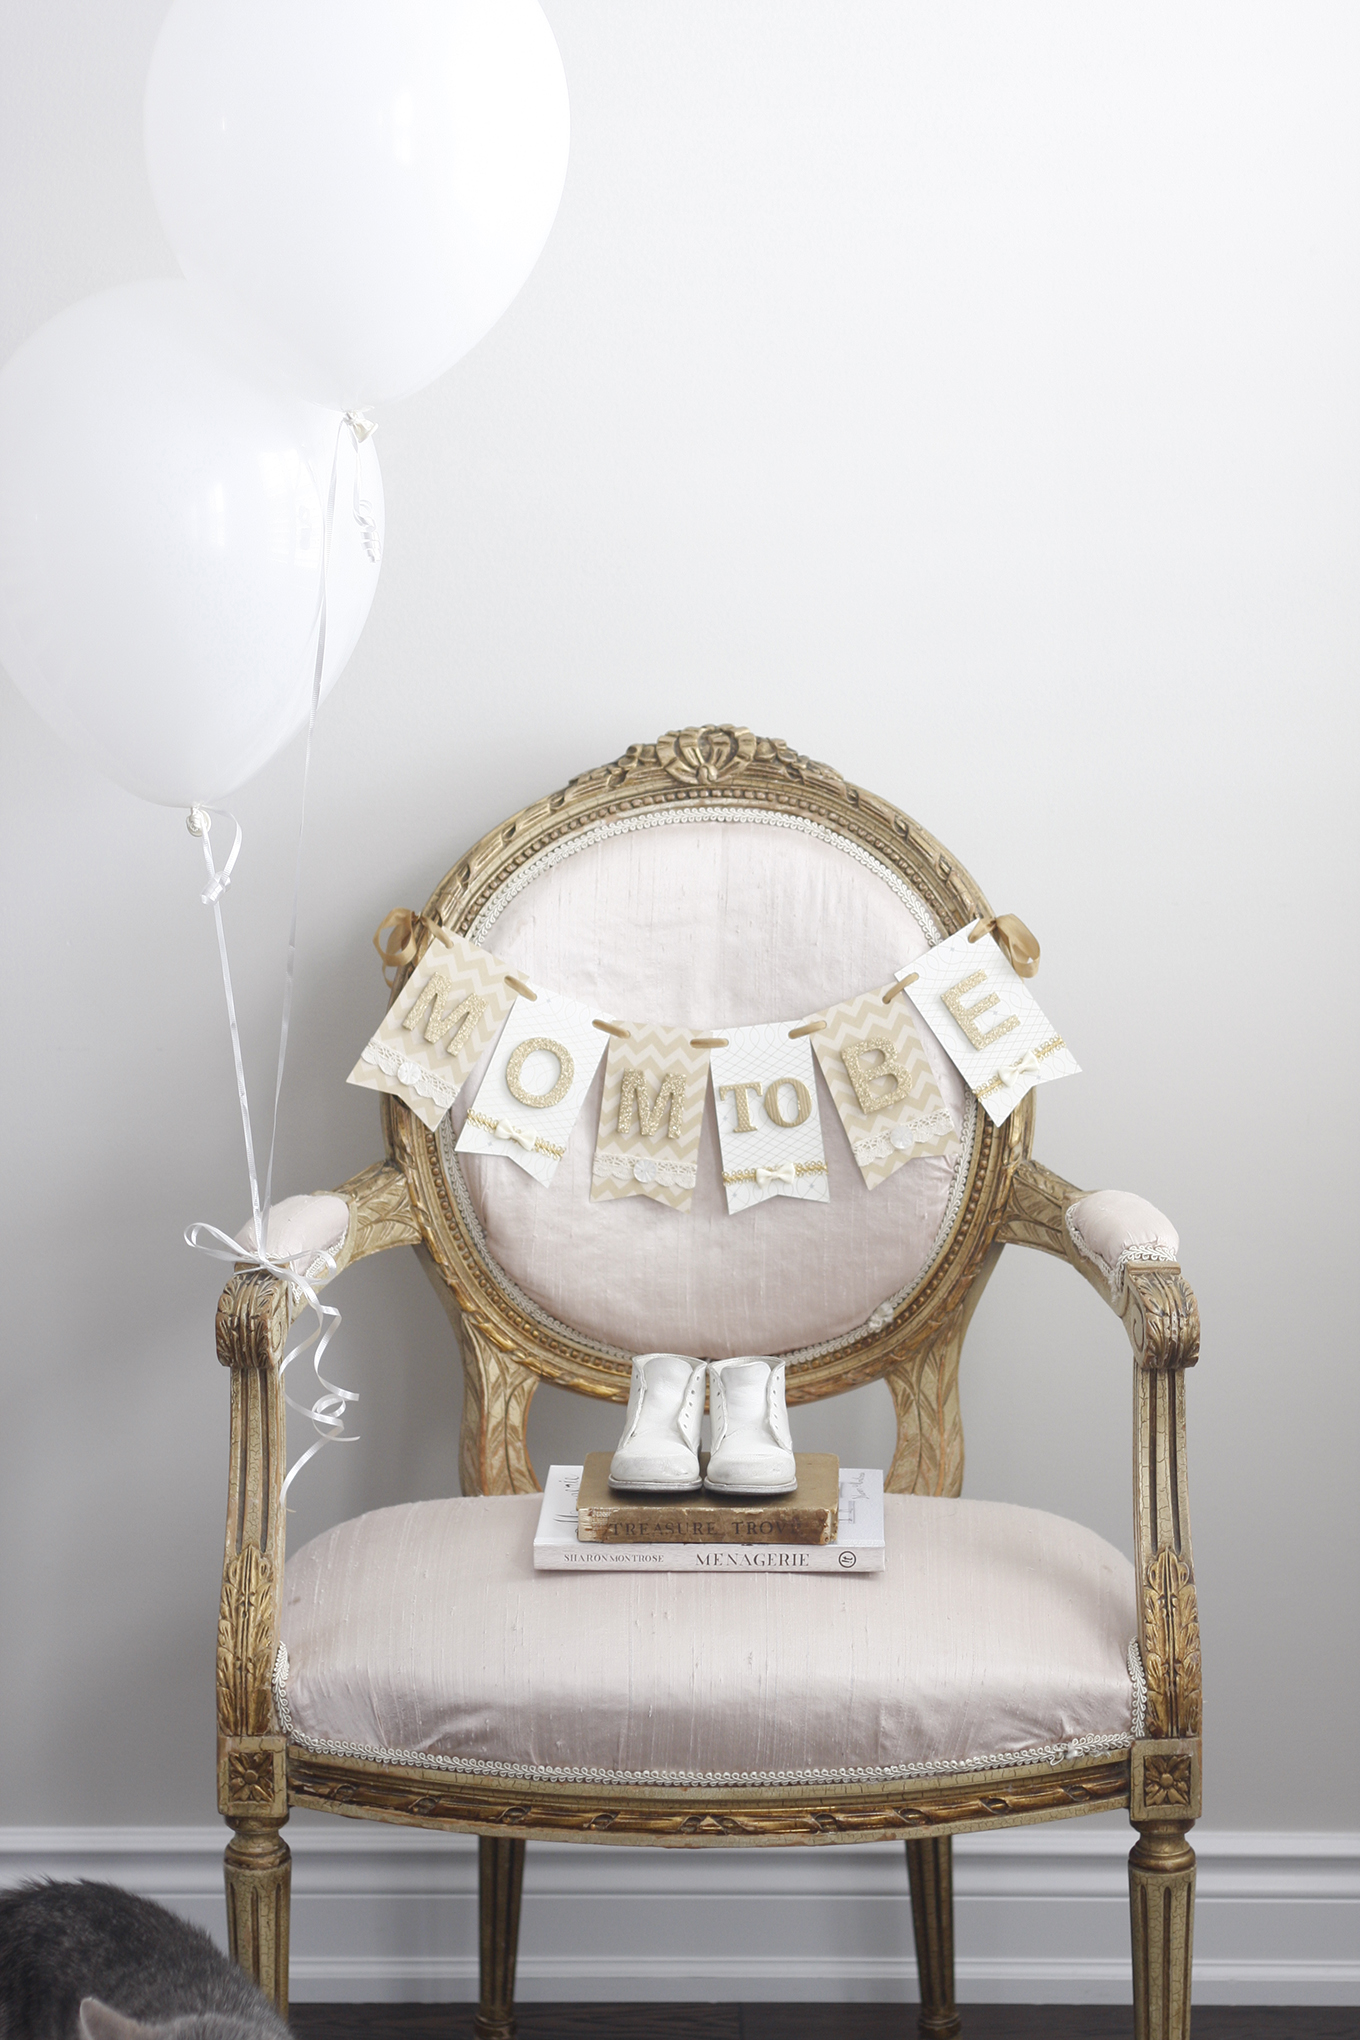 Look….my cat Jasper photo bombed my picture! He was very interested in playing with the balloons and kept sneaking back into my shot. LOL
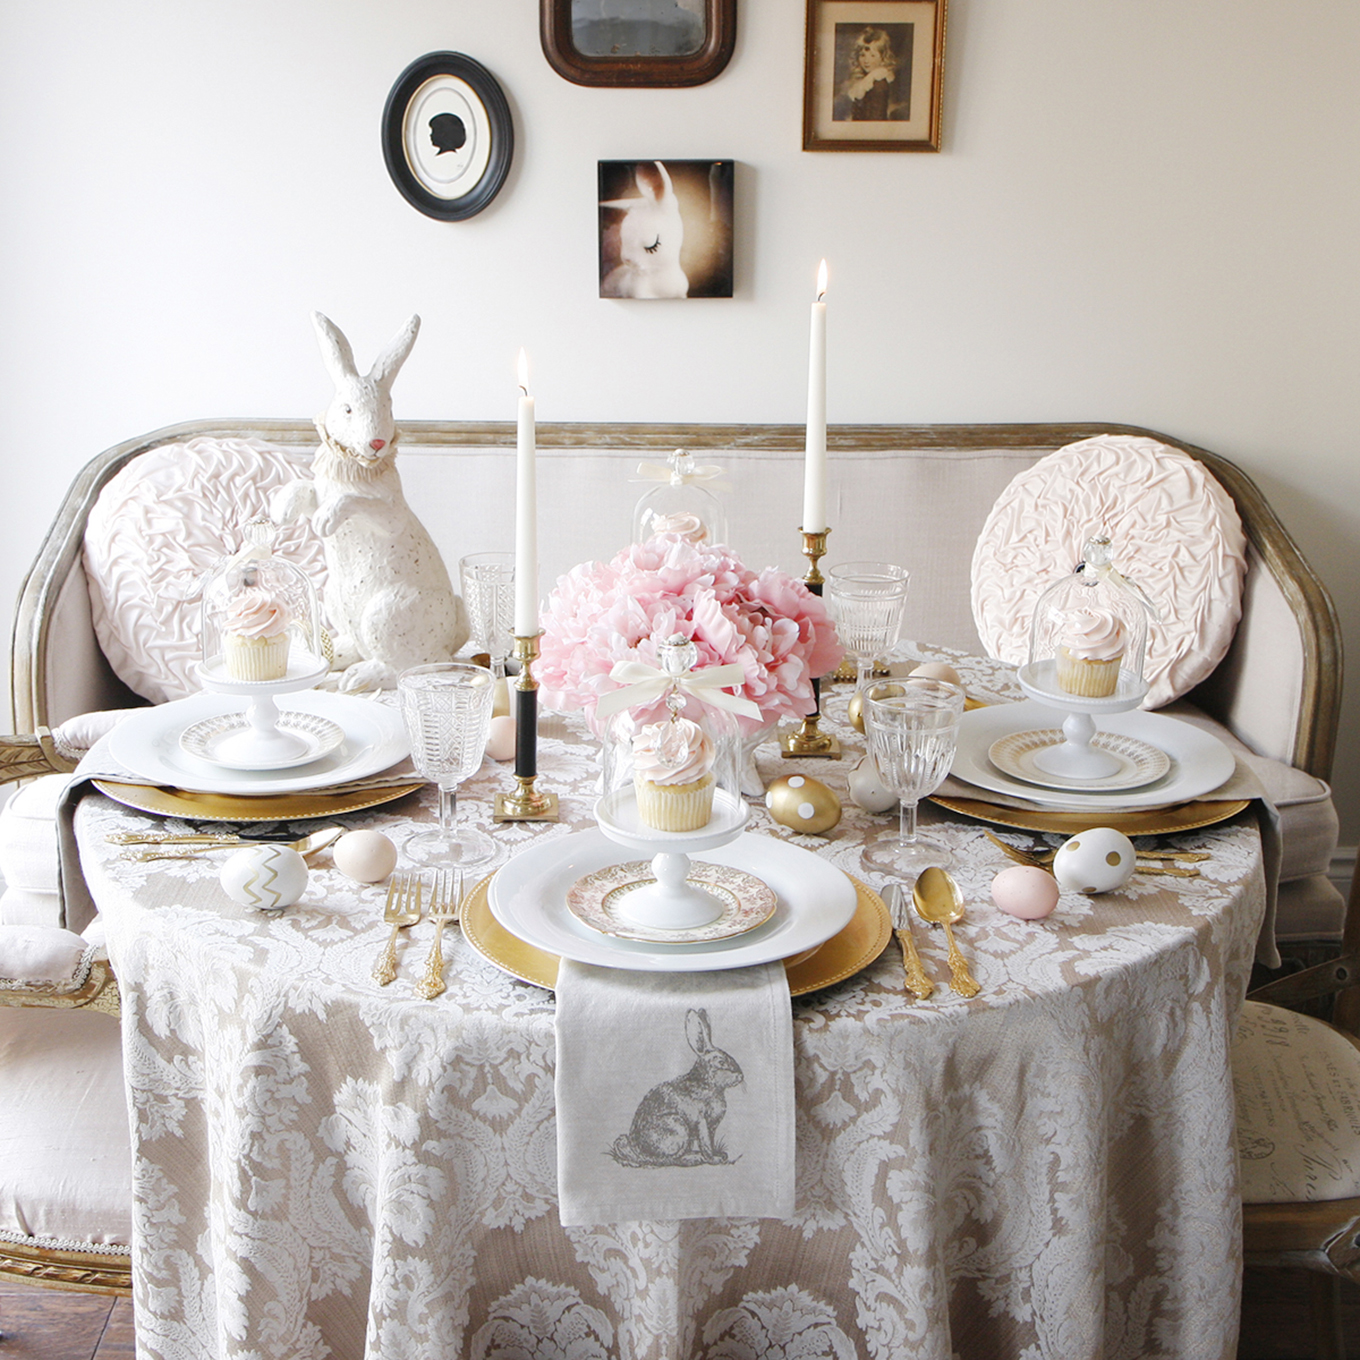
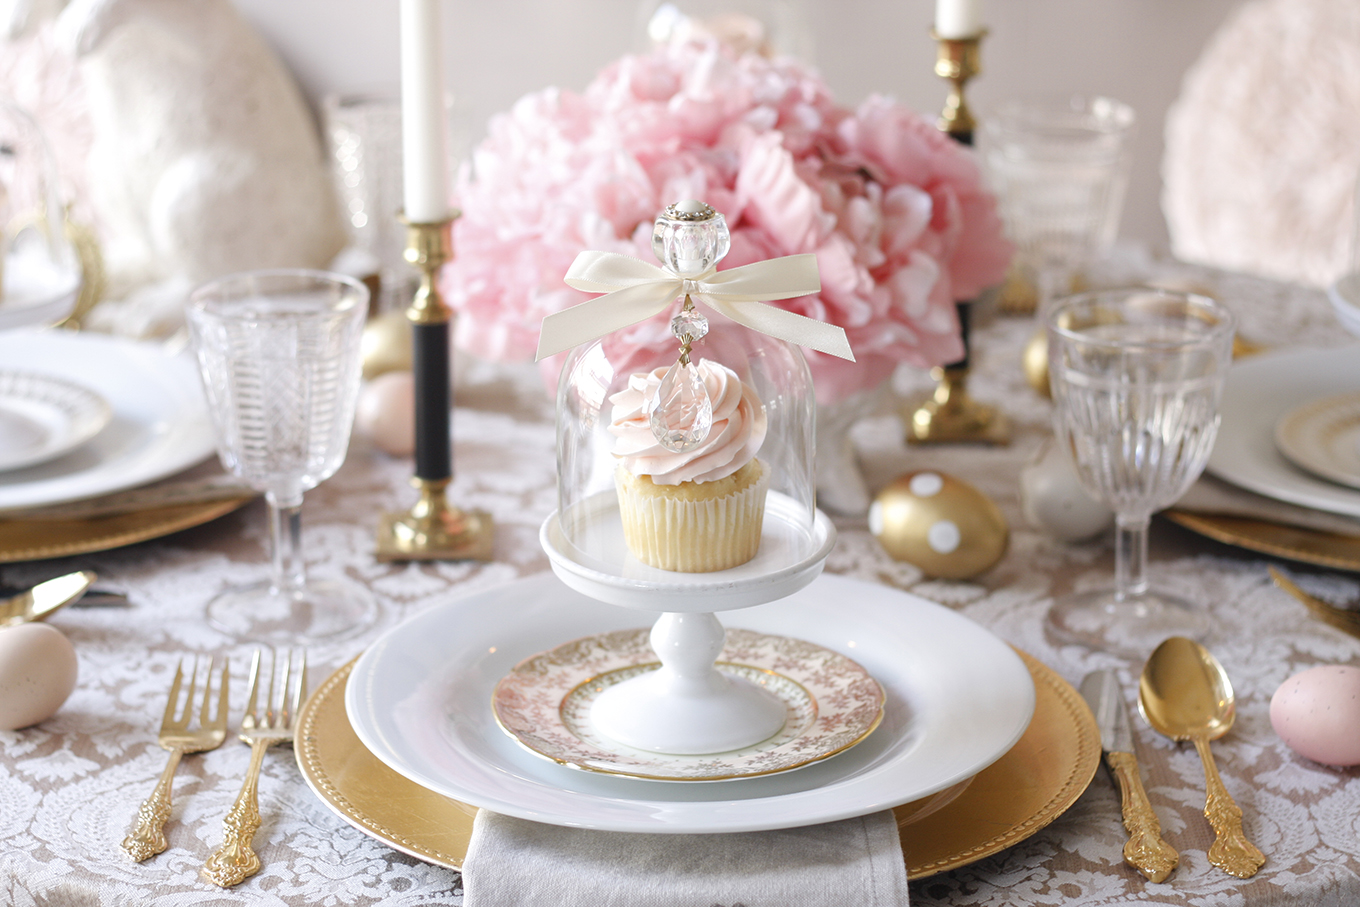
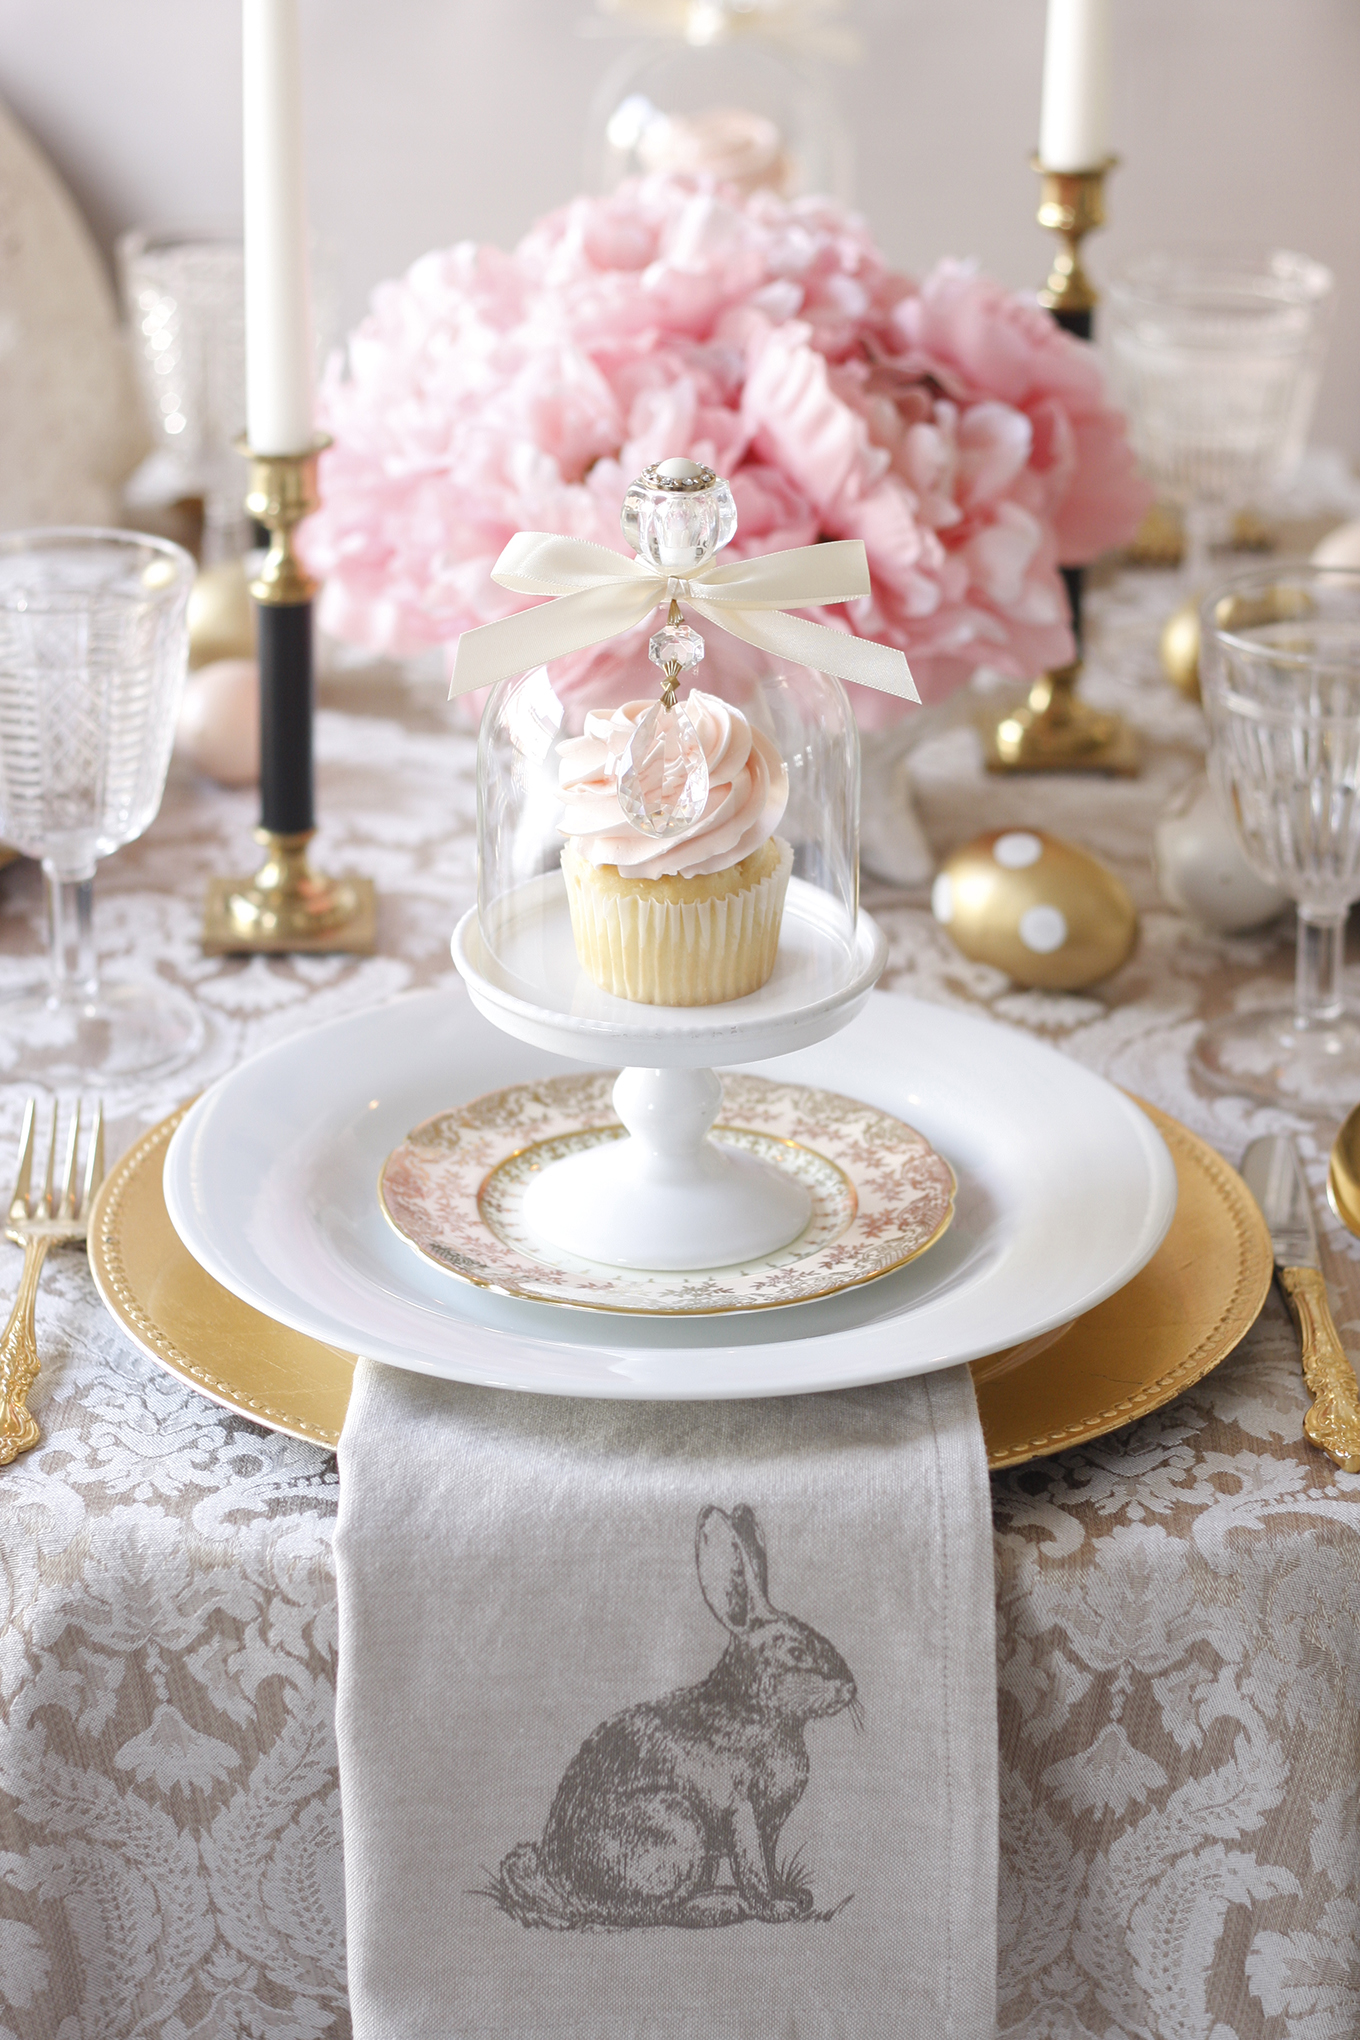
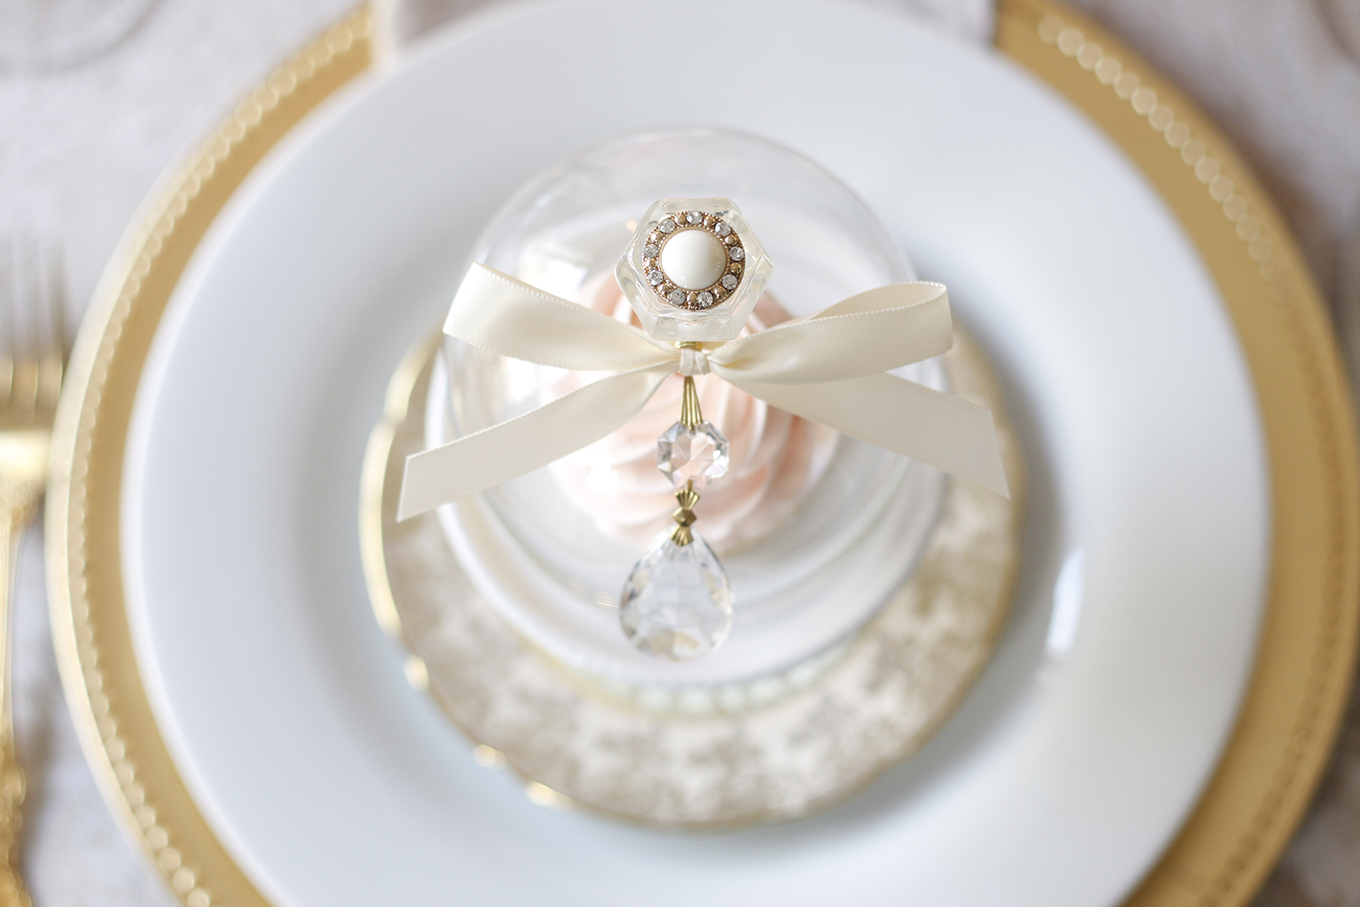
The winners for Rosanna’s Tablescape Contest have now all been announced. I did not place in the top 3 but was lucky to receive the only Honourable Mention and $50 gift card. Thank you Rosanna! Looking forward to picking out something special on rosanna.com. I truly loved creating this tablescape and can’t wait to celebrate Easter in a few weeks! Here was my submission:
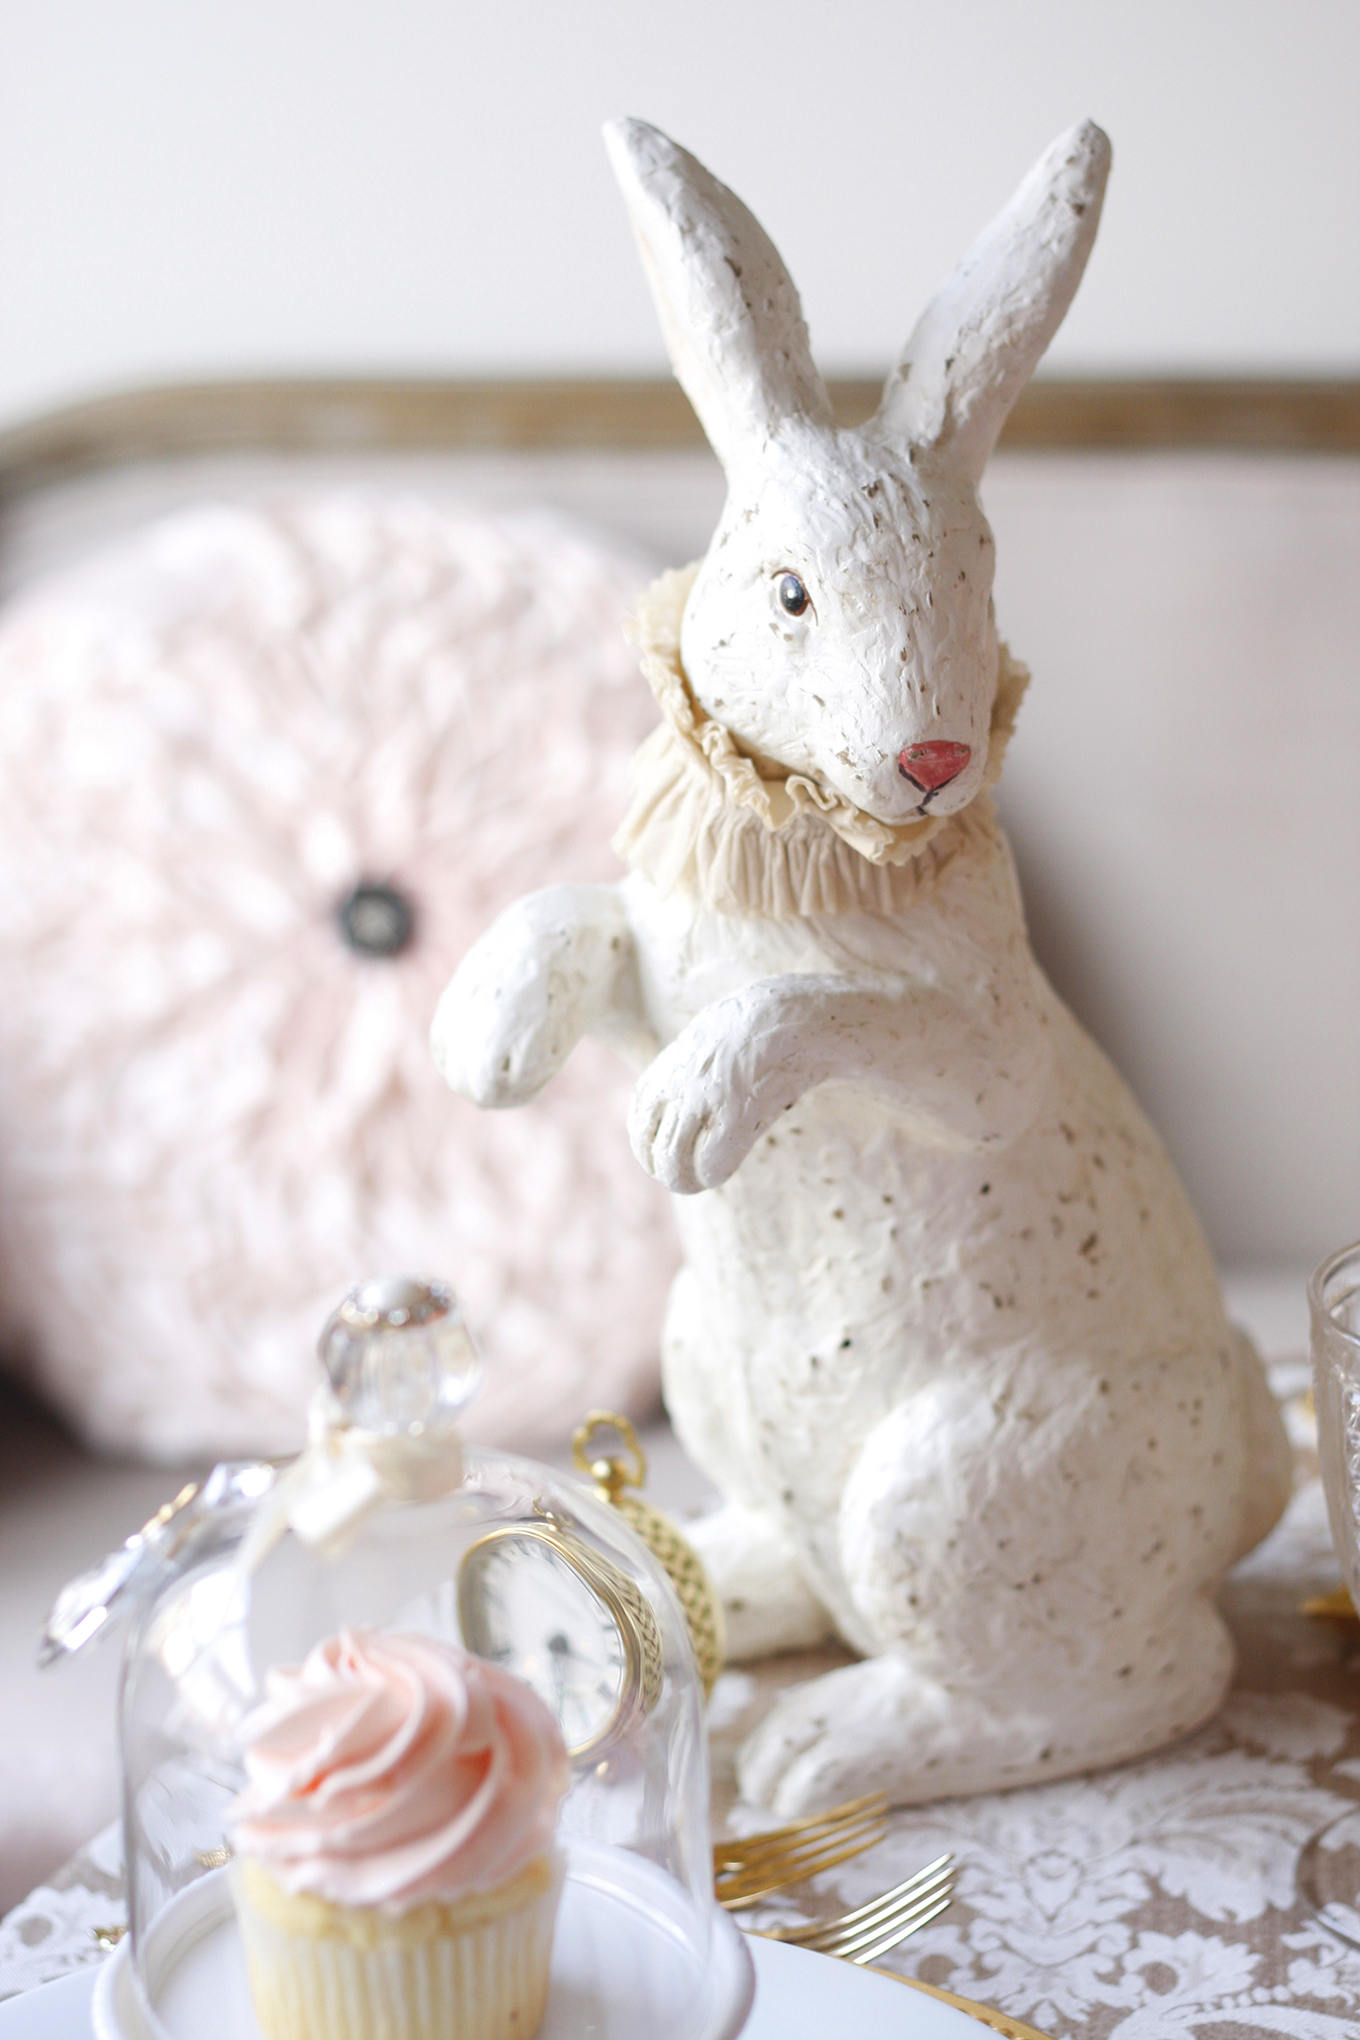
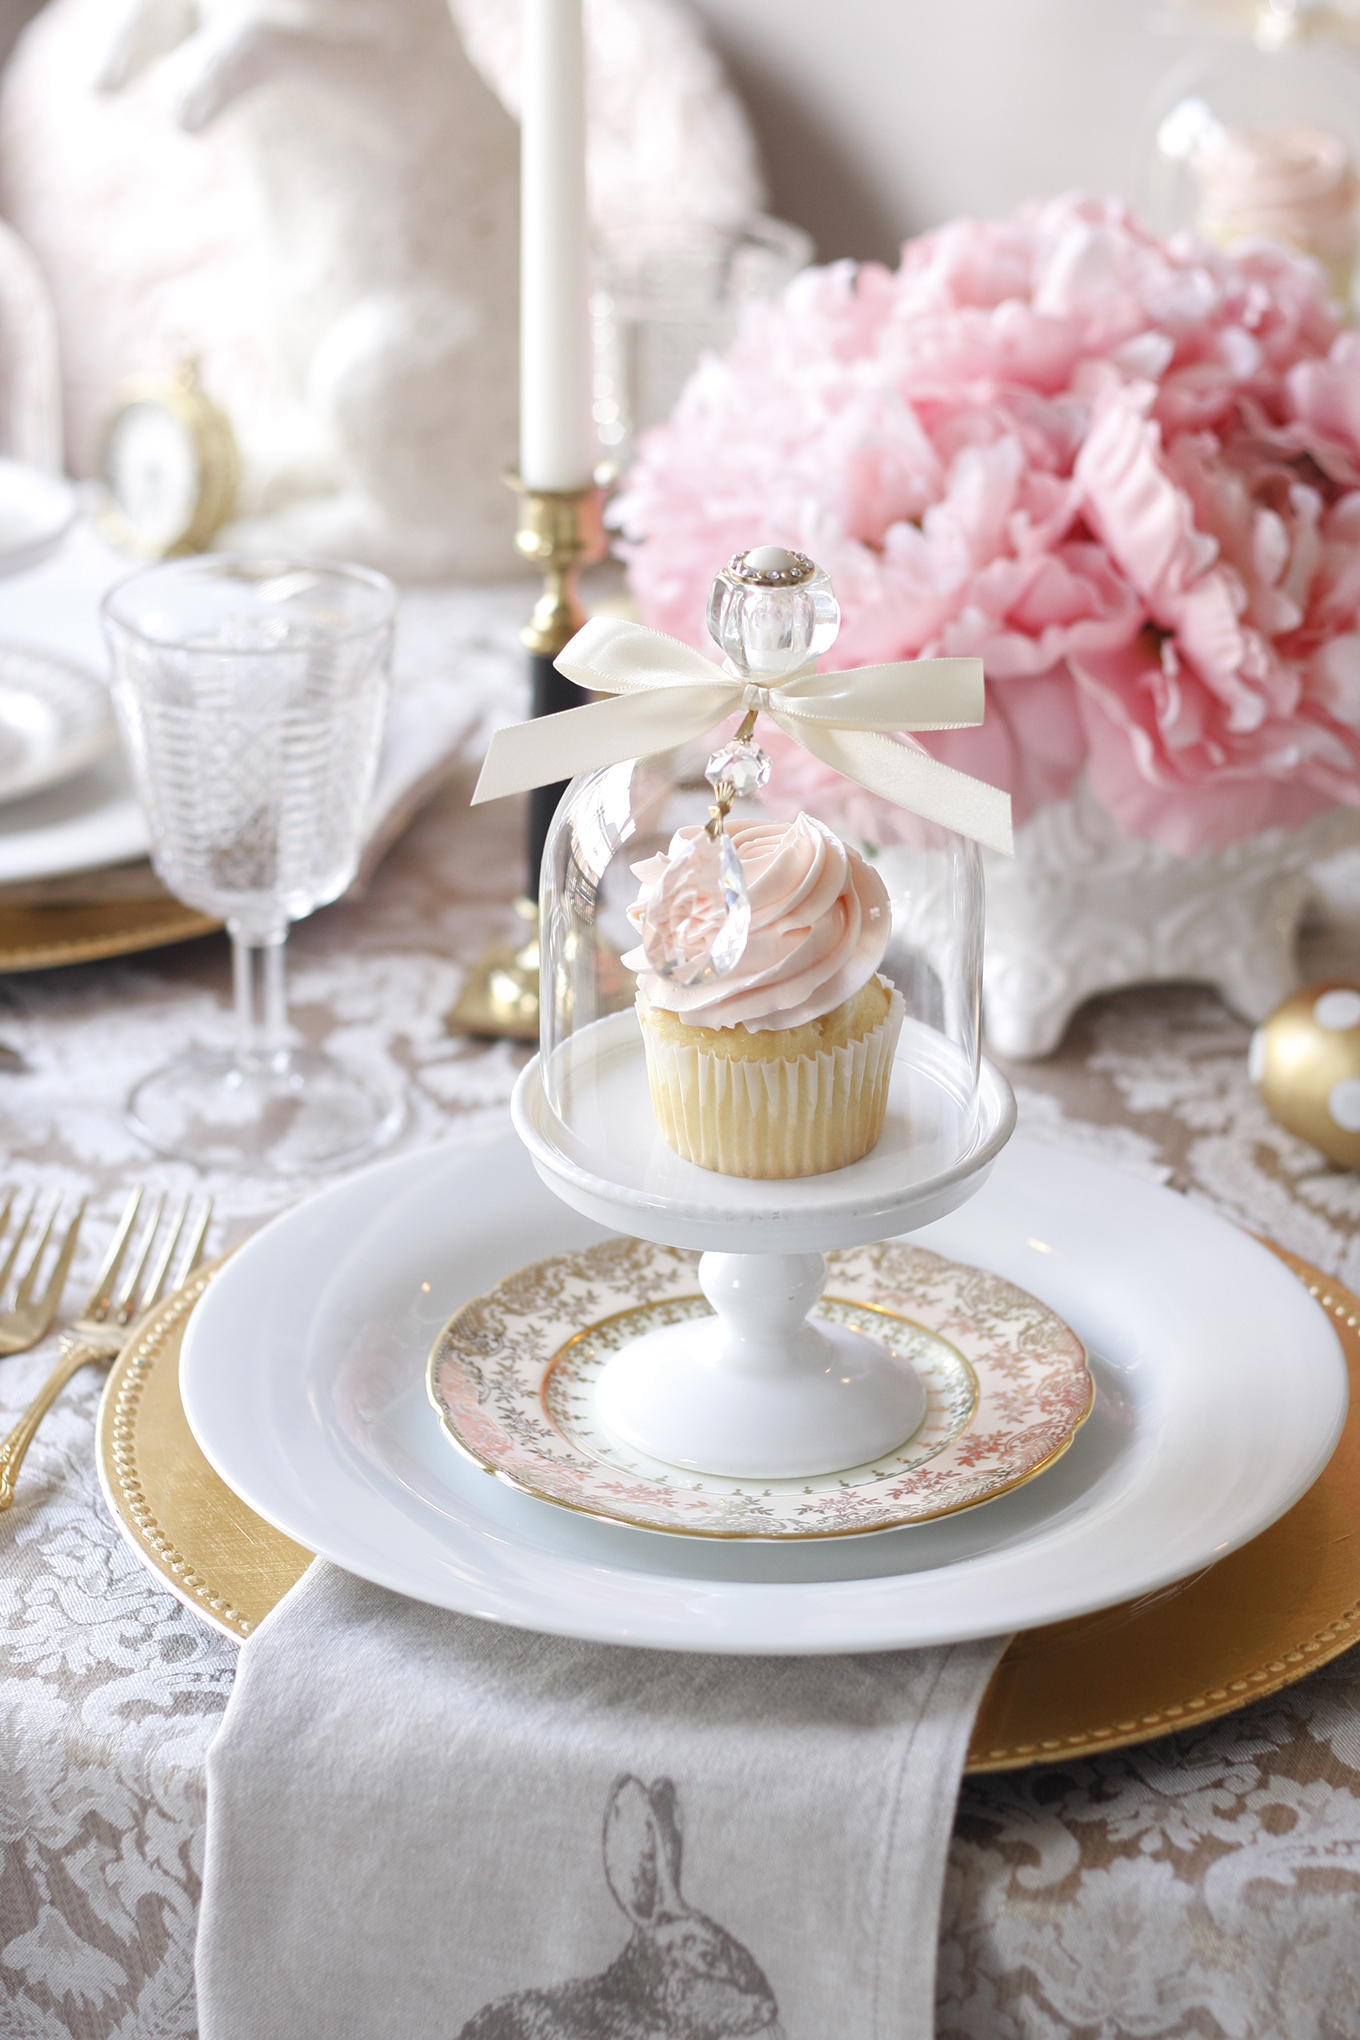
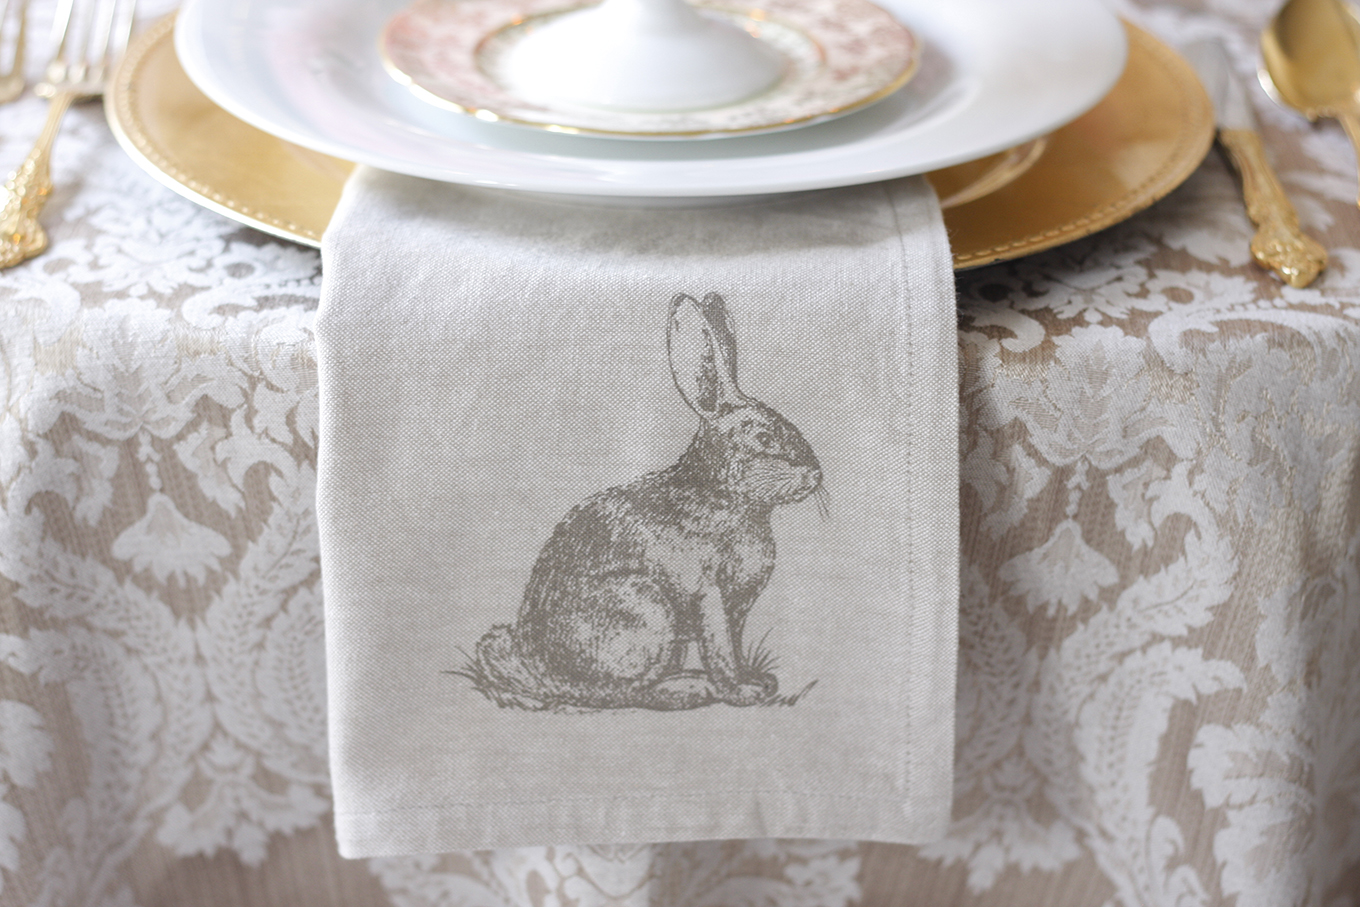
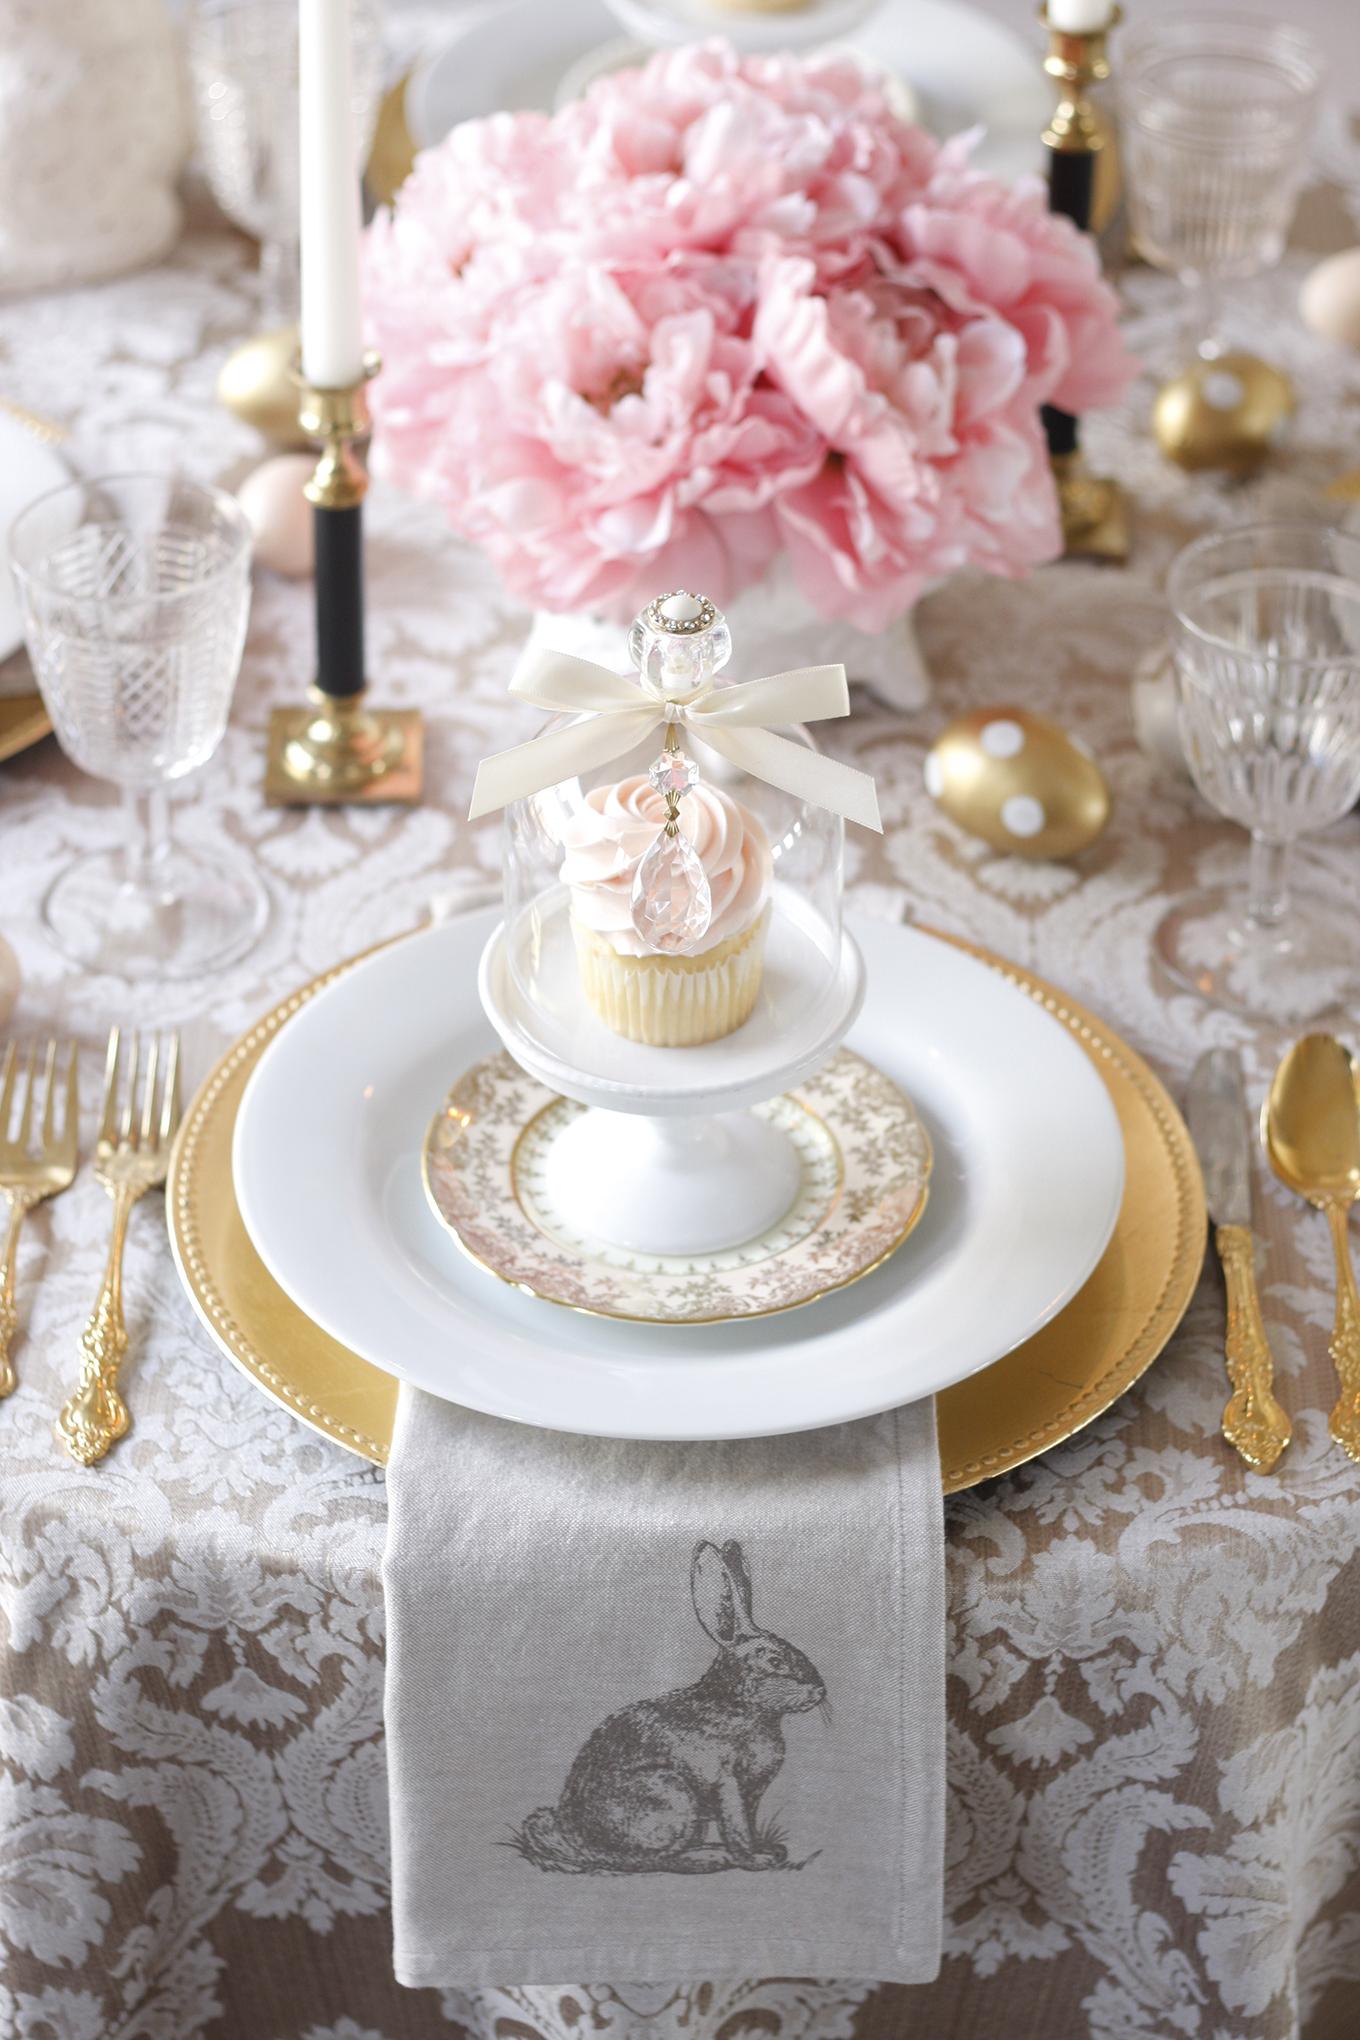
“My inspiration of an Easter-theme table for my girlfriends to celebrate Easter with a weekend brunch features our favorite furry animal — bunny rabbits! An image of a bunny is featured on the gallery wall, linen napkins at each place setting and a life-sized rabbit figurine makes a whimsical visit to our table. Each guest is treated to a vanilla strawberry cupcake, which is displayed under a glass dome and elevated on a Rosanna Décor Bon Bon Hue Mini Pedestal stand. Decorated Easter eggs are sprinkled around the table for a final special touch.”