https://blog.weddingstar.com/get-the-look-poppers-3-ways/
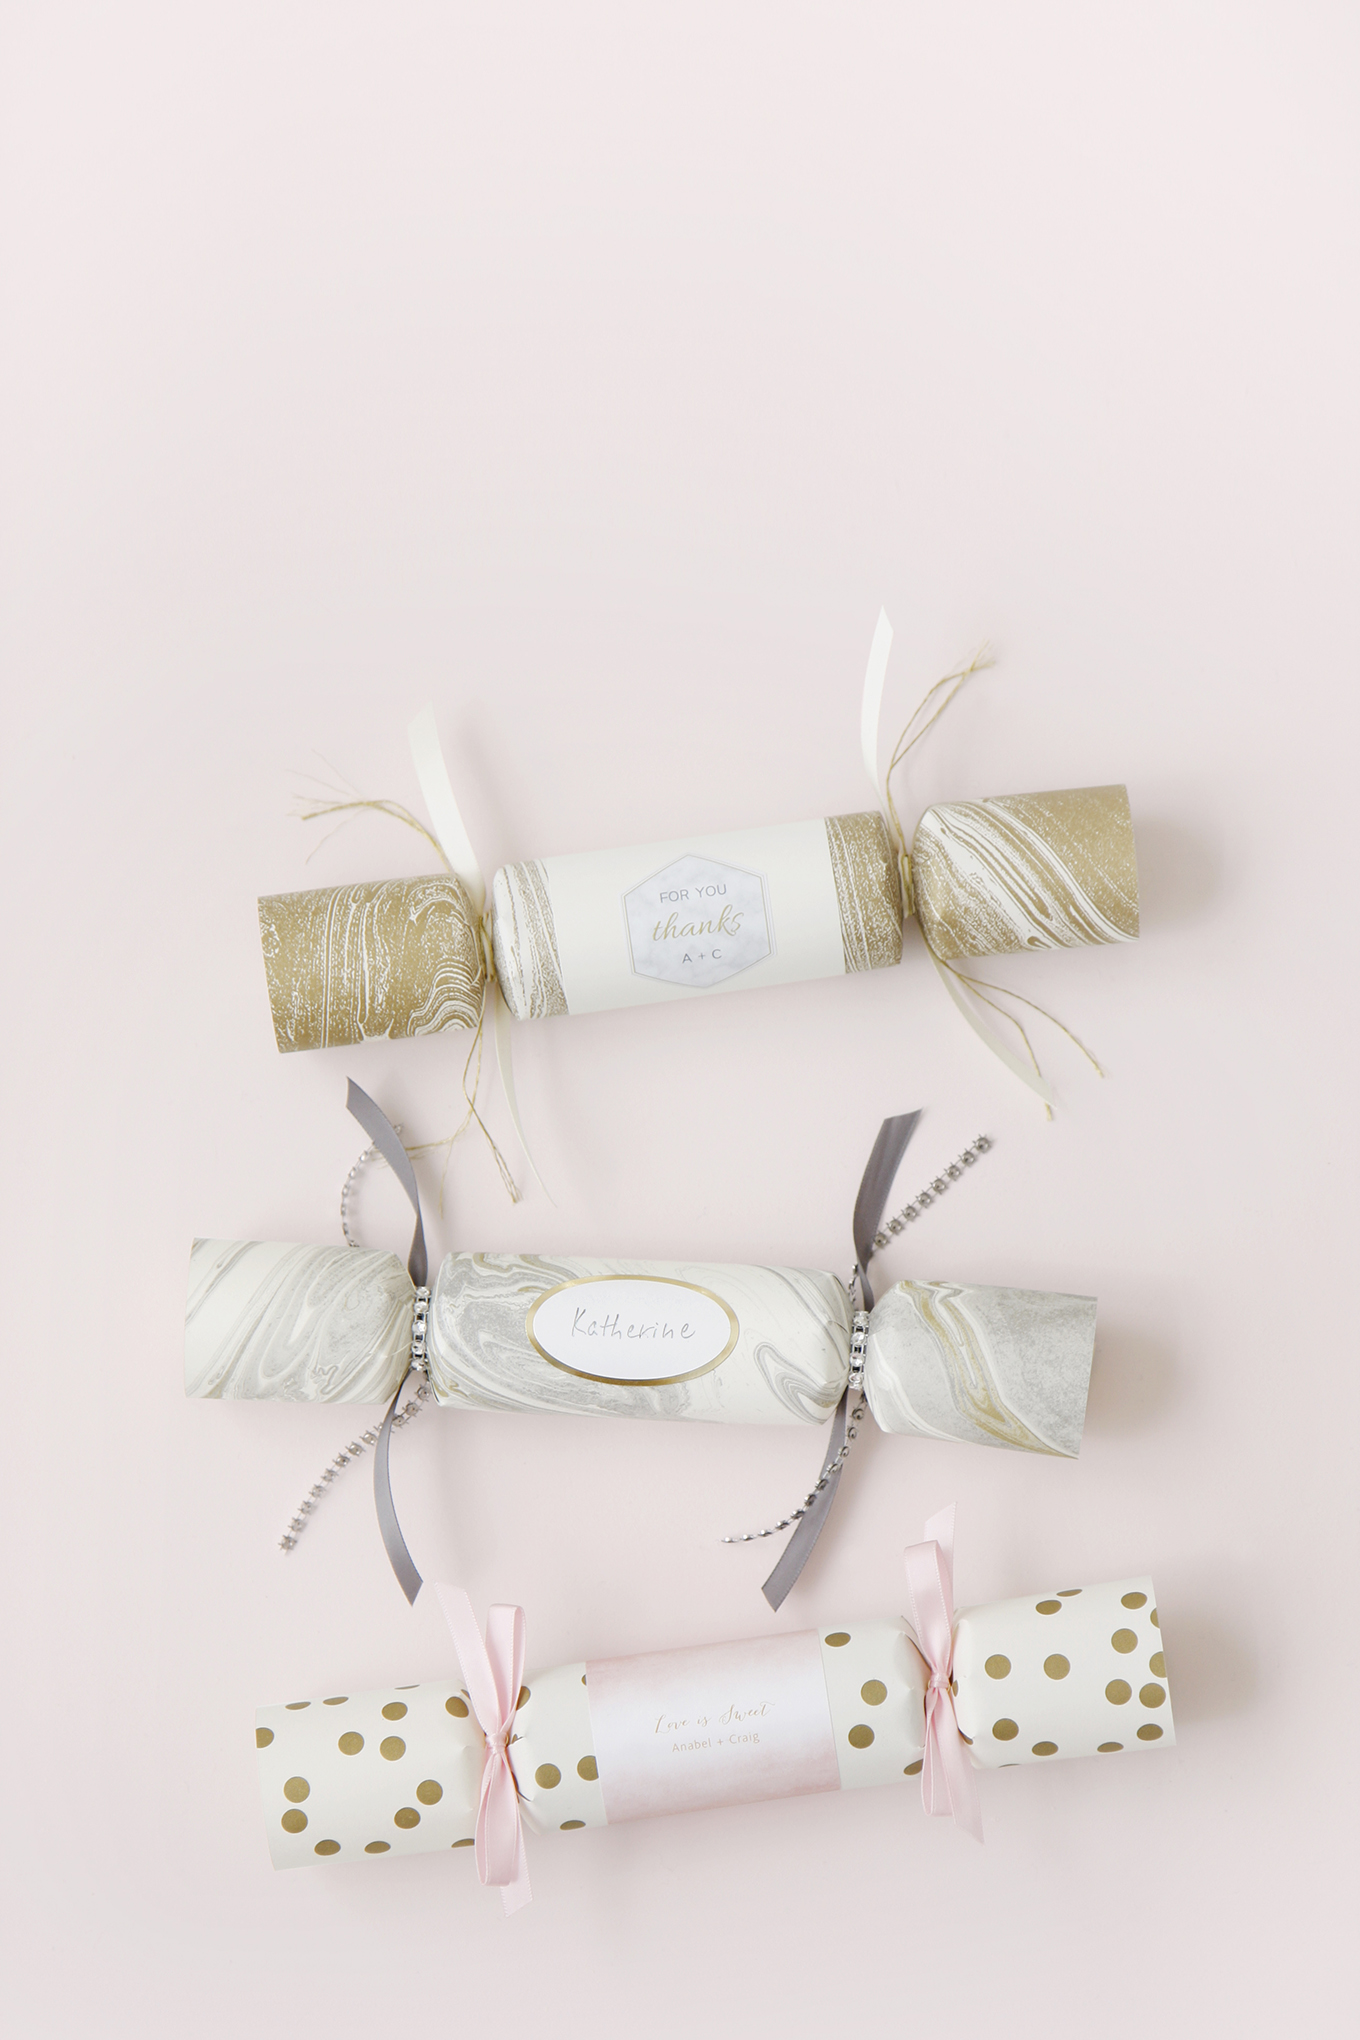
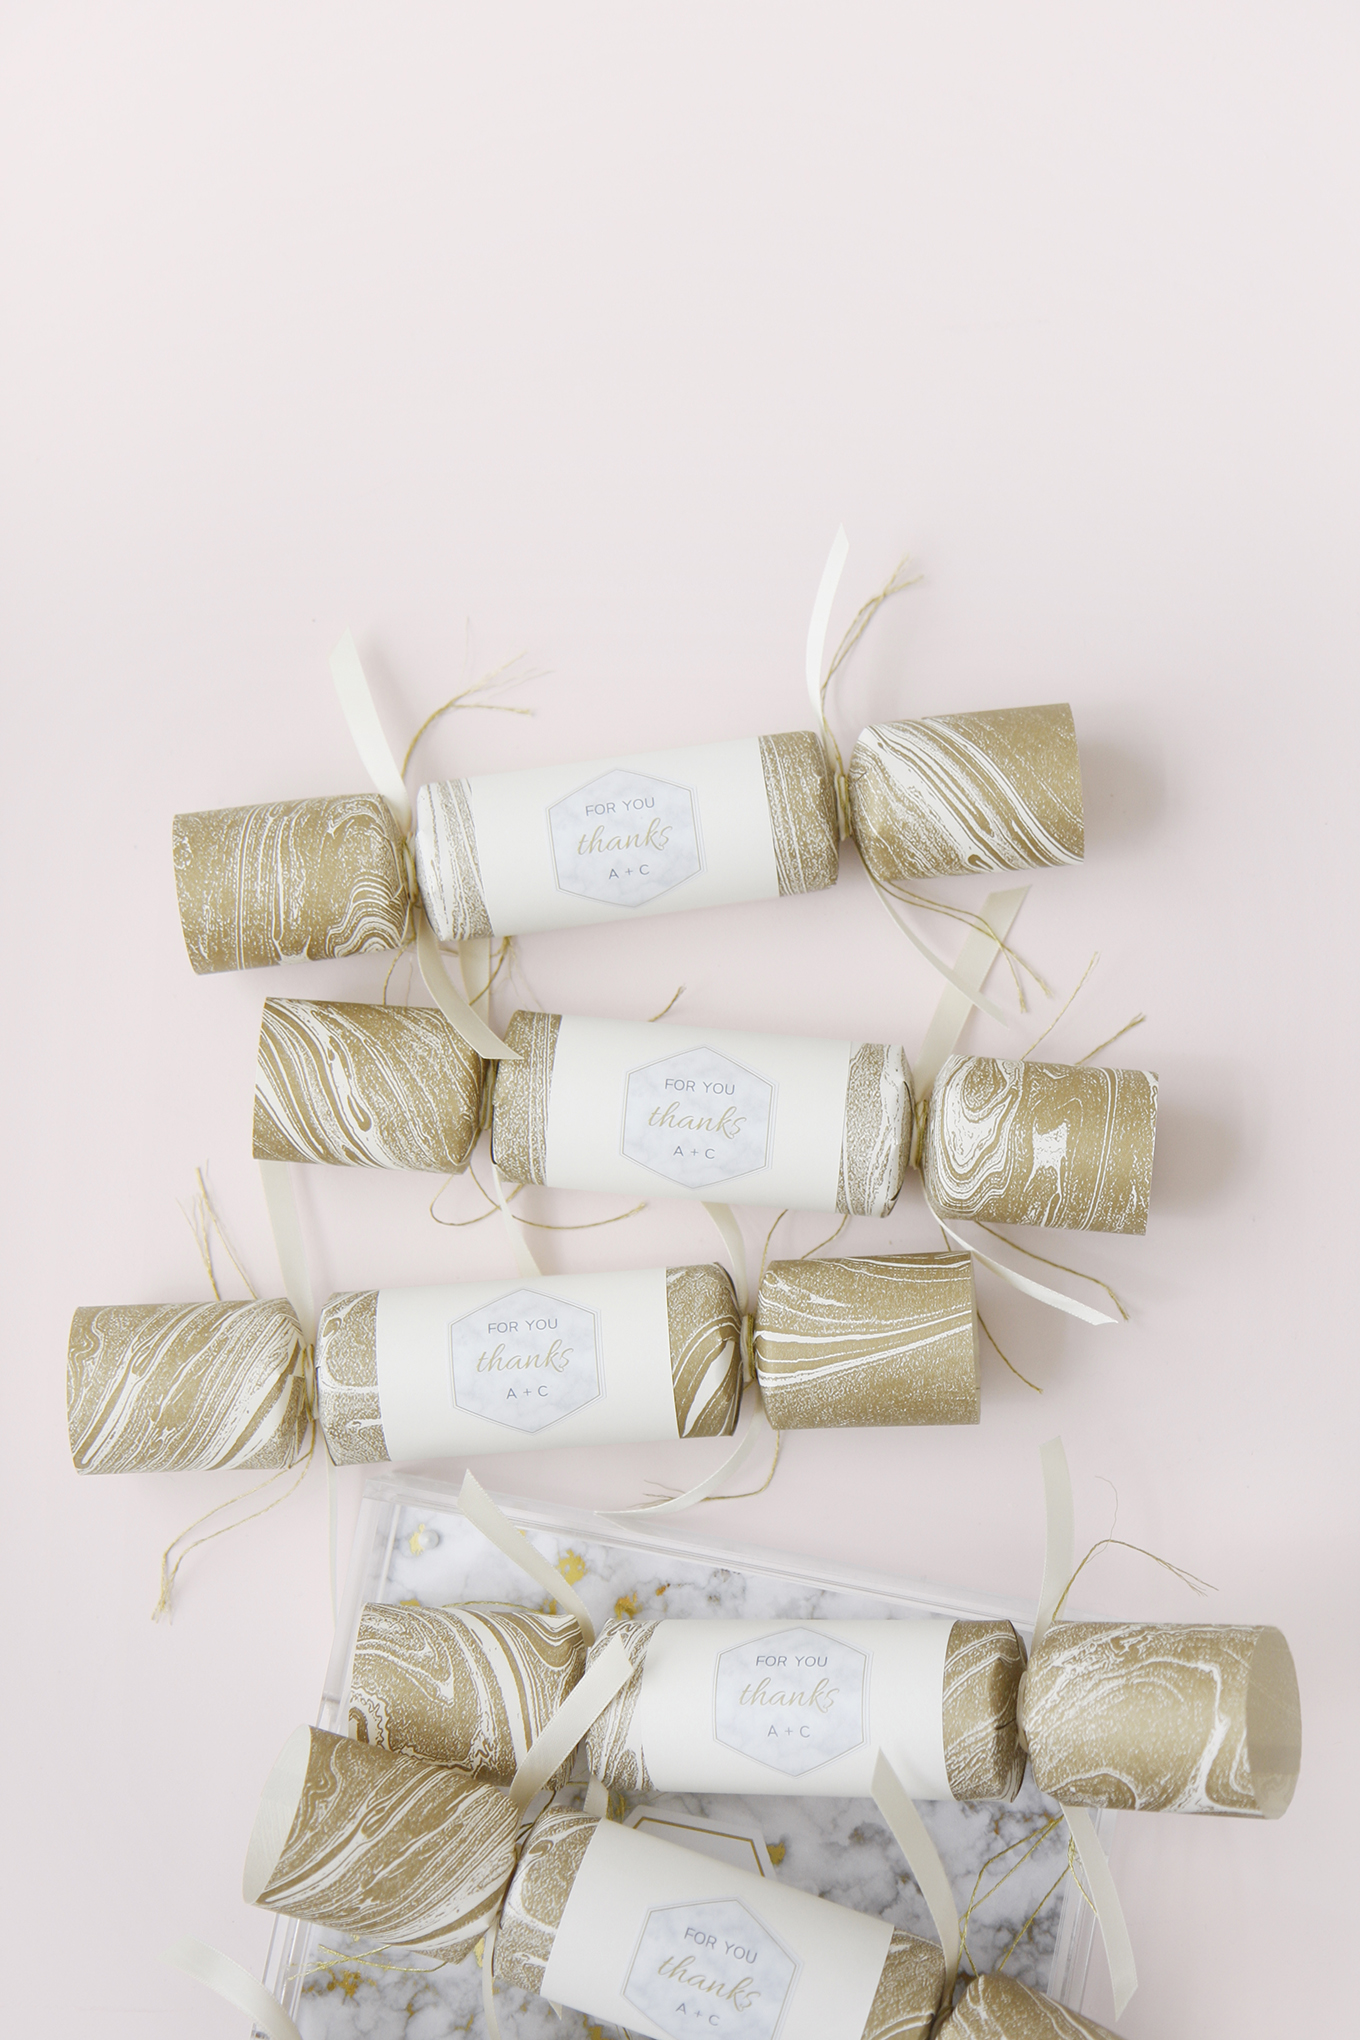
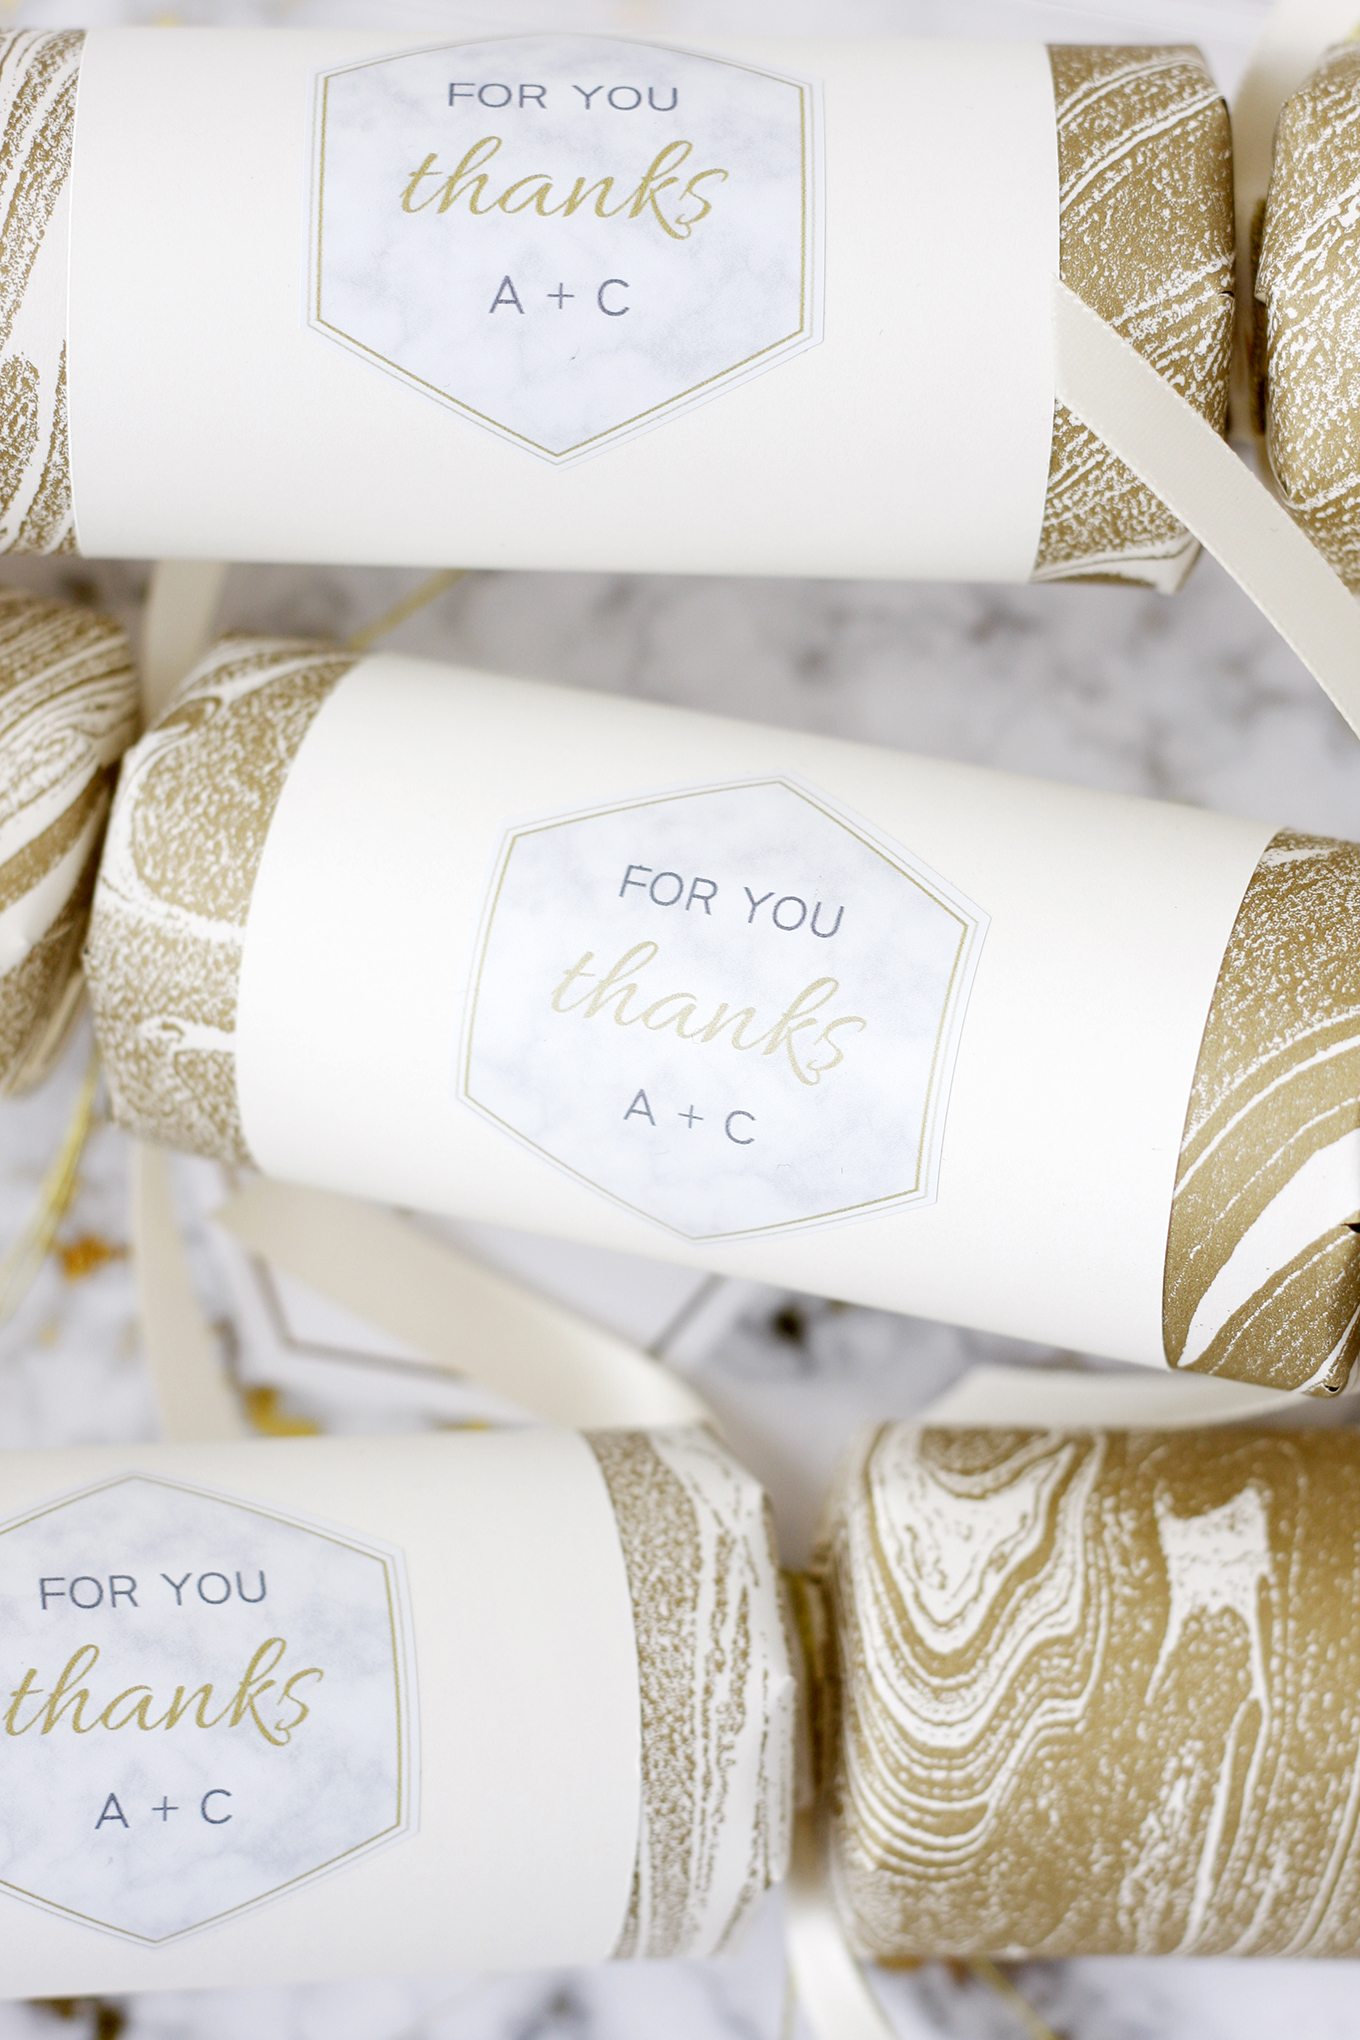
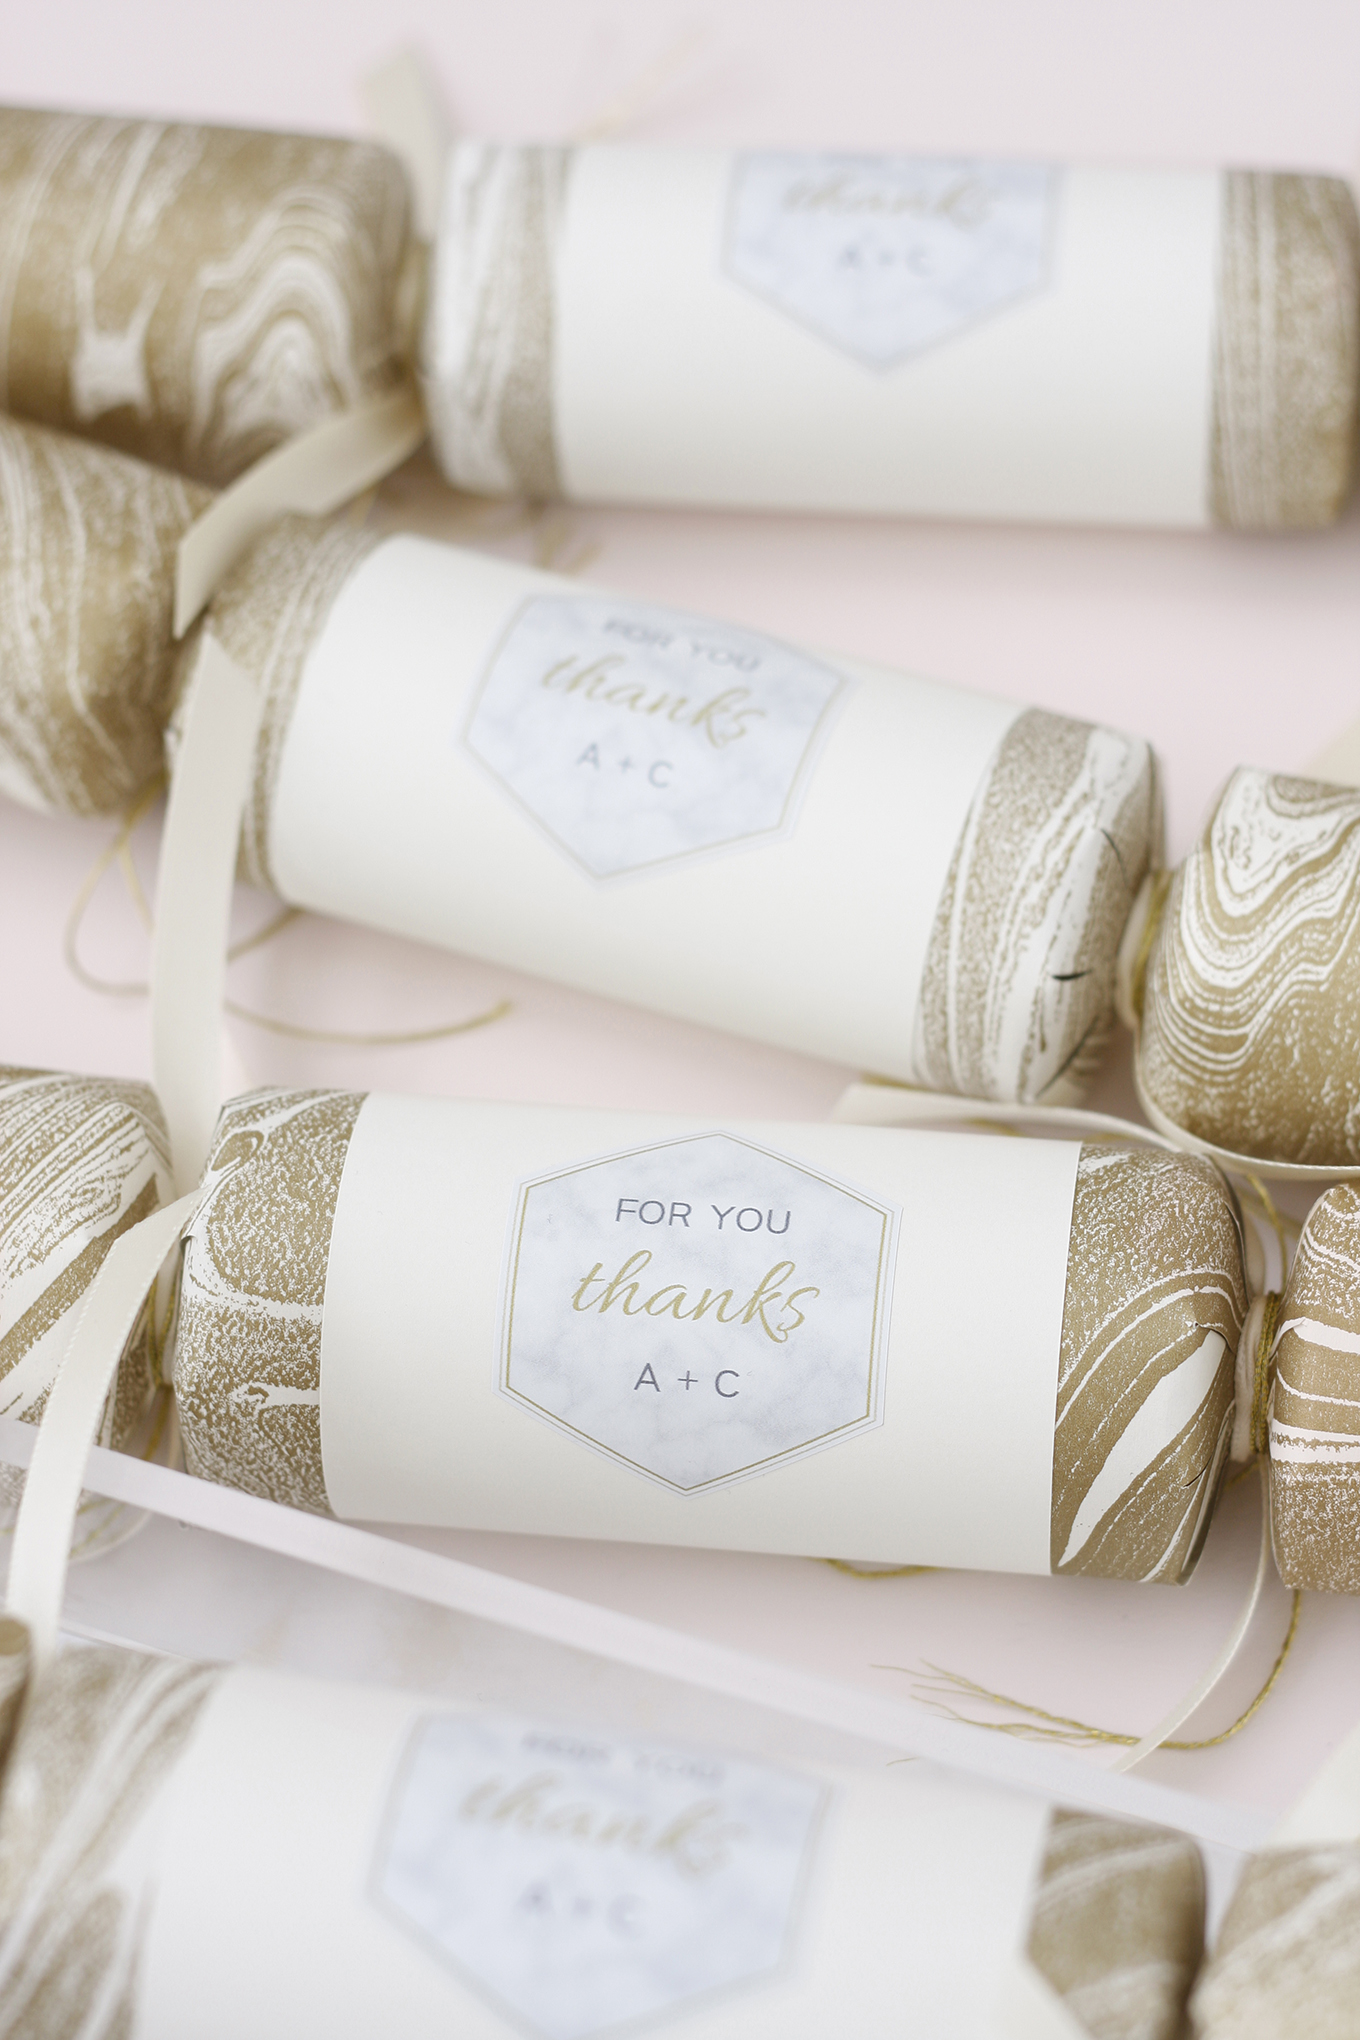
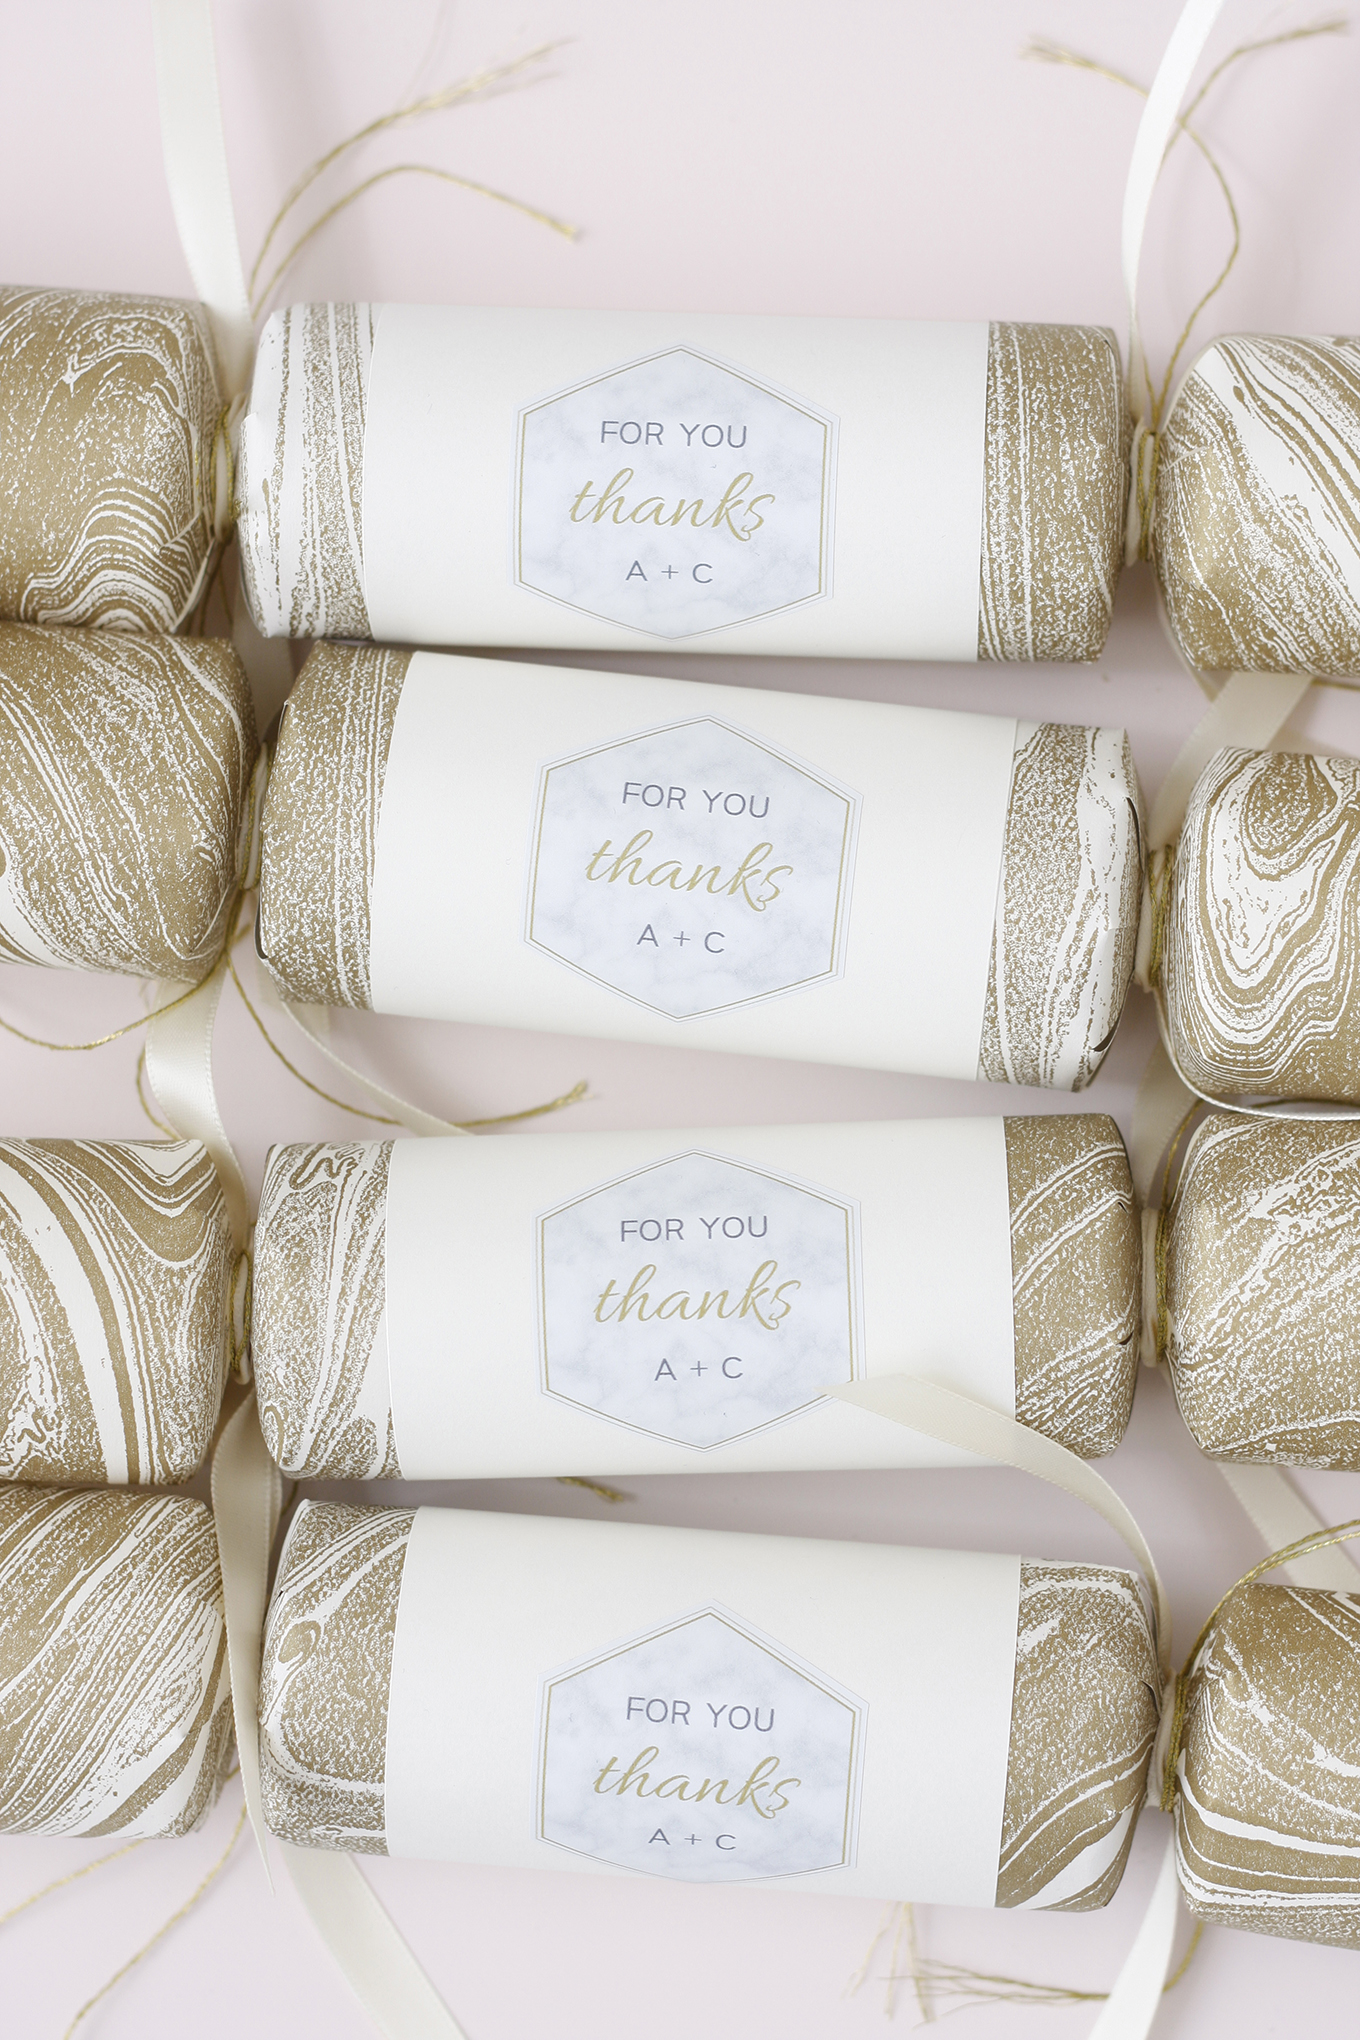
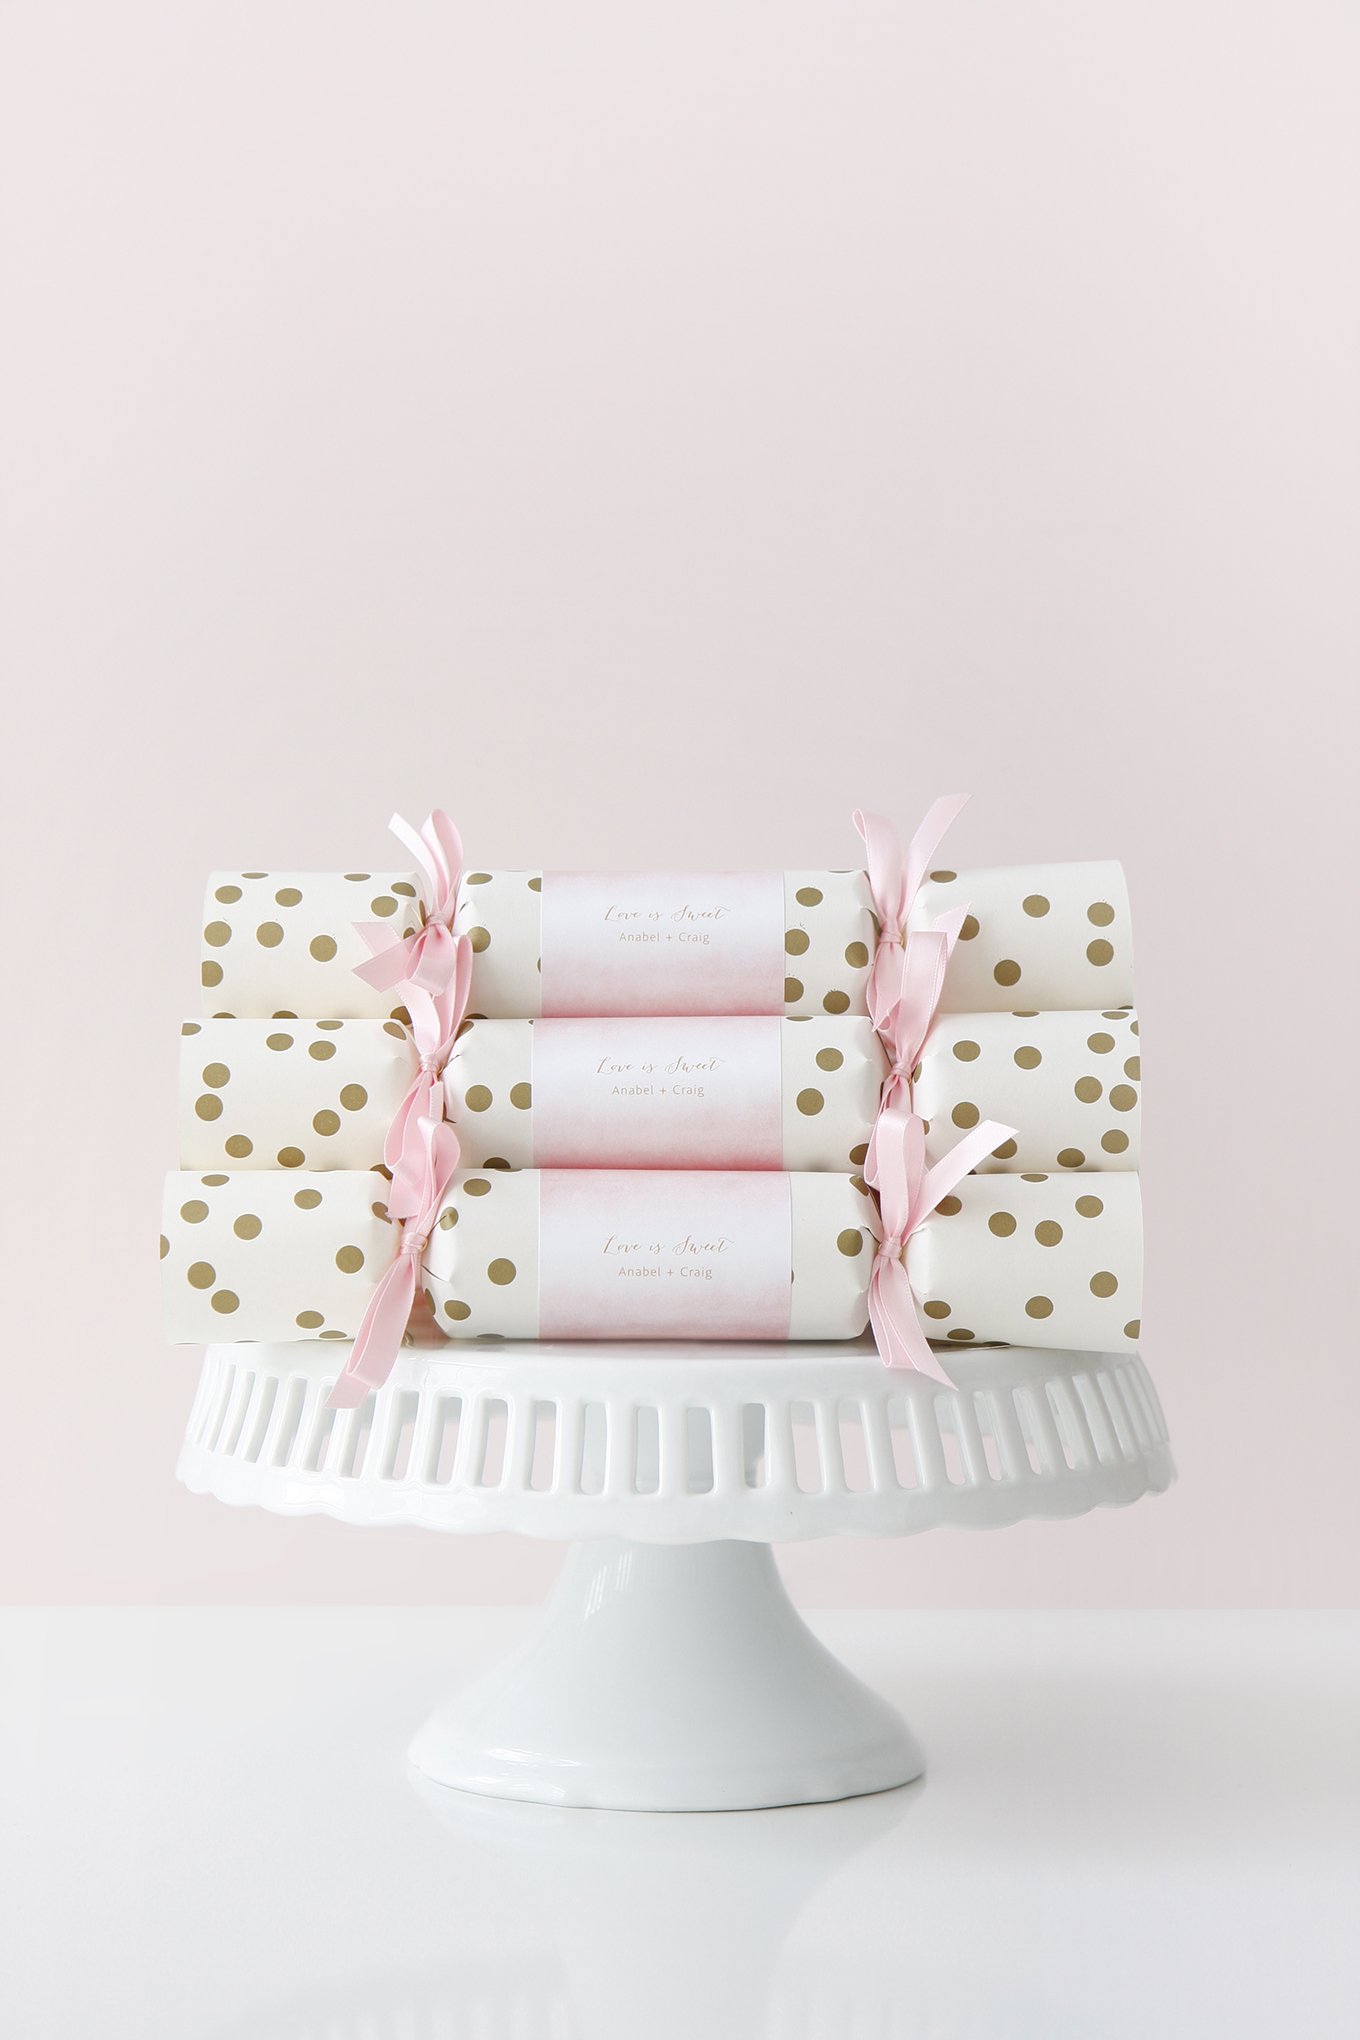
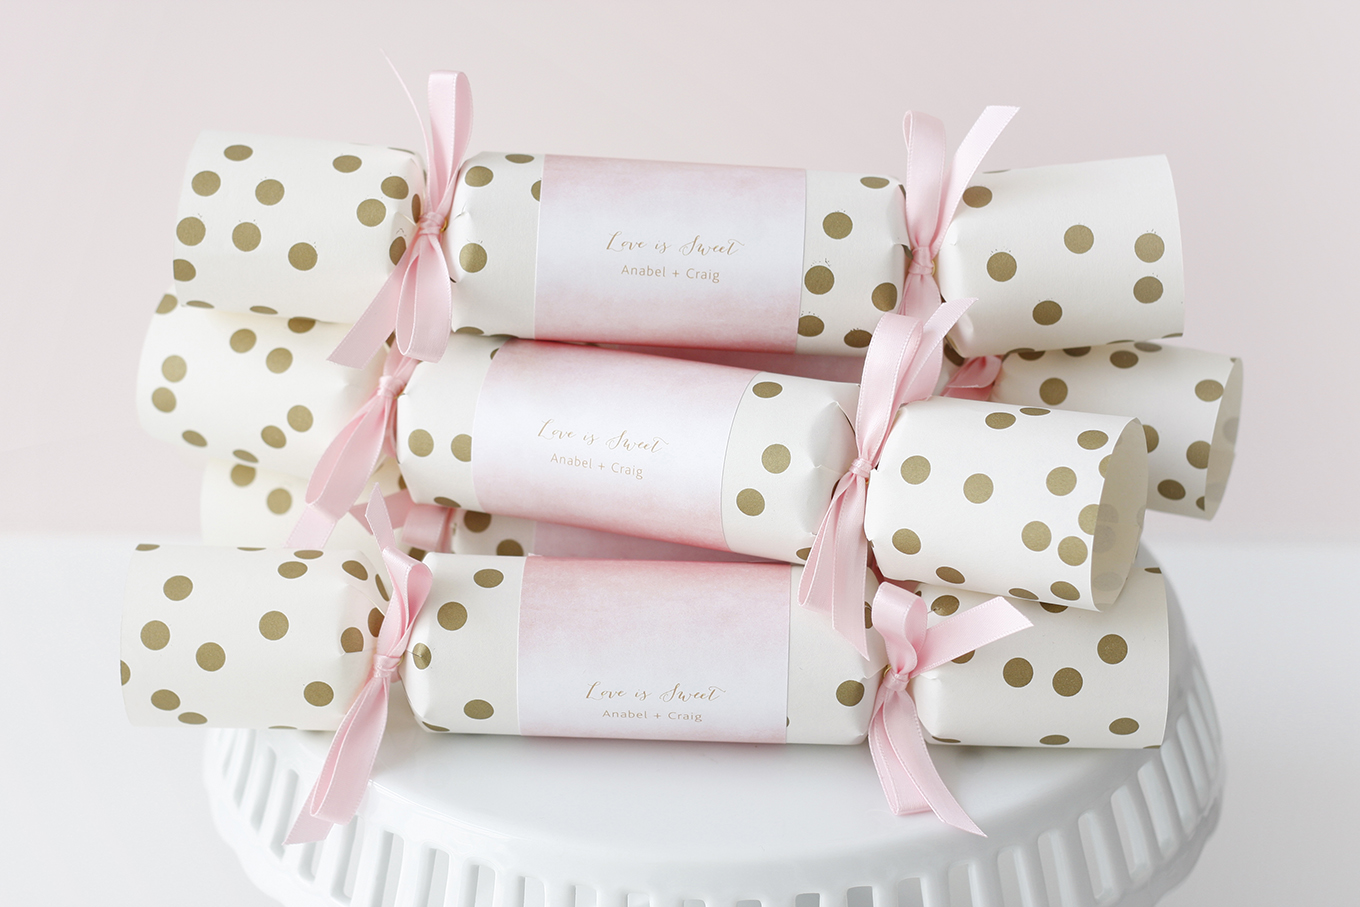
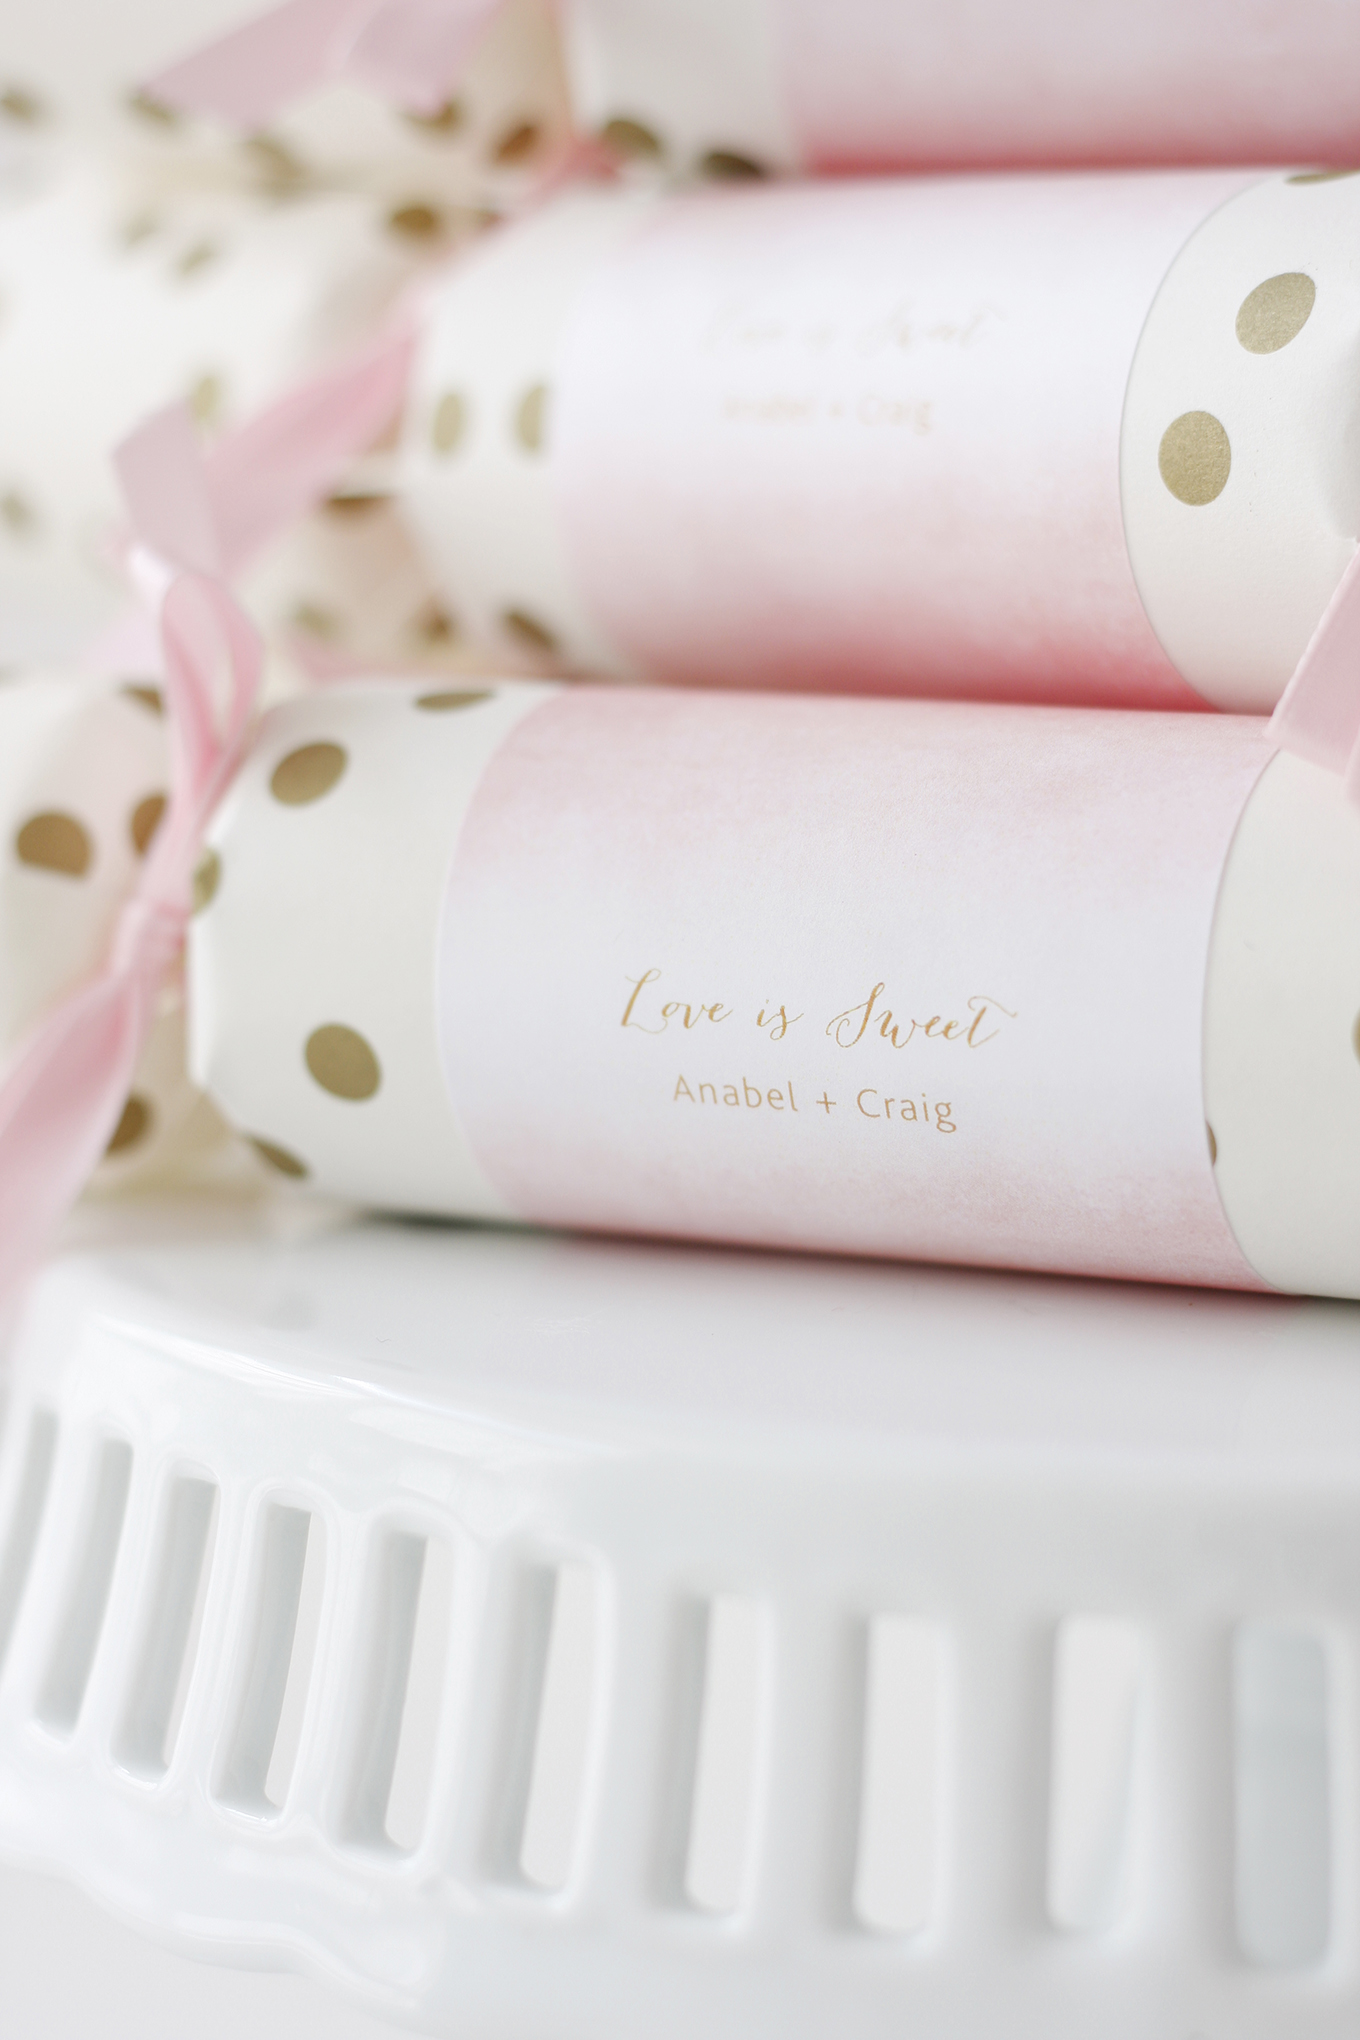
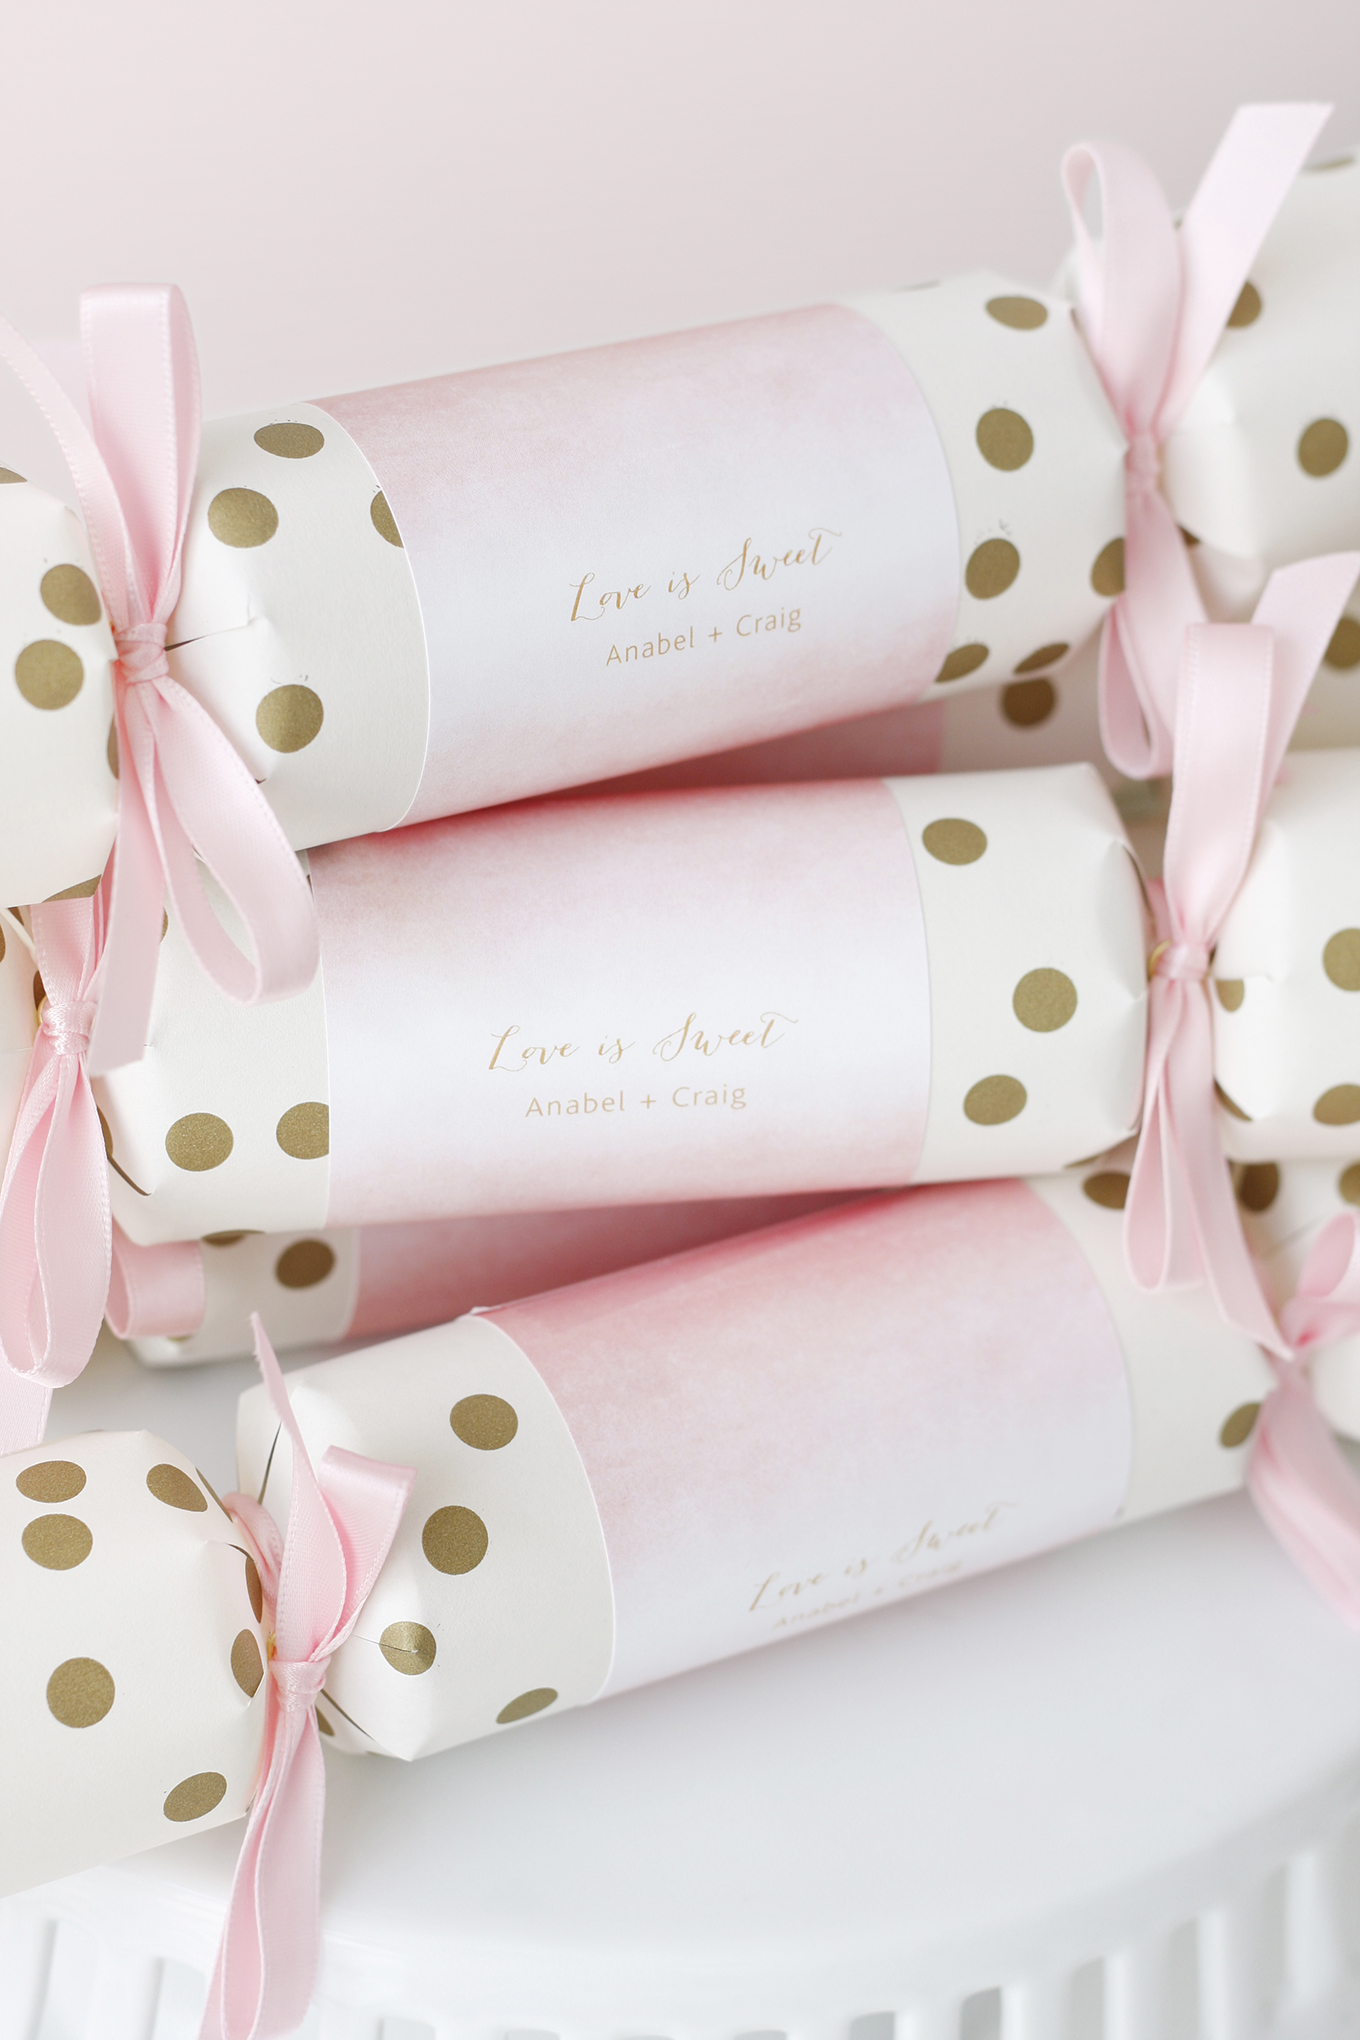

https://blog.weddingstar.com/get-the-look-poppers-3-ways/
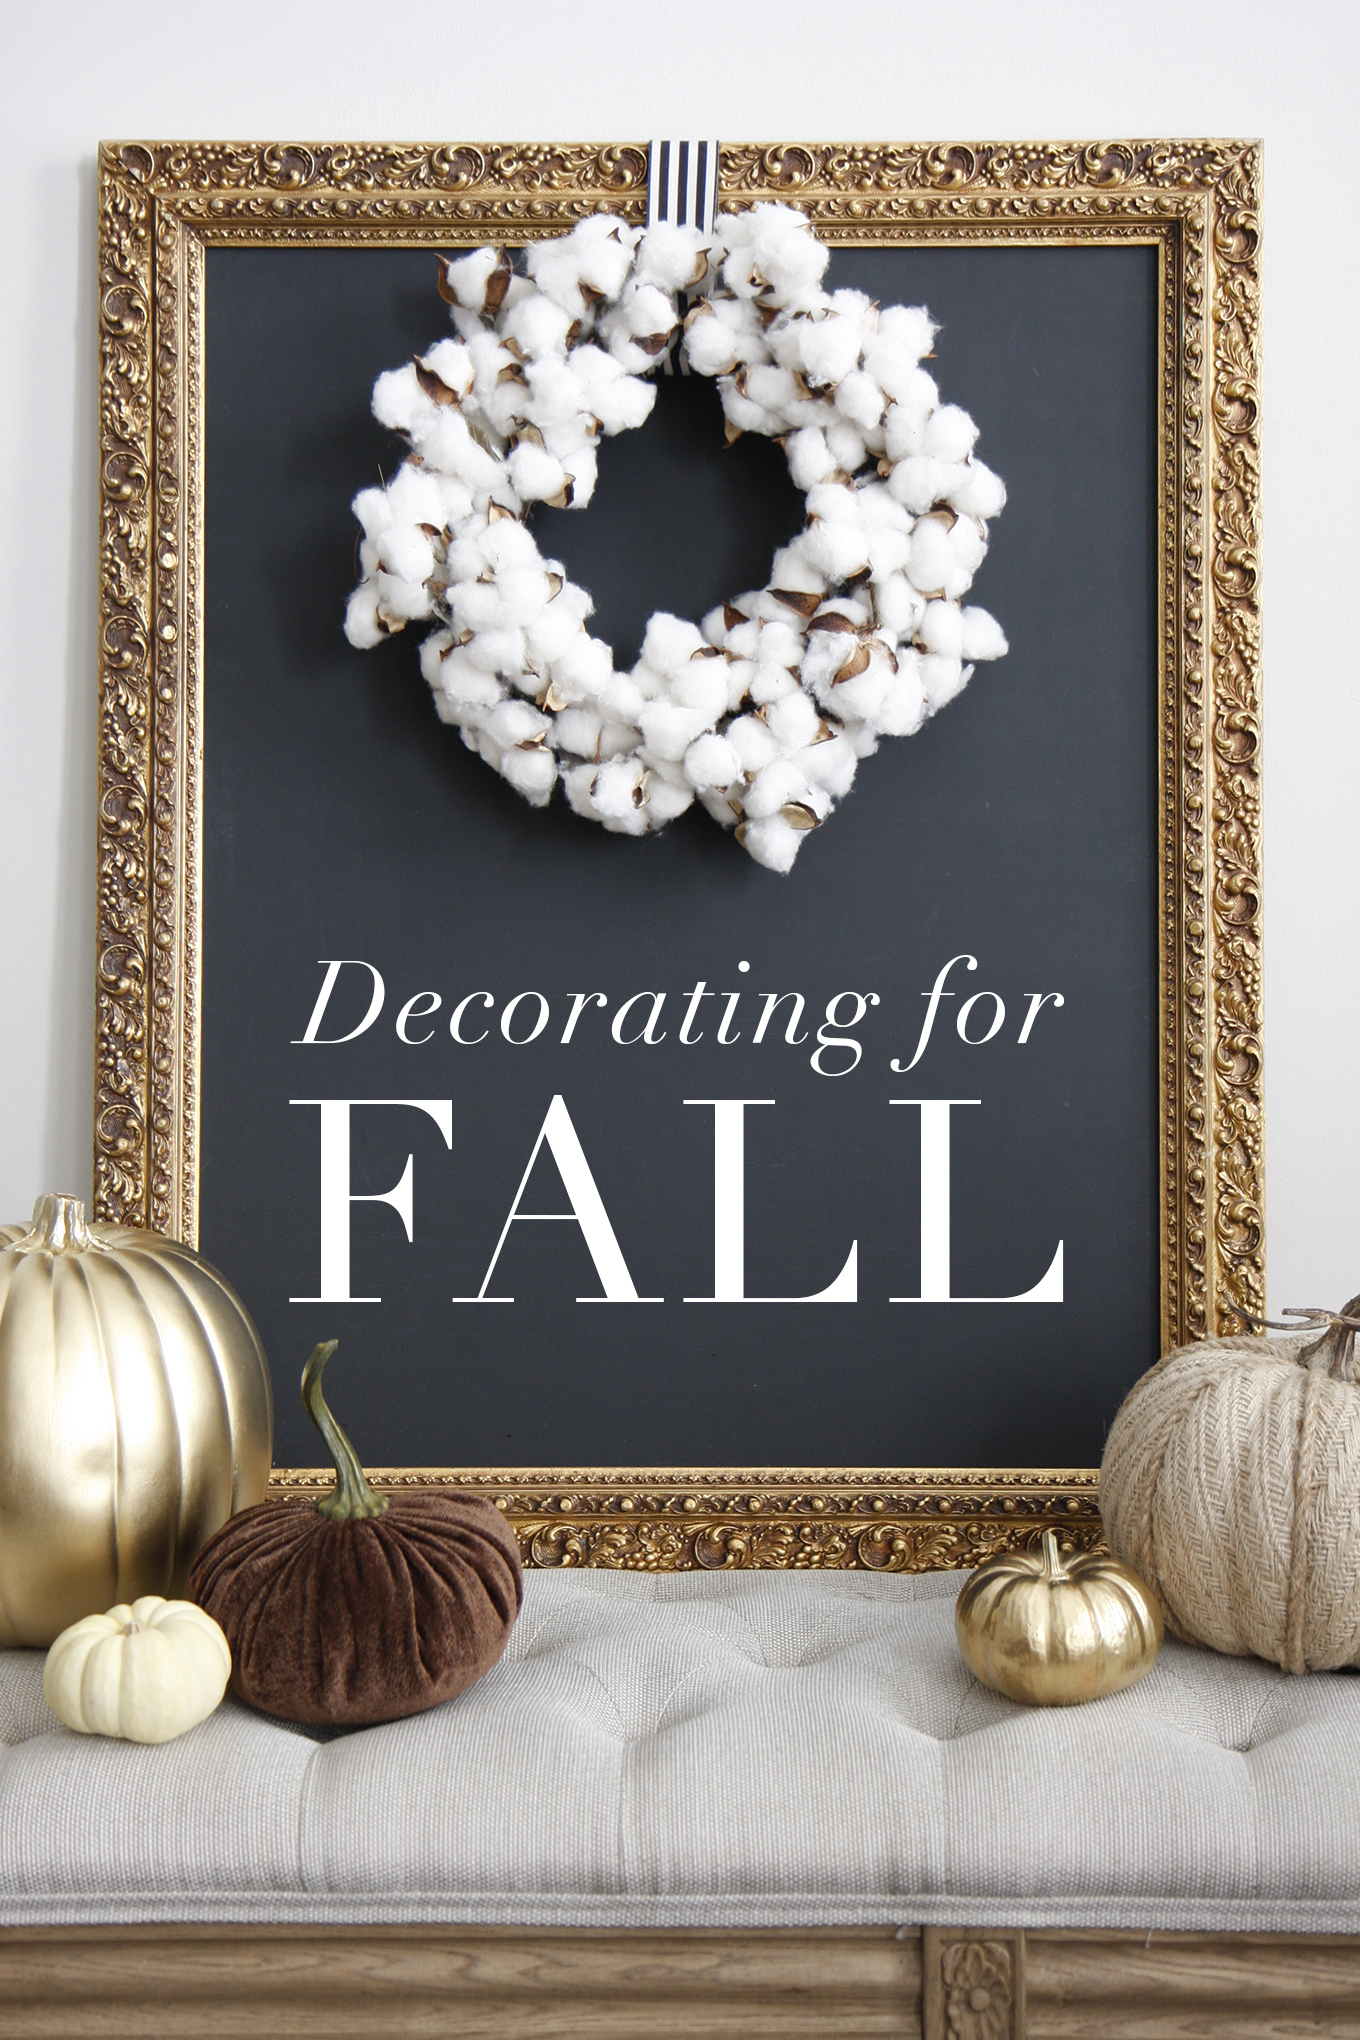
Fall is one of my favourite times of the year and it’s so easy and fun to decorate around the house. Bringing in aspects of nature like mini pumpkins, pinecones and wheat is both affordable and beautiful. Here are a few key ways that I decorated my house for Fall this year.
 Set the Table
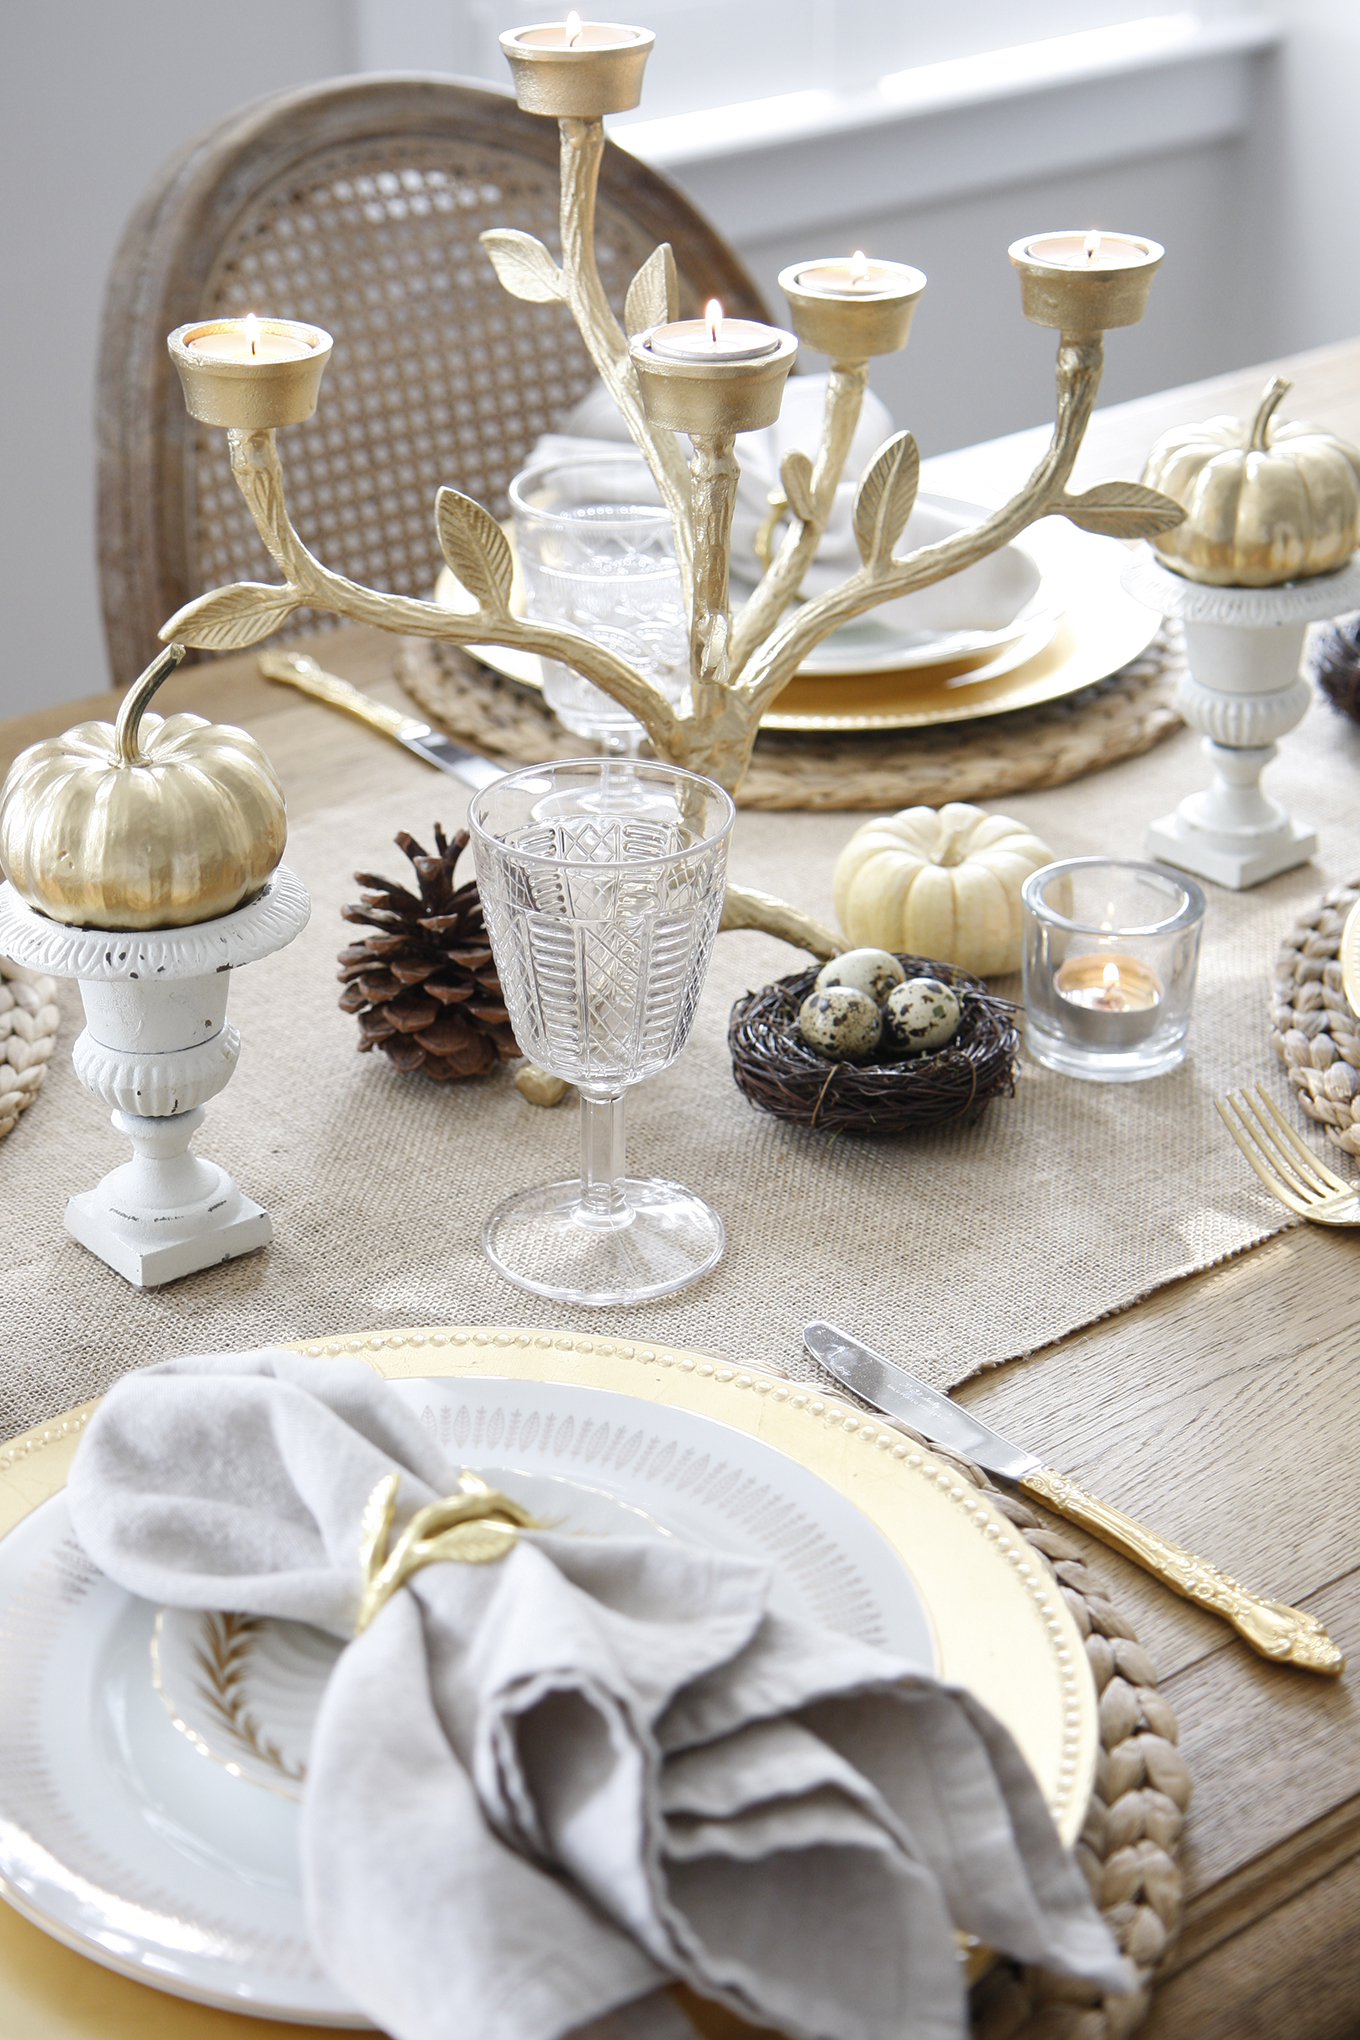
On the quest for a table runner for quite awhile now, I finally found the perfect one made of a burlap material. Yay! It provides a neutral colour and brings in just a bit of texture to the table. For my tablescape, I gathered items that I already had tucked away, like the pinecones and mini quail egg nests and only needed to purchase the mini pumpkins. I added some tea light candles and the table was set for a warm and inviting dinner with my family.
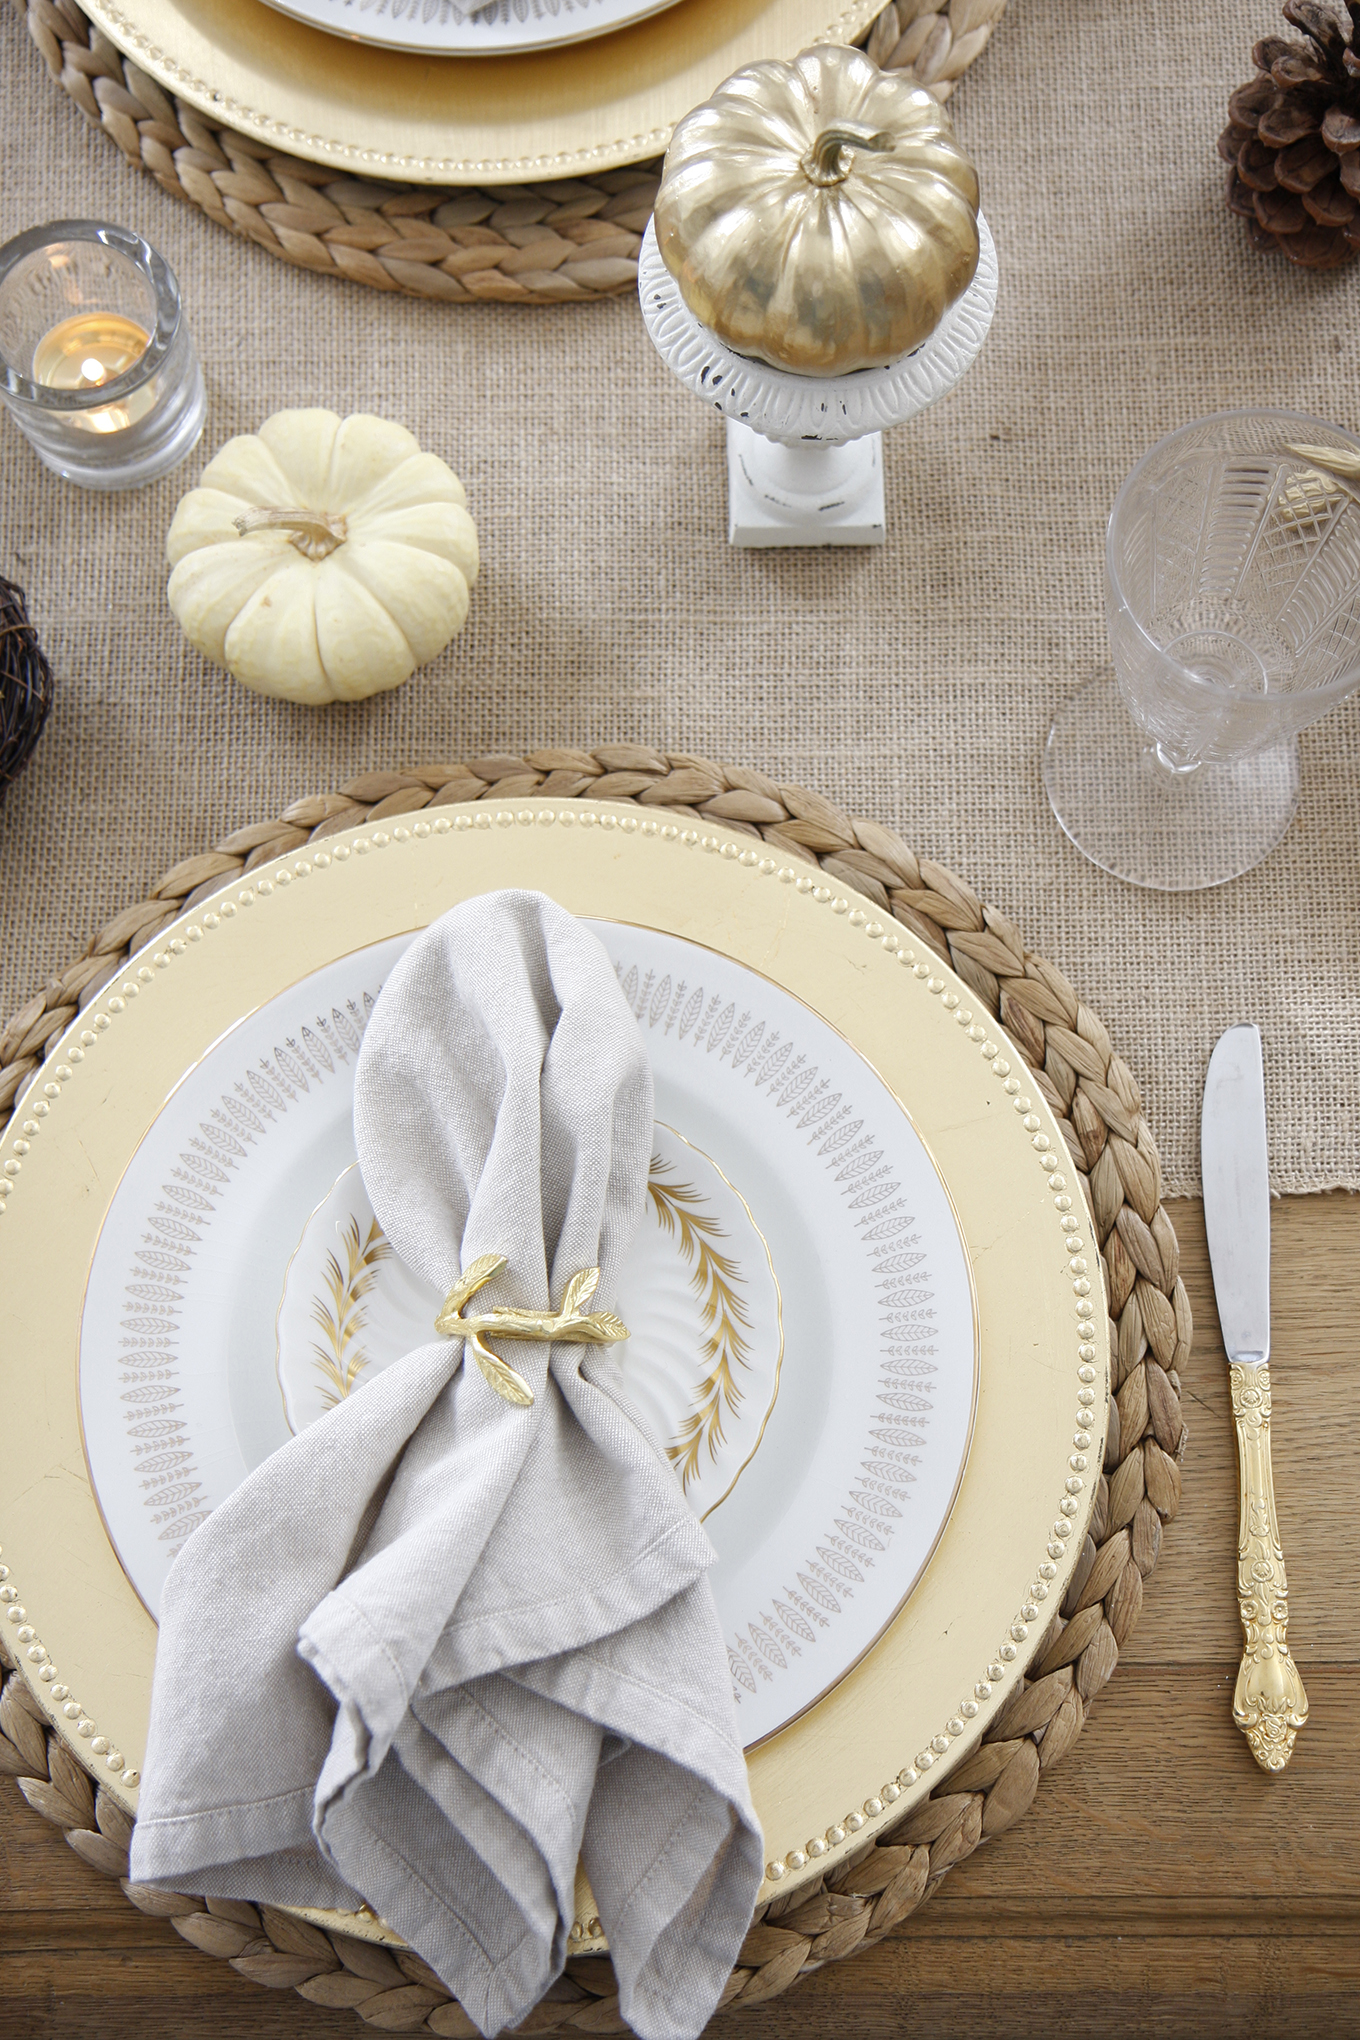
 I must confess, I have a fetish for urns of all sizes, and I was delighted to top these little white urns with mini pumpkins. I was only able to find a few white pumpkins so gold spray paint came to the rescue to glam up the orange pumpkins.
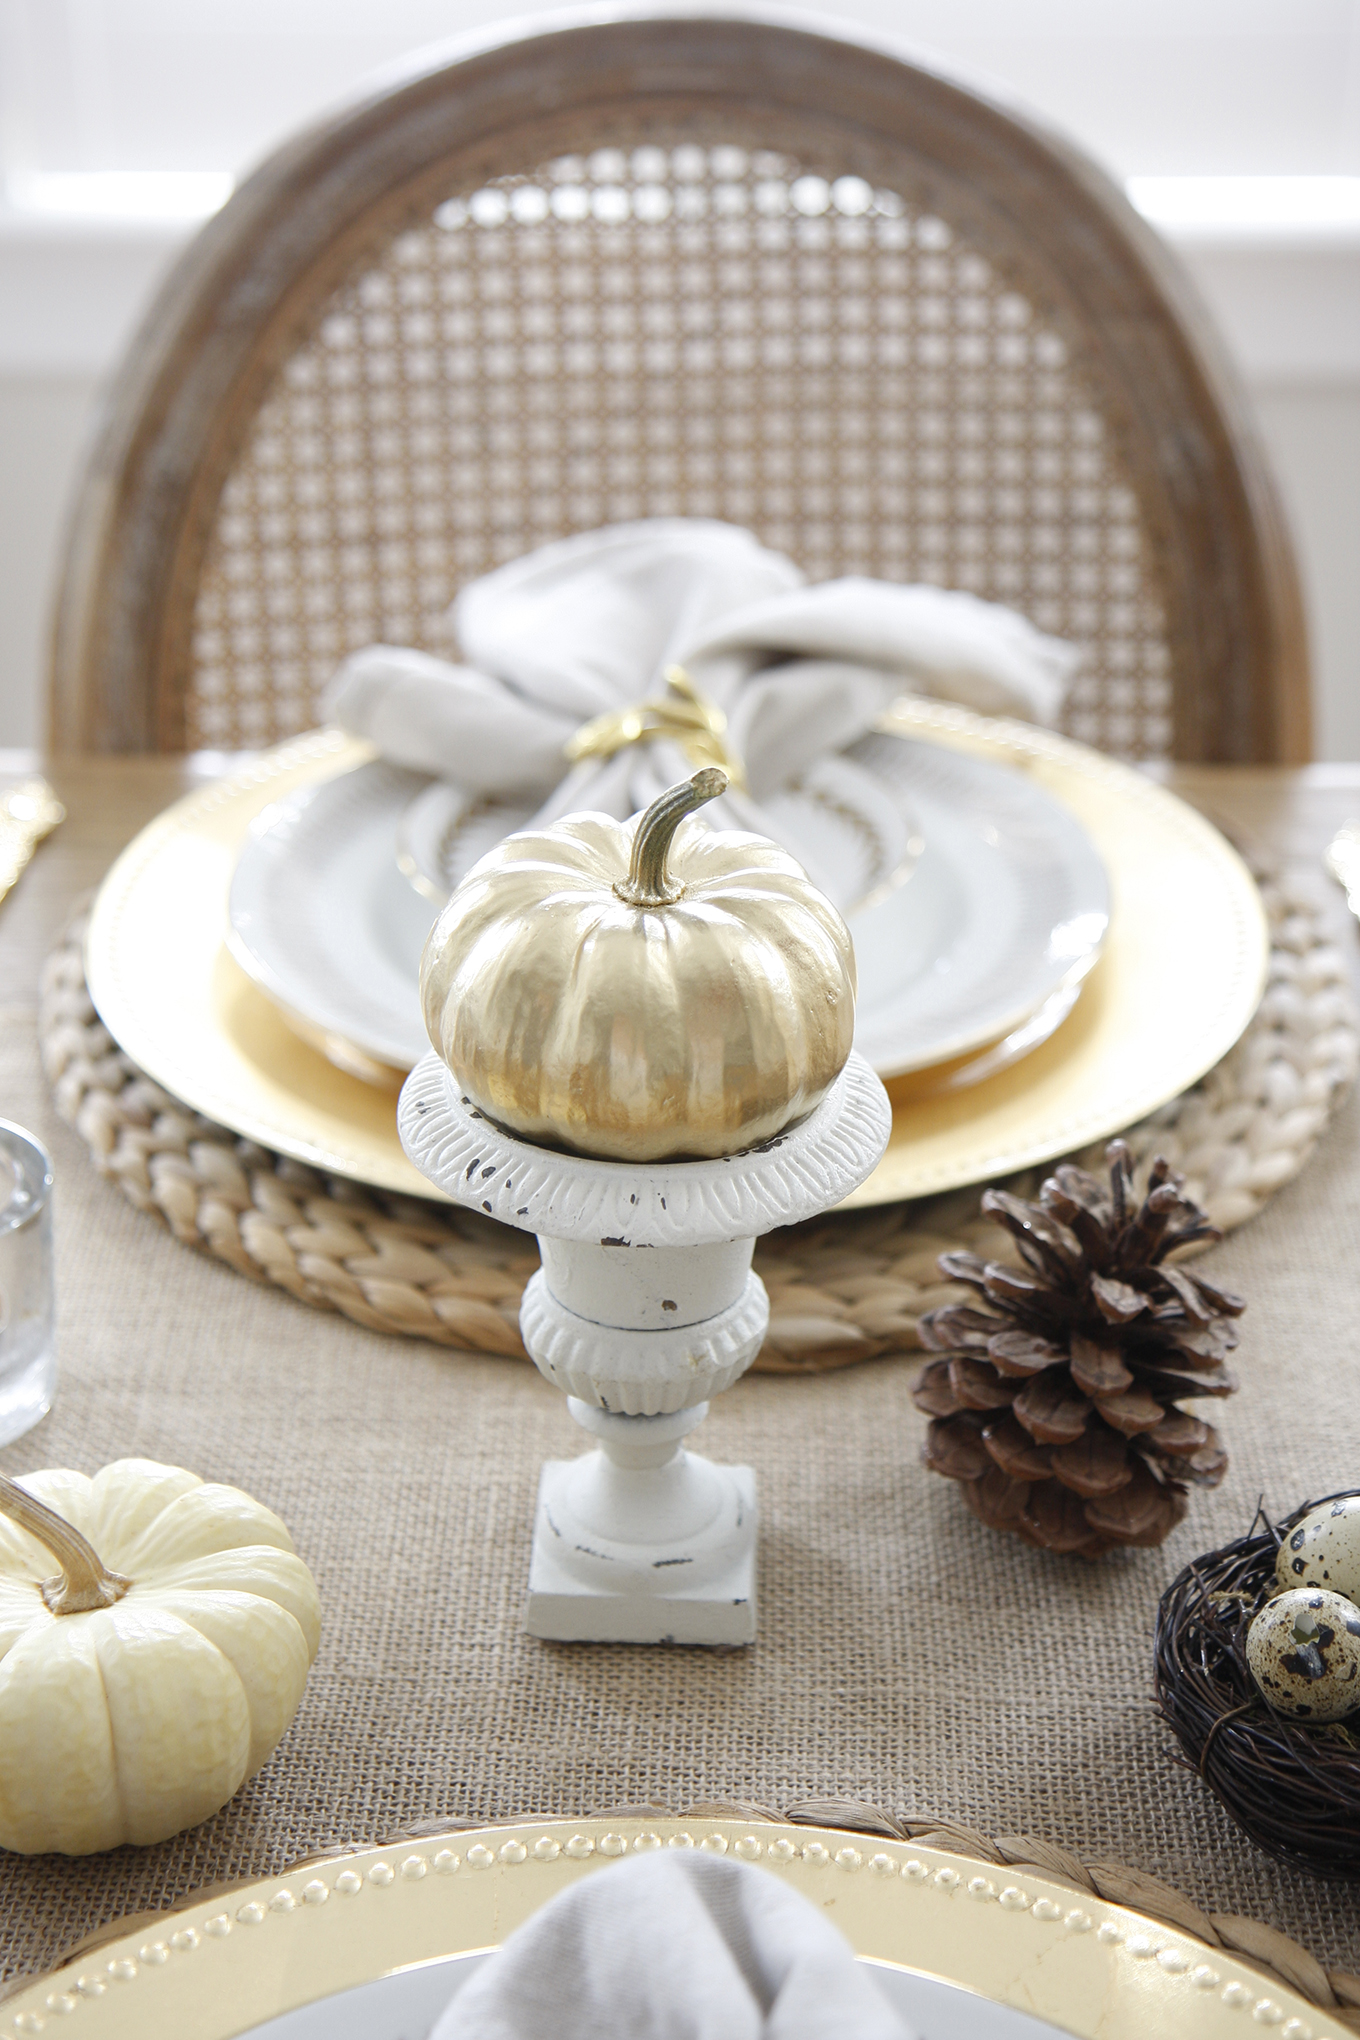 Do you have a box of dinnerware inherited from your family and buried in the garage for years? That was the case for me until I realized that the plates I received from my mom are ‘kind of cool’ after all. The white plates with the leafy band design feels very elegant and modern to me now. Wish I knew how old this pattern is, maybe from the 60’s or 70’s?
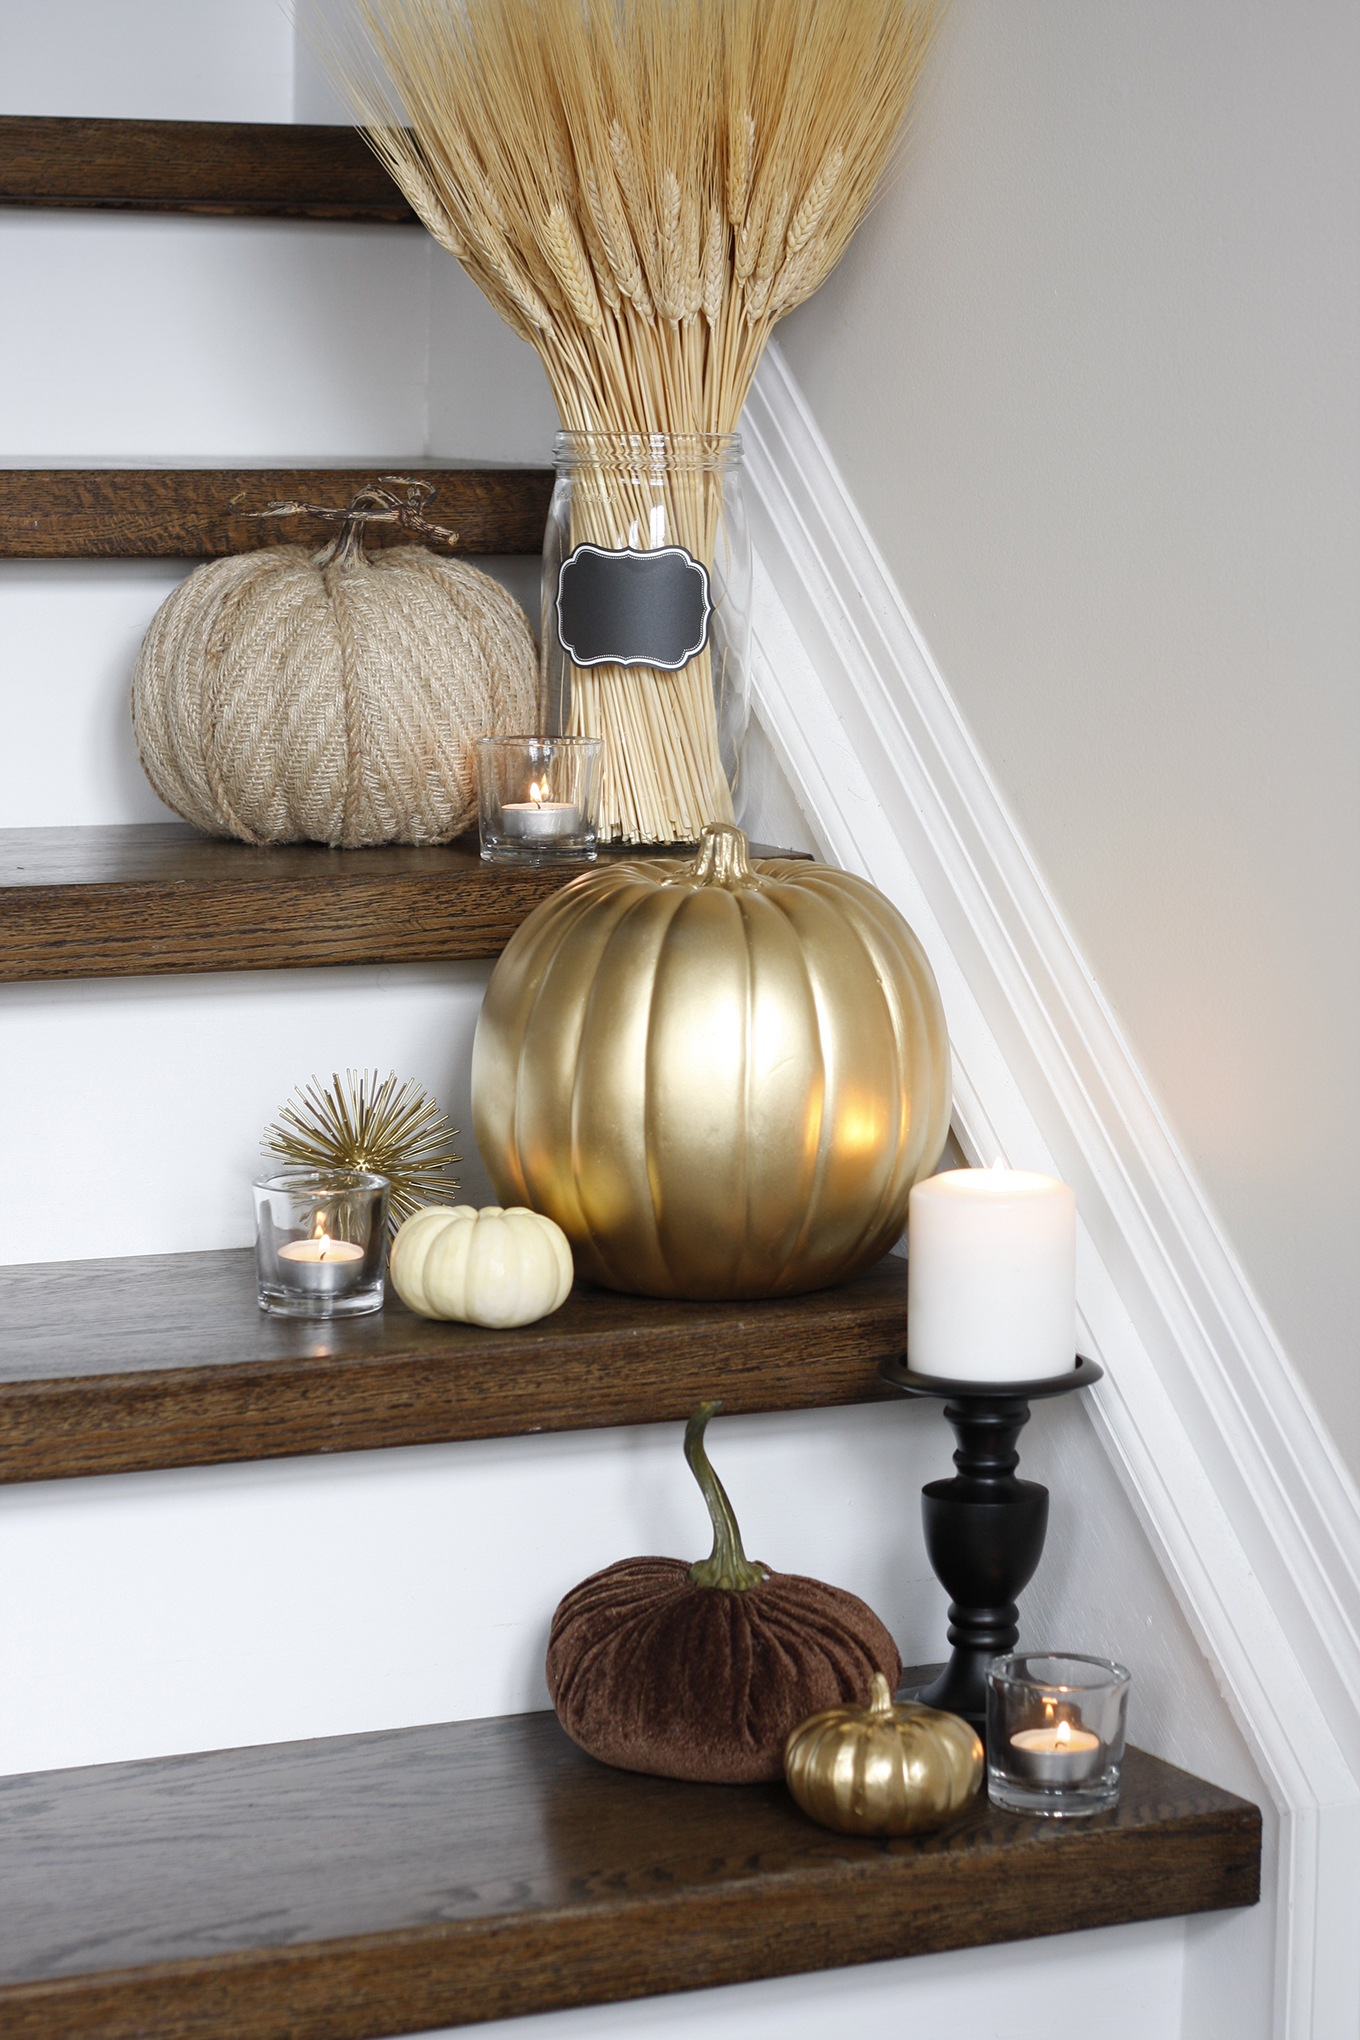
 Decorate the Stairs
If you don’t have a fireplace (like me) to display decorations, then an alternate area is the stairs. (Sorry, this might not be an option for those with small children and curious pets) Since I grew up on a farm in Saskatchewan, sheafs of wheat always remind me of the Fall harvest. The lit candles add such a wonderful glow and sparkle.
 Create a Vignette
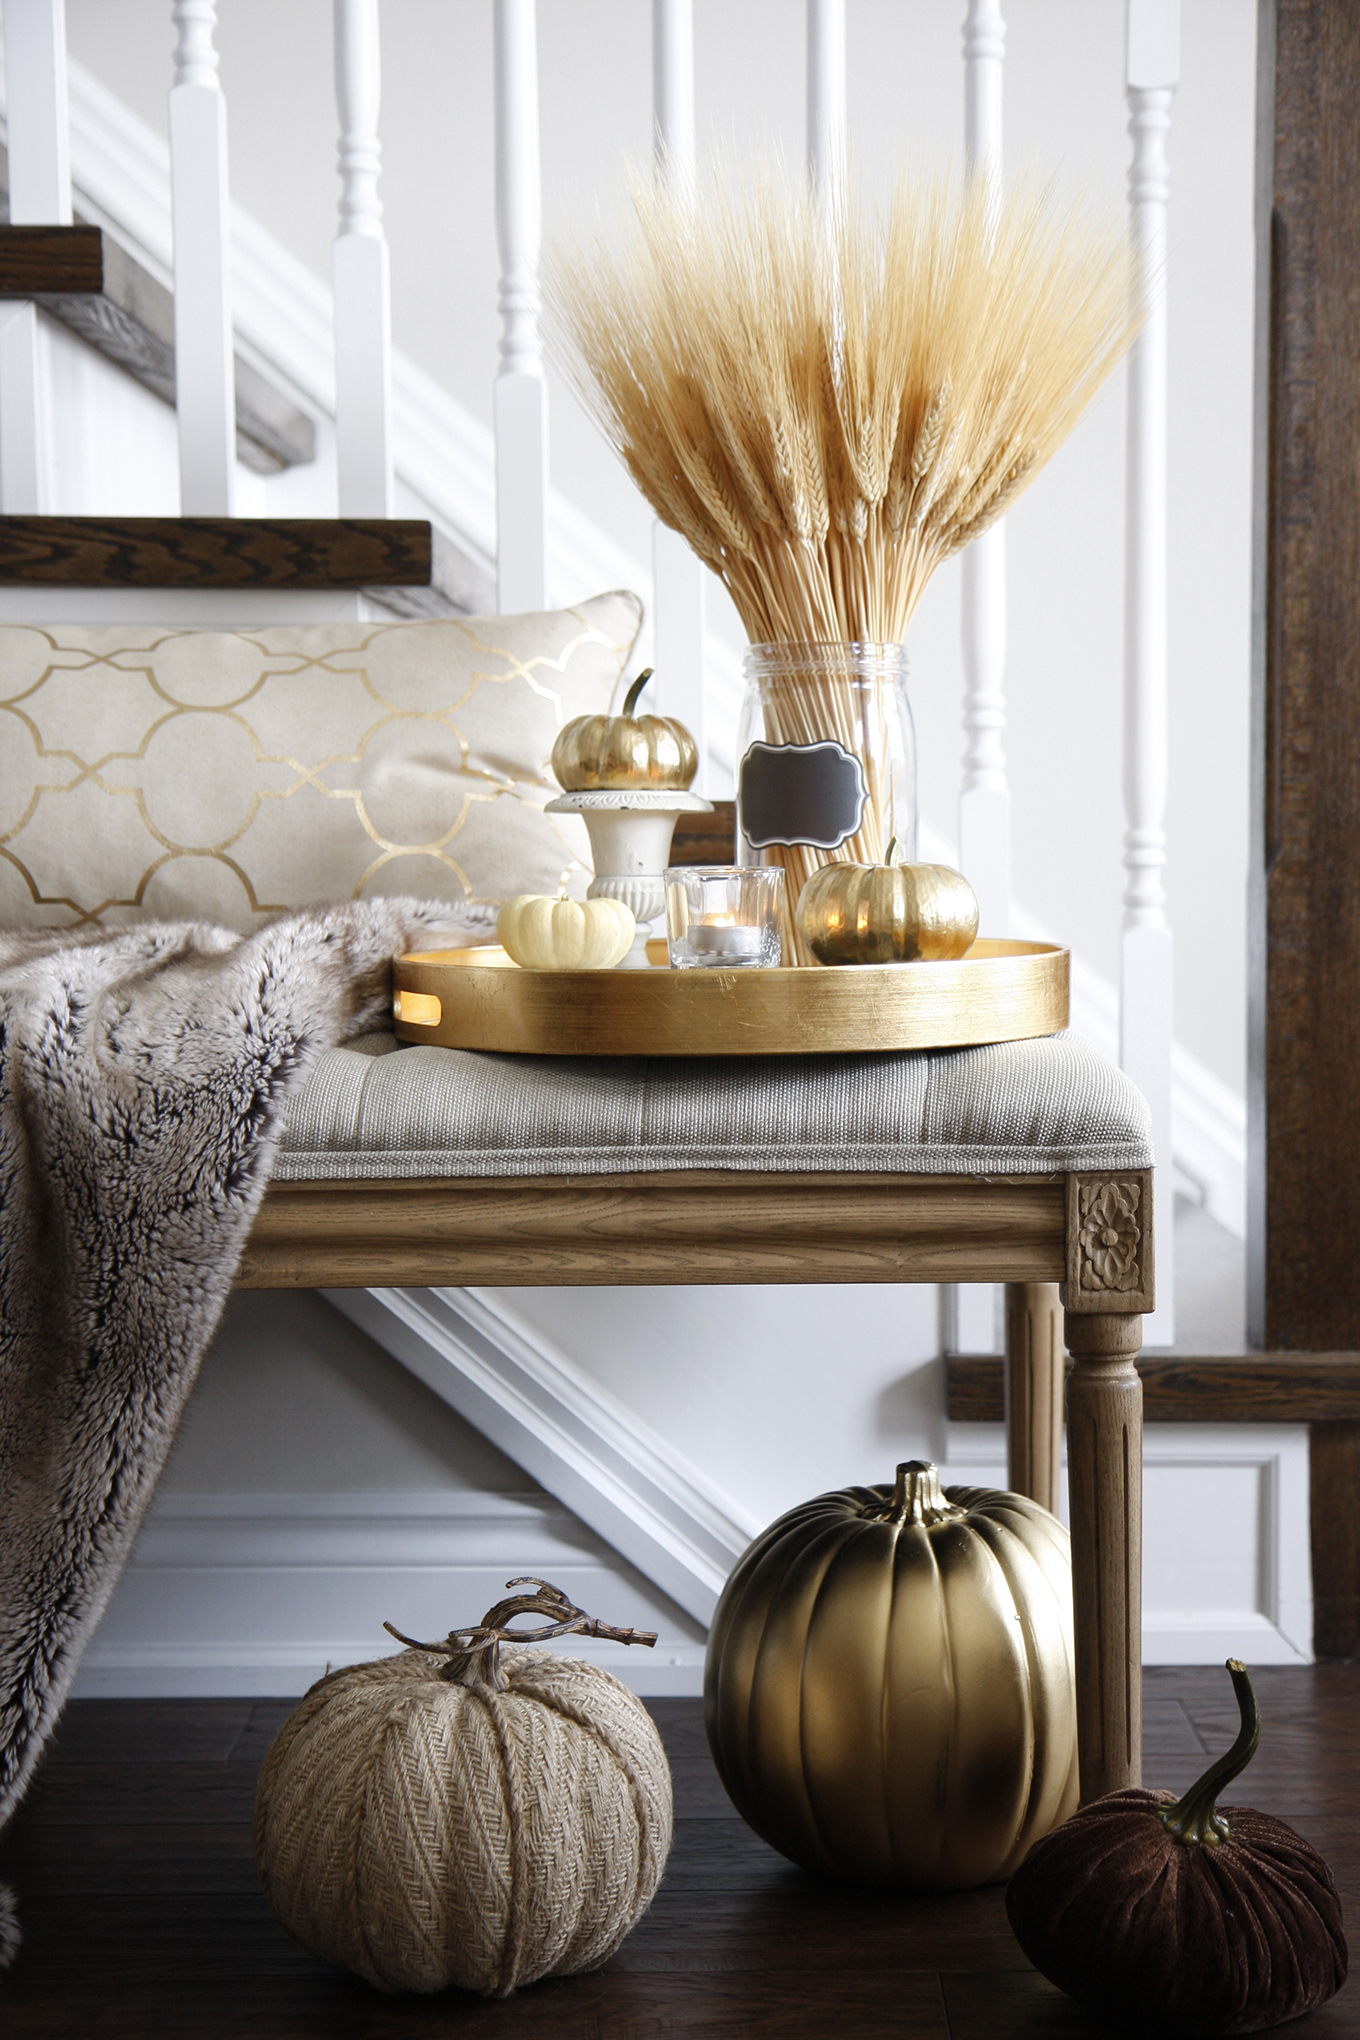
Pulling together a few of my favourite things — a decorative pillow and faux-fur throw — I created a vignette on a bench next to the stairs with pumpkins and the sheaf of wheat. Makes for a cozy and inviting spot to sit and enjoy a cup of tea with a good book.
As a bride-to-be myself, I had so much fun creating this chair banner craft for my wedding shower concept. As you may have noticed, I love absolutely everything pink and gold, but recently I have been finding myself appreciating the colour yellow. On a recent antiquing trip with my dear friend Jennifer of Tufts and Toile, I found the perfect pale yellow tablecloth to compliment my wedding shower tablescape, which was a great score that only cost $10. I can’t wait to have my very own wedding shower — to come one day

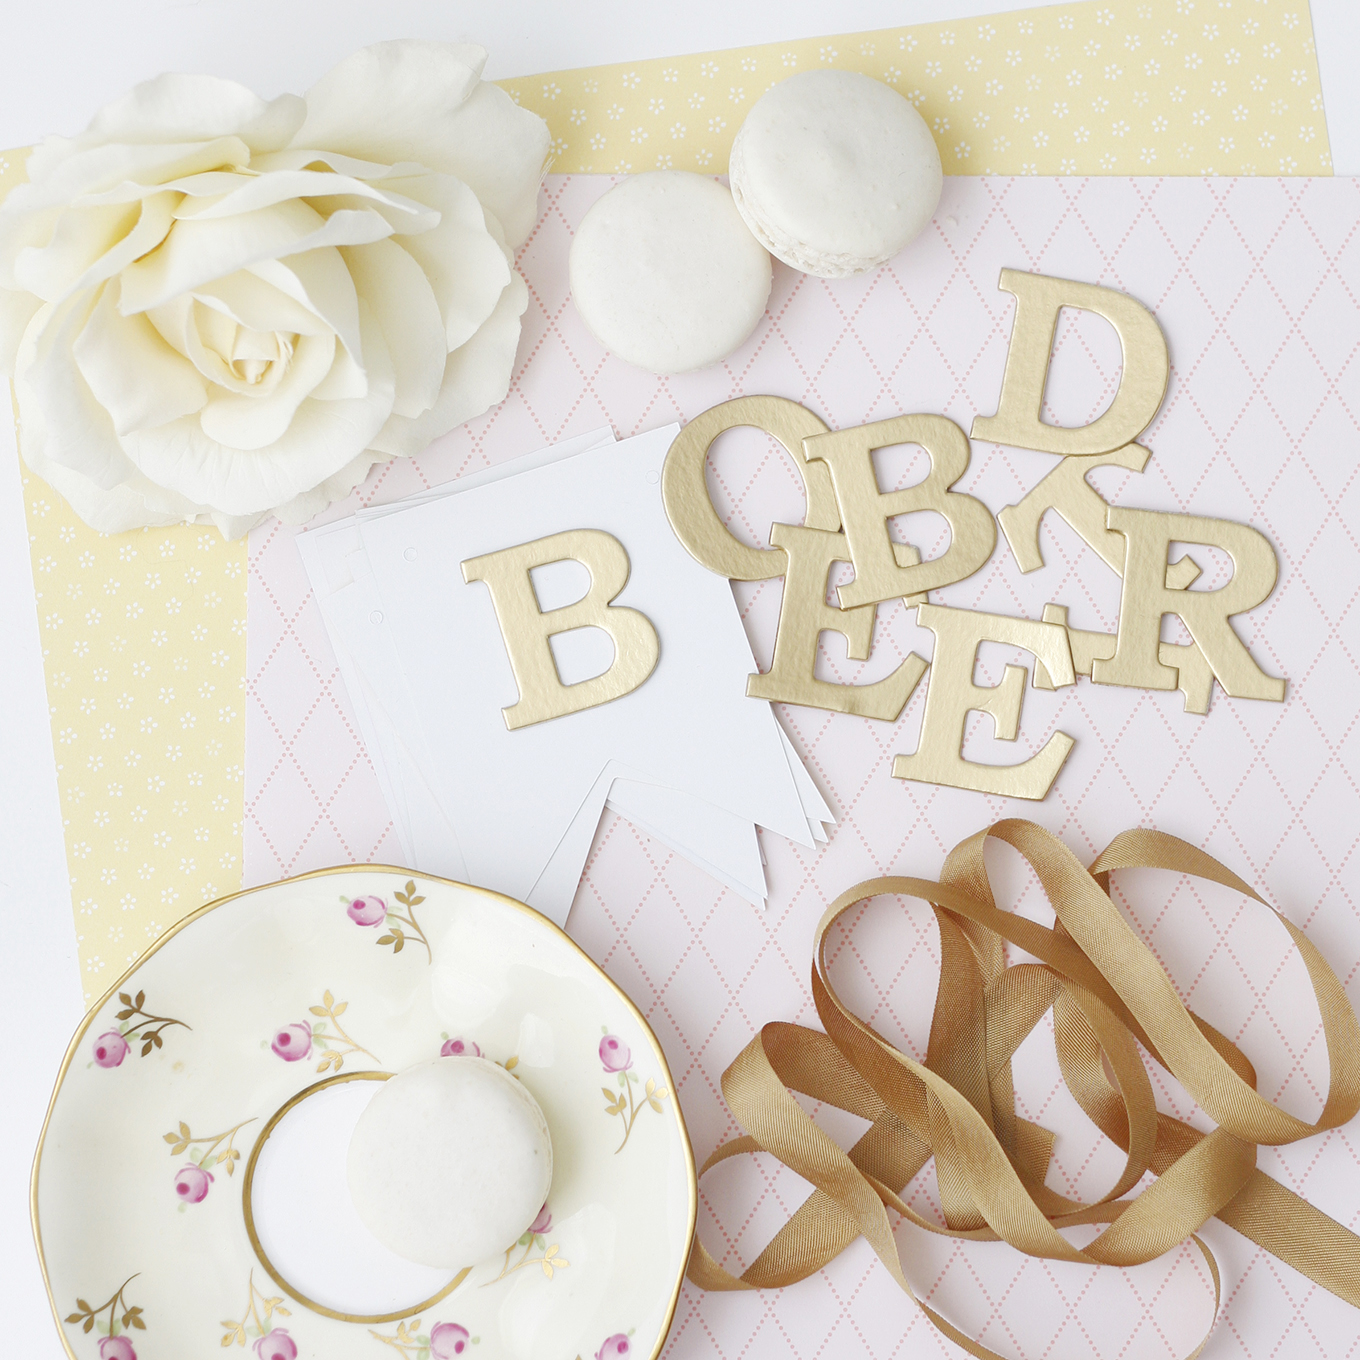 Materials
• Various crafting card stock in complimentary colours and patterns (yellow & pink)
• Alphabet letters (spray painted gold)
• Foam adhesive circles
• Washi tape to coordinate with paper stock
• Seam binding ribbon
• Decorative flower
 Tools
Tools
• X-acto knife and blade
• Ruler
• Hole punch
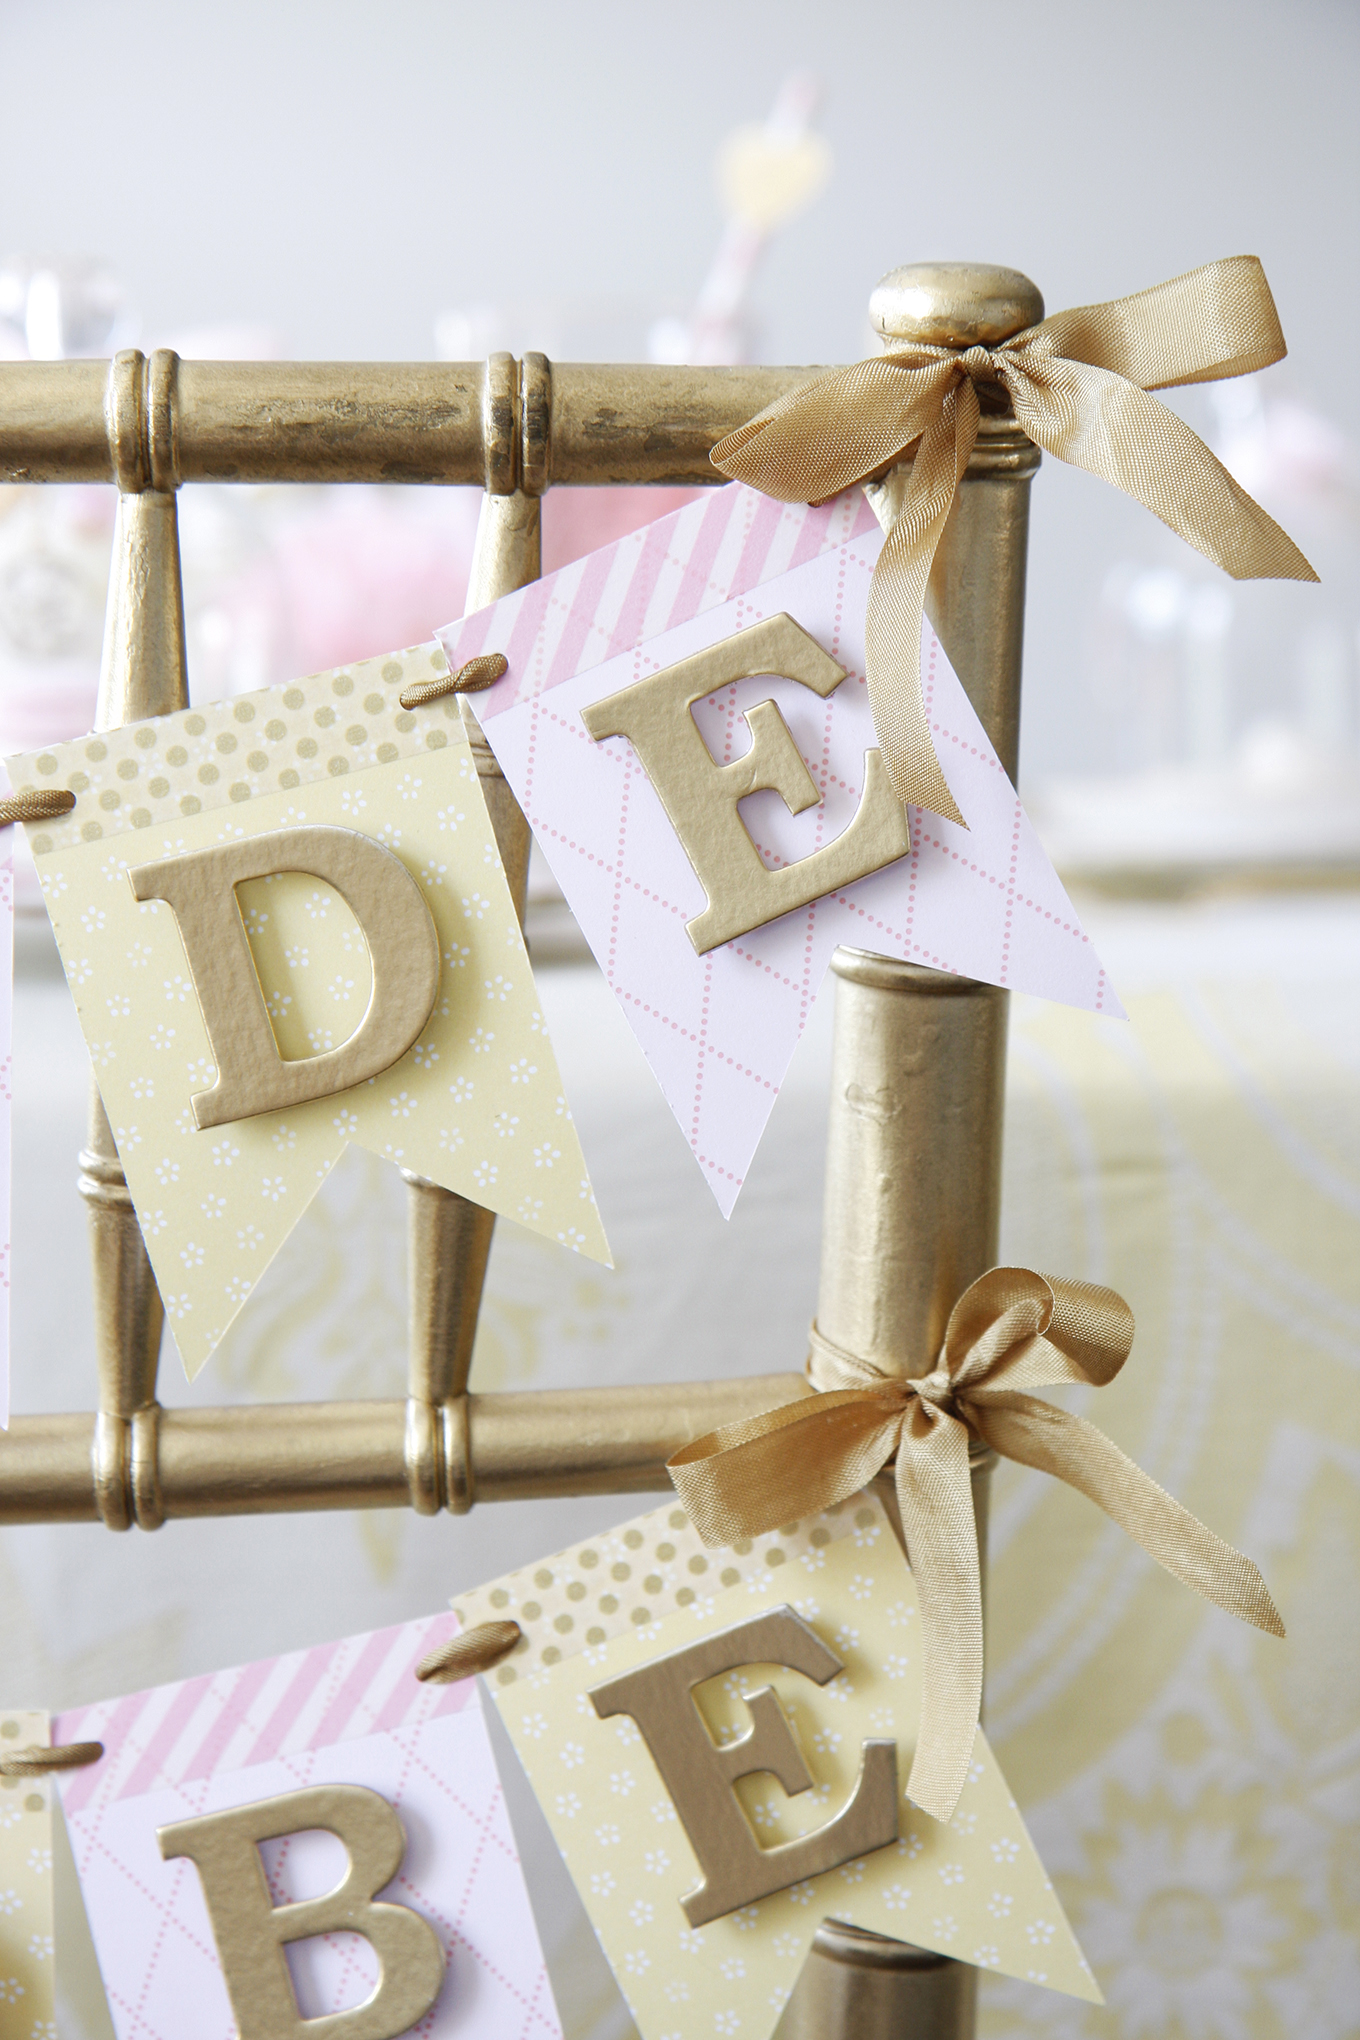
 Step 1
Measure and cut out ten rectangular cards in card stock of your choice that are 2 5/8″ wide x 3 3/4″ tall. You can use alternating paper designs for variety. Cut a triangular notch at the bottom of each card.
Step 2
With the hole punch, create 2 holes at the top of each card on both the right and left side.
Step 3
Arrange each letter of ‘Bride to Be’ on a separate card. You can either use glue to attach the letters to the cards. Or as I prefer, to use small foam adhesive circles that give dimension to the letters.
Step 4
At the top of each card, lay a strip of washi tape and trim the ends on either side of the card.
Step 5
Thread the seam binding through all of the holes in the cards to hang the banner.
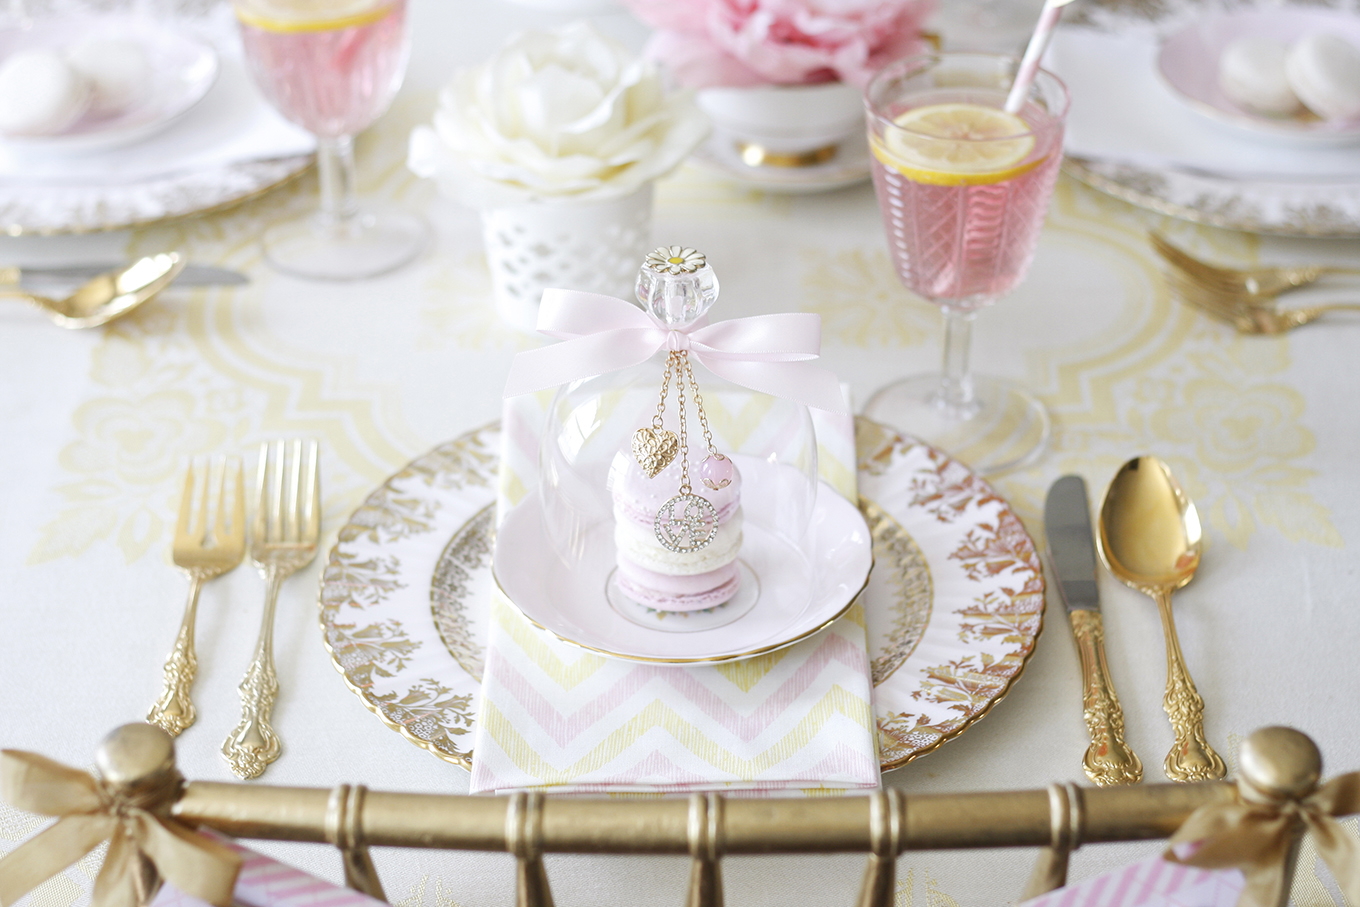
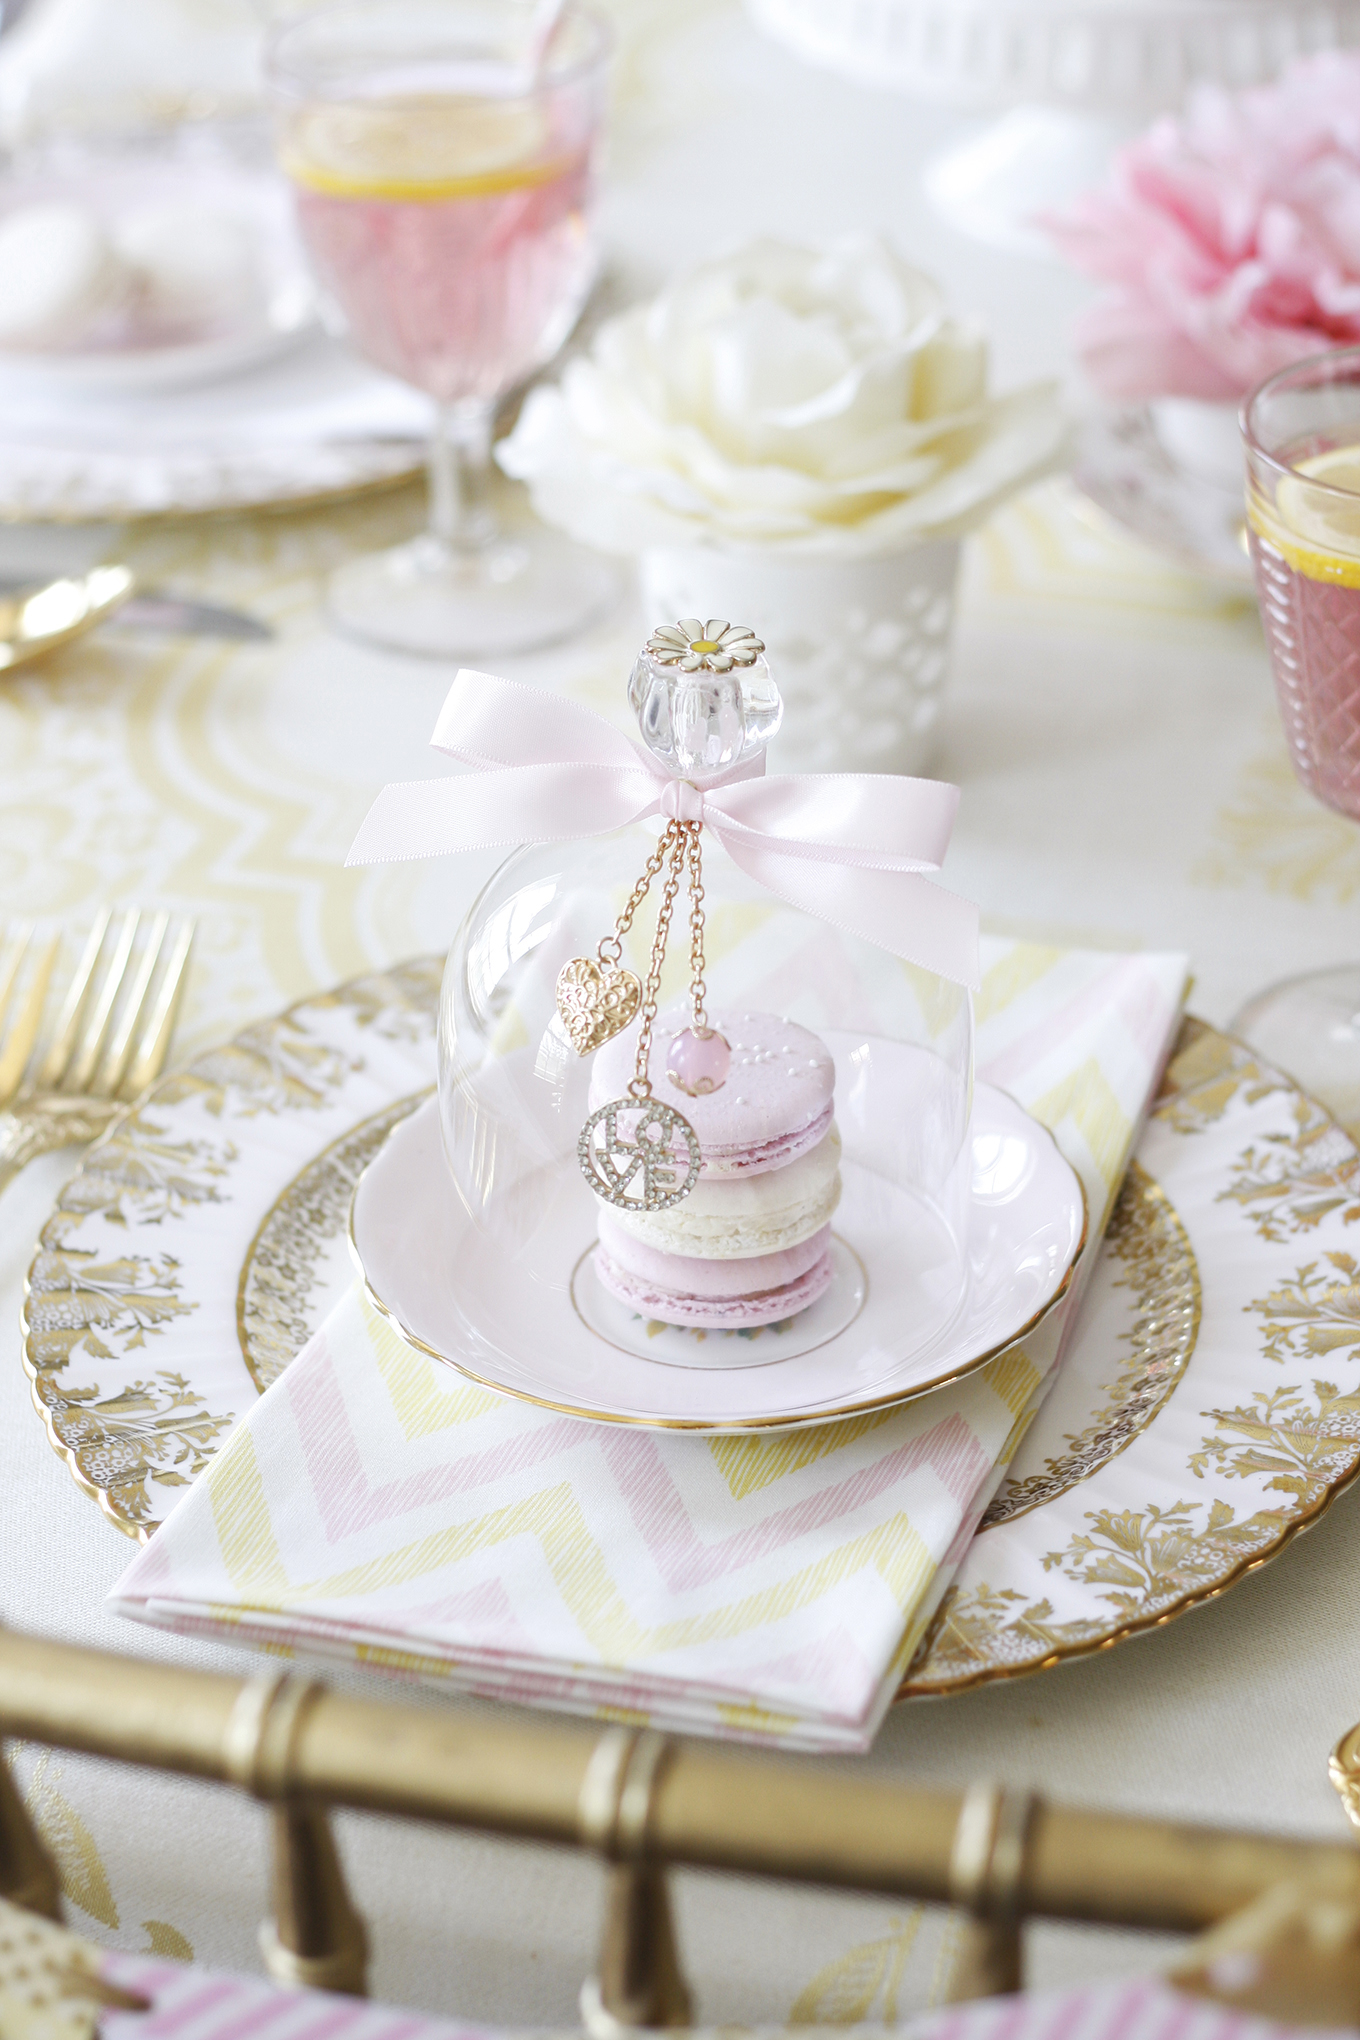
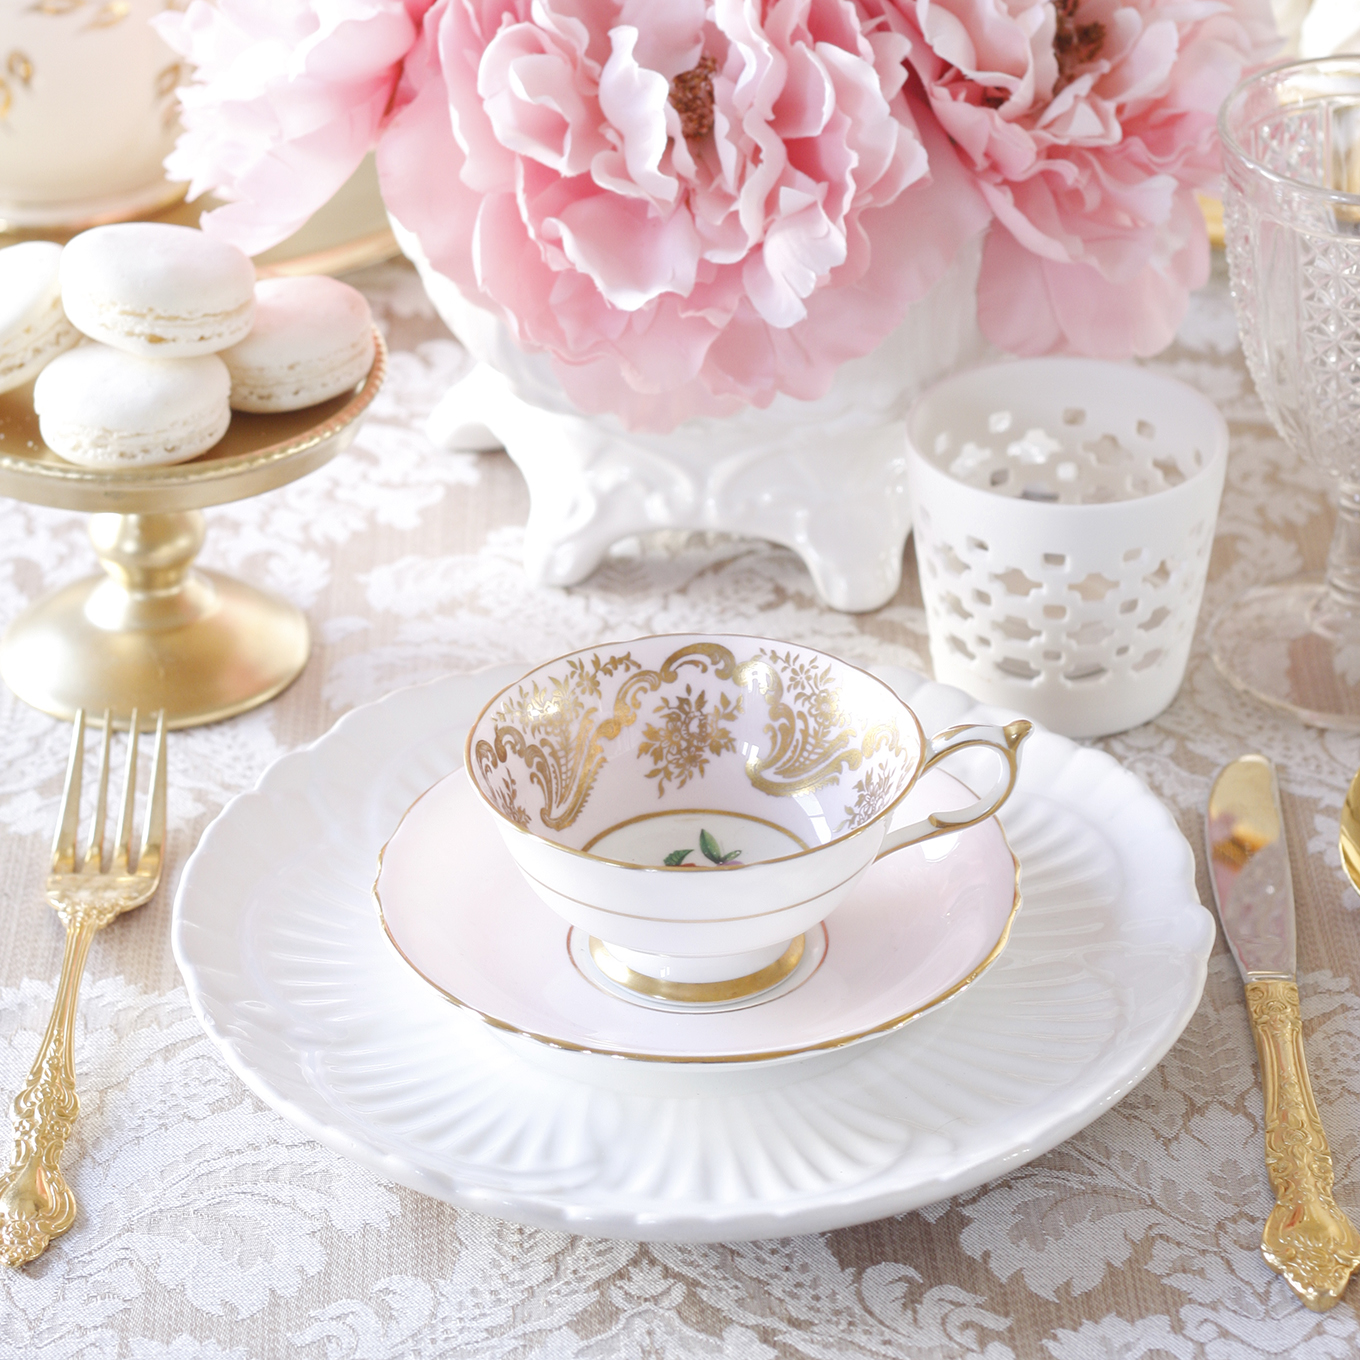
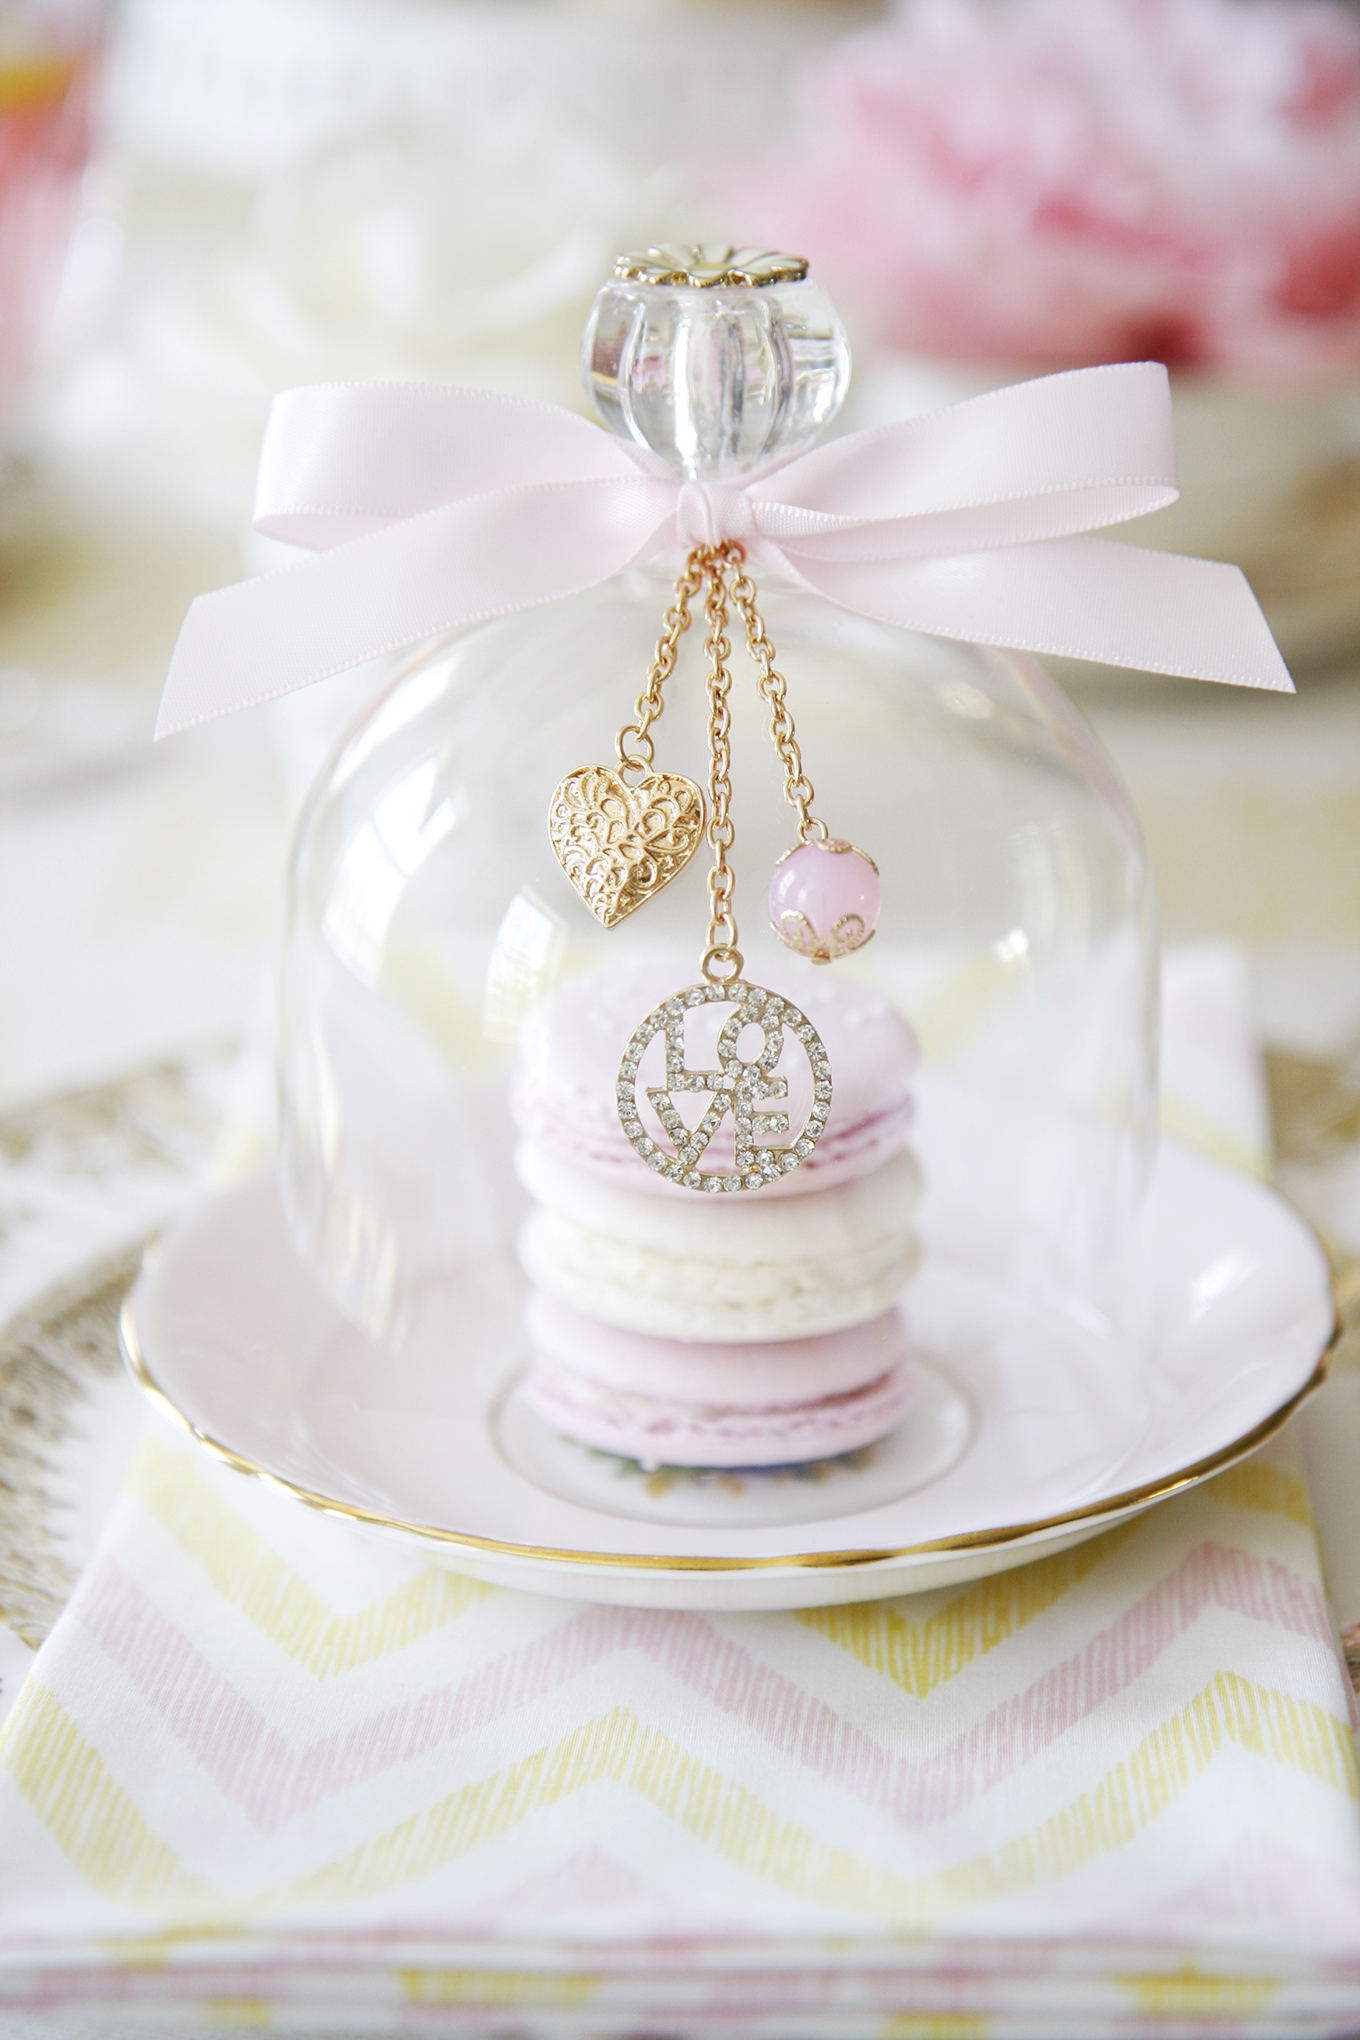 Macarons by Sweet Philosophy
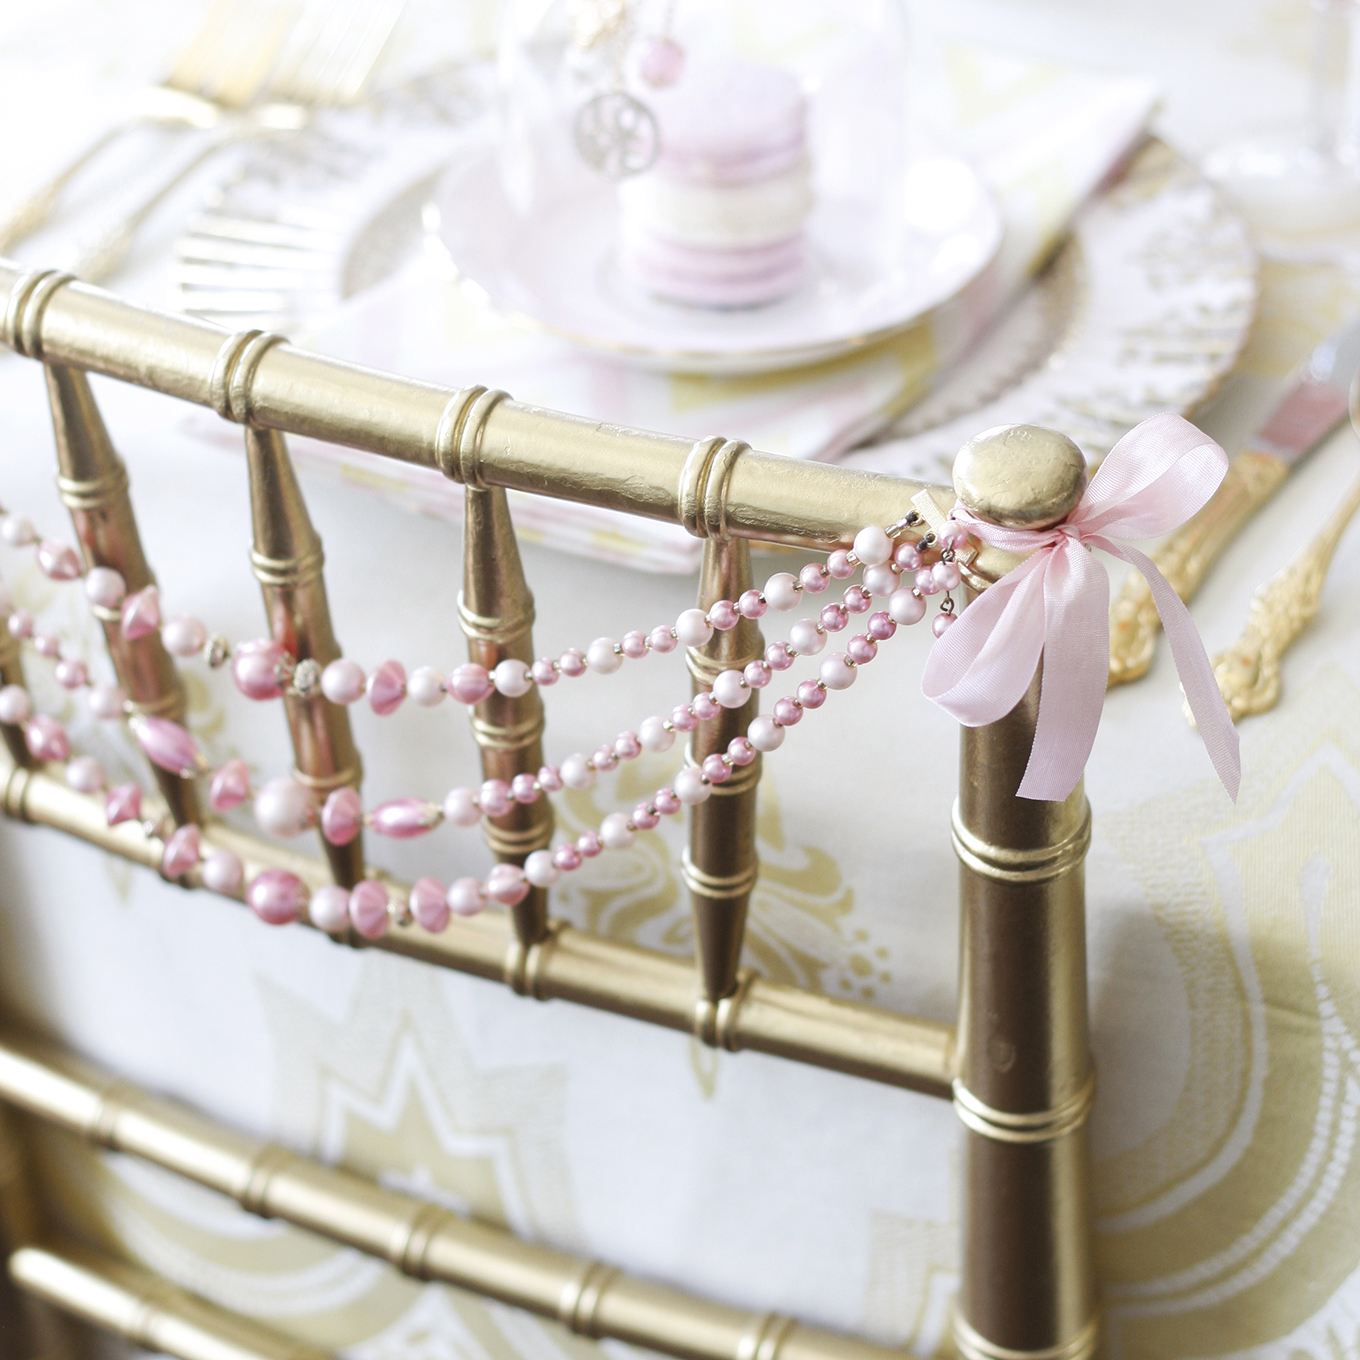
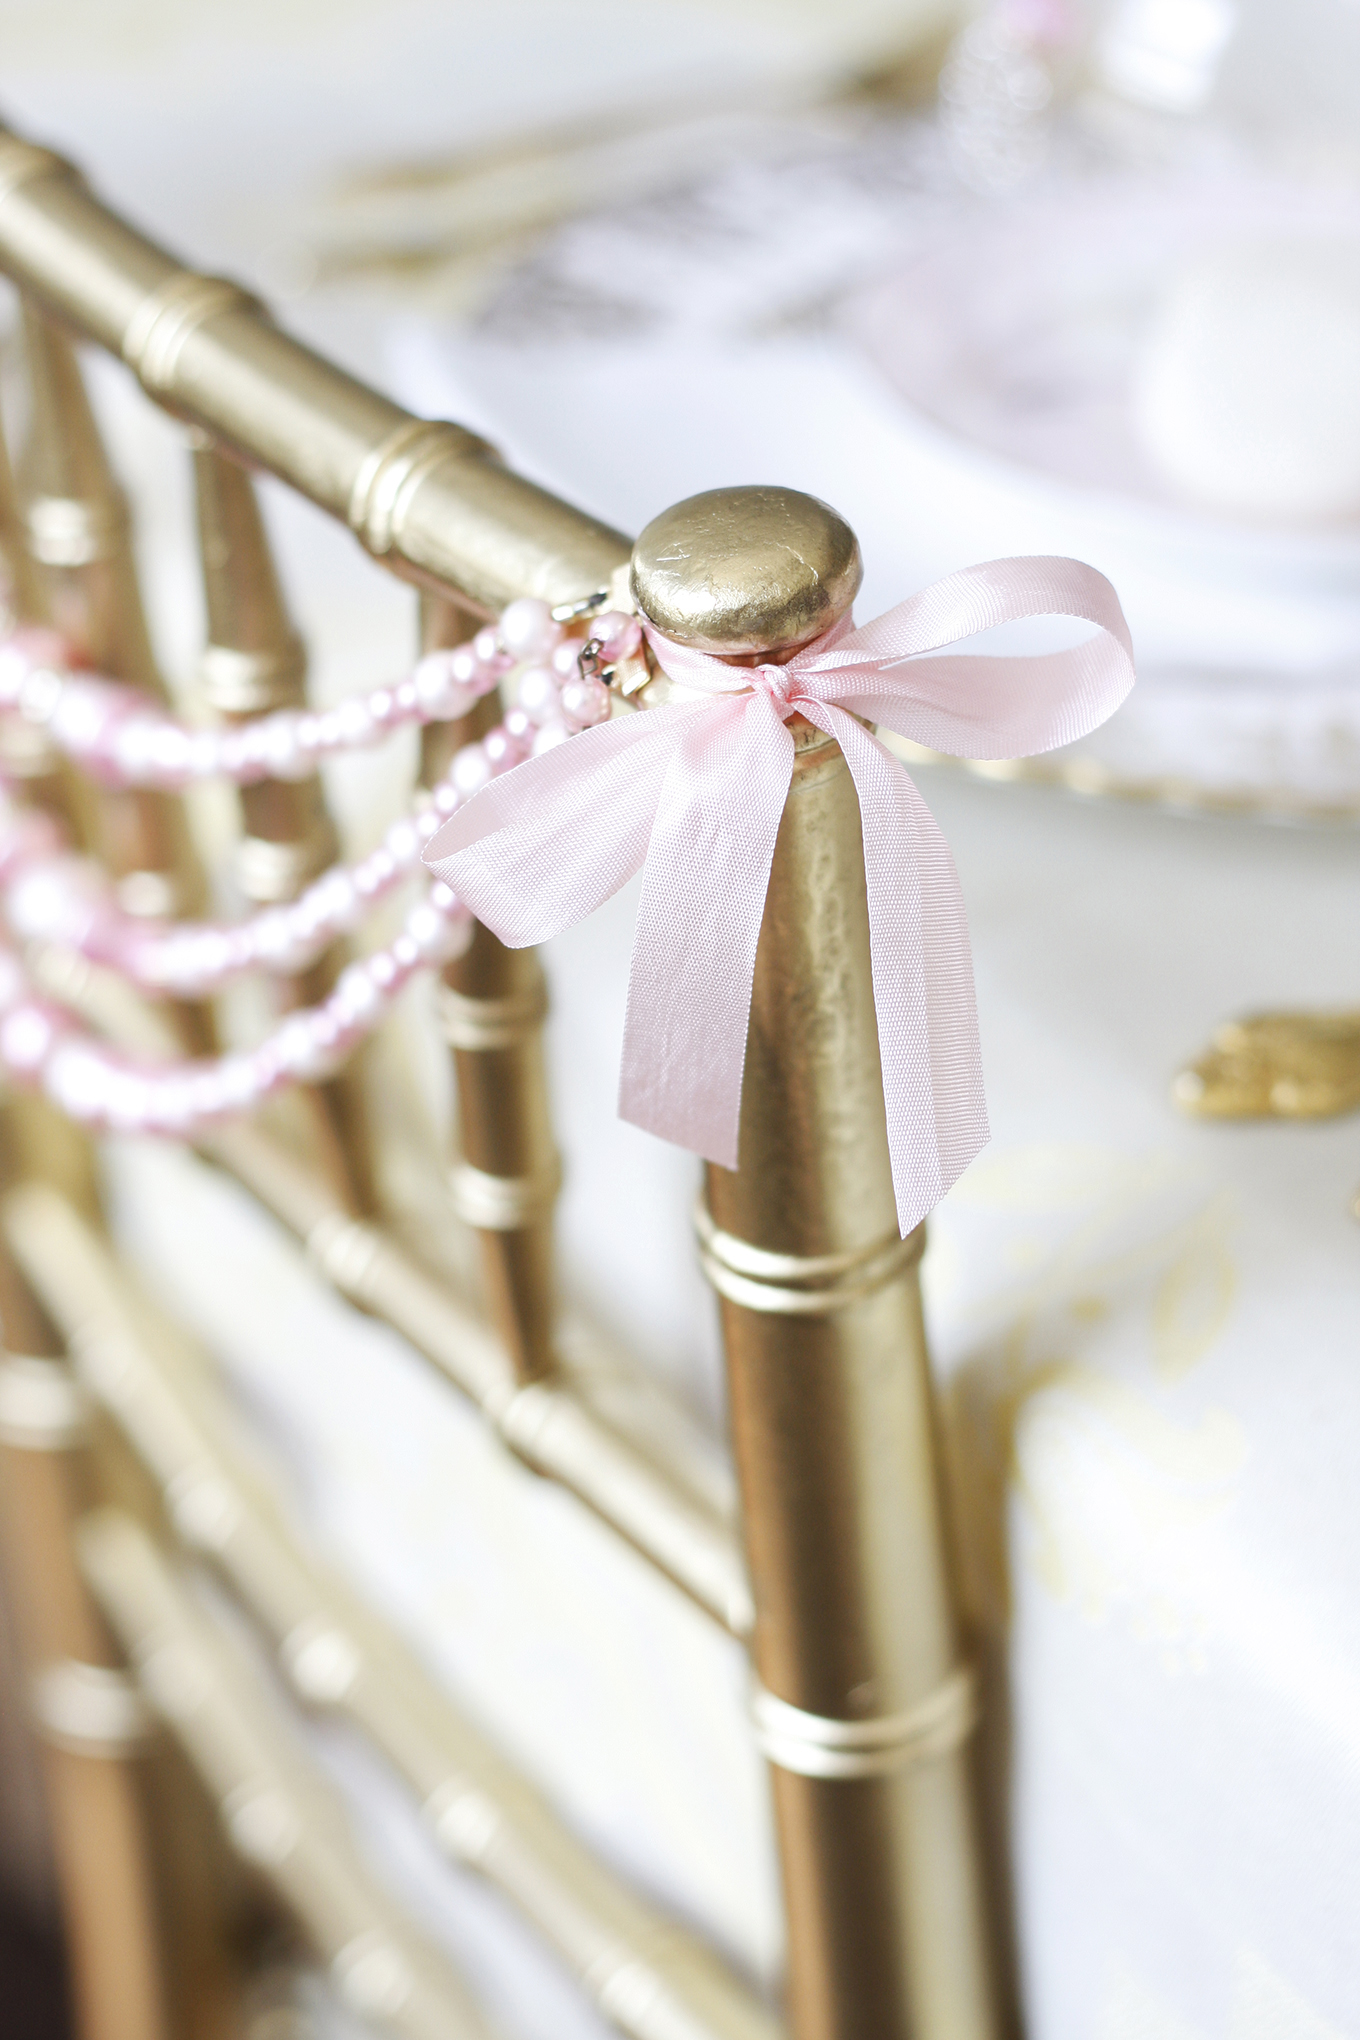
 For each of the guests, I decorated the chiavari chairs with vintage jewelry necklaces for added sparkle and charm.
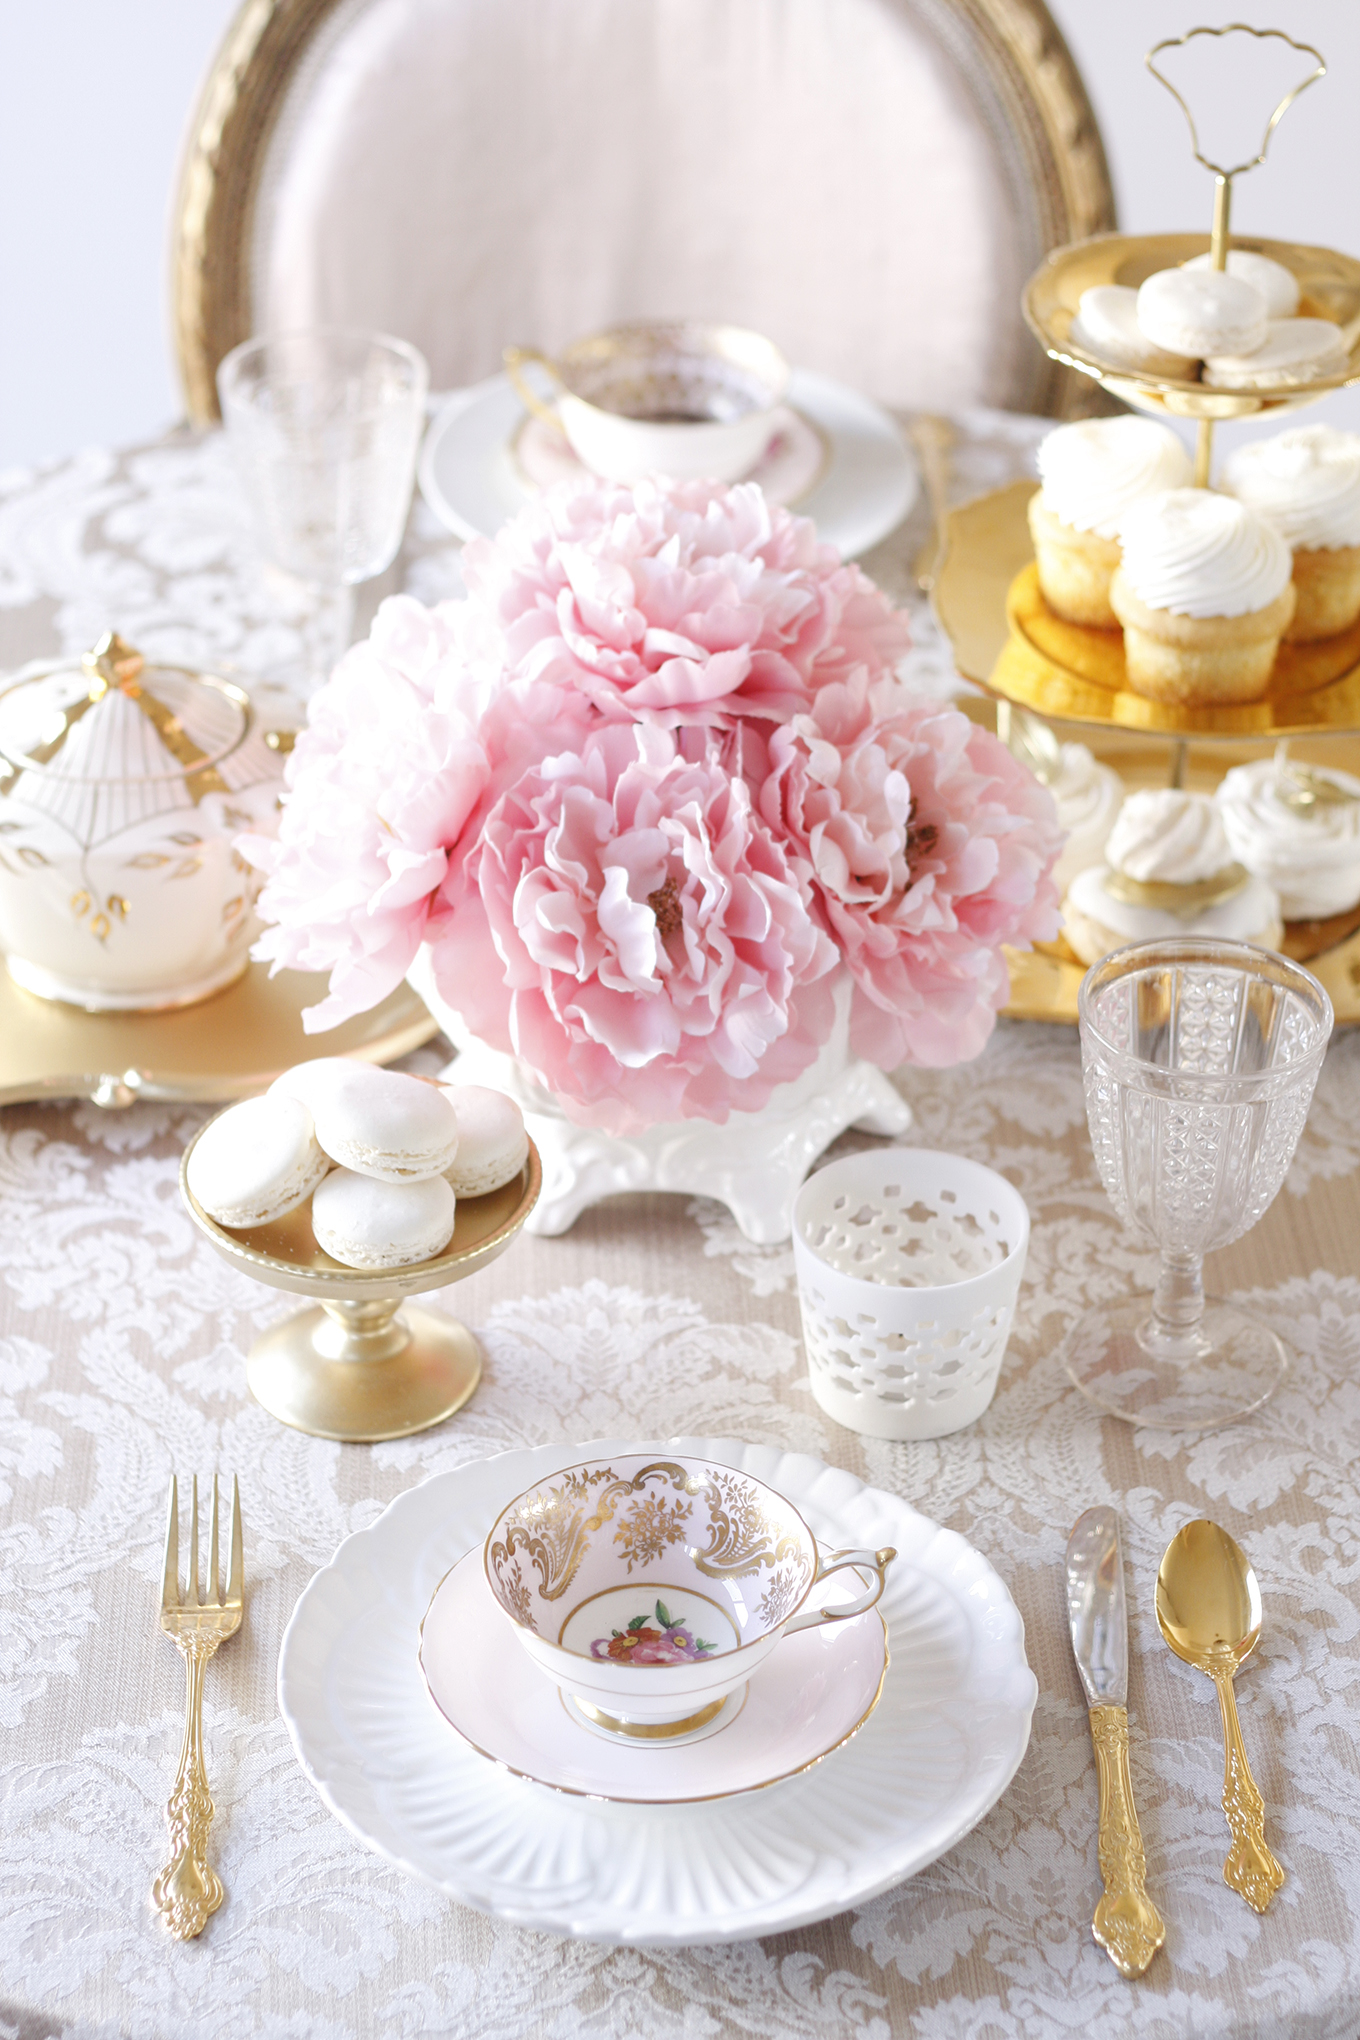
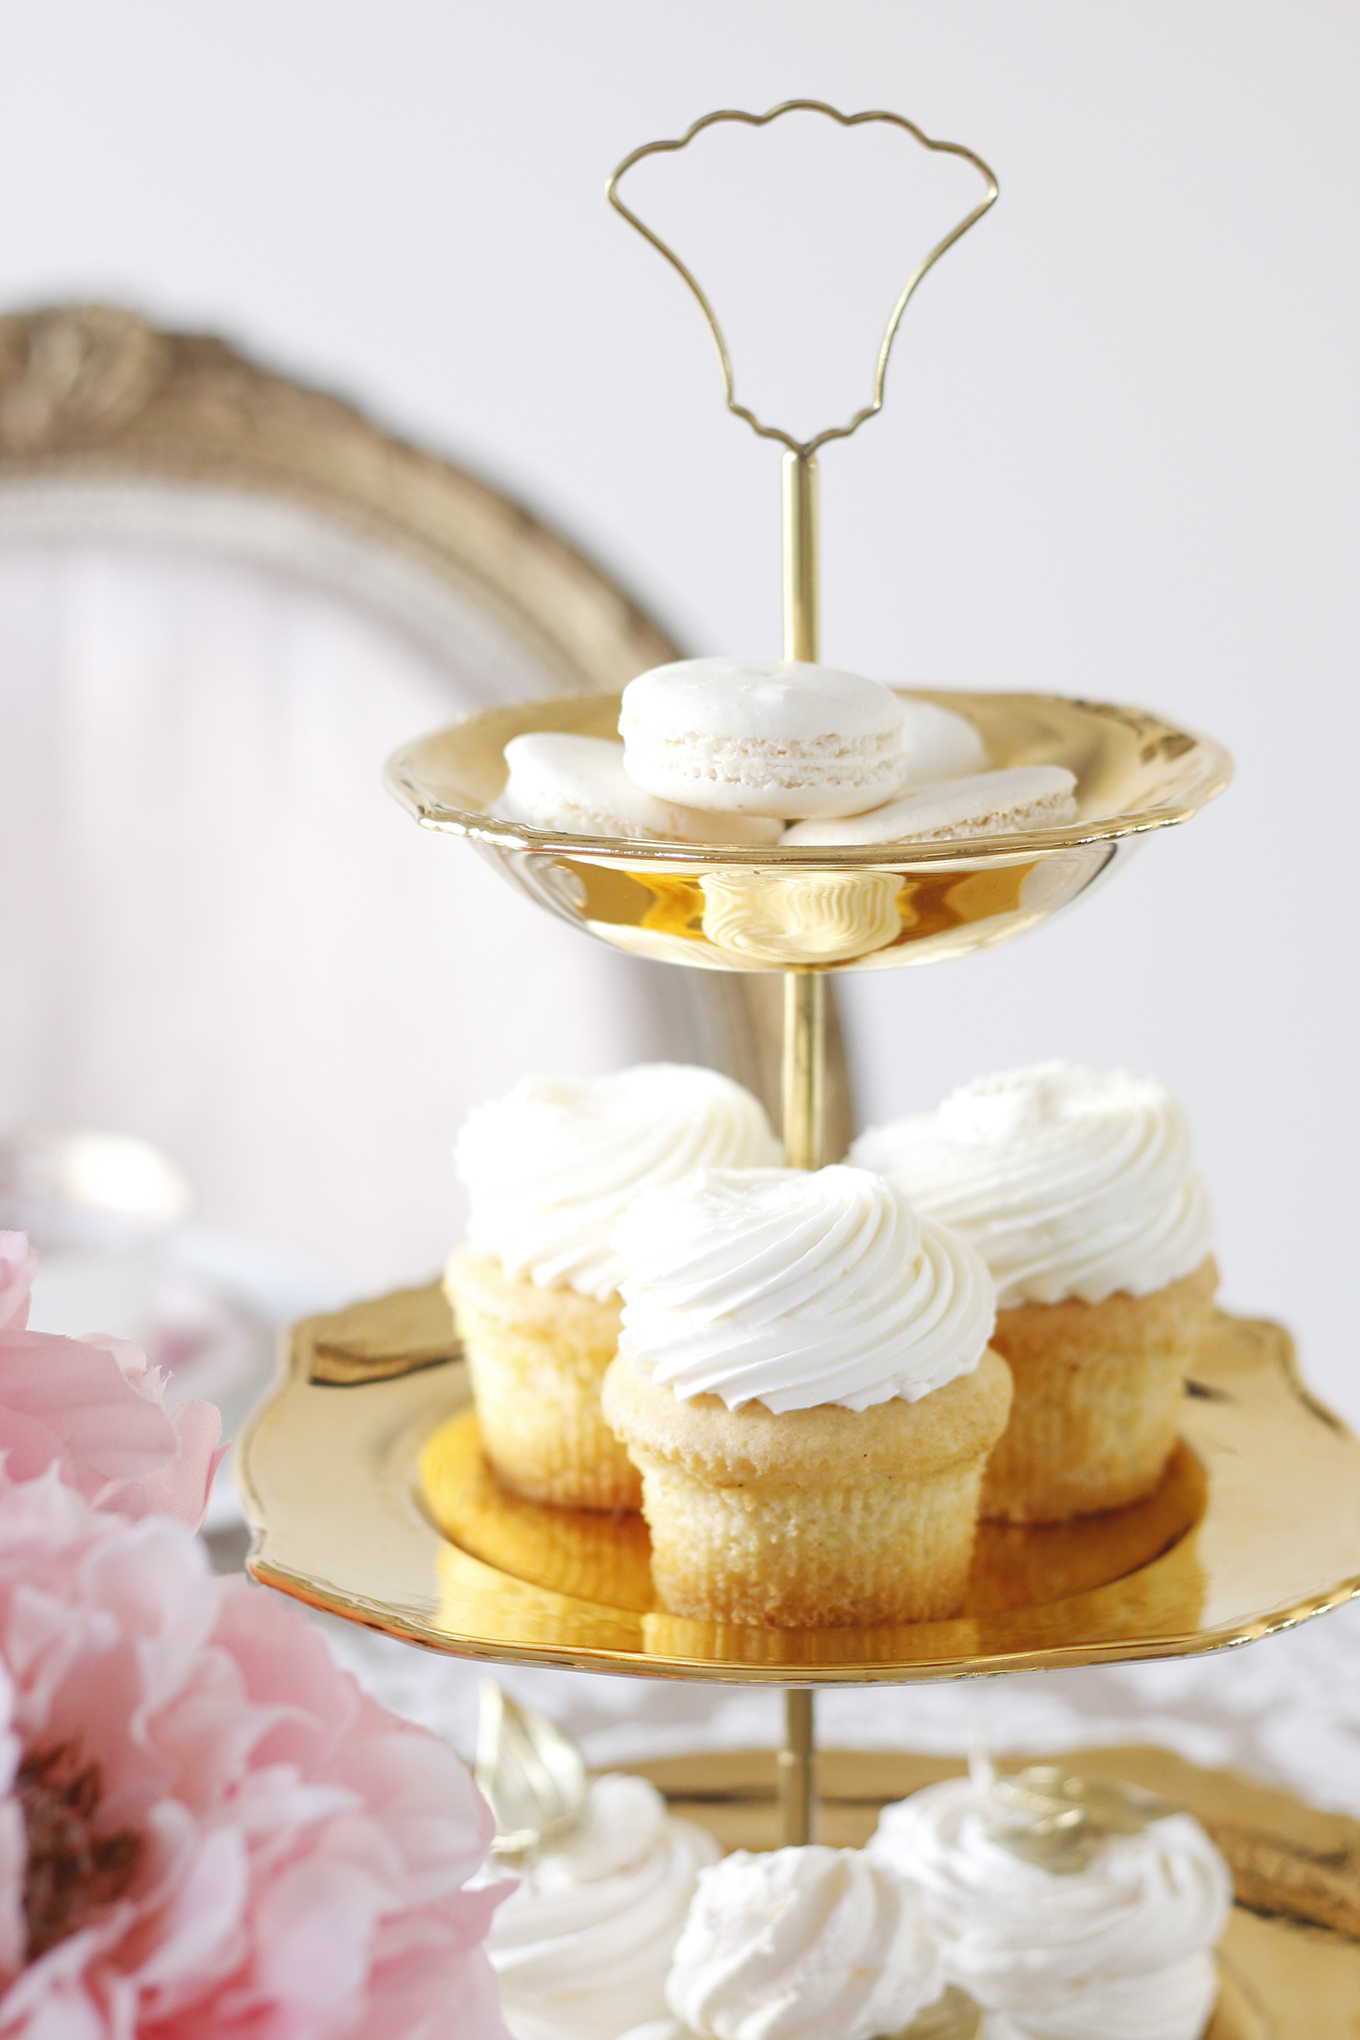 Vanilla cupcakes from CakeStar Bakery
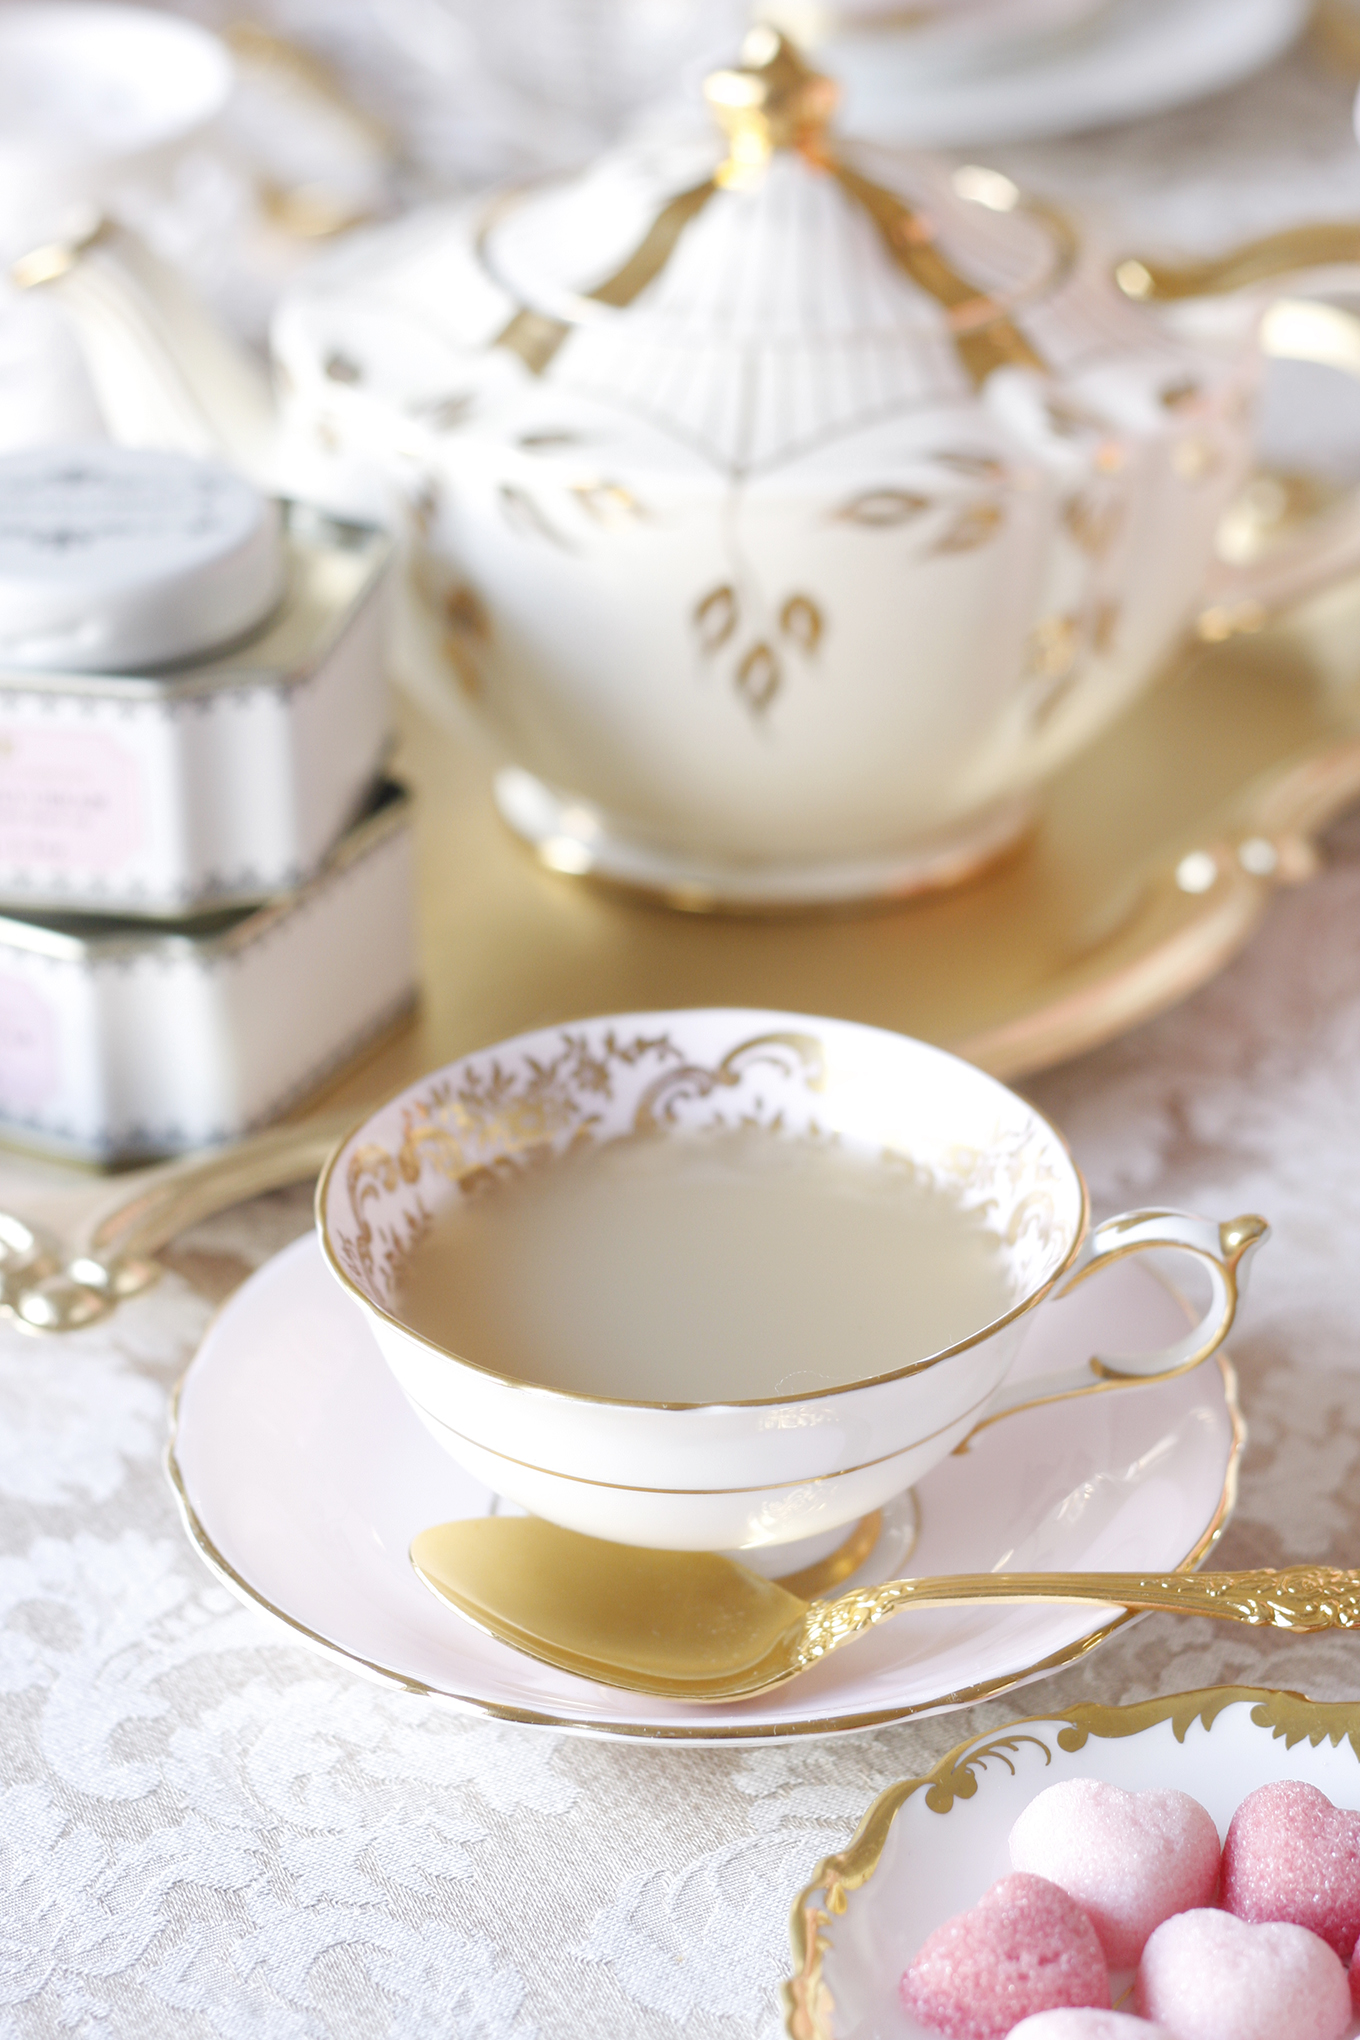
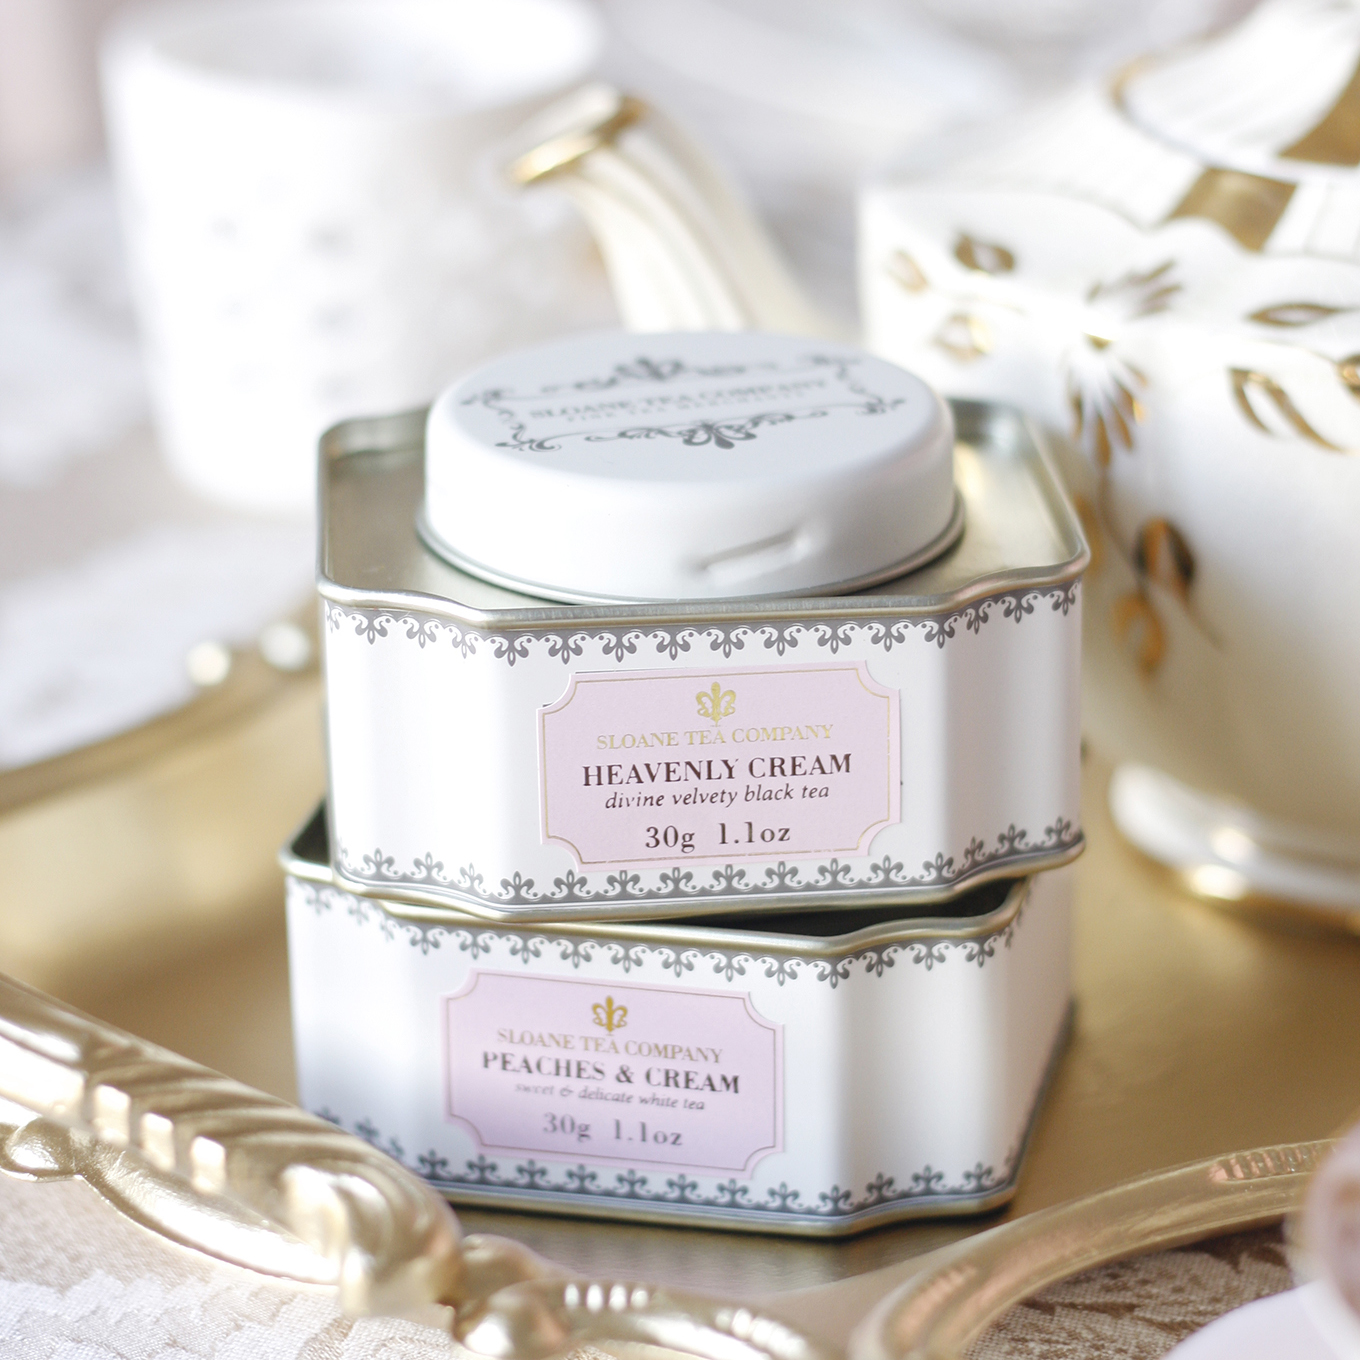 A selection of my favourite teas from Sloane Tea Company
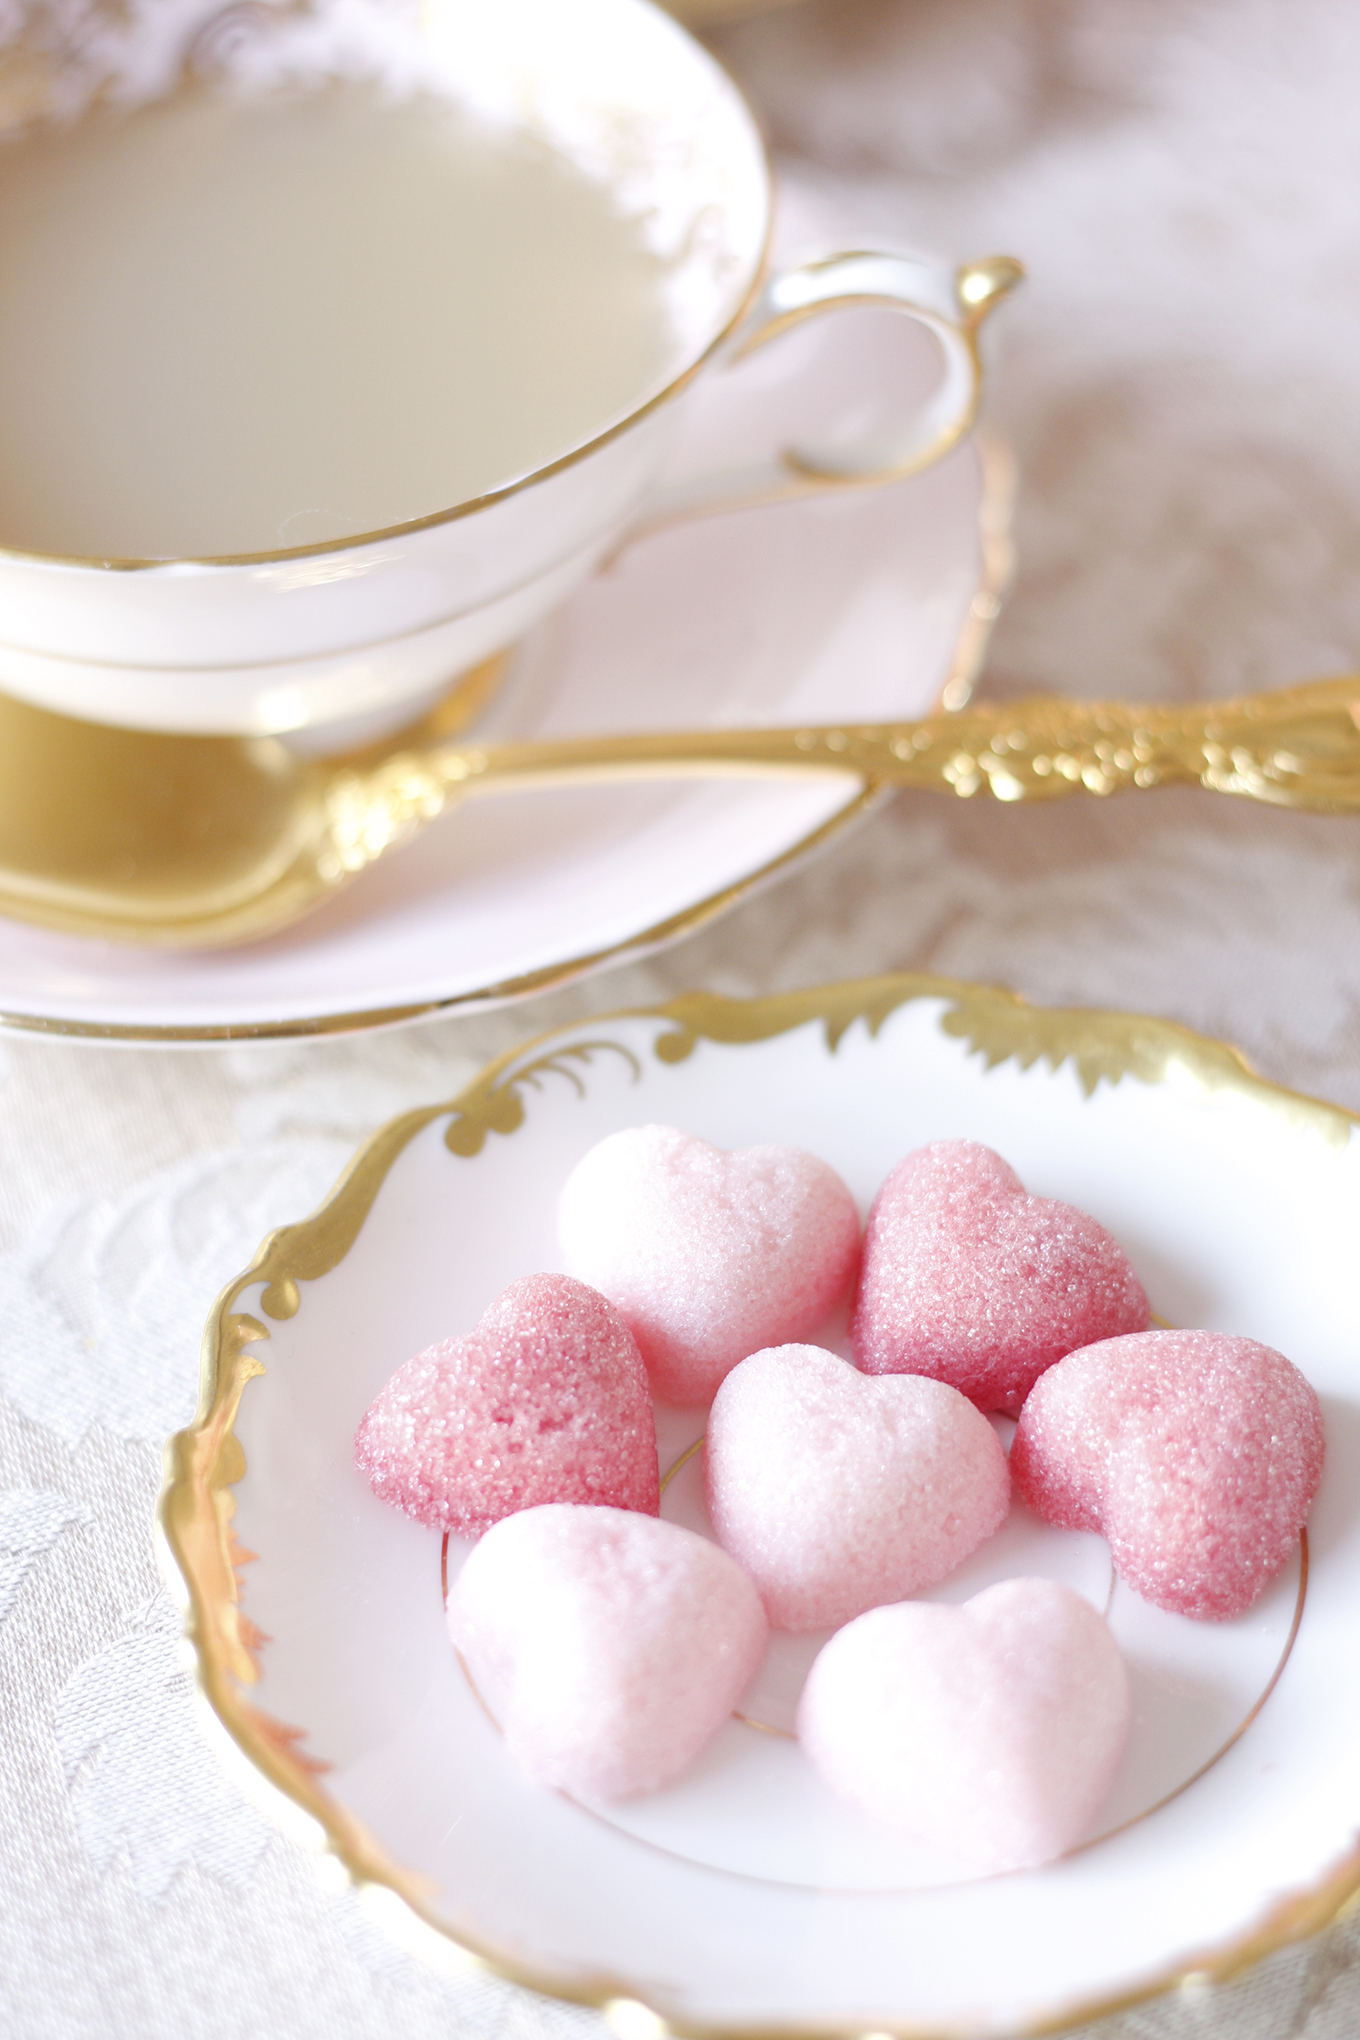 Handmade flavoured heart-shaped sugar cubes by Sweet Bee’s Tea Party
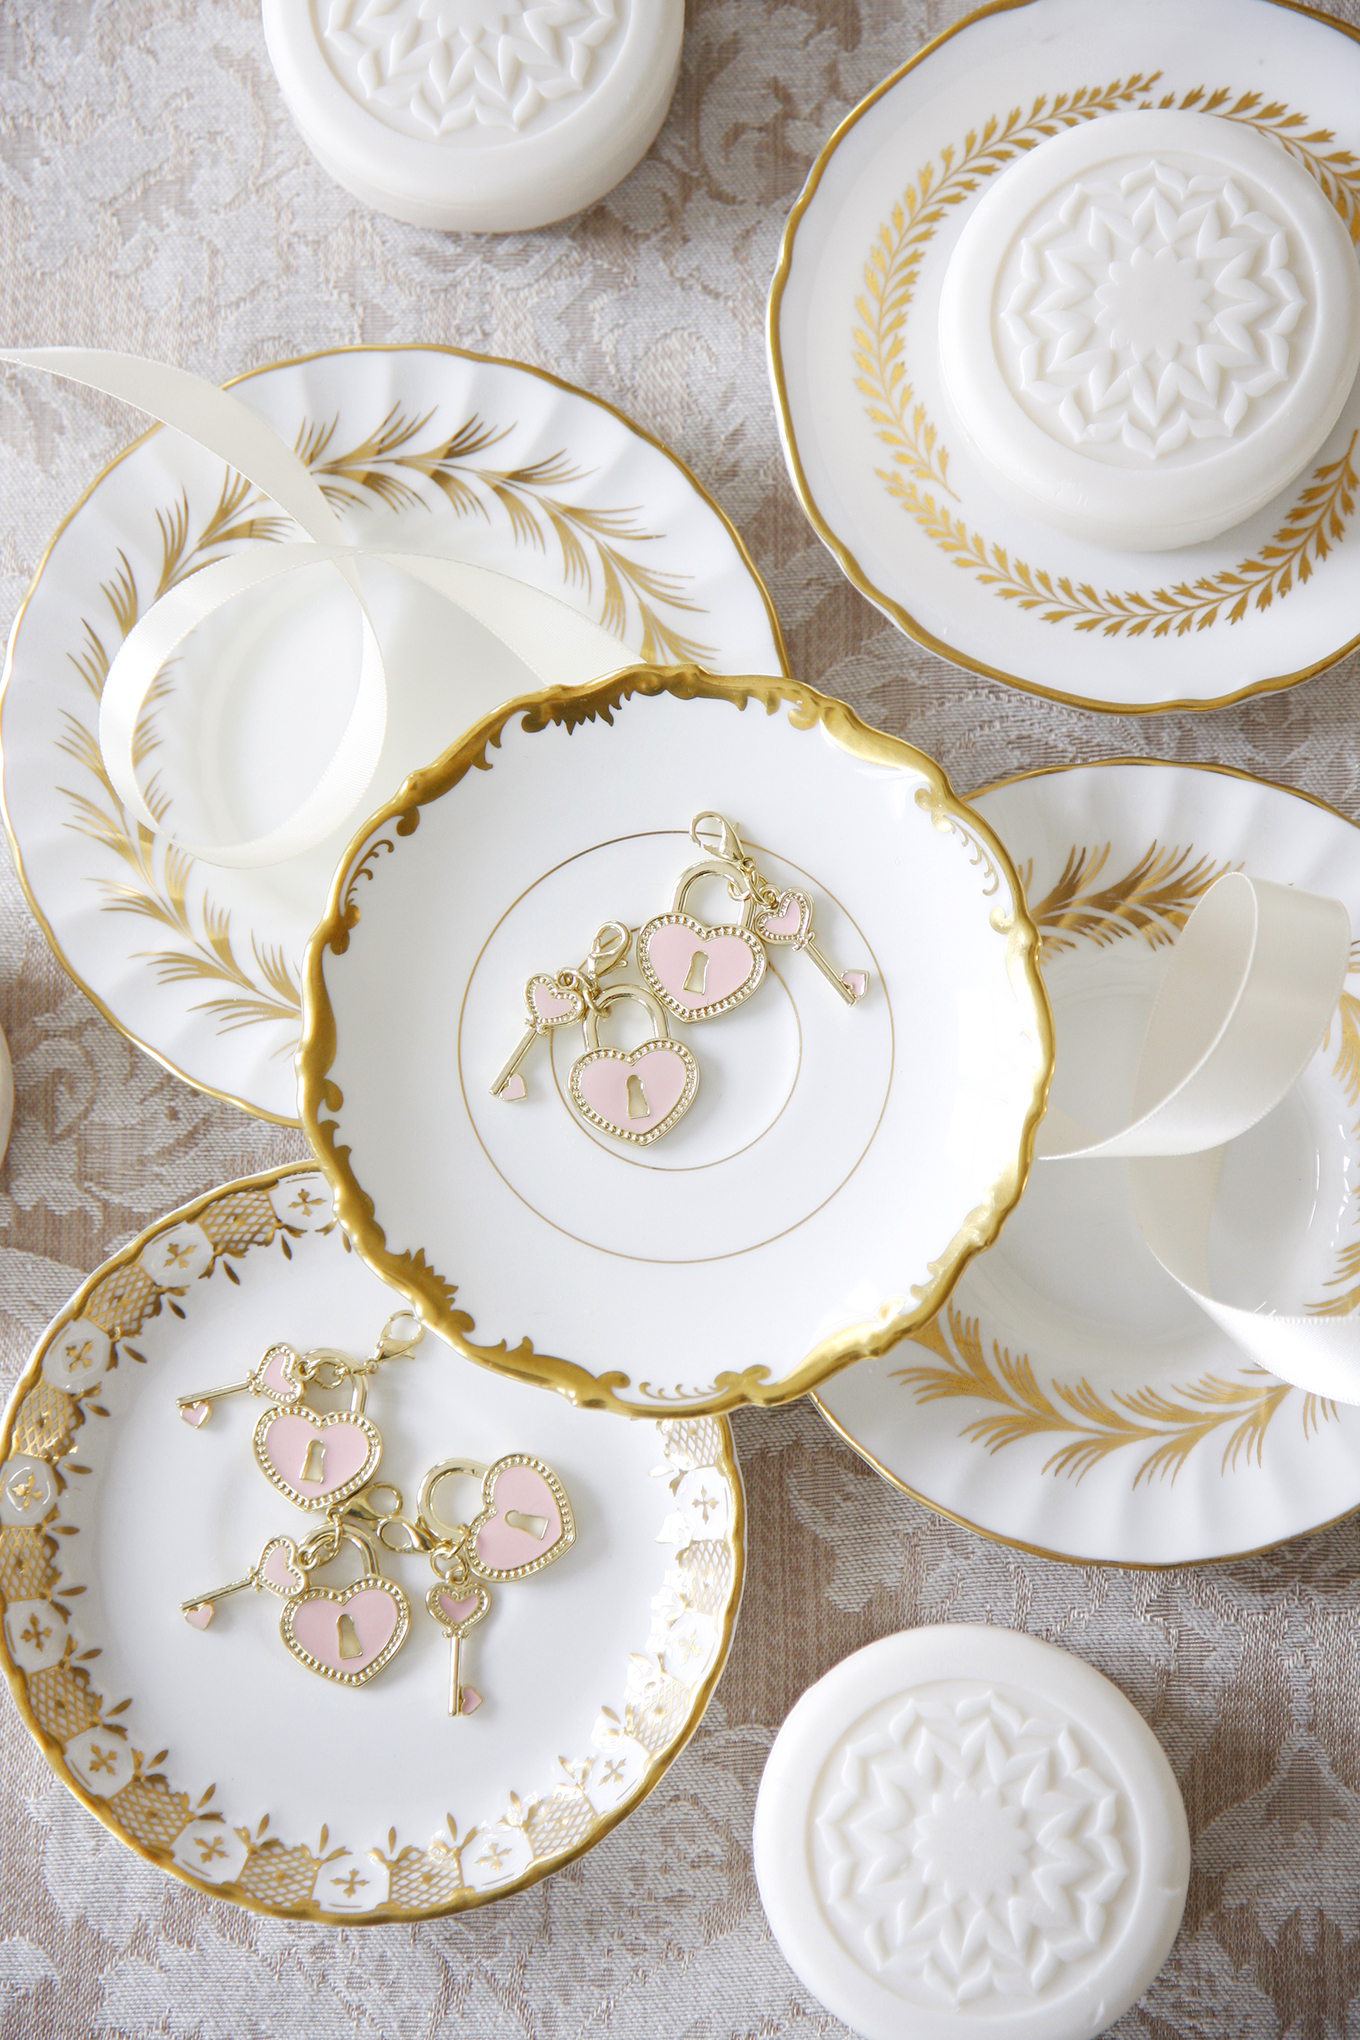
Materials & Tools
• 4.5″ mini fine bone china saucers
• 5/8″ single face satin ribbon
• 2.5″ scented round soaps
• Charms with lobster claw
• Small clasp ring
• Scissors
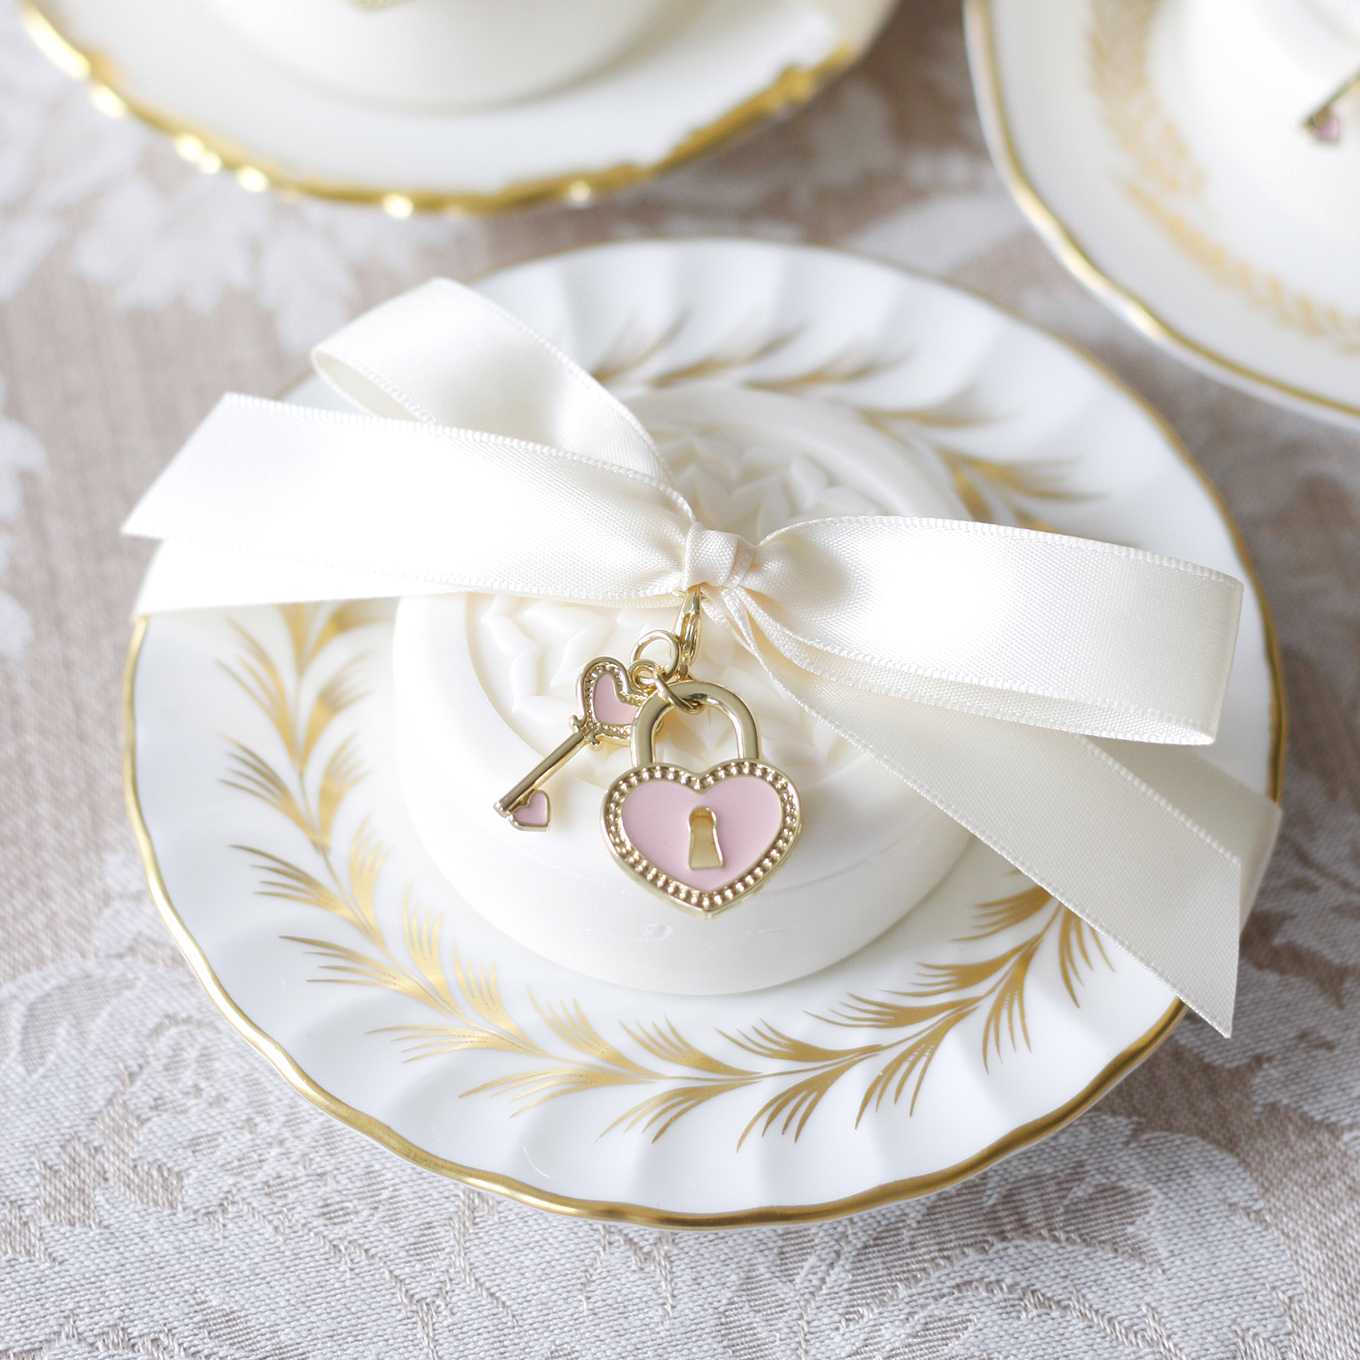
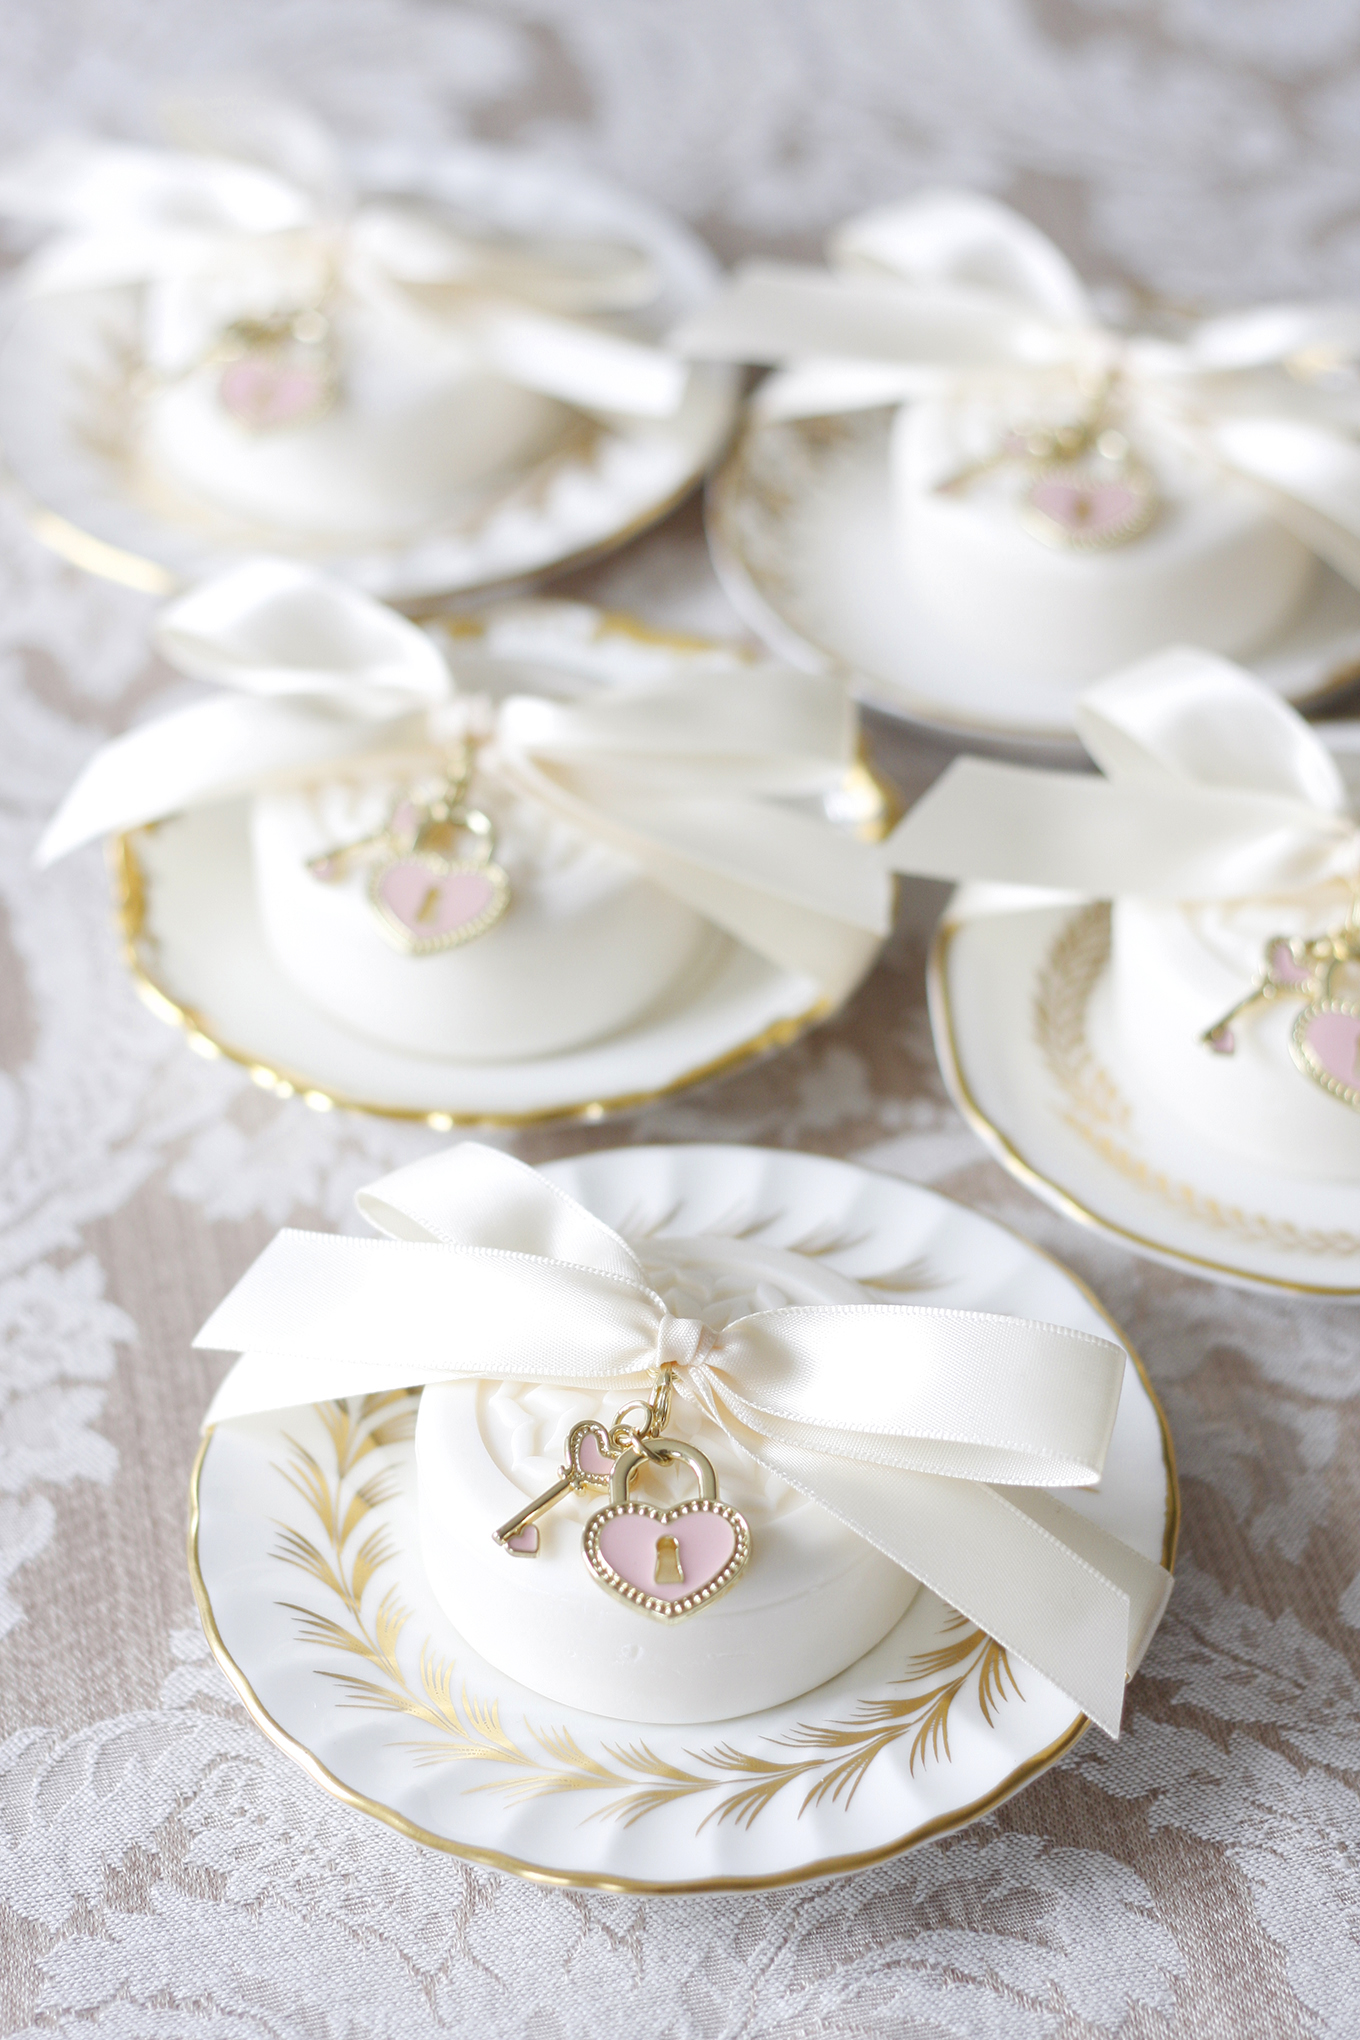
 The following instructions are for one soap favour.
Step 1
Cut a strip of ribbon to 18″ and lay flat on table with the shiny side down. Place a round soap in a mini saucer and lay both of these elements in the middle of the ribbon.
Step 2
Feed both ends of the ribbon through a small clasp ring and pull it down till the ribbon is tight against the top of the soap. (Visual not shown)
Step 3
Open the lobster claw and attach the charm to the small clasp ring that is holding together the ribbon in the middle of the soap.
Step 4
Grab both ends of the ribbon and tie a bow in the middle of the soap. Trim ends off at a slant with the scissors.
In April of 2007, I spent three weeks on vacation in Paris and it was the most amazing experience of my life. A year earlier, a girlfriend of mine had quit her job and moved there to live the artist dream to study the masters and paint. Luckily, I was able to stay with her in a small apartment before her Visa expired. For a small town girl like me, going to Paris was literally living a dream — going up the Eiffel tower, visiting the Louvre and shopping the flea markets.
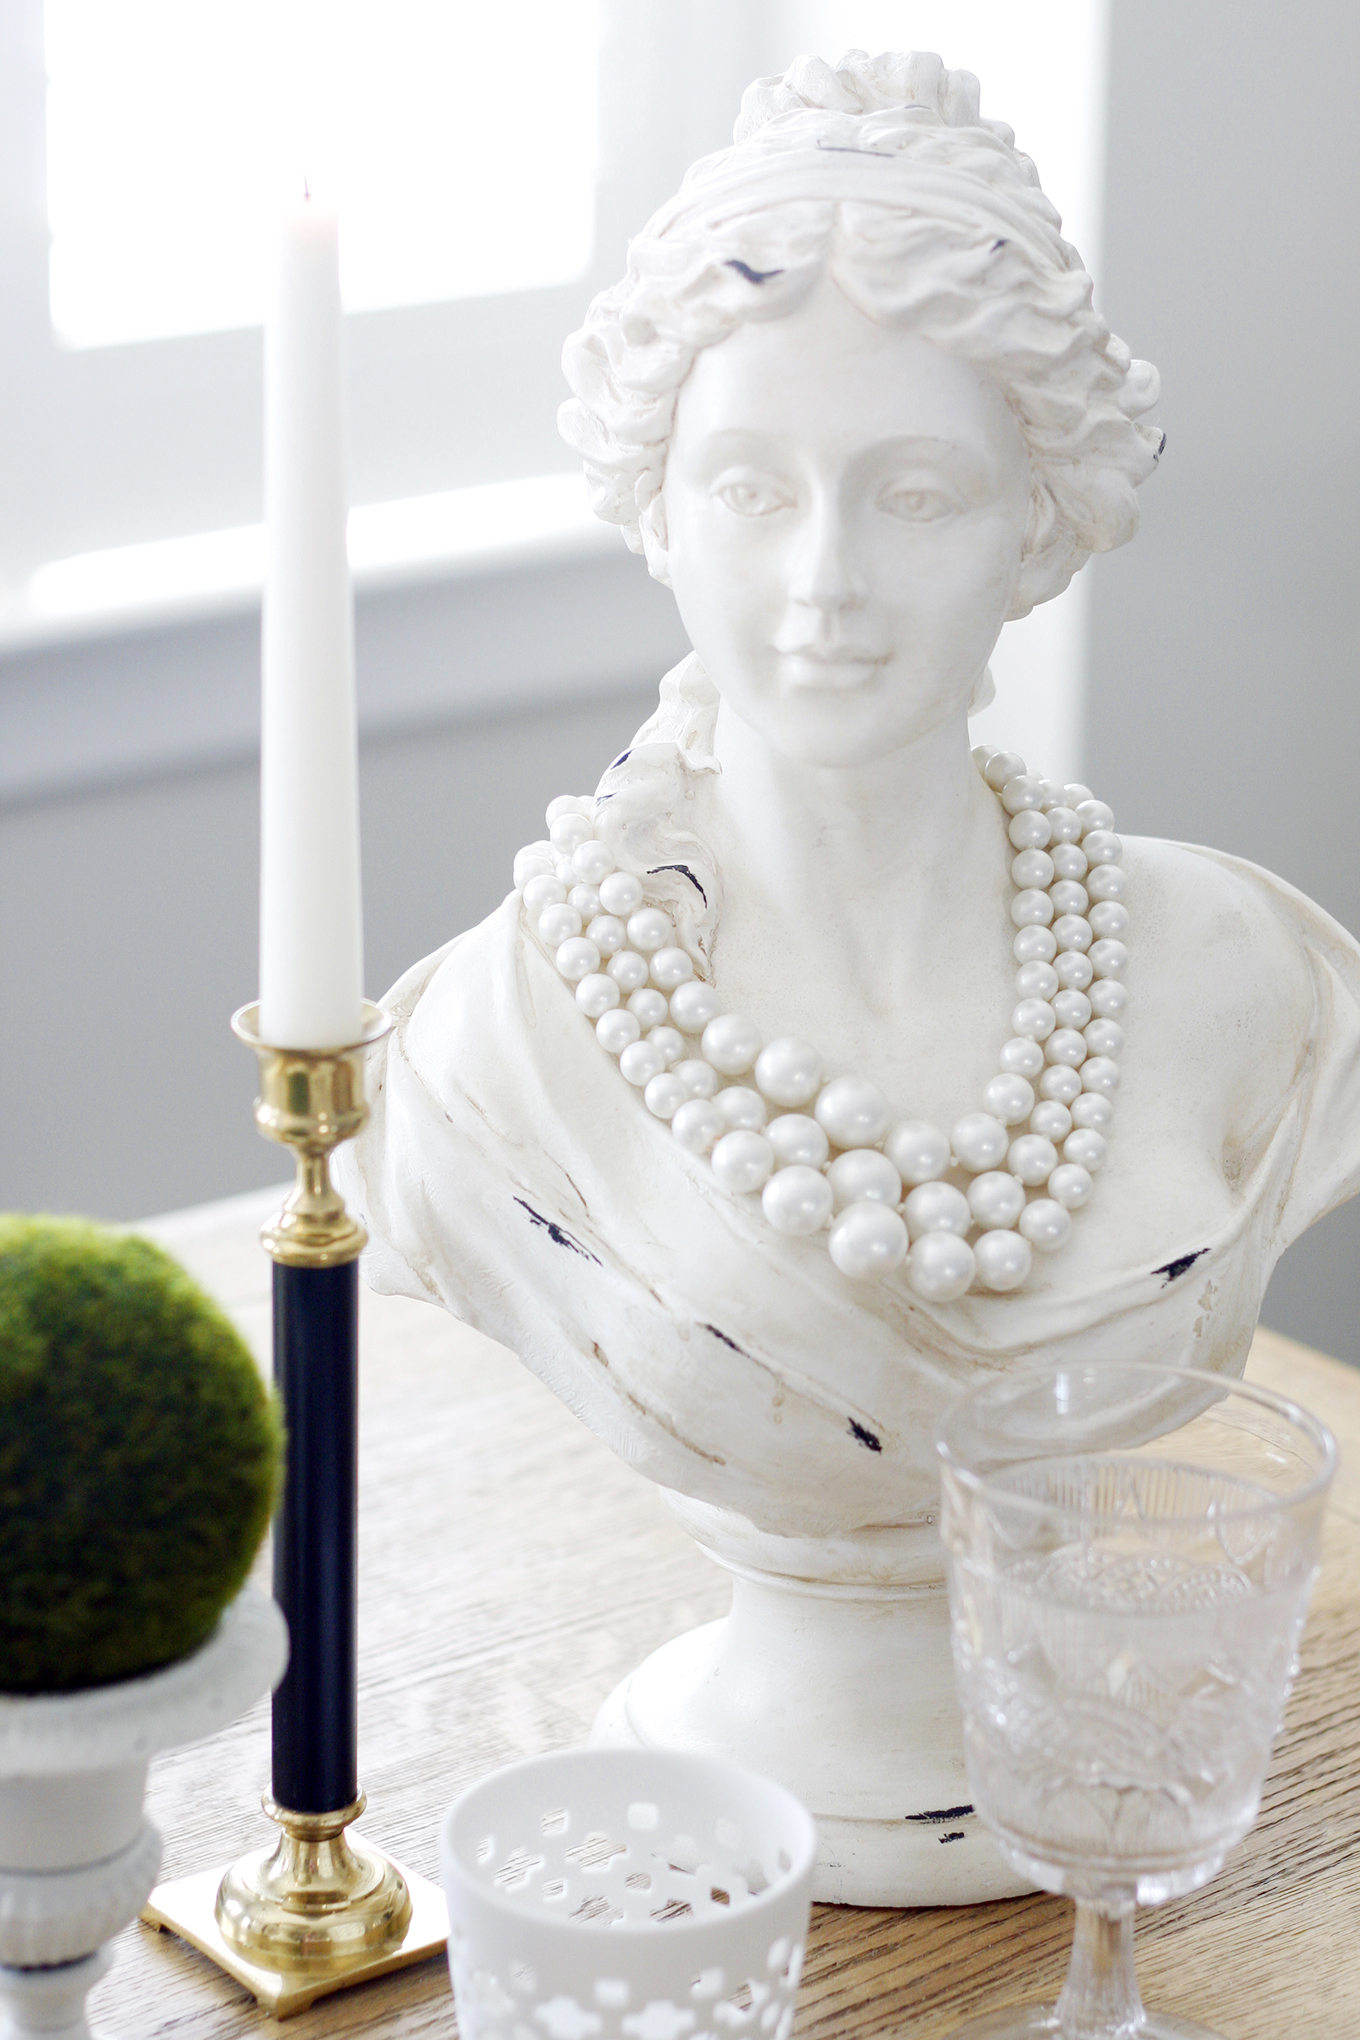
Since I do not have any plans to go back to Paris anytime soon, I was inspired to bring back the look and feel of my time spent there through a French inspired garden tablescape. I put together a style board showcasing some of my favourite things — monogrammed wreath laurel, marble busts, manicured gardens and grand architecture.
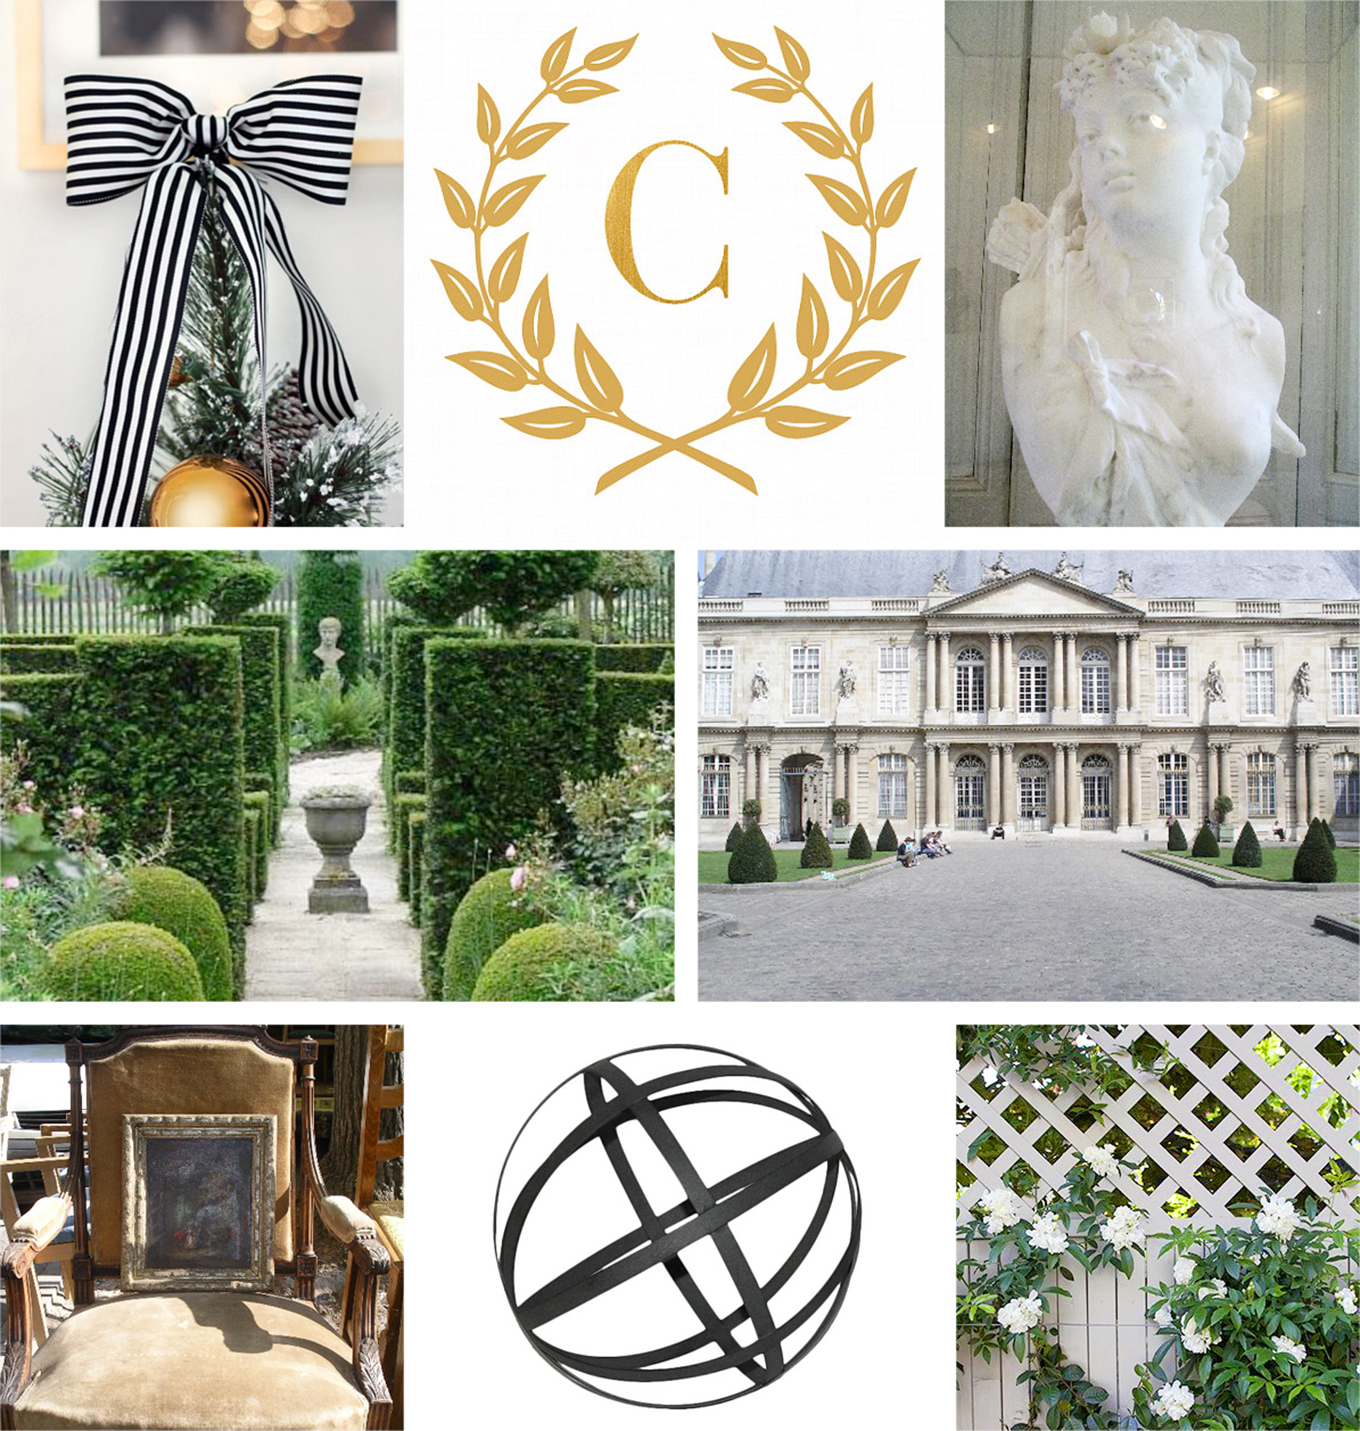 Pulling together decorative props that I already had in the house, I was able to create the look and feel of a French garden through my tablescape below. You may recognize a few things like the brass candlesticks, gold chargers, flatware and glassware from the Easter tablescape I created a few months ago. Its all about using the things you already love and have in your home, but by just adding a few different elements, like the black metal orb and lady bust (I love her!) it makes things fresh and tells a whole new story.
The only thing missing is that I wished to have used a table runner. I have been looking for the perfect one for quite some time now with no luck. But sometimes finding those things you love for your home take time. Just like everything else in life, you just need to have patience and faith that one day, the table runner of my dreams will find me.
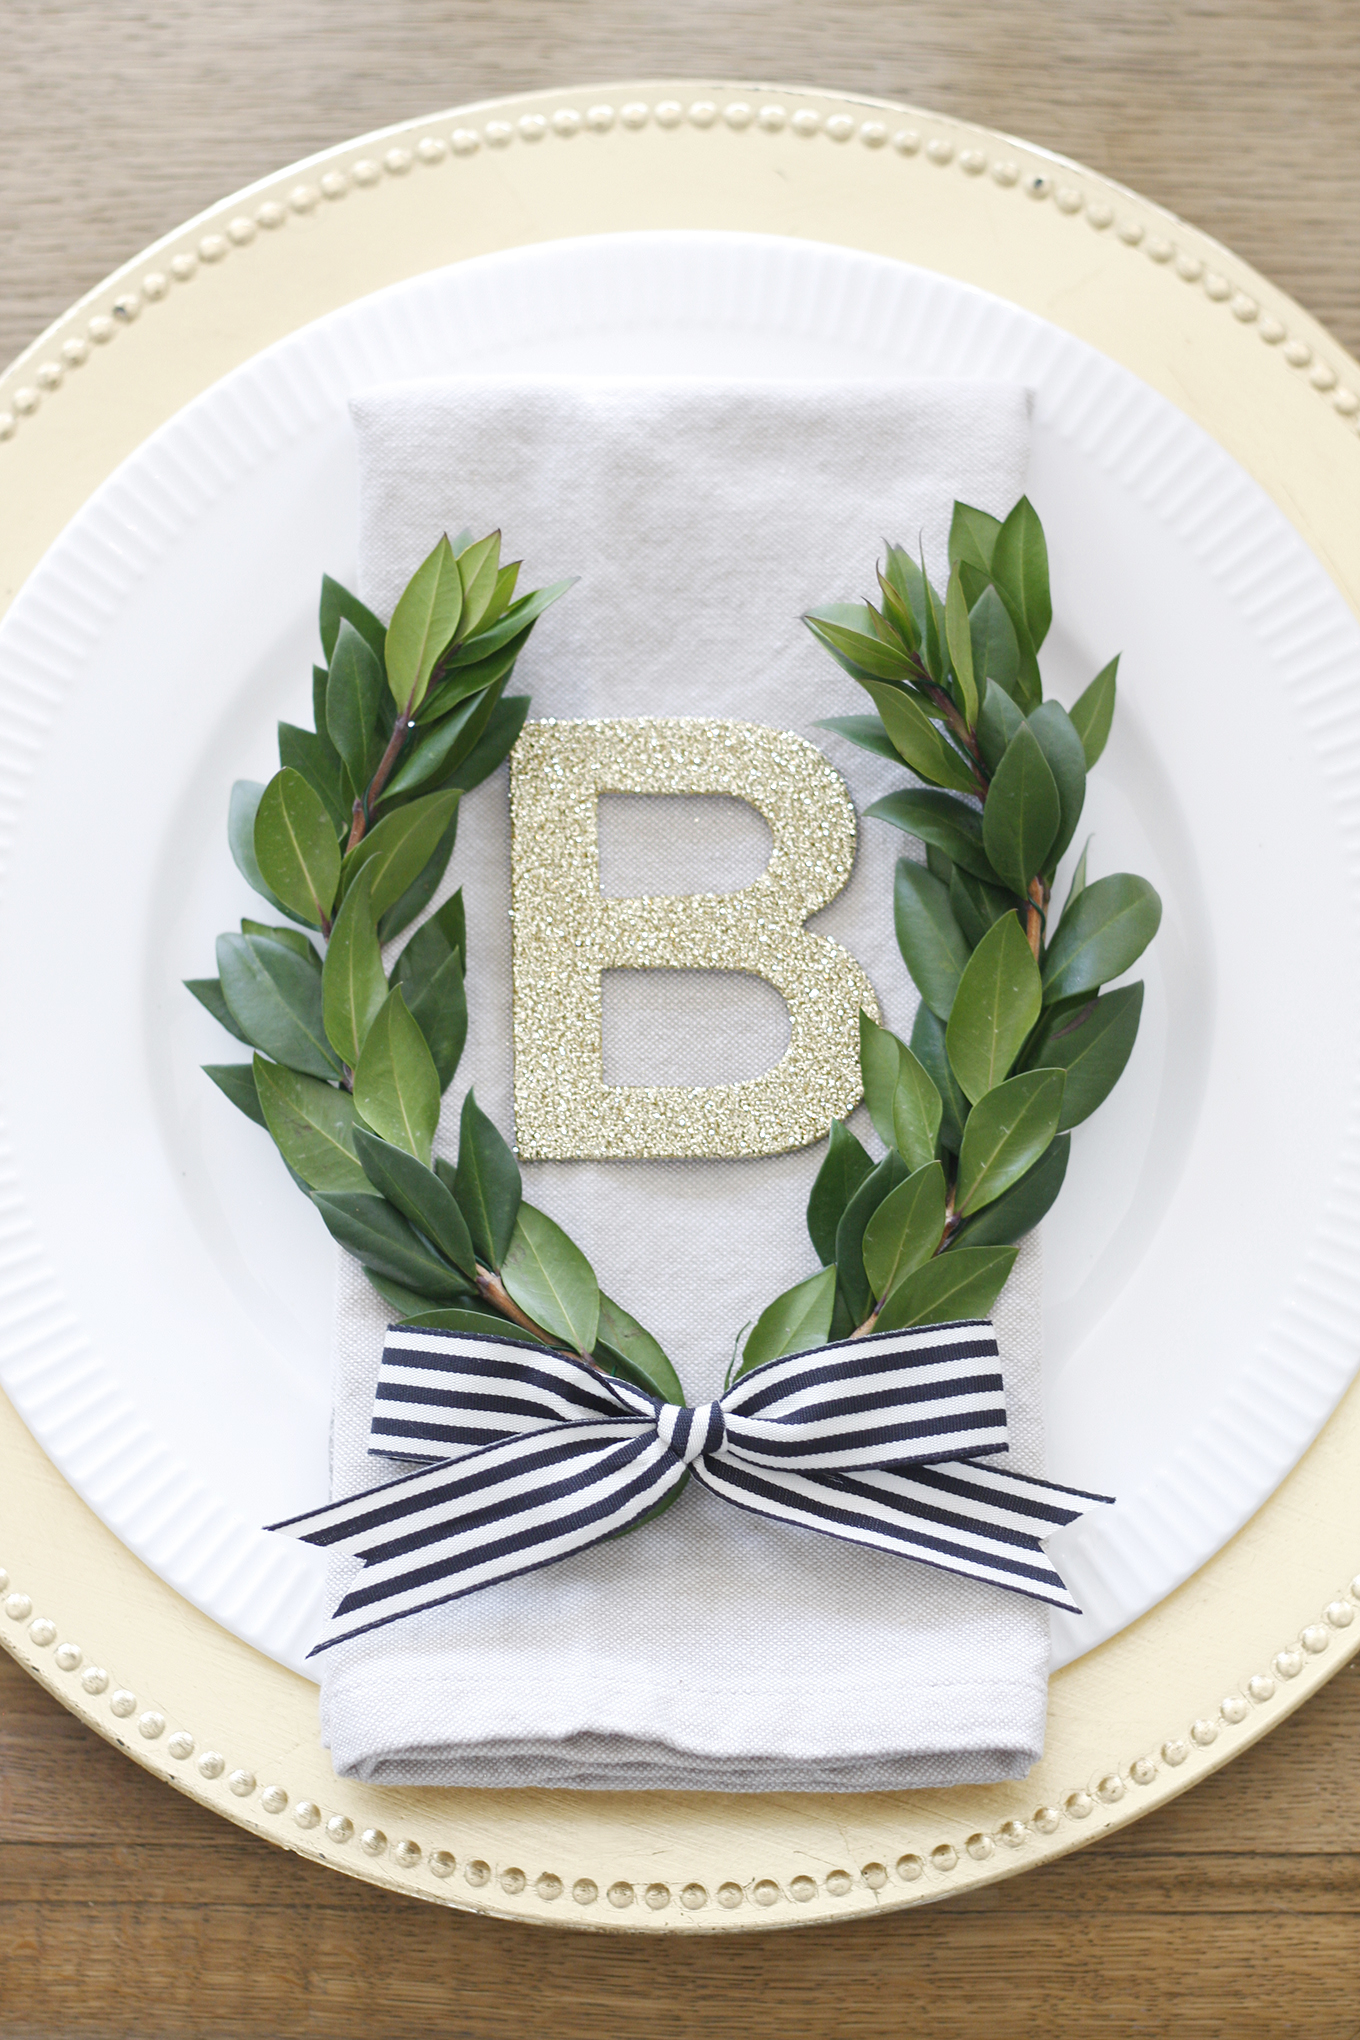
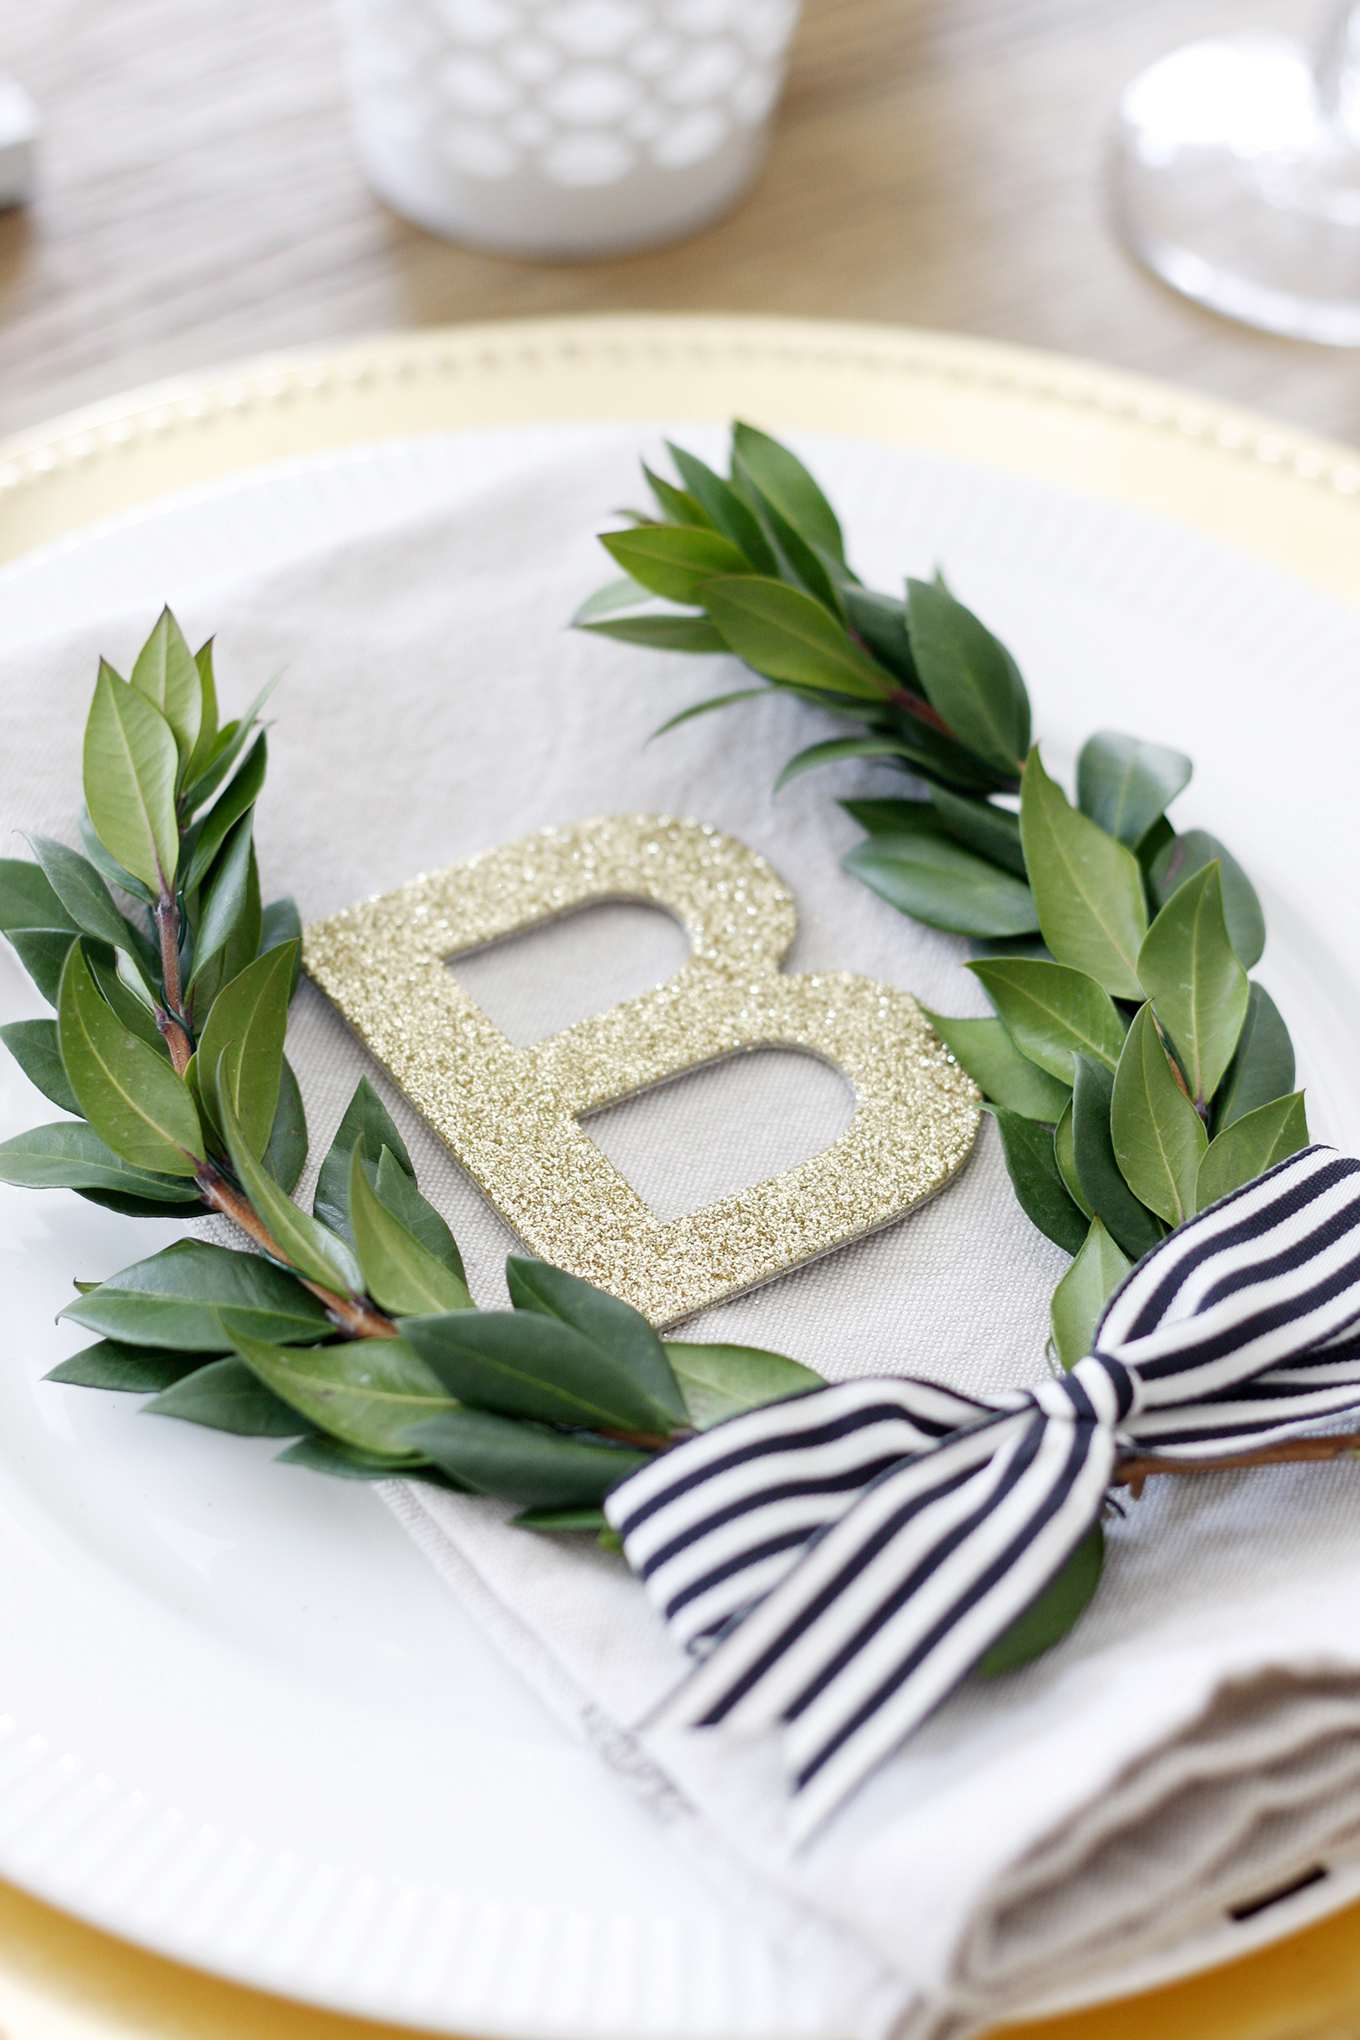
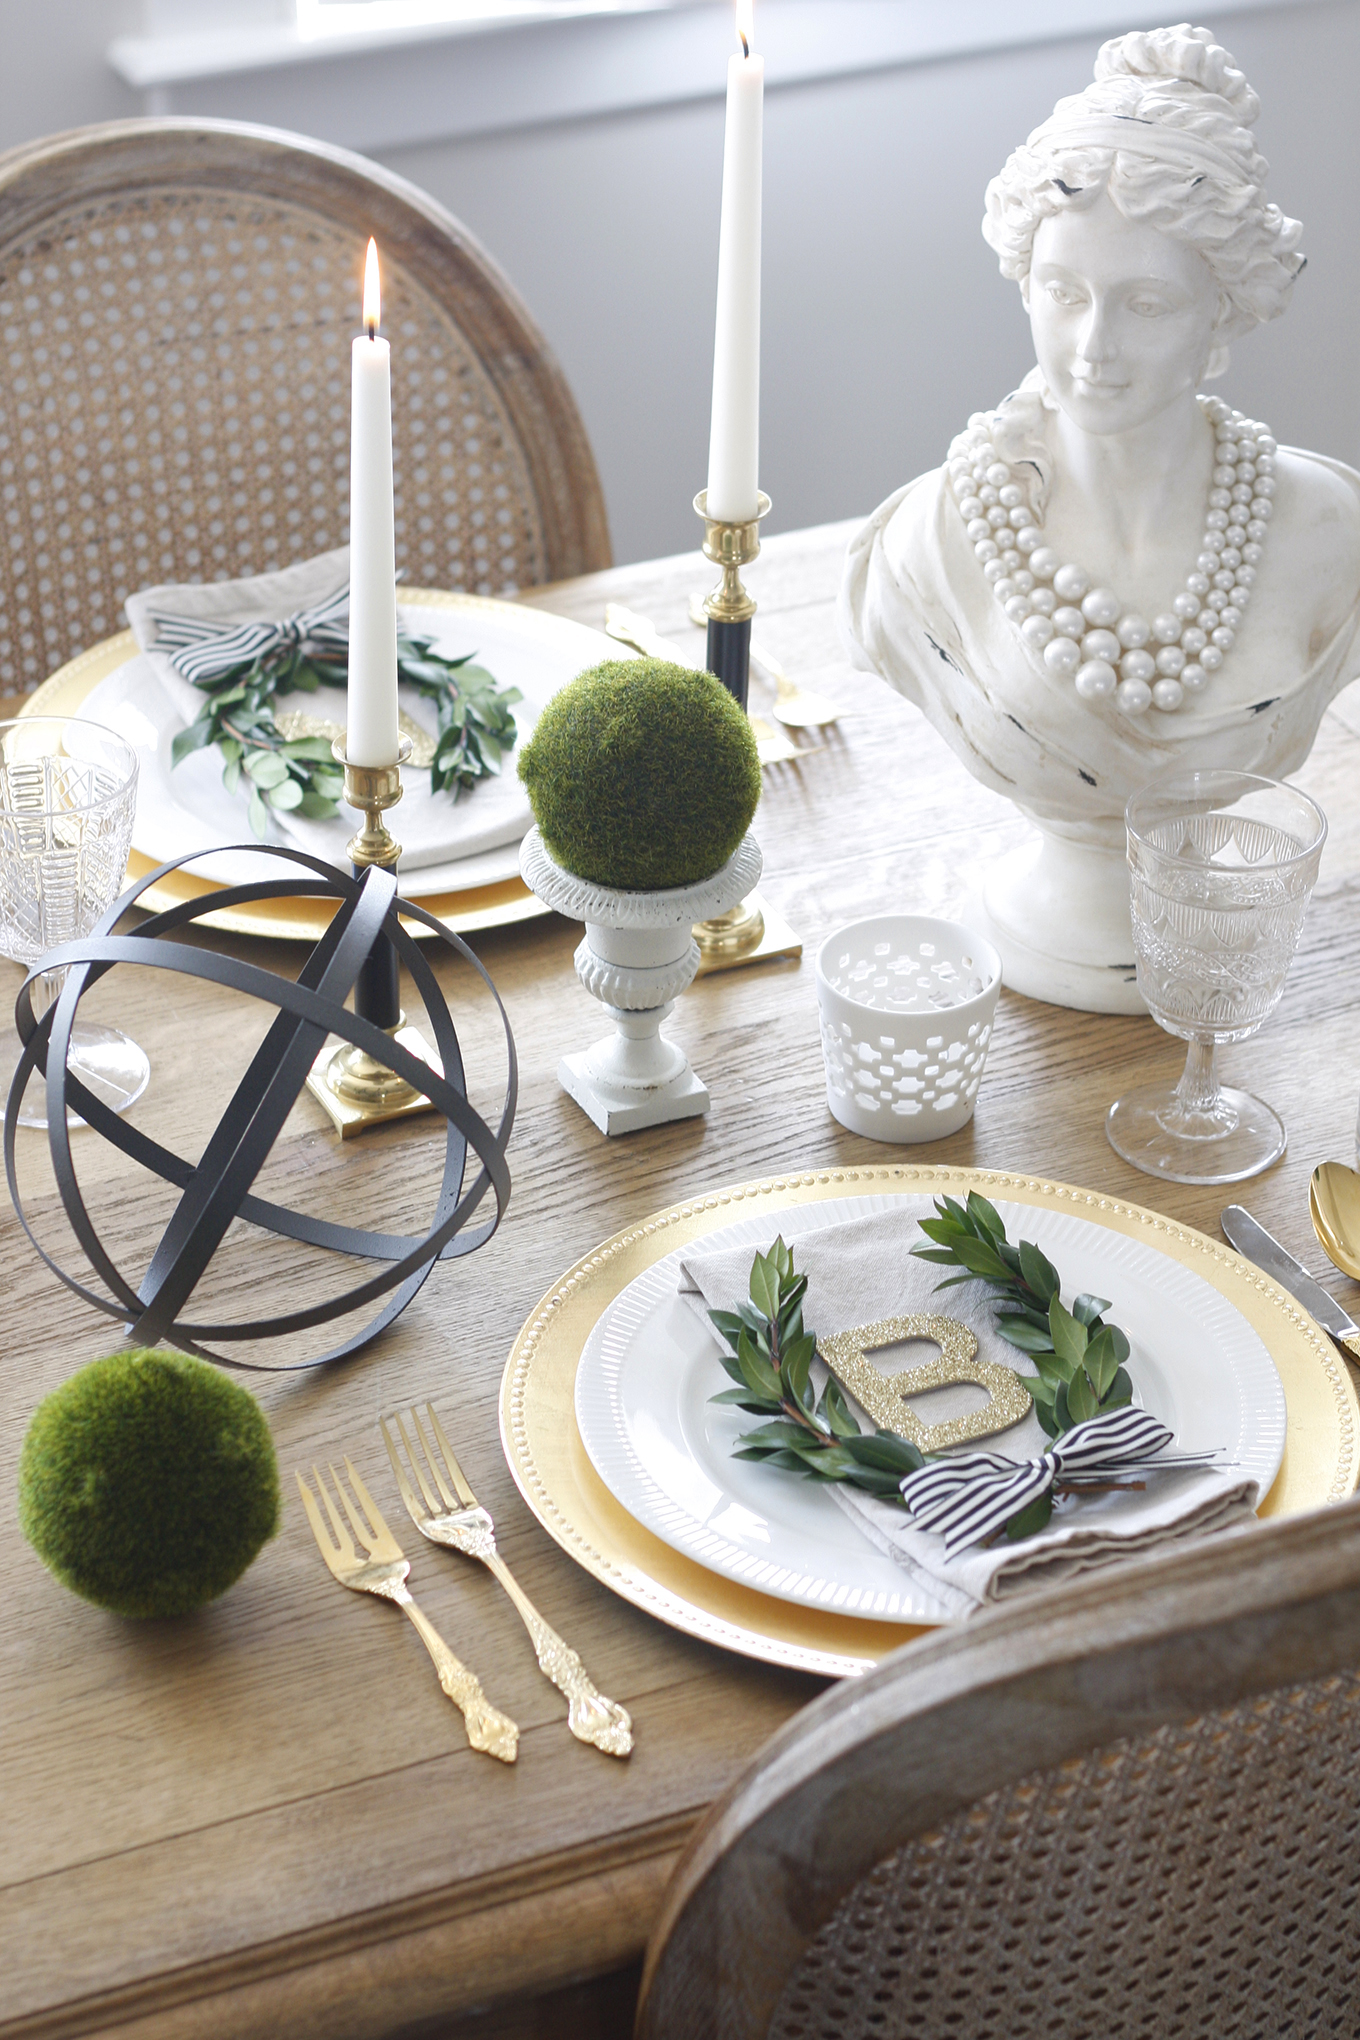 For the French inspired garden tablescape, I really wanted to create something special for each of my friends/guests. For each dinner place setting, it features the initial letter of each guest’s name, surrounded by laurel leaves and topped with a modern black and white striped bow. It looks so classy and elegant, and best of all, it was easy and super simple to create. Also, by using greenery it was very economical and a great alternative to flowers, which yes are beautiful, but can be very expensive. And since the greenery will be out of water, its freshness with last up to only about 1 – 2 days.
 Materials & Tools
• 3 inch gold glitter letters (available at Michaels)
• 7/8″ black and white striped ribbon
• 24 gauge floral wire
• Sprigs of greenery
• Scissors
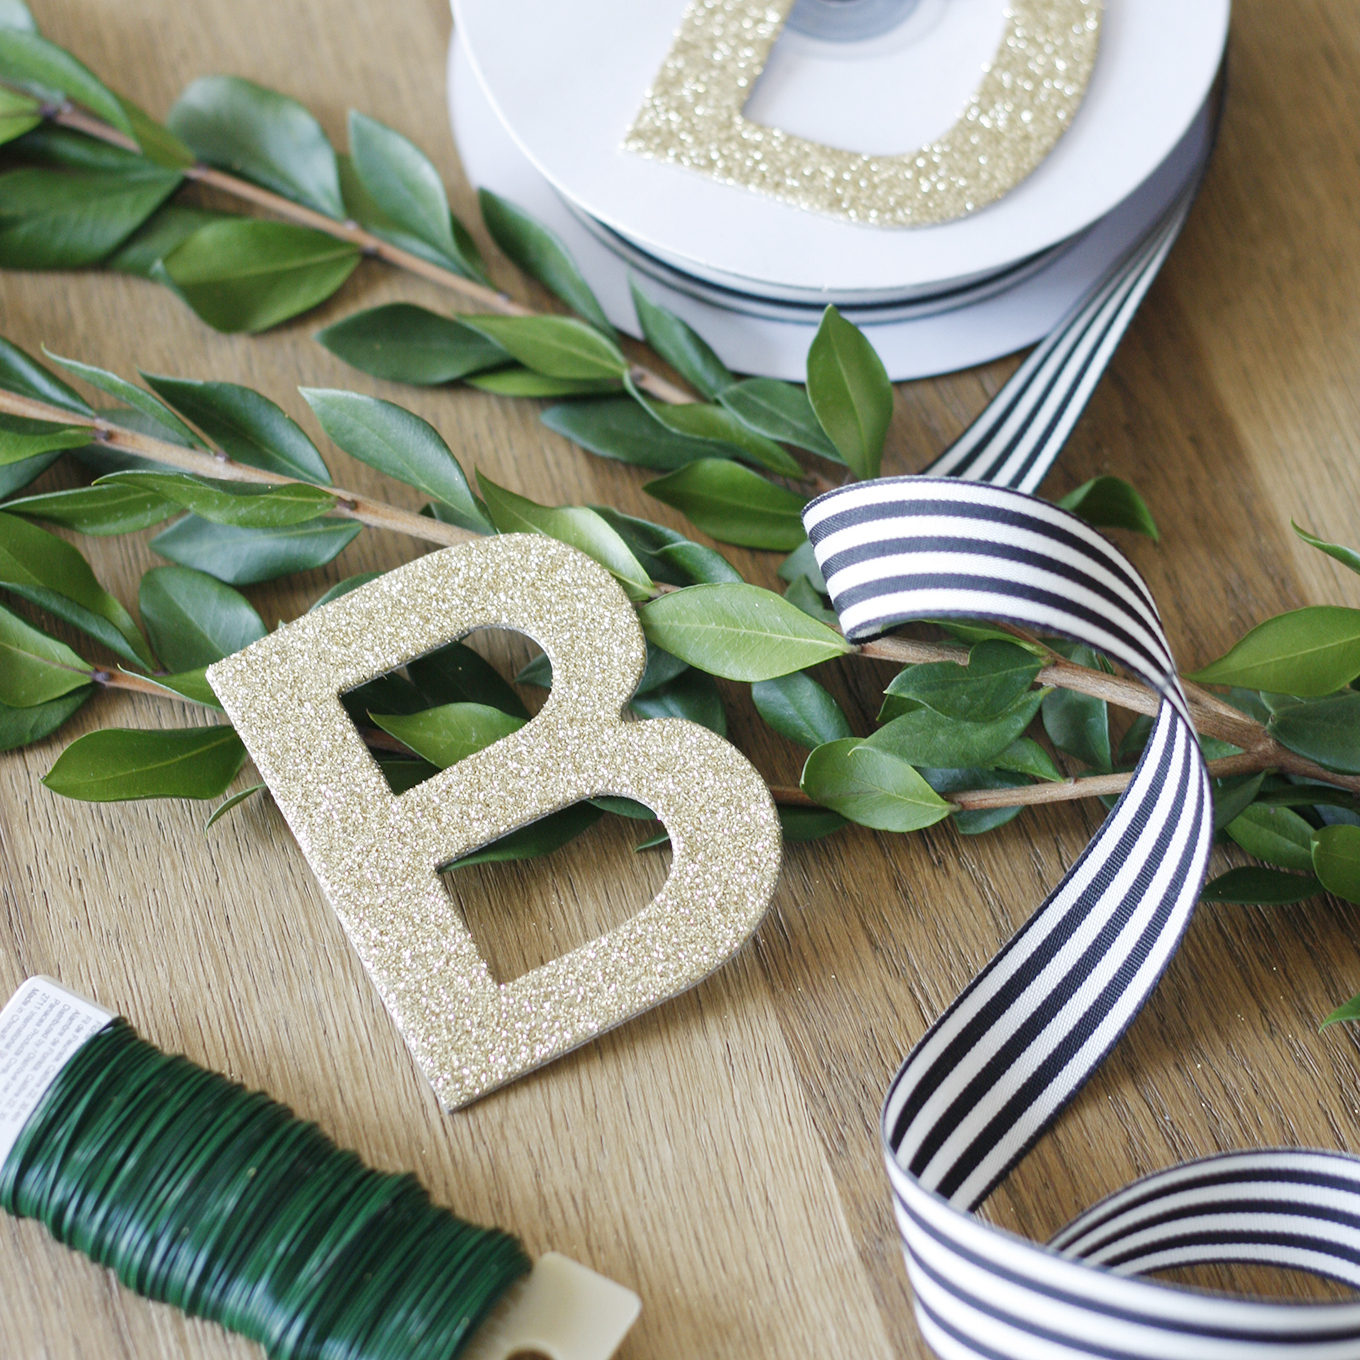 The following instructions are for one individual laurel wreath place setting.
Step 1
Cut two sprigs of greenery approximately 8″ long each. Unwind a strand of floral wire, measure and cut approximately 10″ of wire. Starting at the bottom of the sprig, wind the wire gently around the stem and continue working all the way up. Cut the wire and hide the end behind the leaves.
Step 2
Gently curve each sprig in a horseshoe shape. At this point, you may use another small piece of wire to join the sprigs at the point where they intersect.
Step 3
Next, time to make the bow. It can be a tricky thing to explain, yet alone master, so here are instructions via Martha Stewart. To be honest, my original plan was to tie the bow directly with the greenery, but after a few unsuccessful tries to make the bow look ‘just right’, I decided to ‘cheat’ and just rest the bow on top of the laurel wreath.
Step 4
In the example shown, I selected the letter ‘B’ for my friend Barb. Fold the linen napkin, lay the gold letter in the middle, assemble the laurel wreath around it and lay the striped ribbon on top. Voila, it’s done!
 I hope you have enjoyed learning about how to make your own laurel wreath. Please leave a reply in the comments below. I would love to hear from you! And just for fun, I have compiled a few sources of where to find the pieces you need to create your own French inspired garden tablescape.
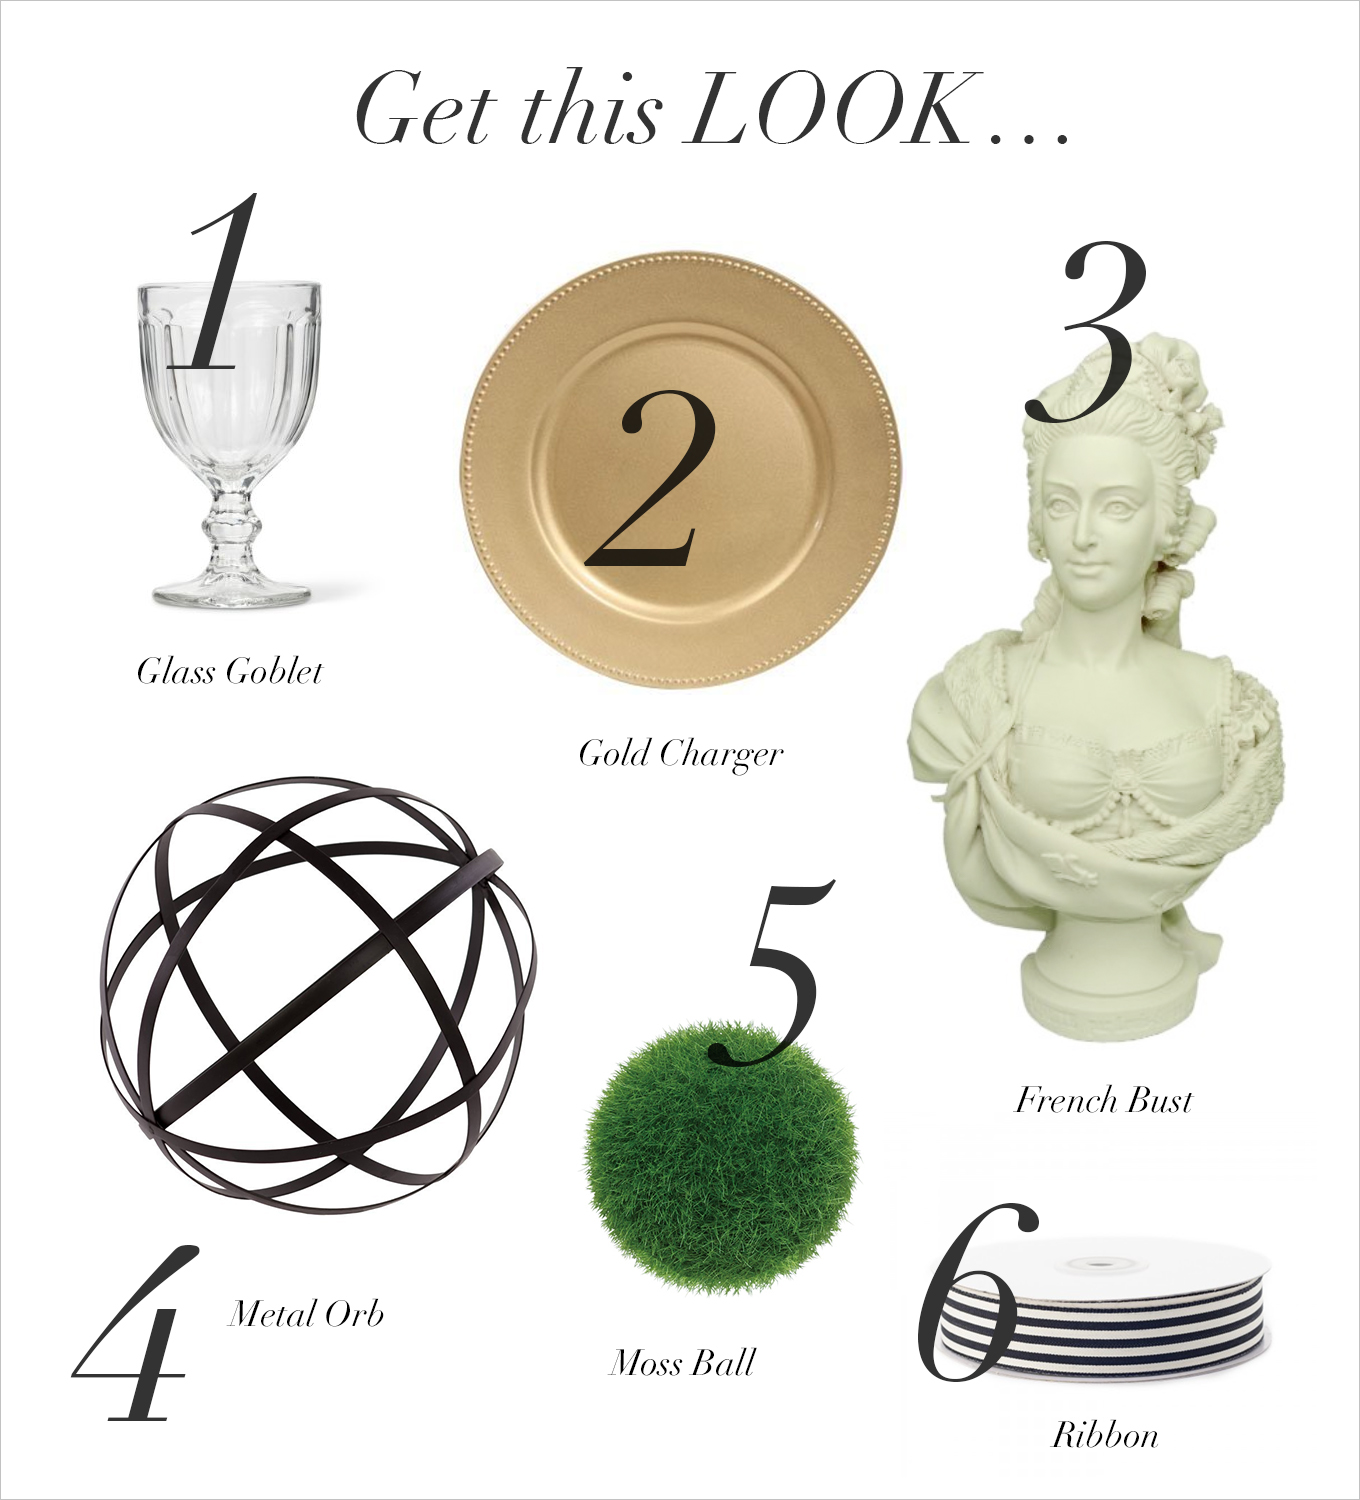 1 Glass Goblets, Amazon.ca, 2 Gold Charger, Amazon.ca, 3 French Bust, Amazon.ca, 4 Metal Orb, Amazon.ca, 5Moss Ball, Amazon.ca, 6 Ribbon, Creative Bag
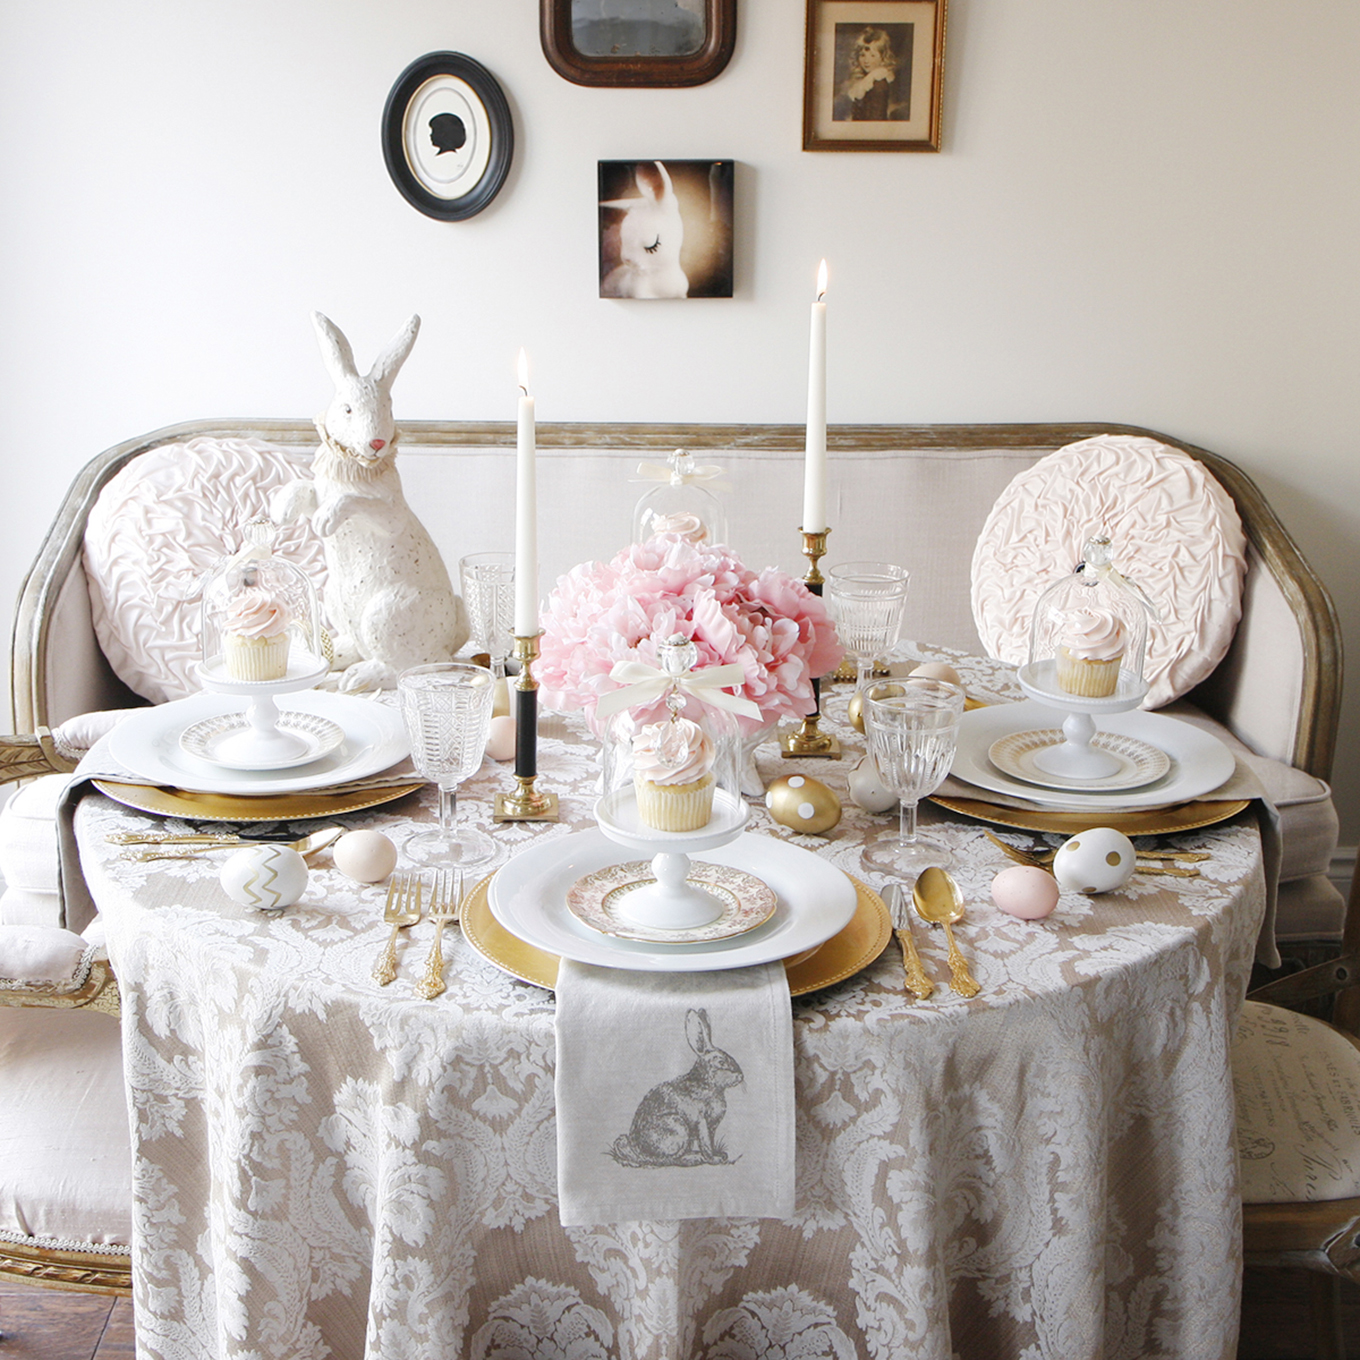
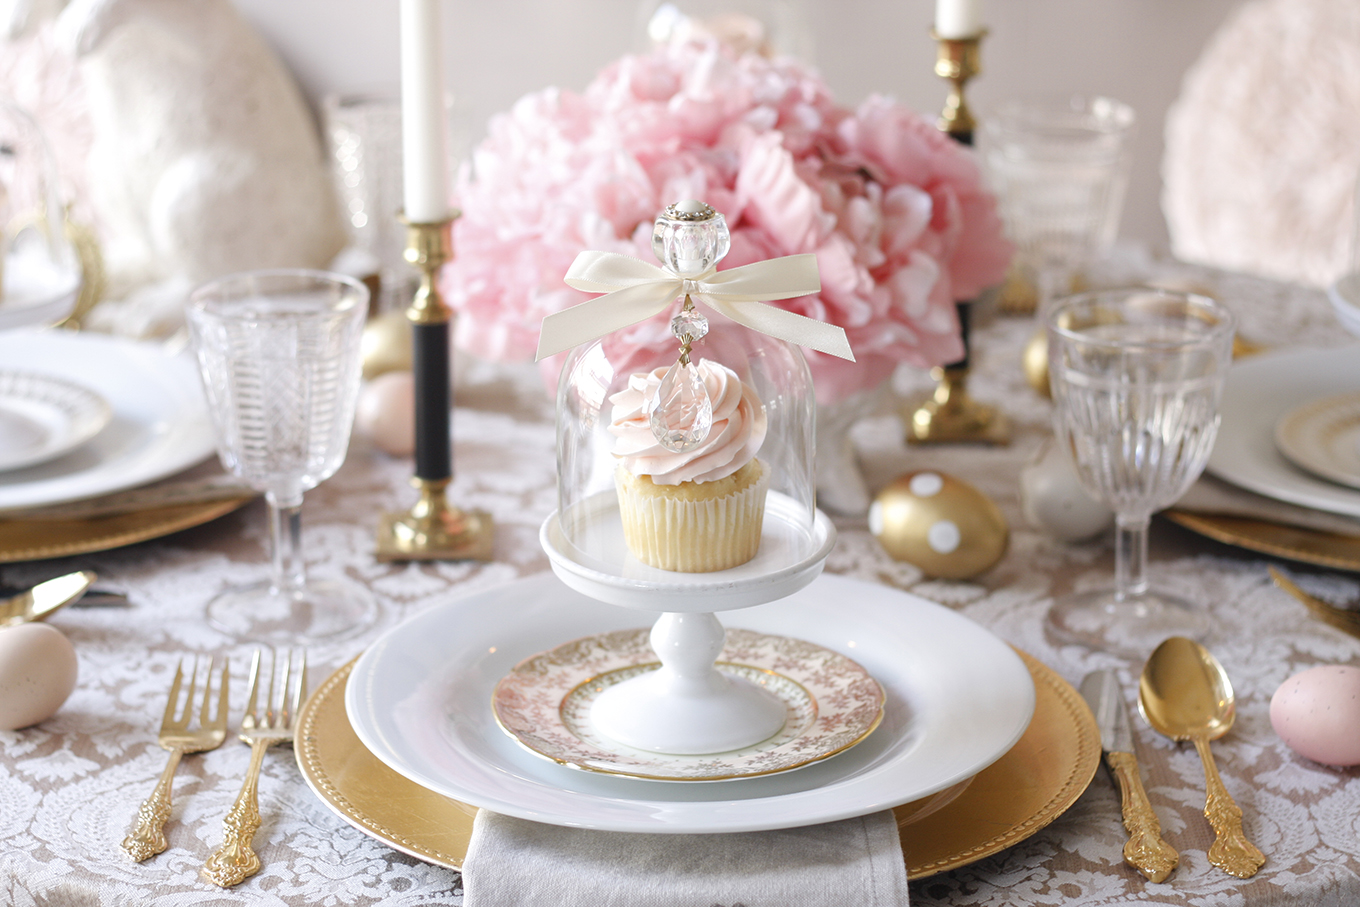
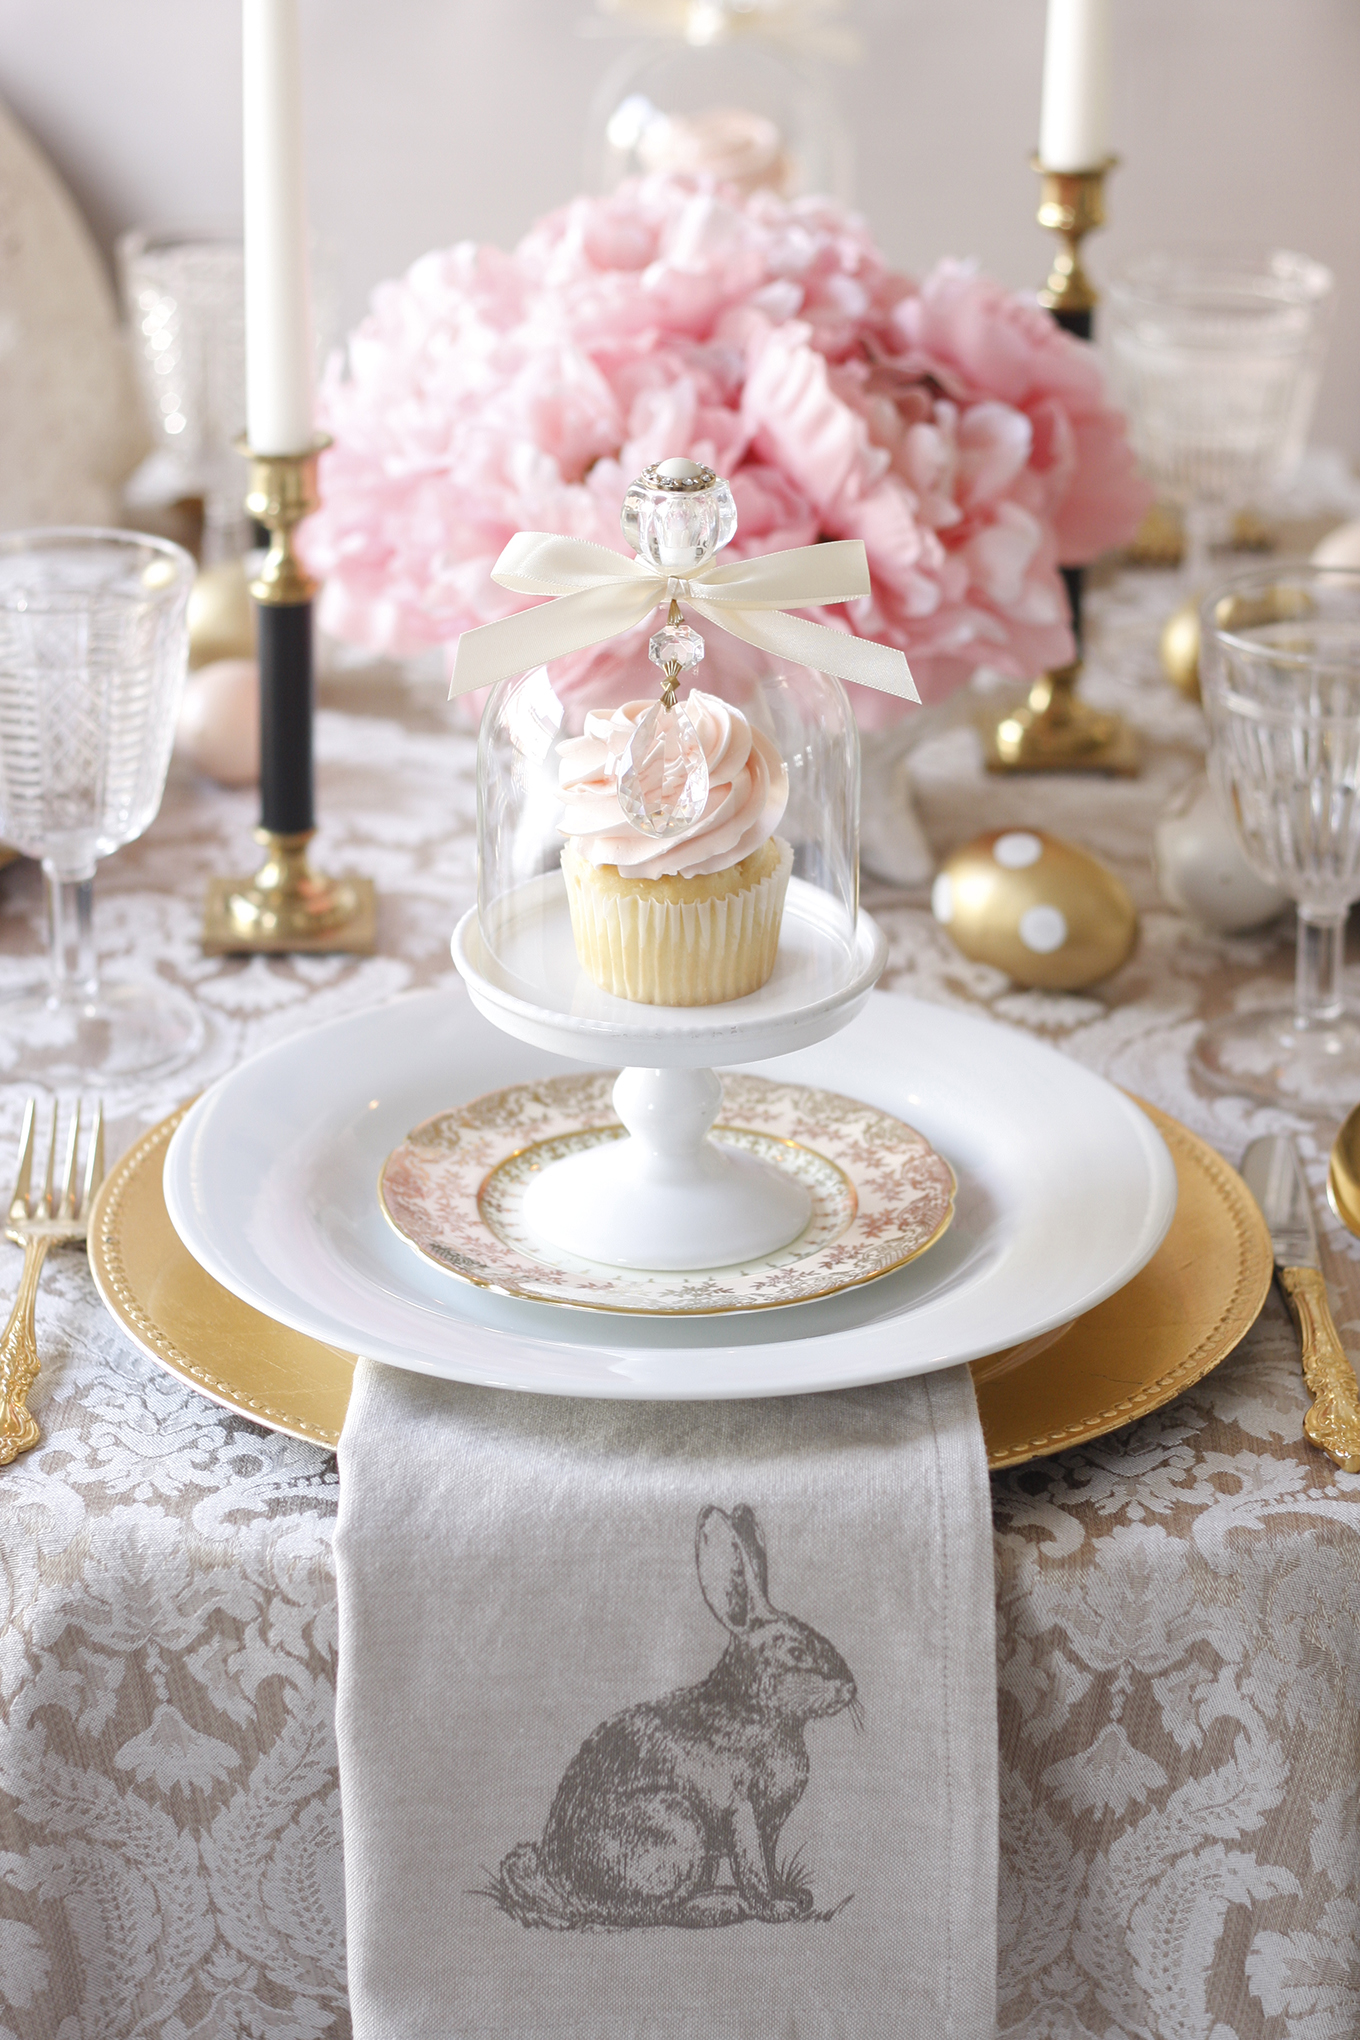
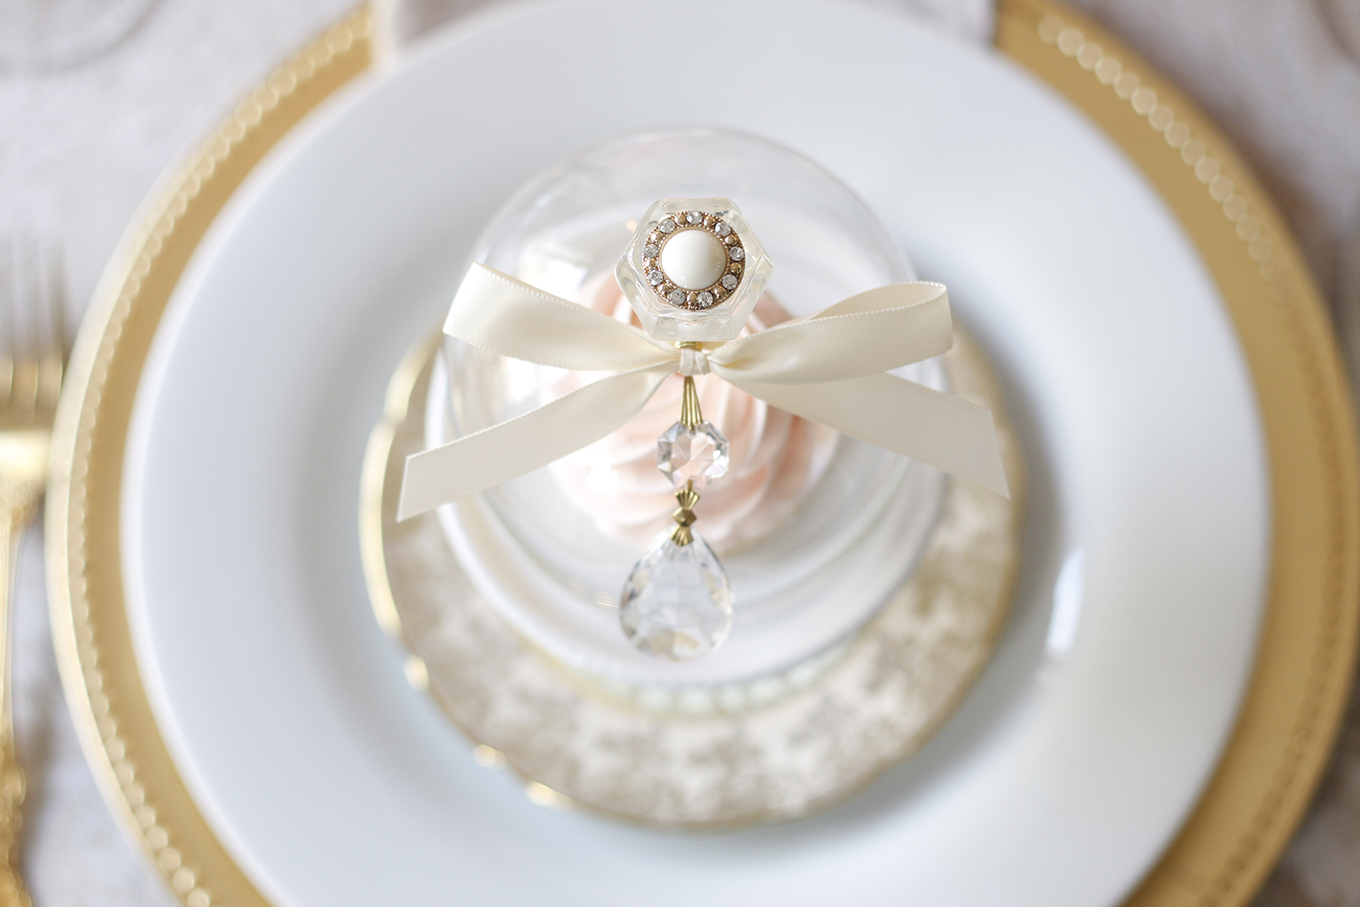
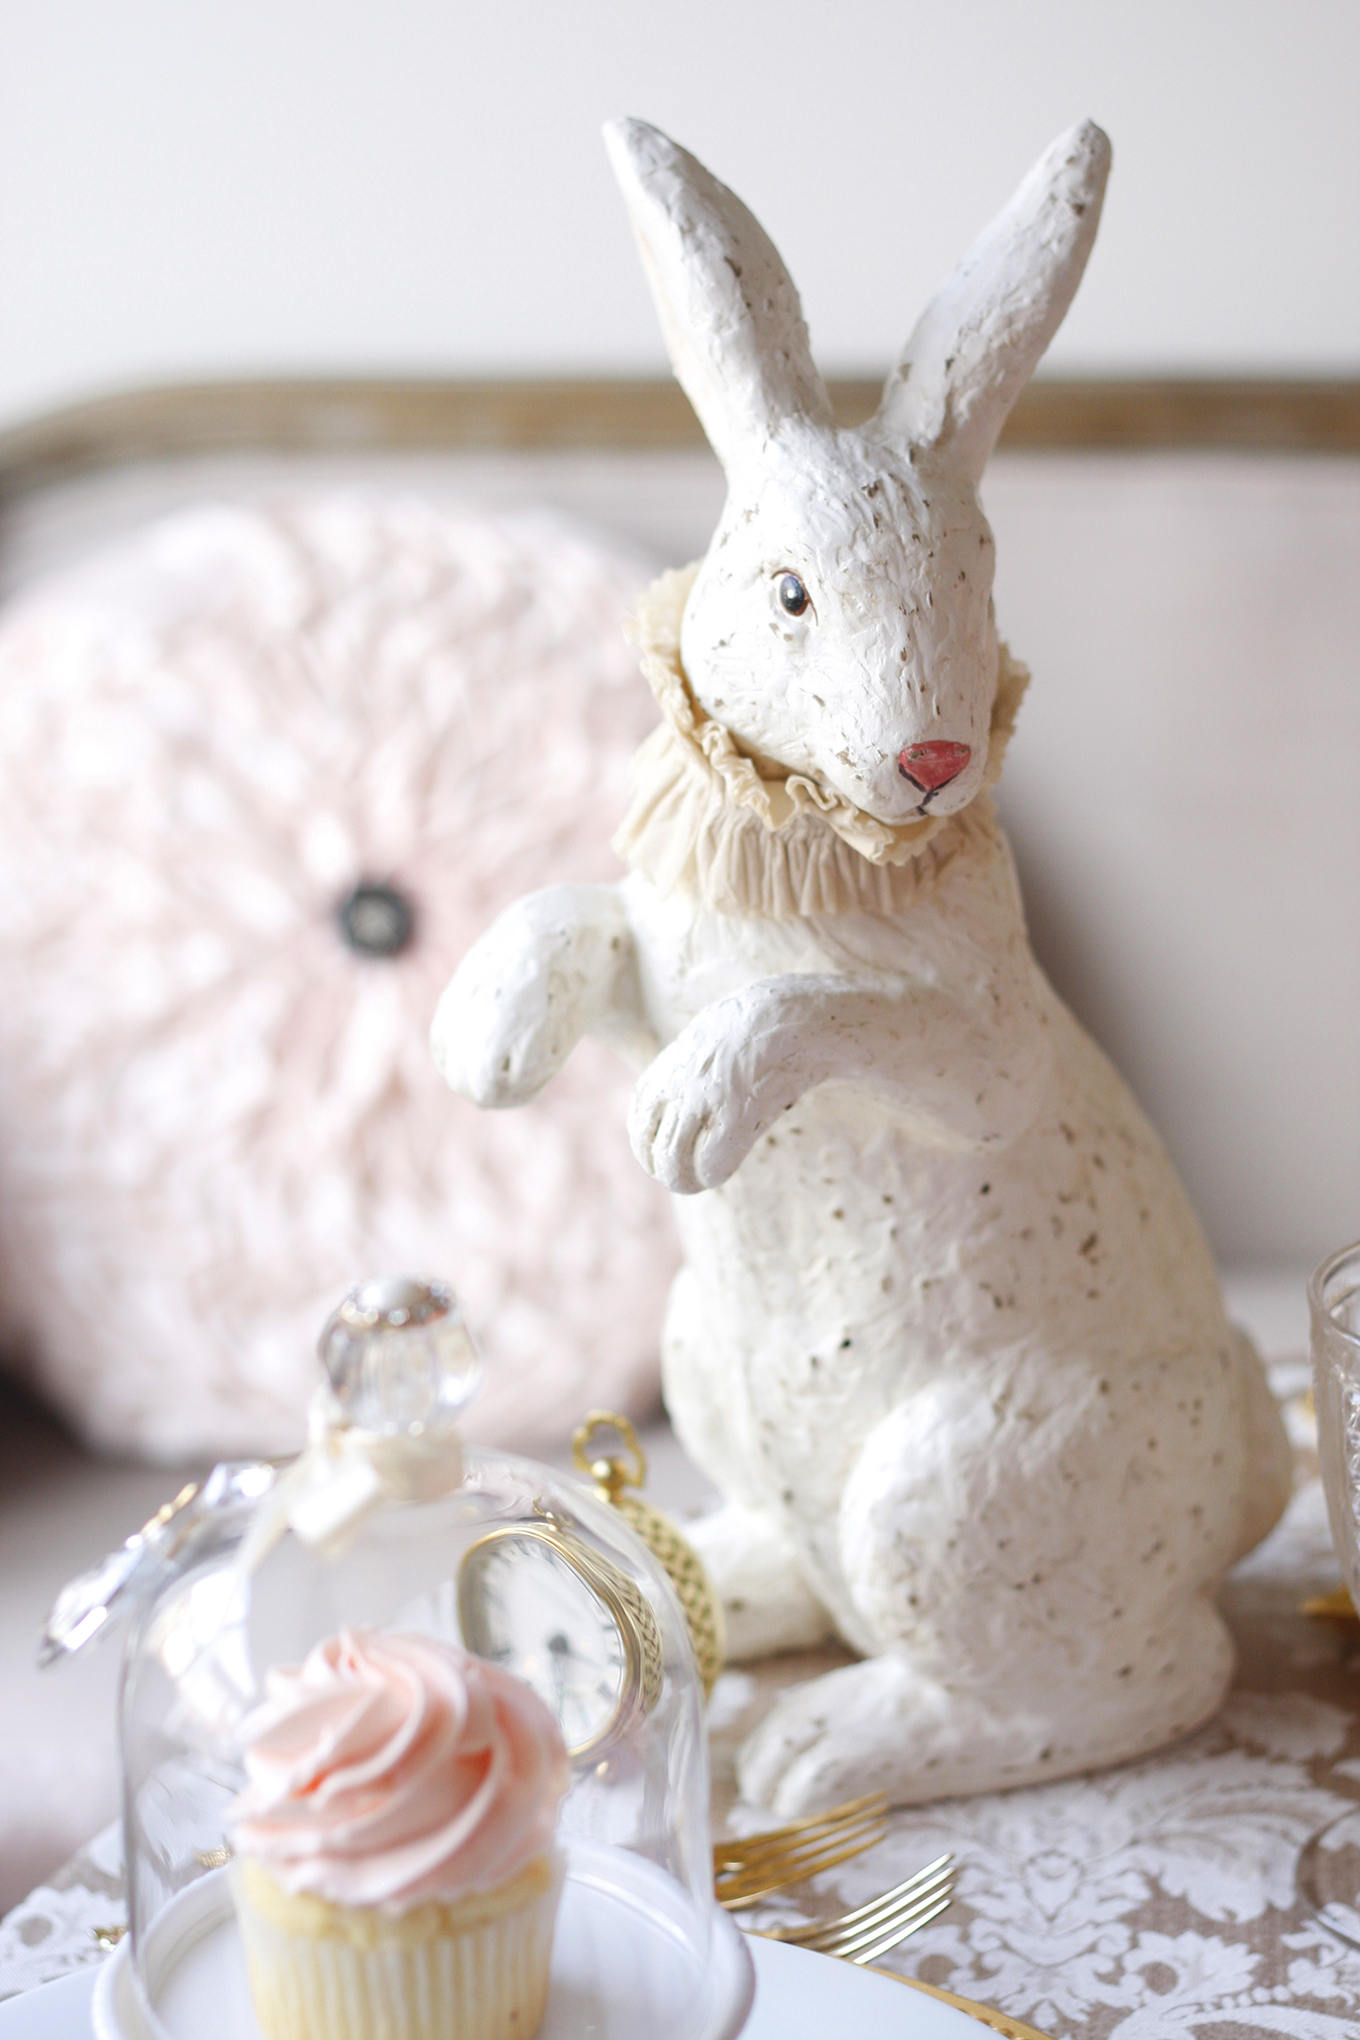
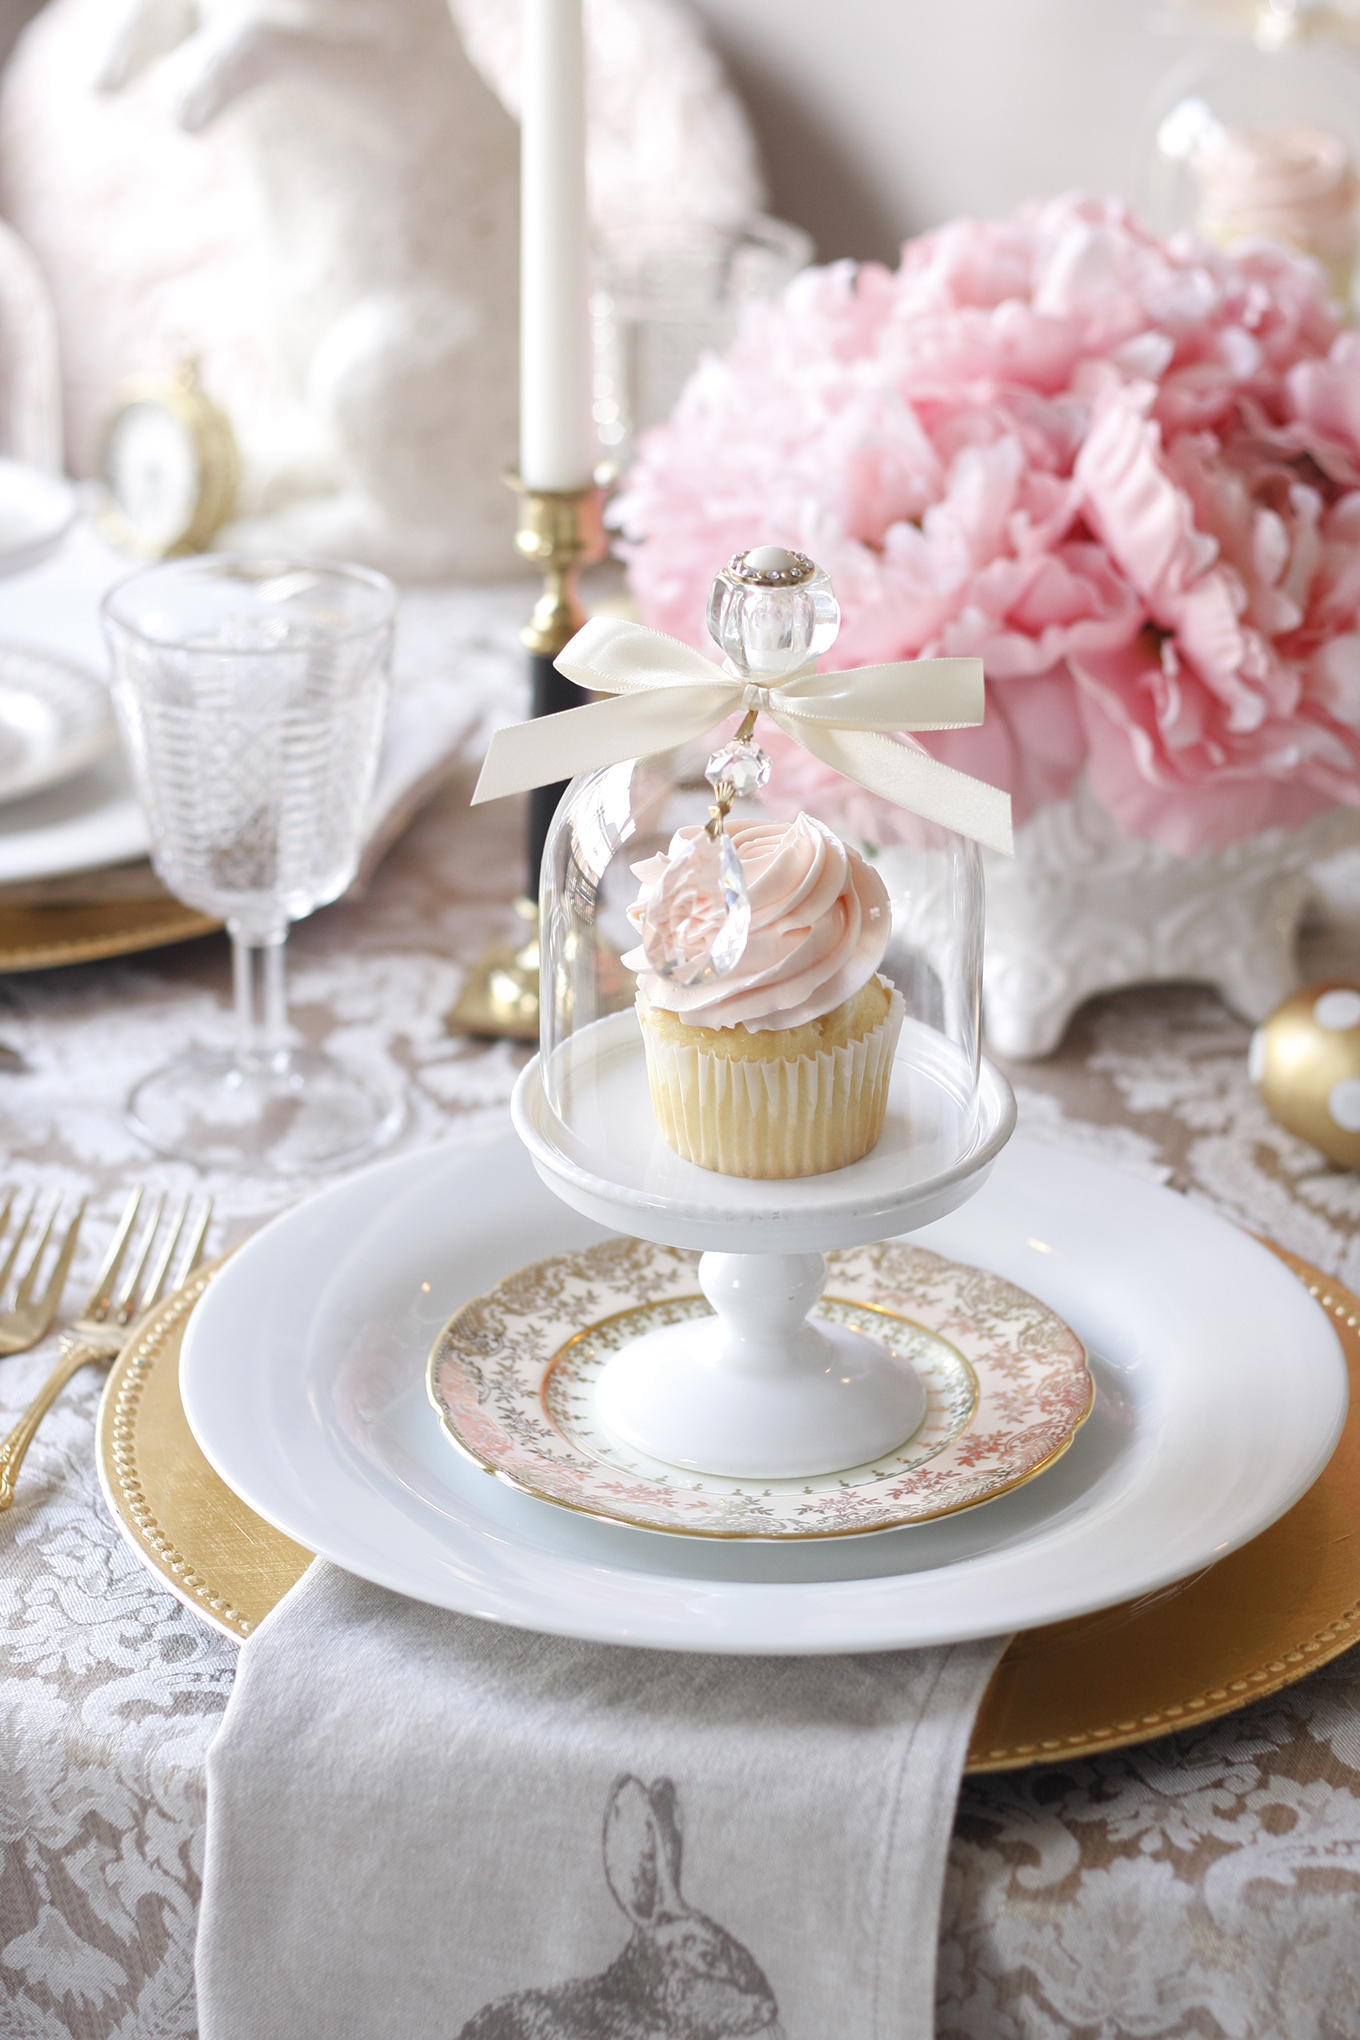
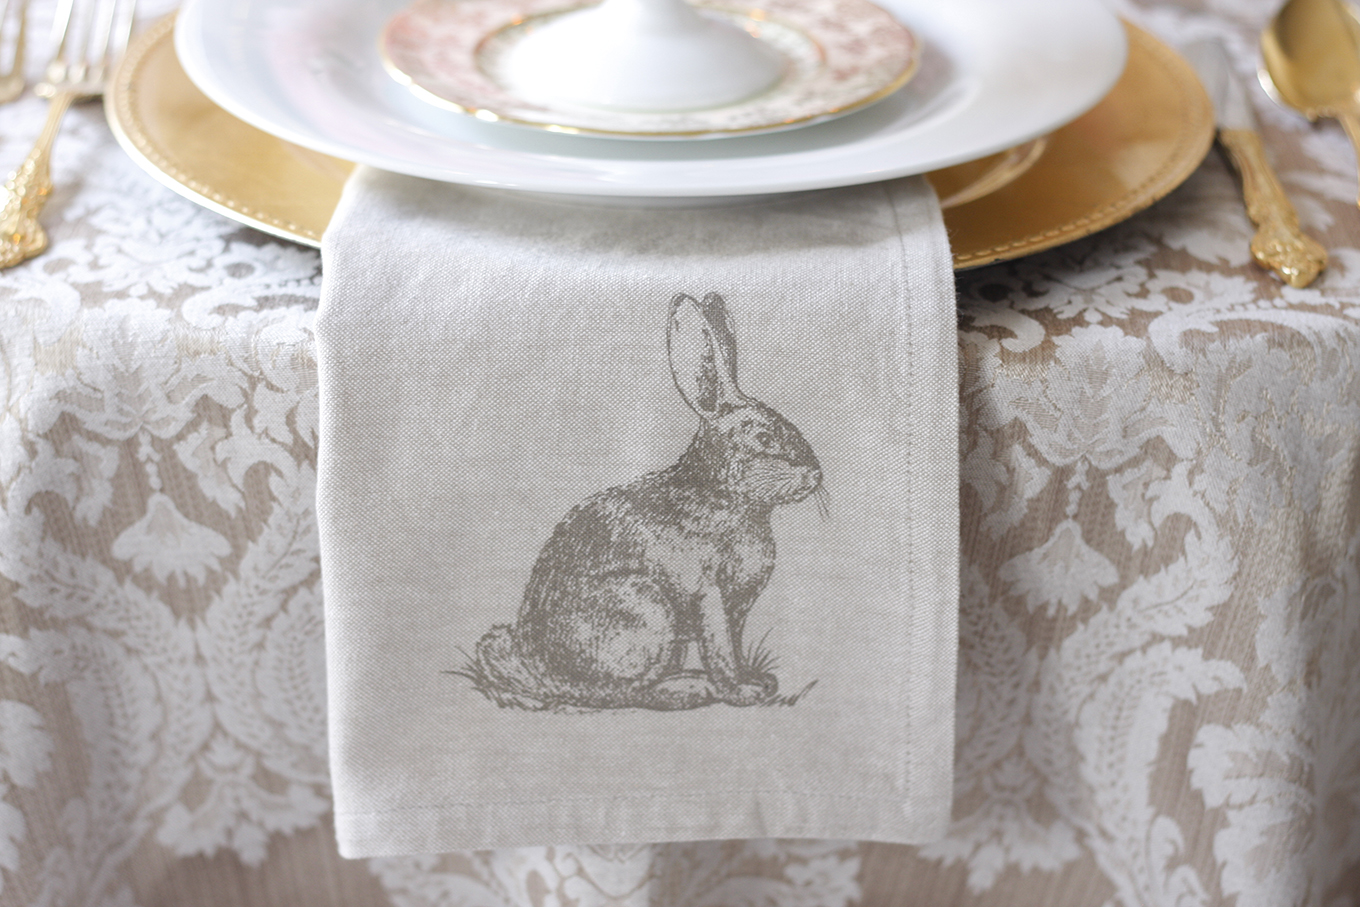
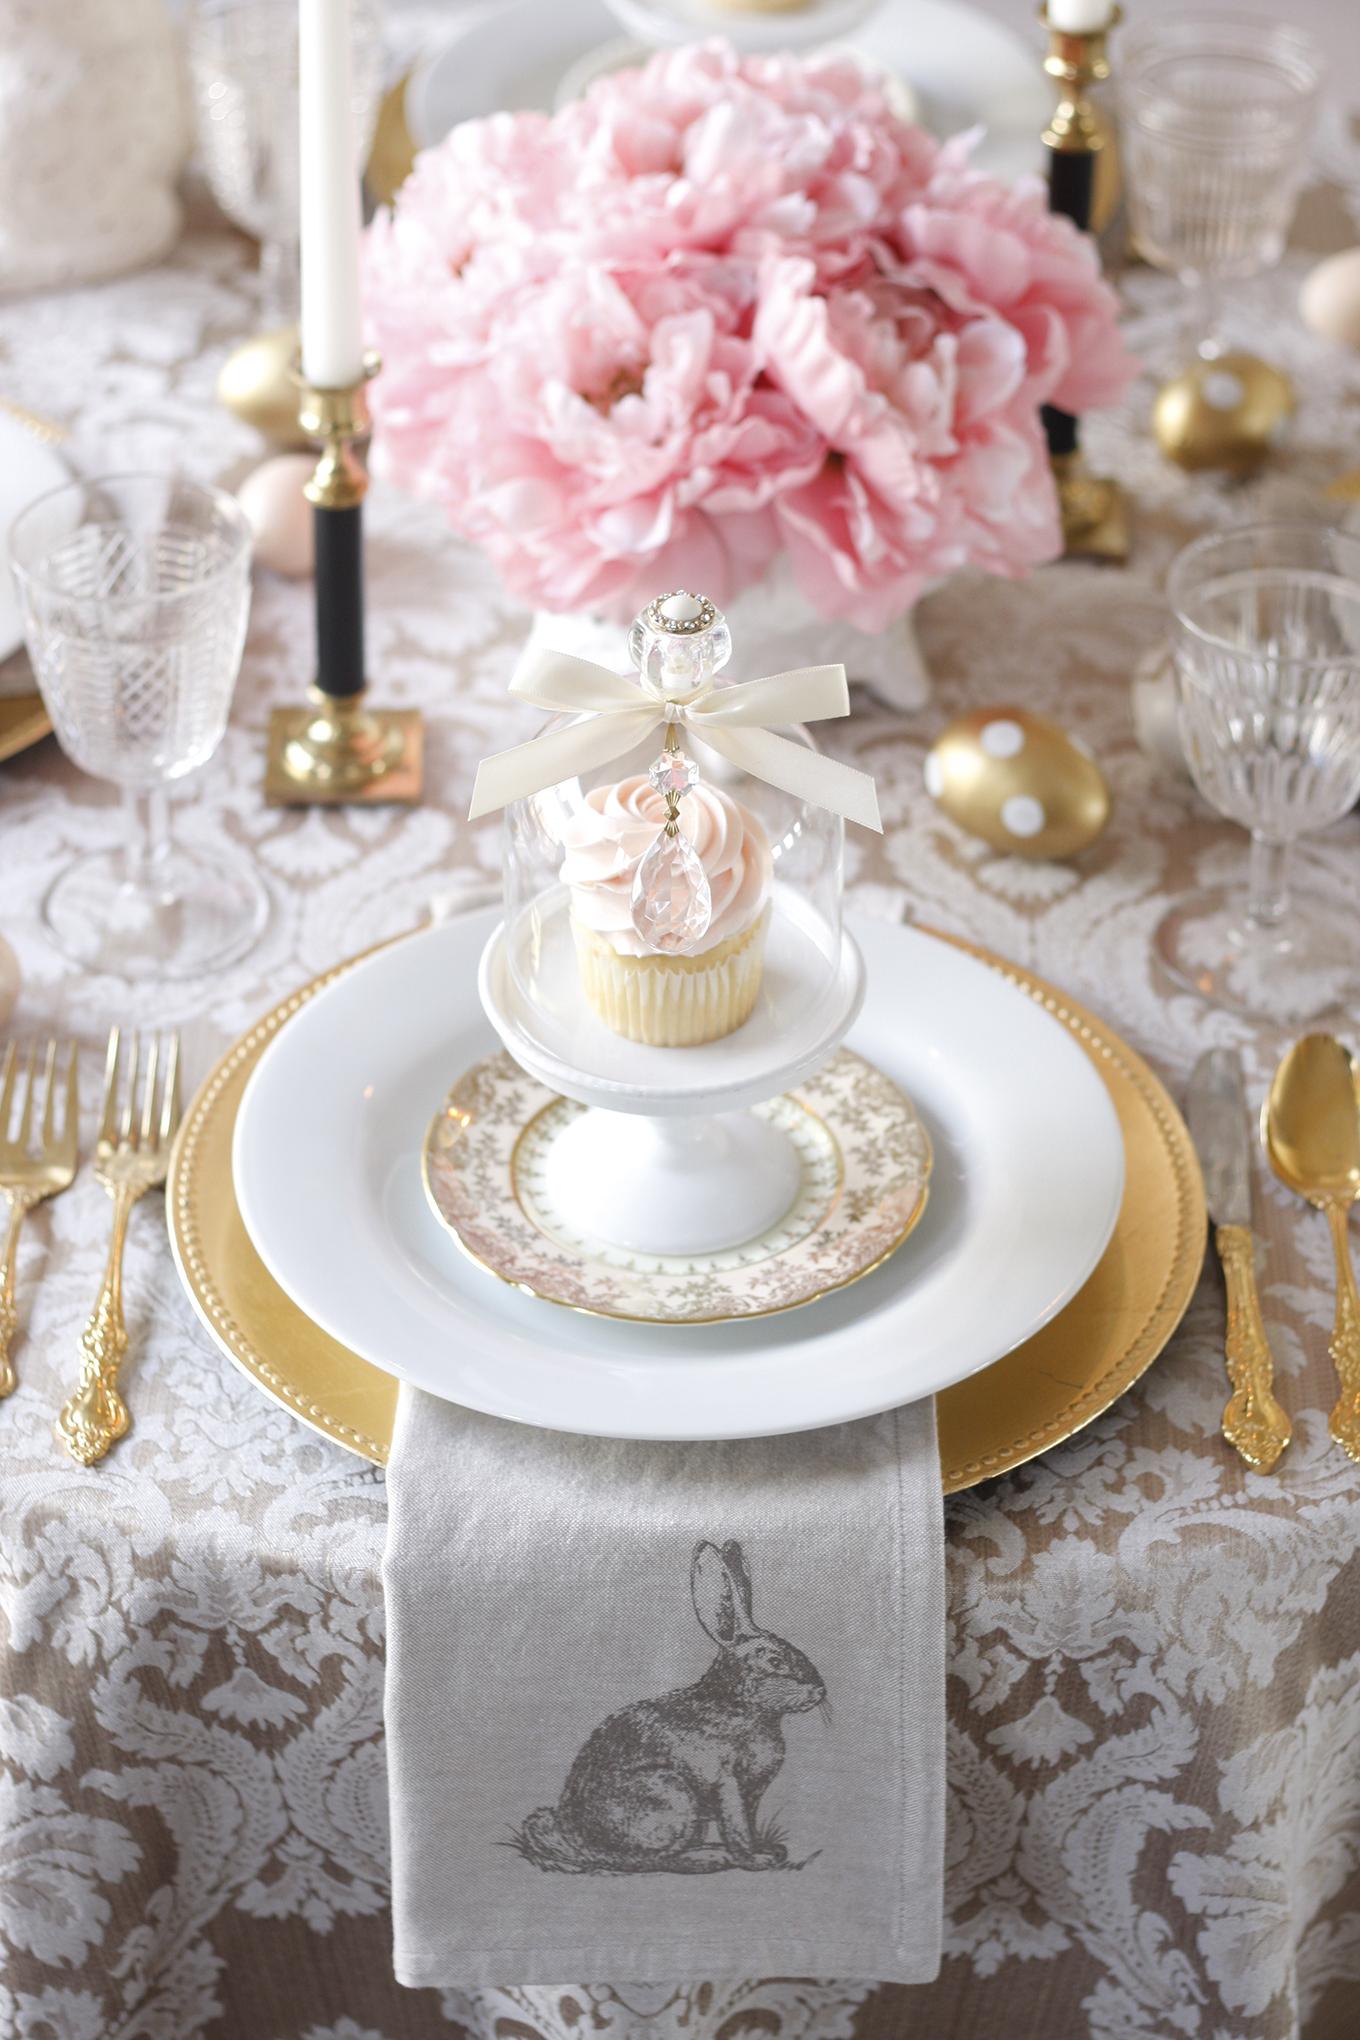
The winners for Rosanna’s Tablescape Contest have now all been announced. I did not place in the top 3 but was lucky to receive the only Honourable Mention and $50 gift card. Thank you Rosanna! Looking forward to picking out something special on rosanna.com. I truly loved creating this tablescape and can’t wait to celebrate Easter in a few weeks! Here was my submission:
“My inspiration of an Easter-theme table for my girlfriends to celebrate Easter with a weekend brunch features our favorite furry animal — bunny rabbits! An image of a bunny is featured on the gallery wall, linen napkins at each place setting and a life-sized rabbit figurine makes a whimsical visit to our table. Each guest is treated to a vanilla strawberry cupcake, which is displayed under a glass dome and elevated on a Rosanna Décor Bon Bon Hue Mini Pedestal stand. Decorated Easter eggs are sprinkled around the table for a final special touch.”